

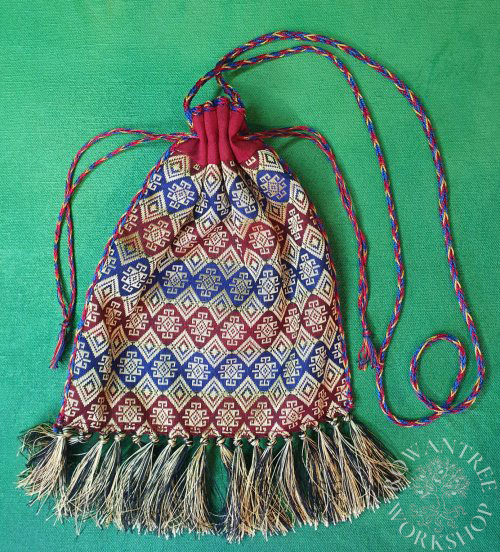
An ornate brocade drawstring purse, for a noble Spanish lady of the 13th or 14th centuries. I made this as a gift for my friend Tigre, to go with her new 13th century Spanish pelotte.

I made this purse as a surprise gift at short notice, so I had to rely on my stash for materials. Luckily, I had the perfect brocade, which I had long thought would be perfect for such a purse.
Research & Design
Drawstring purses were used by both men and women in 13th century Spain, with some differences. Many were richly decorated with colourful geometric designs, some with fringes along the base. All the purses (both men and women) have a pair of drawstrings and separate hanging cord.
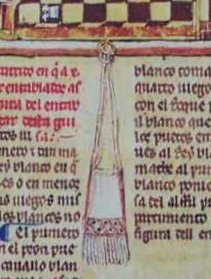
Whilst men’s purses were on short hanging cords, images of woman show purses with long cords, so the purse hangs near the knees, over the brial (gown).
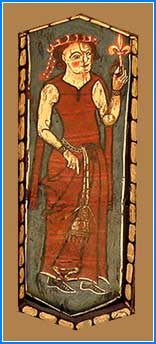

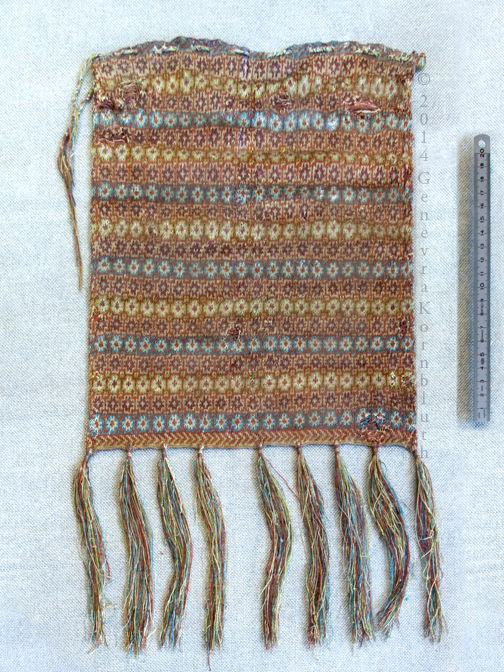
These purses appear in artworks of the time, and there are several extant examples which show how true the pictorial representations are. These include both knitted designs and sewn brocade, in geometric patterns, often with horizontal banding.
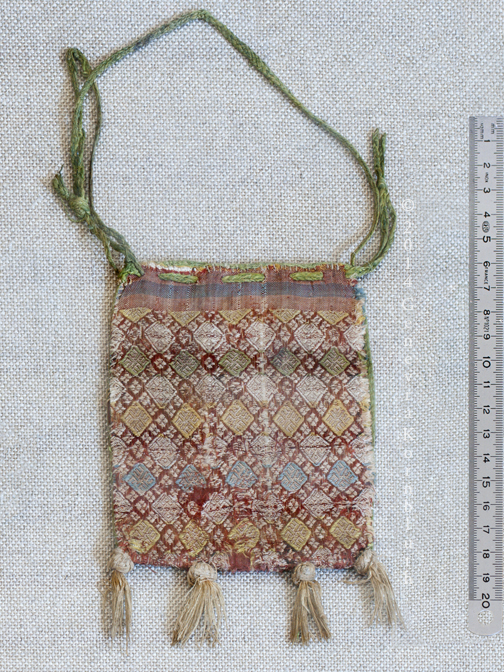
The Sion purse 258 shows a brocaded grid design, with a plain section of weave at the top where the purse strings are threaded. This purse is also a good practical size – around 20cm long – as is the knitted Sion purse.
The hanging cords and drawstrings on the extant examples are rounded or flat braids – either fingerloop, plaited or possibly tablet woven.
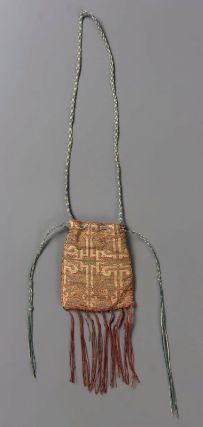
The cords on the MFA example above are of linen; the Sion examples are silk. Some cords are a single colour, while others were made of threads of many colours. As with many other medieval purses, the cords are simply pulled through the fabric – there are no worked eyelets.
Braided cord is also used to decorate the top edge, covering the seam where the lining joins the outer fabric.
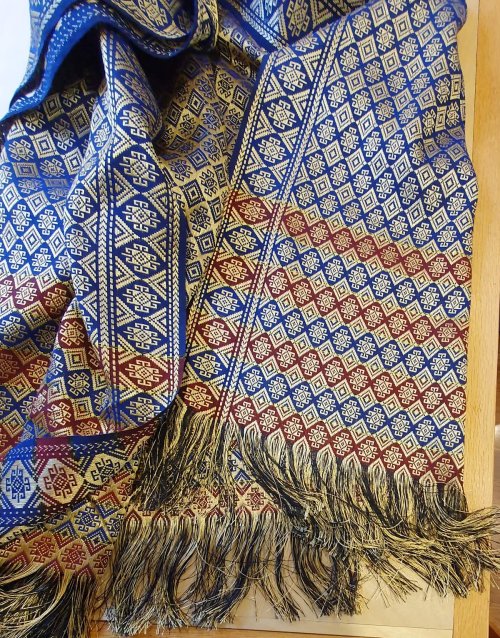
My fabric stash included a brocaded silk shawl with an ideal pattern and fringe, and I had some red silk taffeta to add to the top for the drawstrings. I did not have silk in the right weight and colours for the drawstrings, so I used perle crochet cotton, which has both strength and sheen.
Construction
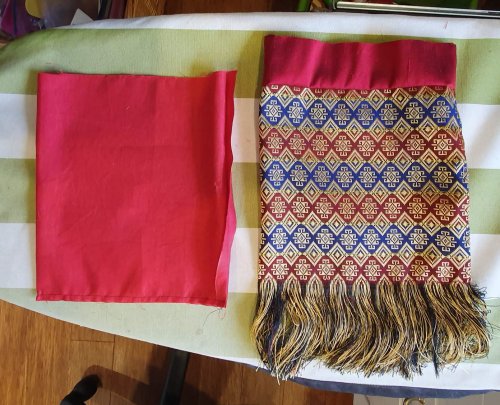
I cut the purse from the shawl, making use of the regular design and fringe, sewed the side seam and basted it open to ensure the stiff brocade would lie flat.

A strip of matching red silk taffeta added along the top simulates the plain woven section on the extant example. I made up a lining in red linen, inserted this and whip-stitched the two layers together. To seal the base, I sewed along this in backstitch (in retrospect, probably unnecessary).
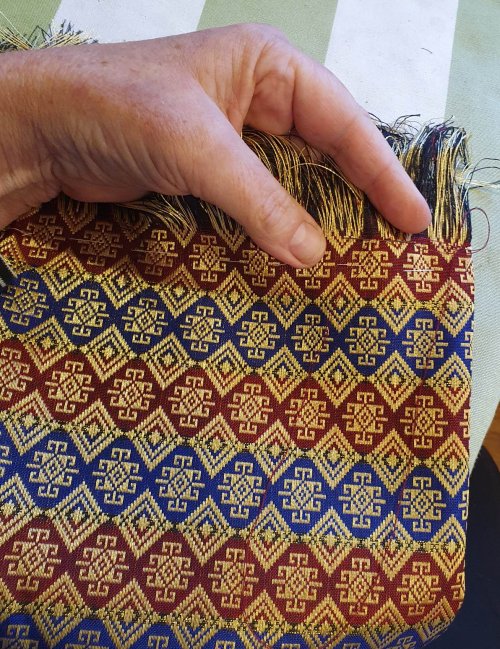
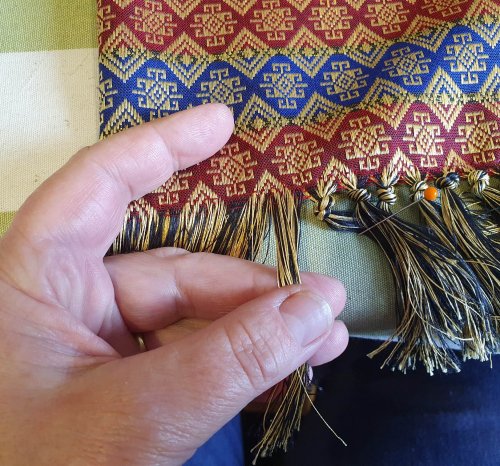
For the tassels, I divided the threads in line with the design, twisted each section and tied an overhand knot. I thought the knots would hold, but they started to loosen as I worked on the purse, so I had to sew through each knot several times to secure them.
On to the cords! I made three fine fingerloop braids of 5 bowes, matching the colours of the brocade, in size 8 perle cotton – one 35cm long to edge the top of the purse, and two 50cm for drawstrings.
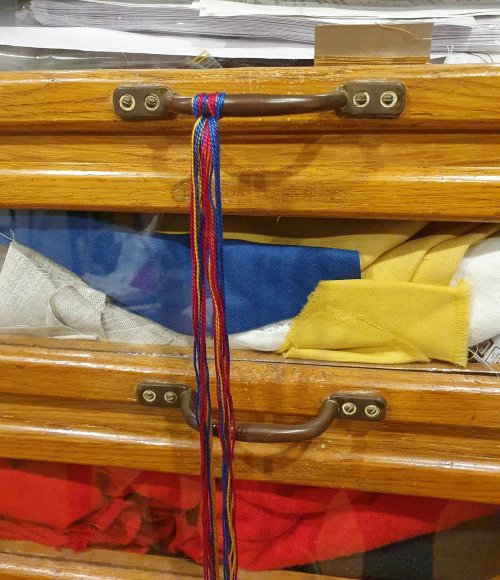
I wanted a the hanging cord to be thicker (size 5 perle) and 70cm long – longer than is possible with my usual technique using a foot stirrup. So I made up each loop separately, tied the bundle in half and worked from the knot out. Then I retied it and worked the other half – easy!

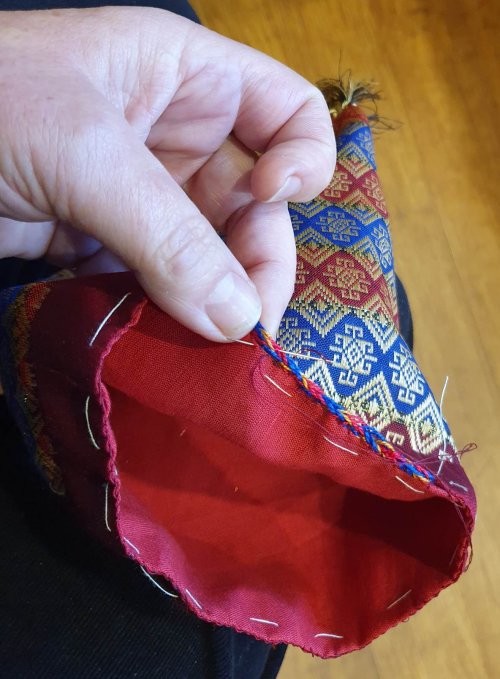
I sewed one of the thin braids along the top edge, hiding the end knots in the top of the side seam Then I sewed on the heavier hanging cord down the two edges, tying a knot at each end. Usually I would turn this into a tassel, but in this case, it would clash with the gold and black tassels made from the warp threads.
Now for the drawstrings. To make the opposing drawstrings work, you need an even number of holes, offset half a space from the edges. Extant examples from the 13th century have anything from 6-12 holes on each side – I went with 8 holes, as per the brocade example. Folding a strip of paper to get even spacing is much easier than measuring and calculating!

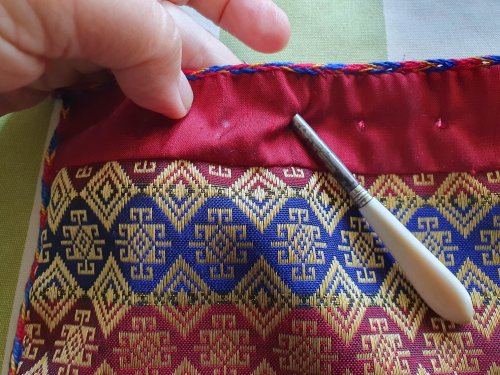
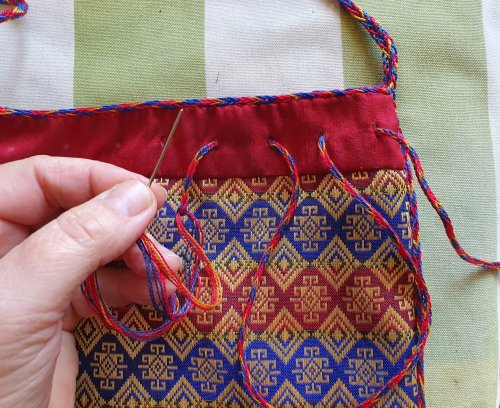
I used an awl to make the holes and pulled the cords through with a blunt needle. For the second string, I started with the free ends on the opposite sides. Tying the ends together with an overhand knot and trimming makes easy, small tassels.

I was very happy with the completed purse, and Tig was suitably surprised!
Now I just need a picture of her wearing it…