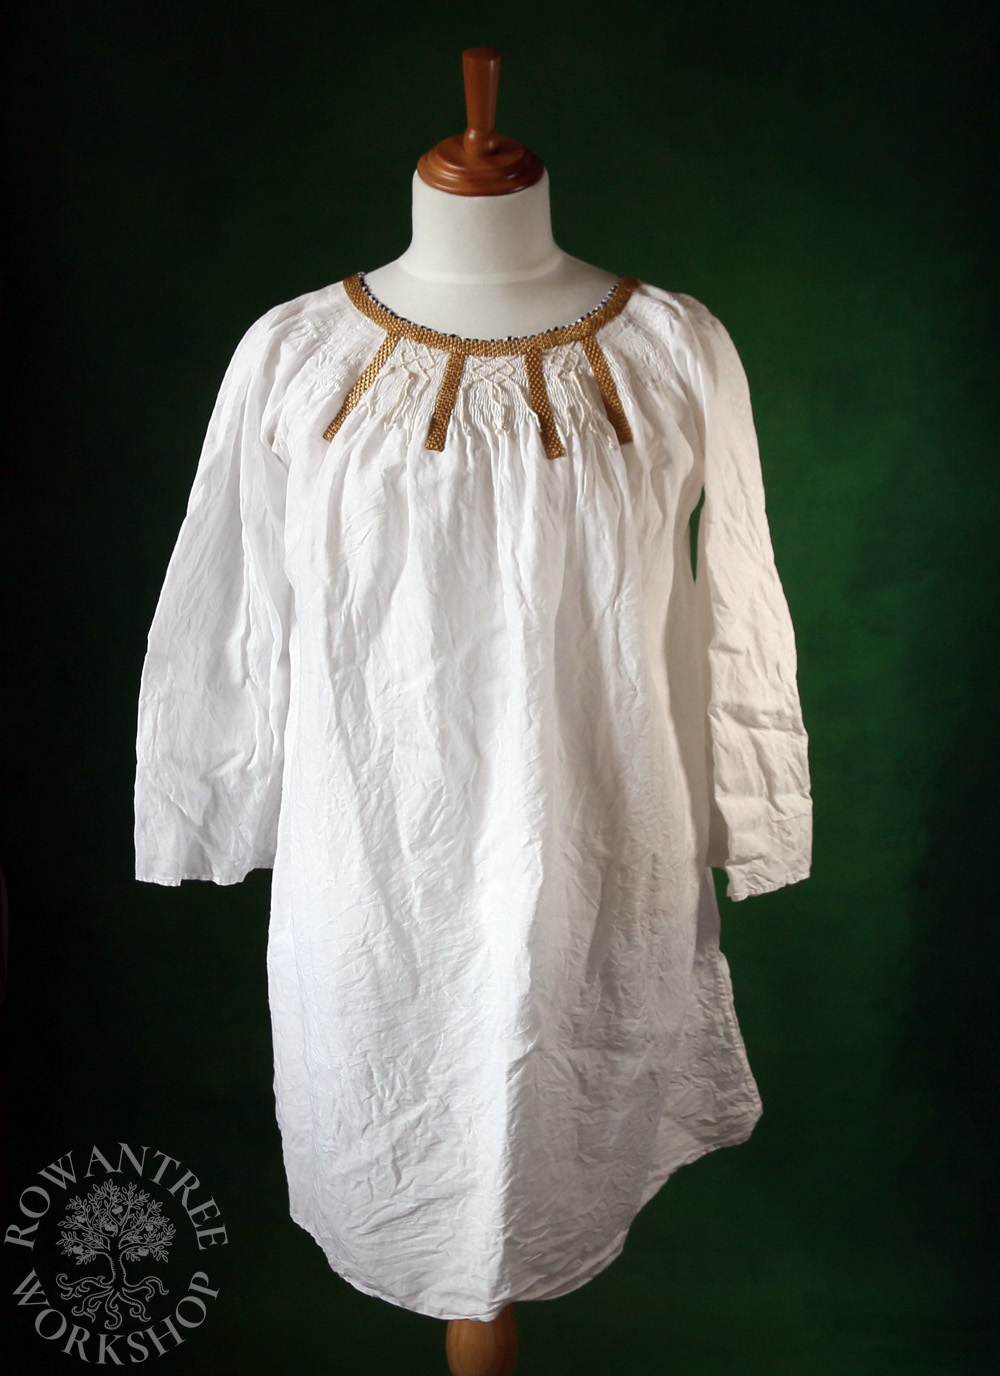
An early 16th century smocked Hemd, based on the Portrait of Dorothea Meyer by Hans Holbein.
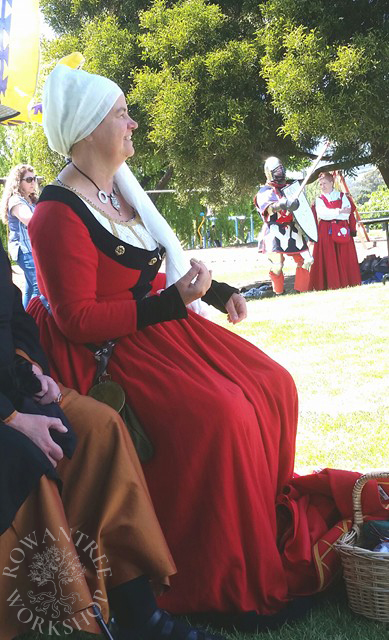
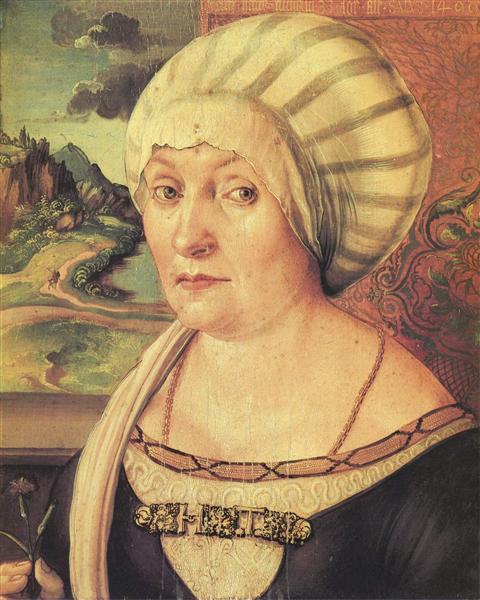
This famous portrait by Hans Holbein the Younger was my introduction to middle class German clothing, and I made a version of the red wool Rock (gown) as part of my first big wardrobe upgrade in 1997. I’d always intended to make the Hemd (smock, chemise) as well, and eventually I did.
‘Eventually’ in this case was 20 years later, by which time I had to remake the whole outfit…
Research and Design
When I started researching this, I looked in vain for similar images in the 1510-1520s. Eventually I realised that although the Rock is typical for early-mid 16th century, the style of Hemd depicted in the Holbein portrait was in fact an earlier style. The rounded neckline and especially the vertical stripes of braid harks back to the 1490s, rather than the 1510s.


Source: Web Gallery of Art
Source: Web Gallery of Art
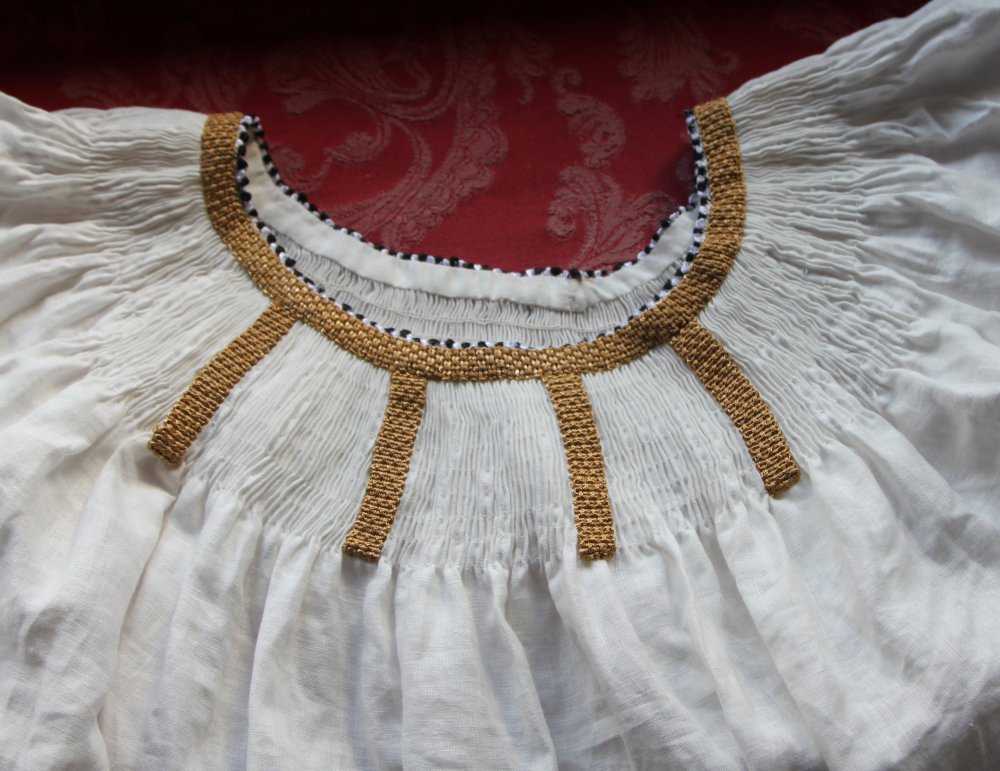
I wanted to copy the Holbein Hemd closely, with it’s back-smocked pleats, couched cord, braid and tufted neckline, but using a simpler style of golden braid.
Construction
The Hemd is made of 4 rectangular panels (body and sleeves). For nice pleats, I need a total width of at least 3x the neck edge – more if possible. I used a piece of ribbon to see where the neckline should sit in relation to my Rock, which gave me the neck measurement.

I sewed heavy woven gold braid into a ring for the neck edge, and cut a strip of solid linen to line it with. With the neckline sorted, I could calculate the body and sleeve panels and cut them (and underarm gussets) from shirtweight linen.
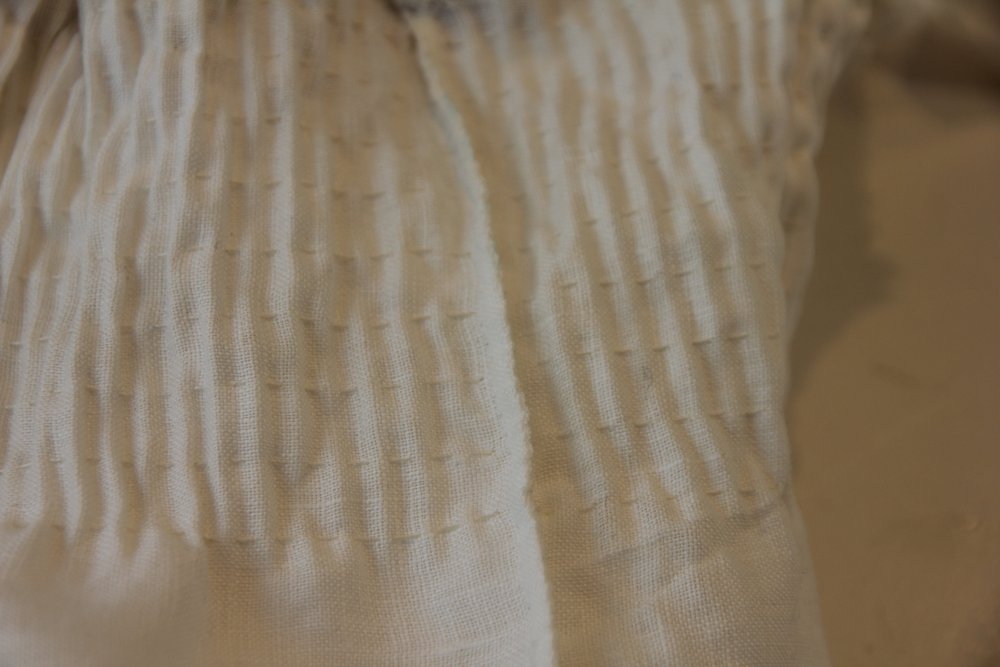
Before making it up, I ran the top of the body and sleeve panels through my smocking pleater – 10cm deep for the front and 6cm for the back and sides. Then I hand-seamed the top 16cm of the long edges together, basting from the outside to line up the draw-threads.
I sewed a false French seam in the gathered area to minimise bulk, then sewed the rest of the Hemd together with run and fell seams (machine run, hand fell).
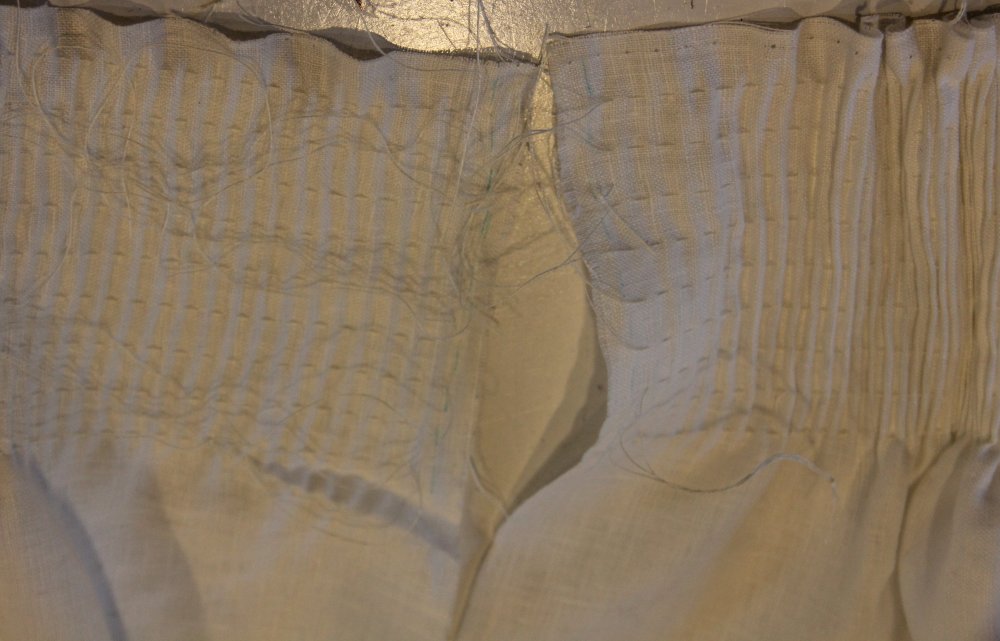

On to the gathering… This had to be done in 4 sections, trying to match the density for even pleats. I pinned the sections to the neck braid, then drew up threads to fit. I tied the draw-threads across each seam to keep the pleats tight, then sewed the braid to the top of the pleats to stabilise them, adding in the 4 vertical pieces, but leaving them loose.
On the inside, I worked a first pair of rows in stem stitch around the entire neck, to secure the pleats and provide a solid foundation line, using waxed linen thread. Then I worked more double rows 1cm apart, using the draw-threads for spacing, reducing the tension in the lower rows.
To finish the neck, I sewed a row of tufted braid along the top edge, then the linen lining. I turned the linen band inside and sewed it over the pleats for a neat, strong finish. I sewed the 4 vertical stripes of braid down over the pleats to secure them. For the front cords, I twisted up some heavy silk thread and then couched these on over the pleats in a fret pattern, with the ends loose.


Finally, I tried it on to check length and then finished the sleeves and hem.
I was very pleased with the end result – and at last I had the right Hemd to complete the outfit!