

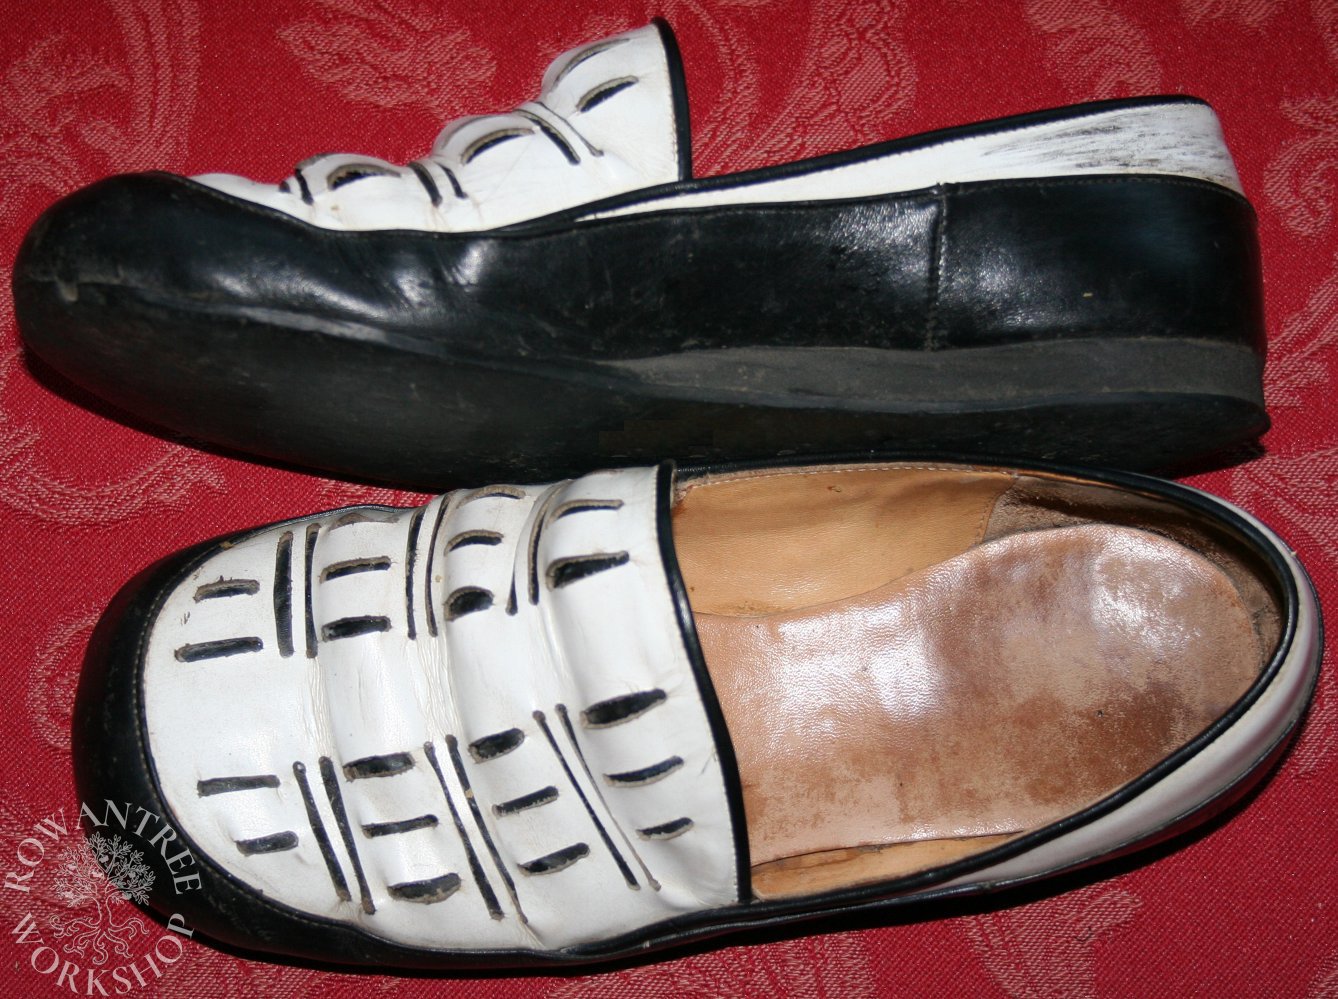
A pair of early 16th century shoes for a noble German woman.
Although I had made myself some simple Tudor style shoes, I was aware they were middle class in style and not really suited to my upper class Cranach style gowns. I knew what style I wanted, but they seemed far out of reach of my knowledge and skills.
In 1997 my marriage broke up. In an effort to distract me, my friend Gabrielle talked me into doing night classes in shoemaking at the College of TAFE (Technical And Further Education). It was a wonderful idea and I learned a lot about making shoes (albeit using modern tools and methods). I made many pairs of modern shoes – and this 16th century pair, which bemused both the teacher and other students.
Research & Design
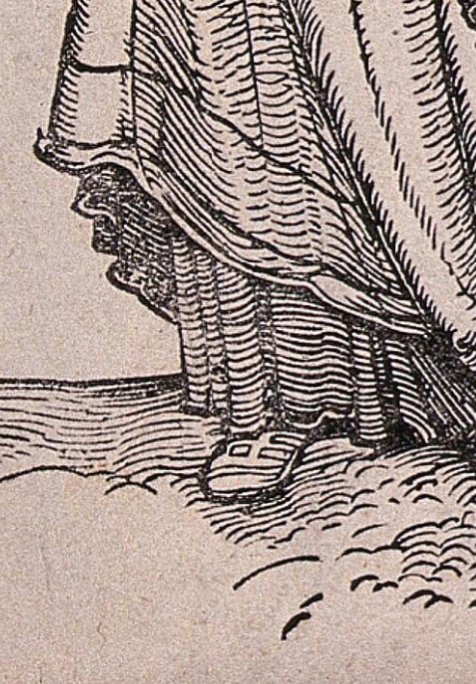
The long skirts of German Patrician women make it difficult to find images of shoes, but they do appear in several paintings from the early and middle 16th century, especially in works by Lucas Cranach the Elder.
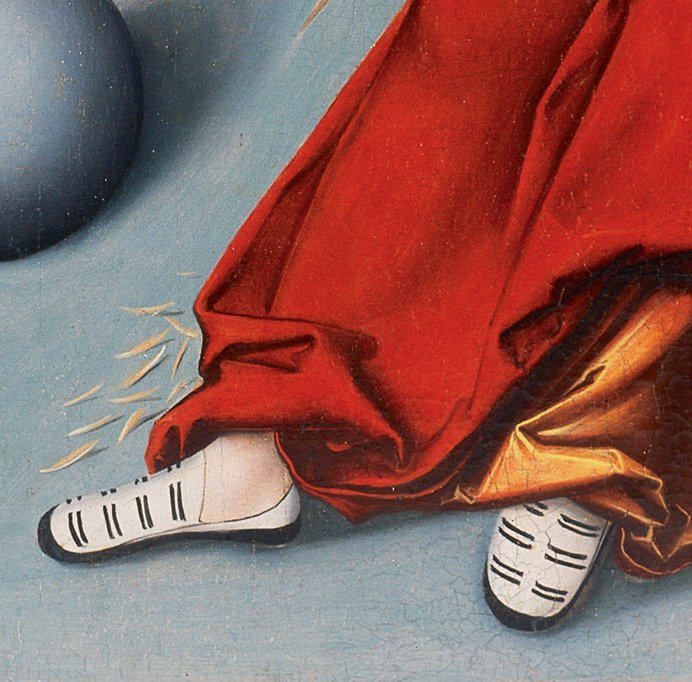
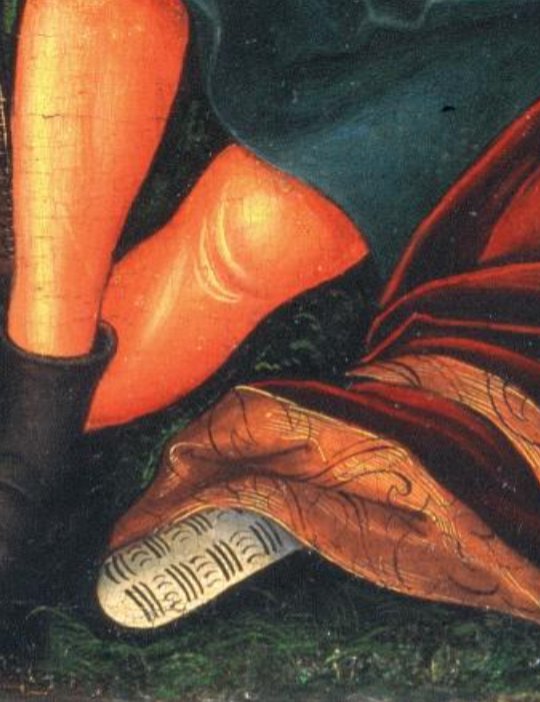
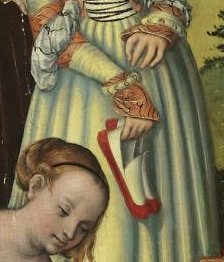
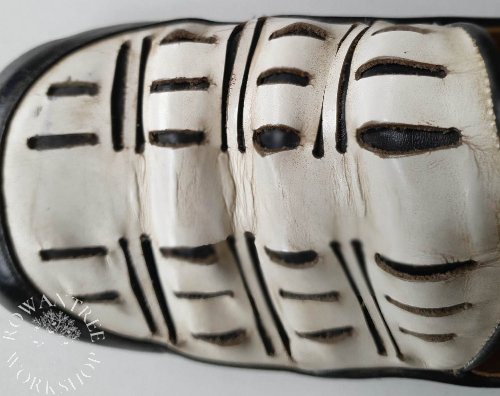
The decoration varies a little, but the most common style in Cranach’s paintings is made like a low black cowmouth shoe, but with a white vamp throat decorated with black slashes and the quarters topped with white, all edged in black, as seen in these examples:
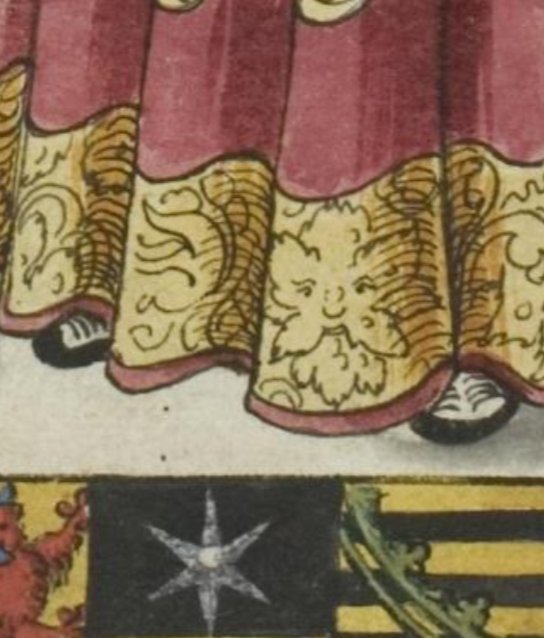
Source: SLUB Dresden
Die Melancholie (detail), 1532
Source: Wikimedia
Source: Bildindex
The style is depicted by other artists too, such as in this woodcut by Hans Schaufelein. Variations on this style are also depicted by Cranach and his contemporaries. The Cranach painting below shows a version in red, with no slashes or edging, while the shoes in the Krodel painting are black with a white vamp and horizontal bands, closer to those seen in woodcuts of Landsknecht women.
Source: Wellcome Collection
Source: Wikimedia
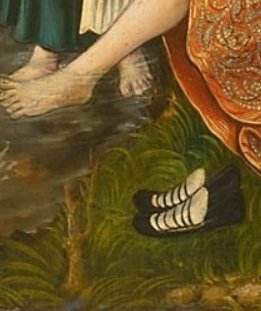
Textiler Hausrat (Zander-Seidel,1990) notes that this style is typical of the upper classes and Goubitz (2001) typifies this style as a closed, slip-on ‘cowmouth’ shoe. I am not aware of any extant examples of this specific shoe type, but would love to find one!
I designed my shoes with a combination of vertical and horizontal slashes, as seen in the Cranach painting of ‘Lot and his Daughters’ above.
Construction
I was working with commercial shoemaking equipment, but aimed to make the end result as close to the images as I could. At the time I gave no thought to pictures of construction in progress, but some of the processes are clear from the completed shoes.
I used a commercial last with minimal heel and toe spring, then glued on layers of cork and shaped them to form the typical broad rounded toe. I tested the shape with a pull-over – a ‘shoe toile’ – then made a tape pattern directly on the last, to get the shape.
I took off the tape, cut it apart and developed a ‘mean forme‘ – a normalised symmetrical pattern. Based on this shape, I drew up the master design, with piecing, decoration and construction details.
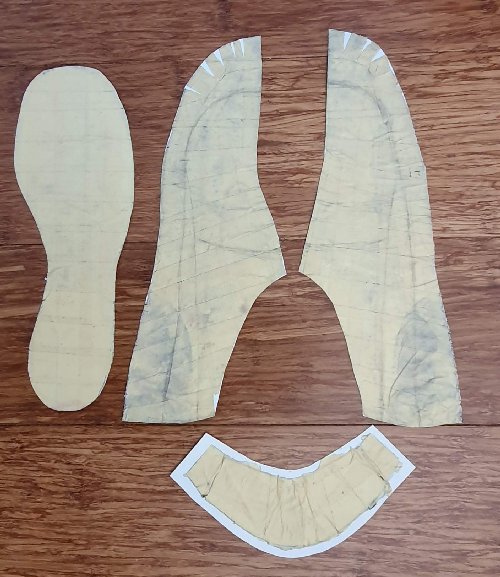
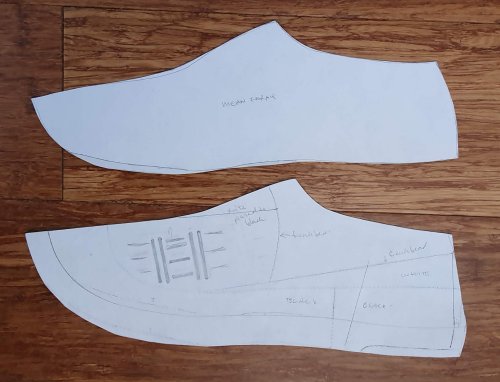
From this I developed the pattern pieces for the outer shoe, and for the lining.
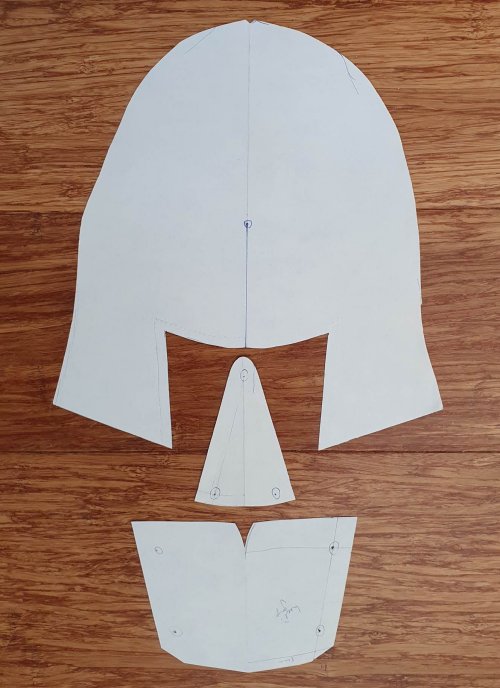
I cut the uppers using pre-dyed chrome-tanned leather: quarters, vamp and vamp throat lining in black, and the quarter extension and vamp throat in white. I joined the quarters and vamp with two side seams using a skived edge and flesh/grain machine stitching.
Next, binding the top edge of the quarters extension using a French bead. I skived down a thin strip of black leather and sewed this to the outer top edge, then folded over, and glued to secure the binding. Then I added the extension to the black quarters with with a skived overlap seam.
On to the vamp throat! I skived all the edges down well to offset the double layer. To decorate the vamp throat, I hole-punched the ends of the slits, then cut the slots. I laid this over the black lining, then bound the top edge as I had for the quarters extension, then skived the ends of the binding.
Finally, I sewed the vamp throat into the uppers with an overlap seam, along the binding seam and then around the vamp edge.
I cut the lining from fine veg tanned calfskin in two parts: vamp and quarters. I added in a gusset over the instep to deal with the high vamp throat, with an overlapped seam, then sewed the overlapped side seam onto the quarter lining, flesh side in for better heel grip. then I sewed in the lining around the throat, stitching into the binding line.
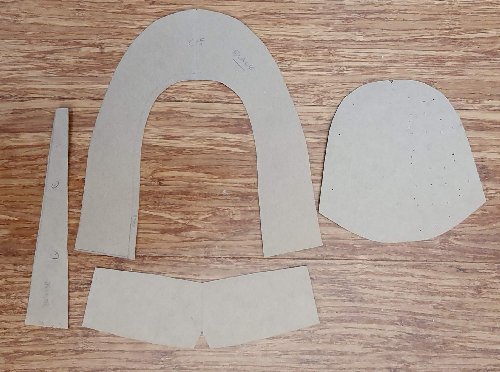
Meanwhile, I had cut a heel stiffener and toe puff from thin vegetable tanned leather, skived the edges, soaked and mellowed them well overnight and wet-formed these over the last. Once dry, I removed them.
I cut a midsole in vegetable tanned leather and tacked it to the last, then pulled over the upper and checked the position. Working in the usual sequence, I tacked the lining – toe, caps, seat, heel, wings and ball joint. I took the last off the peg and checked everything was straight, then glued it up, easing out the wrinkles.
I glued on the heel stiffener and toe puff over the lining, let them dry and then sanded off any wrinkles. Then I lasted the upper over the top, tacking and then glueing, working hard to get a smooth line over the toe – tricky on this shape! Once dry, I filled in the centre with scrap leather and scoured the surface.
Because I was not able to find a completely flat last, I had to deal with the heel rise. After some debate with my teacher, I compromised on a wedge of high density foam rubber (I wanted stacked leather). I shaped this to match the rise and glued it on, shaped again, then glued on a synthetic hard wearing sole.
Once dry, I took the shoes off the lasts and glued in a vegetable-tanned innersole. They fit well, I was very pleased with them – and I won a TAFE prize for my work!
Afterthoughts
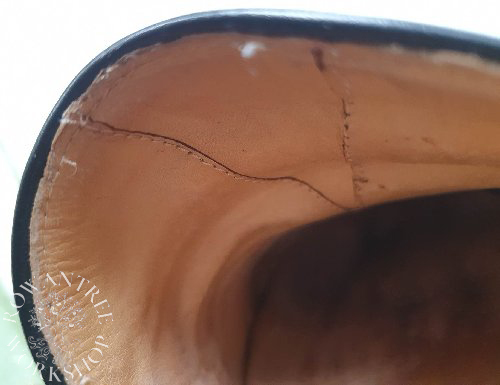
I have worn these shoes for 25 years now, and I still love them. There has been some damage to the vamp decoration, but I still find them beautiful and very comfortable. The decorative slits have caused the leather to form into ridges – just like the slashes on 16th century German armour!