

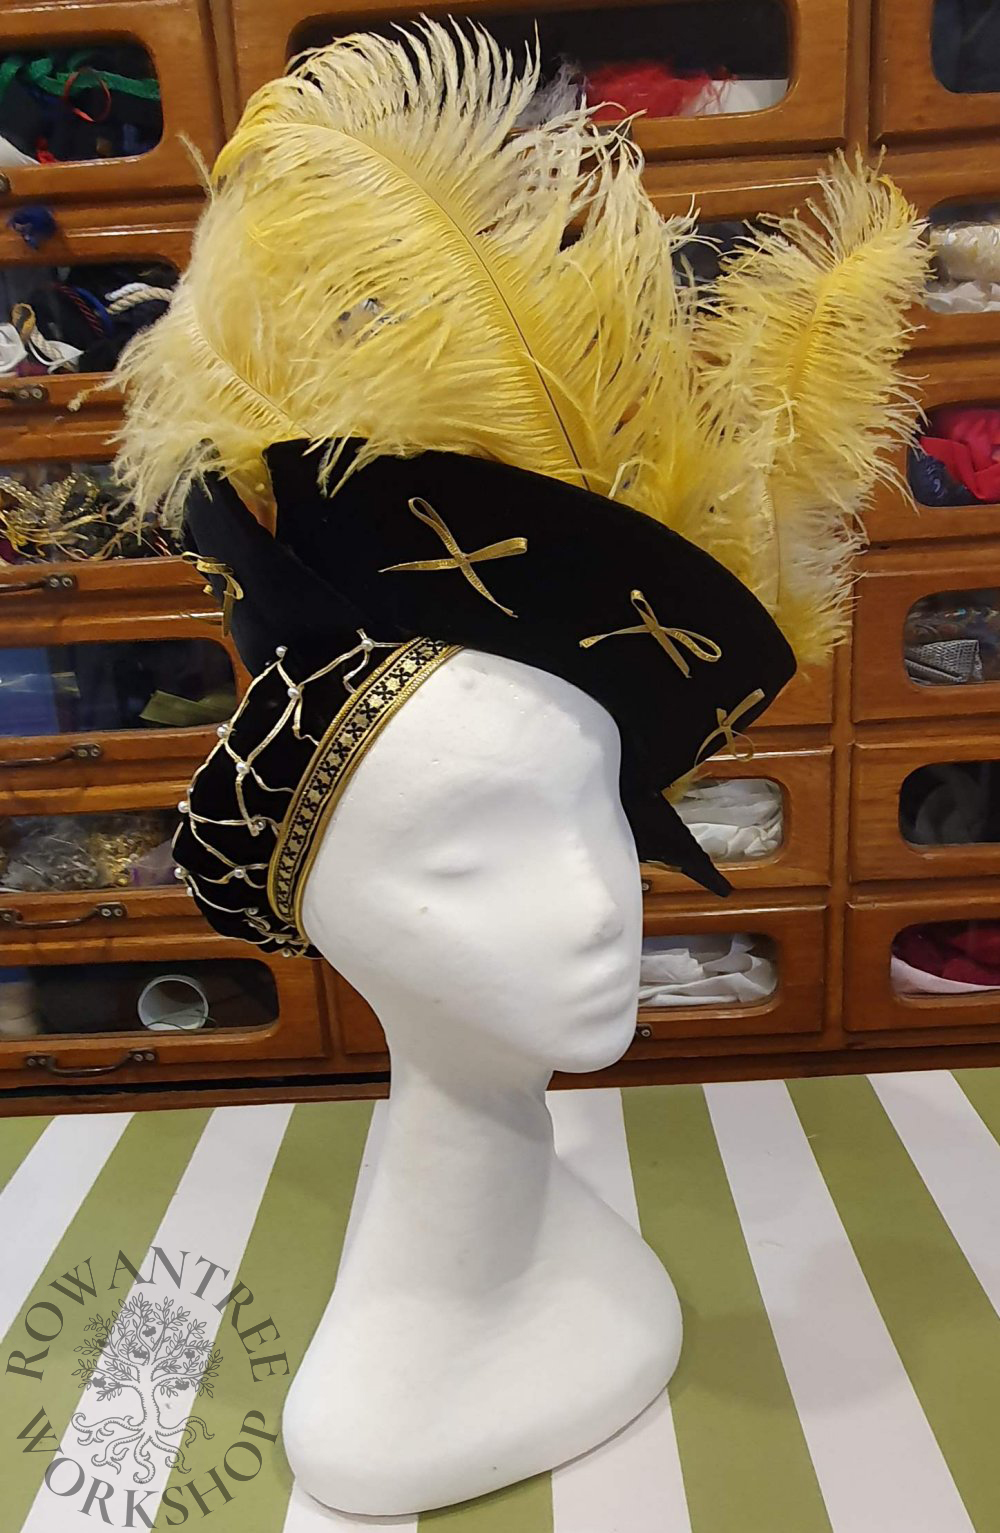
A collection of high end Baretten, a popular hat style in early 16th century Germany for both men and women.
I have made many of these hats over the years, so rather than repeat the common process, I’m grouping them here, starting with the first one I made in this style, in 2002.
Research and Design
The Barett was one of the most common hat styles in 16th century Germany for both men and women, across all classes. They were worn alone over loose or plaited hair, or over a Goldhaube or other coif.
Textiler Hausrat (Zander-Seidel, 1990) notes that the fashionable silhouette changes from the “platter barett” (Tellerbarett) common in the early 16th century, to the smaller hat with a soft crown and narrow brim by the middle of the century.
Baretten were made in numerous styles, with brims in one, two or many parts. Materials and ornaments also varies widely, with felt versions imported in bulk from Verona in many colours. Many of the Baretten detailed in wills were of velvet.
The inspiration for my Zwifache Barett (two piece) is an engraving by Master MZ (probably Matthäus Zäsinger). This picture shows a hat with a two part brim, decorated with bows and four feathers standing up at the front. Bows are a common form of decoration – the painting by Grien shows another example.
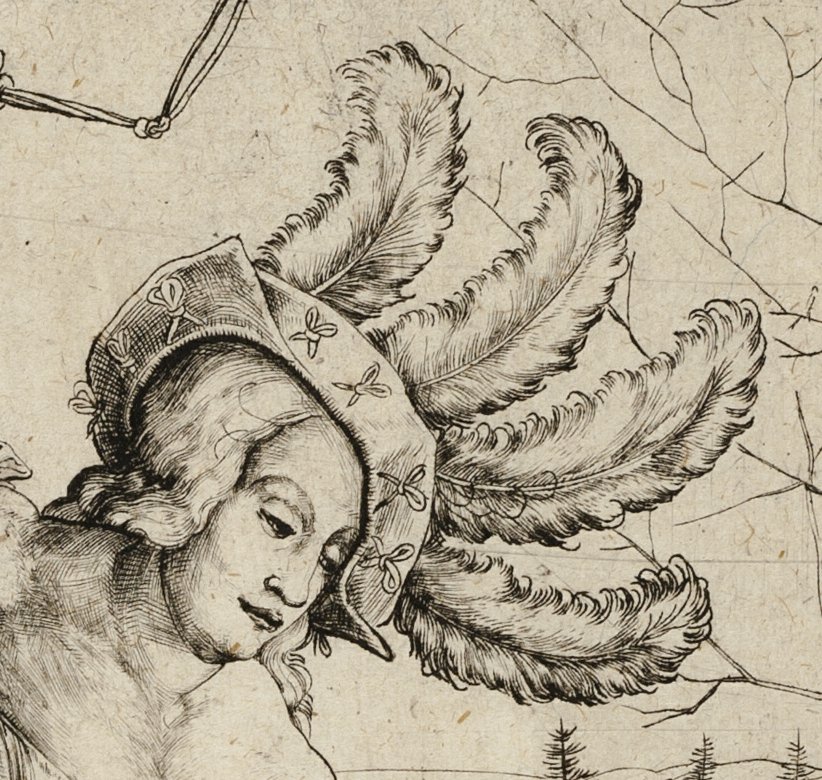
Source: Art Institute Chicago

Source: Wikimedia
Since I have short hair, I could not wear the Barett with loose hair or braids – I needed a rich looking Haube to go with the rest of the outfit. At the time I made this, I did not base the Haube on any specific image, but as a general interpretation of the netted cauls seen in many paintings by Lucas Cranach.
Textiler Hausrat notes that Hauben were made out of many materials, including velvet and silk, with silk and gold cords, often lined in silk.
Construction
First step, making a pattern. Since I have a tiny head, I can use my headform without any padding. However, since I have very short hair, I wear the Barett over a Haube (coif/hood), so I need to make the Haube and dress the headform with this before patterning.
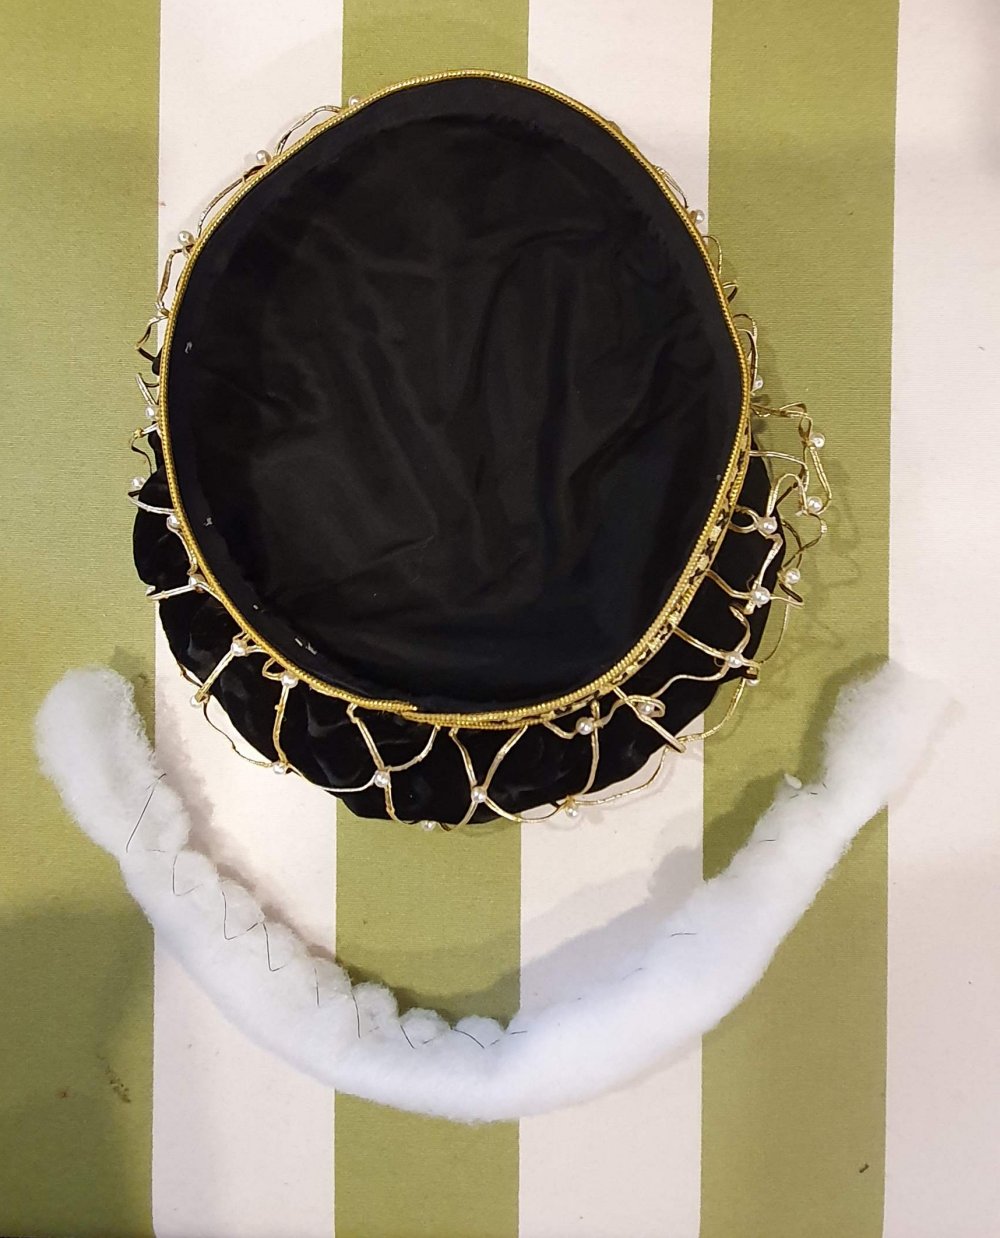
This early Haube was a simple piece of velvet, with a net of gold braid and pearls, gathered into a headband. There is very little gathering at the front and lots at the back – the egg shape helps (this pattern is actually a later iteration, with more fullness).
I made the net and sewed it to the velvet before gathering, This net took 15 meters of gold braid, but the net is too open – 30 meters would have made it a better scale. I finished the inside by covering the gathers with black cotton tape. And since I have short hair, I made a roll of woollen batting to pad out the base. It’s a bit small – these days I would make it fuller at the back.


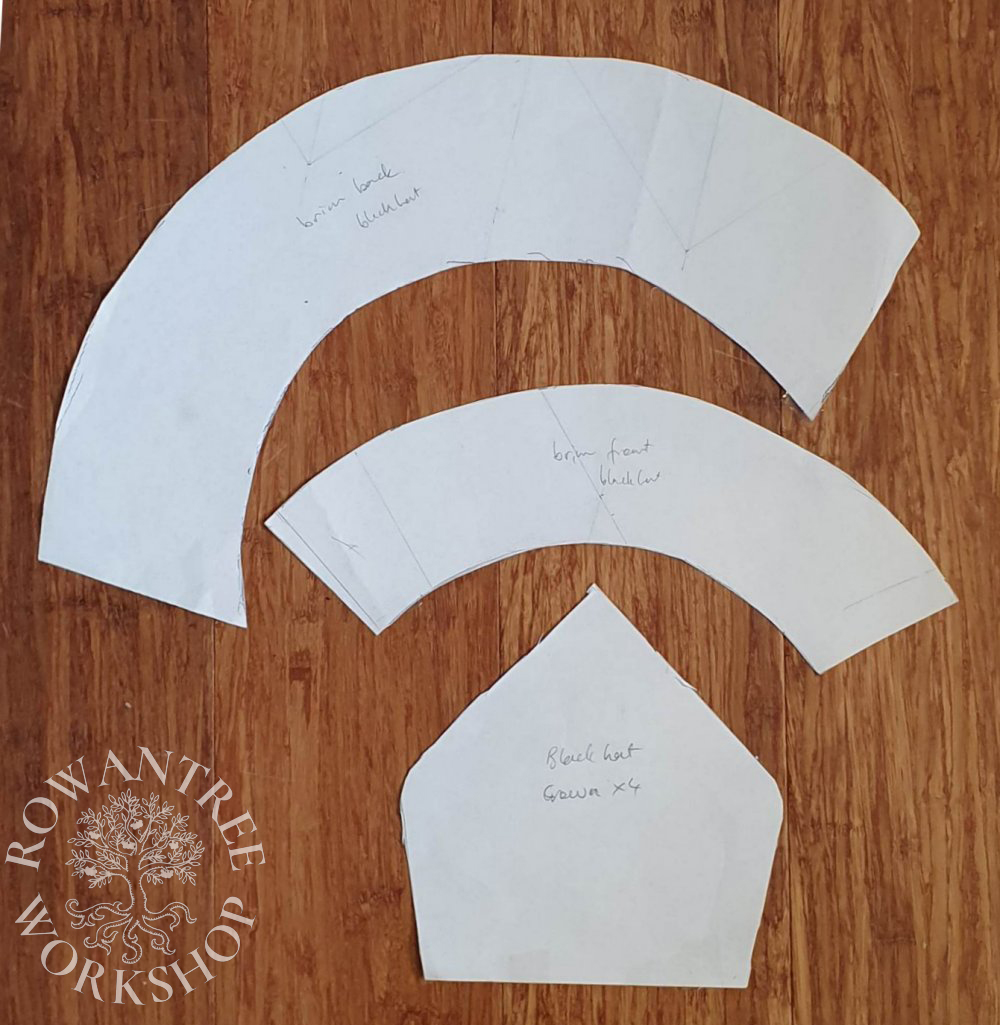
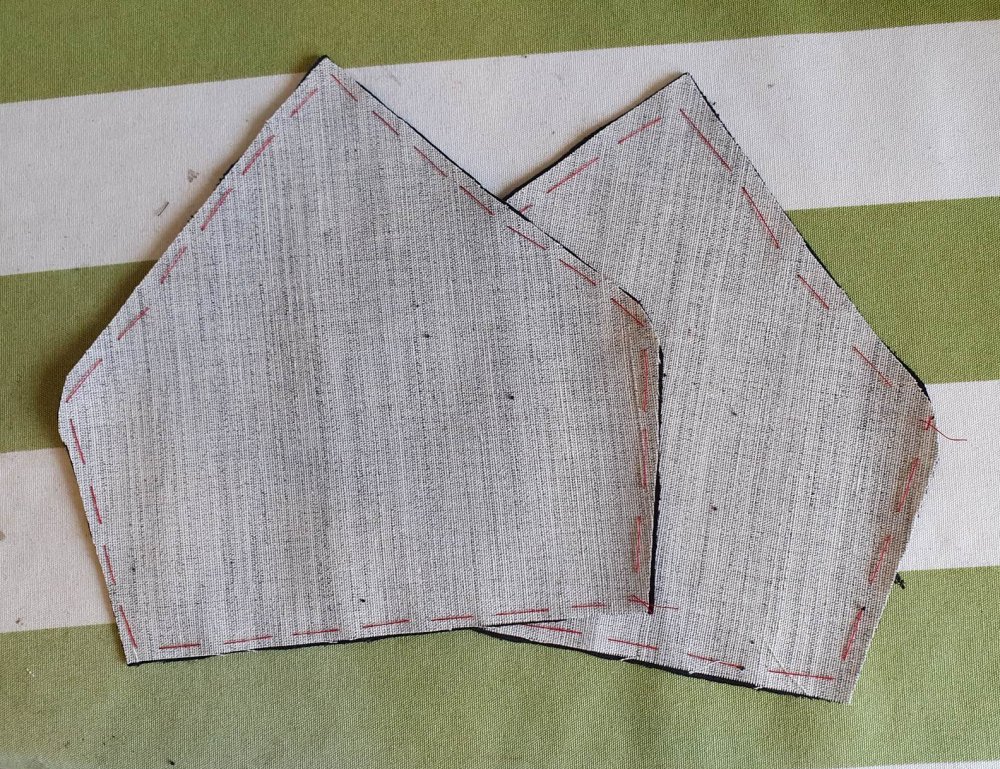
I started by patterning the Barett crown in 4 sections, based on the measurement of the dressed headform. I wanted a low crown but not completely flat. Once I was happy with this, I worked on the brim.
I started with the appropriate headsize oval, then measured out the draft brim width for the outer brim section. I cut in from the outer edge every few centimetres, then put the brim piece on the headform. I adjusted the angles on each section to match the image and taped them together.
I repeated this for the inner brim, then taped both to the crown to make my mock-up. I played with the height of the brim sections and angles until I was happy, then made a final version and taped this together to test the result.

The brim sections need a stiff base. I made this black Barett (and many other hats) using buckram, wire and wool mull – the method I taught myself out of theatrical hat-making books, such as From the Neck Up (Dreher, 1981). Sadly, hats made this way do not stand up to heavy use – or poor packing.
These days I use 3mm furnishing felt, which is easier, faster and closer to the historical examples – so I’m using that process in the description below…
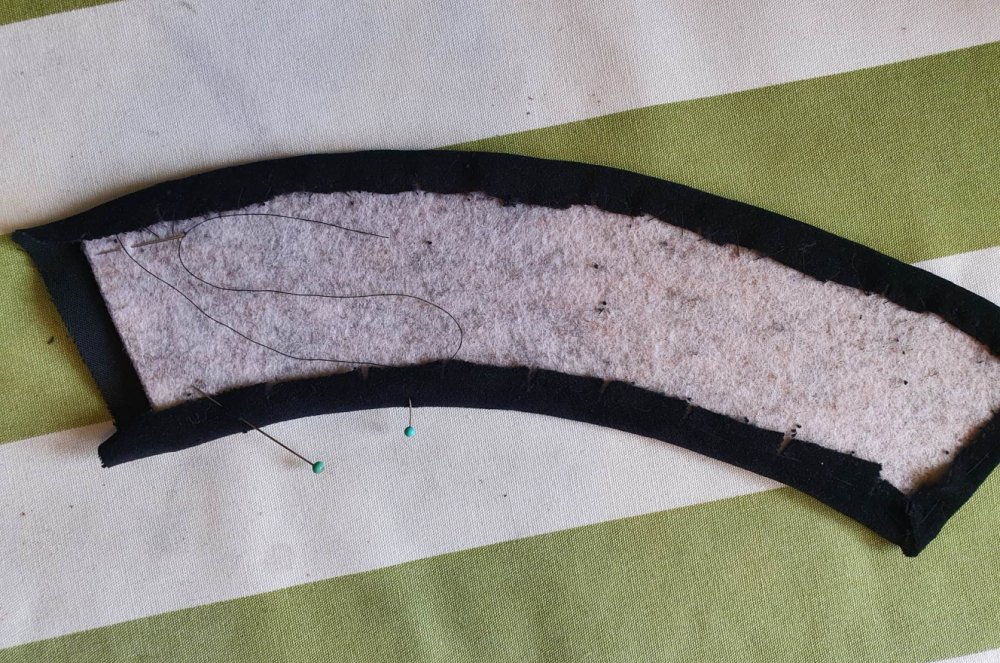
I cut the brim shapes out of the felt, then use the same pattern to cut the velvet brim cover and lining, adding seam allowance (with extra on the cover piece).
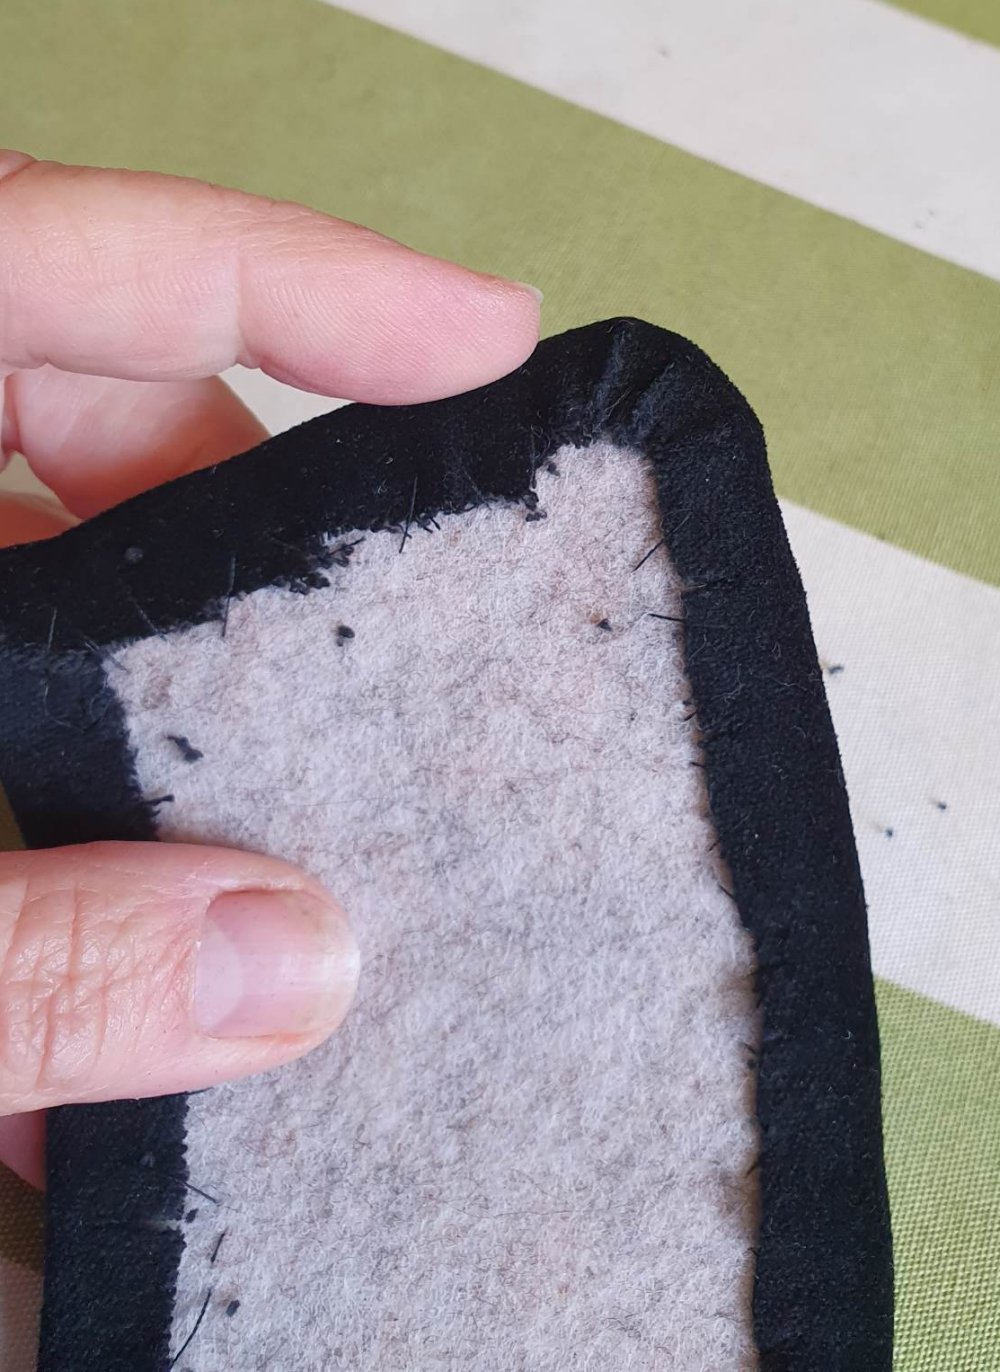
I pin the cover in the middle of the brim, the pin towards each end, bending the brim as I go (if you cover it flat, it will be too tight to curve properly). I catch-stitch the brim to the back of the felt, clipping the seam allowance as needed.

I usually add decoration at this stage, before covering the back of the brim, in case I need to stitch right through. For the black velvet, I made bows of woven gold ribbon and sewed these on.
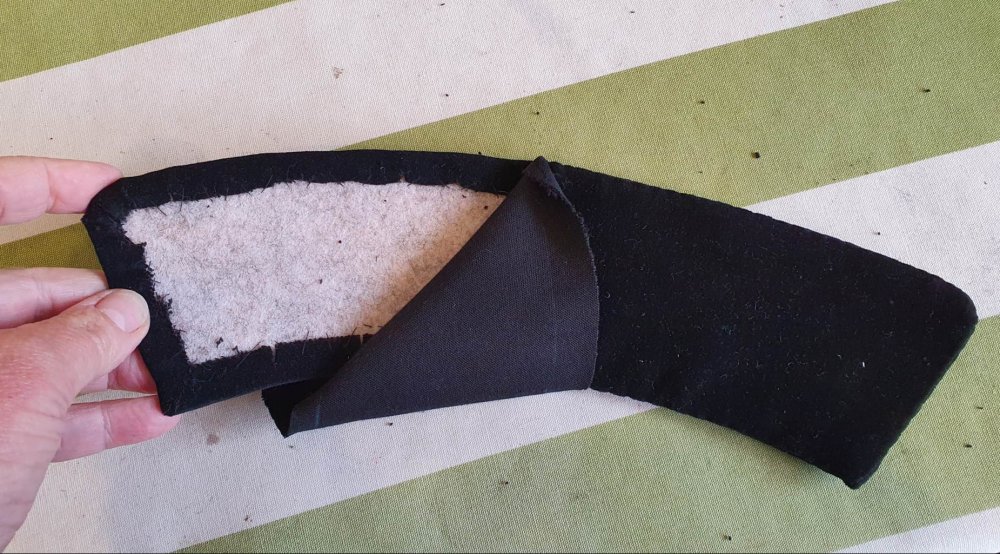
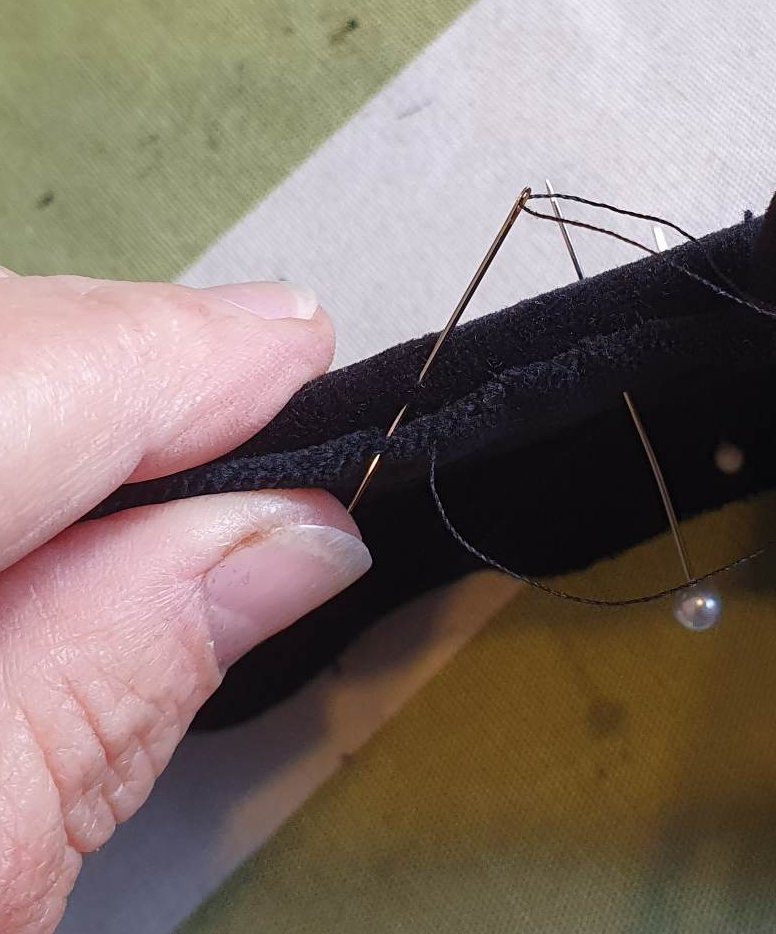
I pin the velvet lining to the back, trimming and turning under the seam allowances and curving the brim as before. I whip-stitch the lining to the outer cover all around, slightly below the edge. Then I repeat this for the inner brim section.

The crown does not need a stiff base, but a canvas interlining helps keep the shape. I cut the crown out in velvet and canvas (adding seam allowance), baste the velvet to each canvas section. I sew the sections together and press the seams, then turn up the hem and baste.

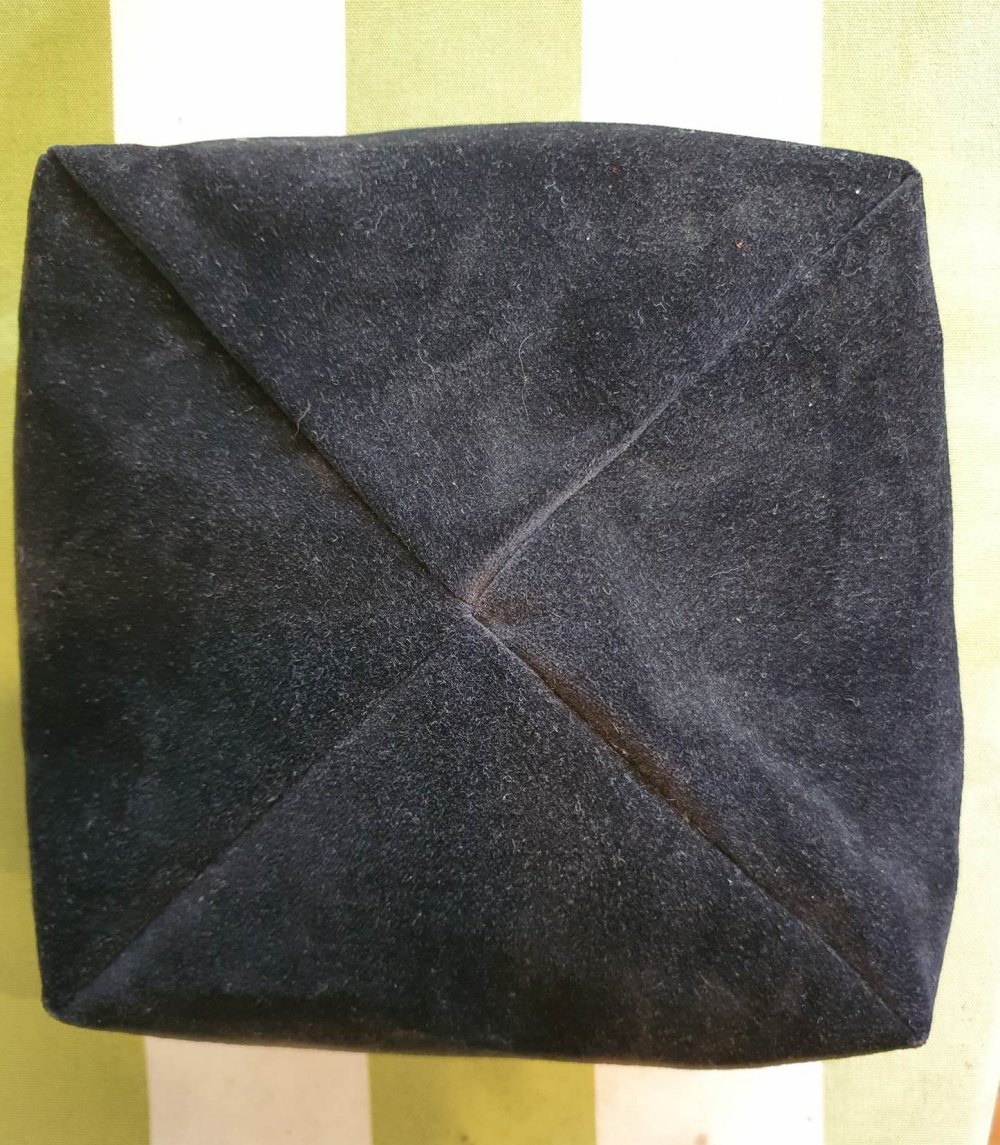
I cut out the same crown shapes (plus seam allowance) out of silk and sew these together to make the crown lining. I slip-stitch this to the completed crown and remove the basting.
To assemble the hat, I sew the inner brim to the front of the crown using whip-stitch. Then I overlap the outer brim and whip-stitch this to the crown and the inner brim, where these overlap.
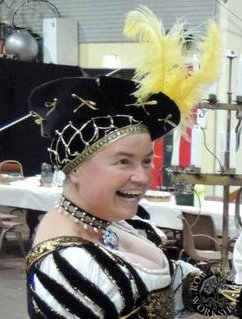
For the black Barett, I wanted tall feathers, like the hat in the engraving. I could not find yellow feathers, so I dyed some white feathers using yellow fabric dye. I glued gold decorative aglets to the ends of the feathers, then sewed them lightly to the inside of the brim.
I was really pleased with this hat – the first version of this style of Barett I had made. I have worn it many times since and still enjoy the shape and effect.


Variations on the theme
Since the Barett was so popular, I have made many versions of this hat to go with different high class gowns. There is little difference in the versions worn by men and women, so I have also used portraits of men for inspiration.
The following examples were all made the same way, using the same crown pattern, but with variations on the width and angles of the brim sections, and the decoration.
Red velvet with rings (2005)
I made this Barett to go with my pearled dress. It was inspired by the wonderful portrait by Hans Baldung Grien – I loved the rings strung on the cord as decoration. In place of the male Haub, I wear it with a heavily pearled women’s Haub.


Photo: Jeremy Gregson
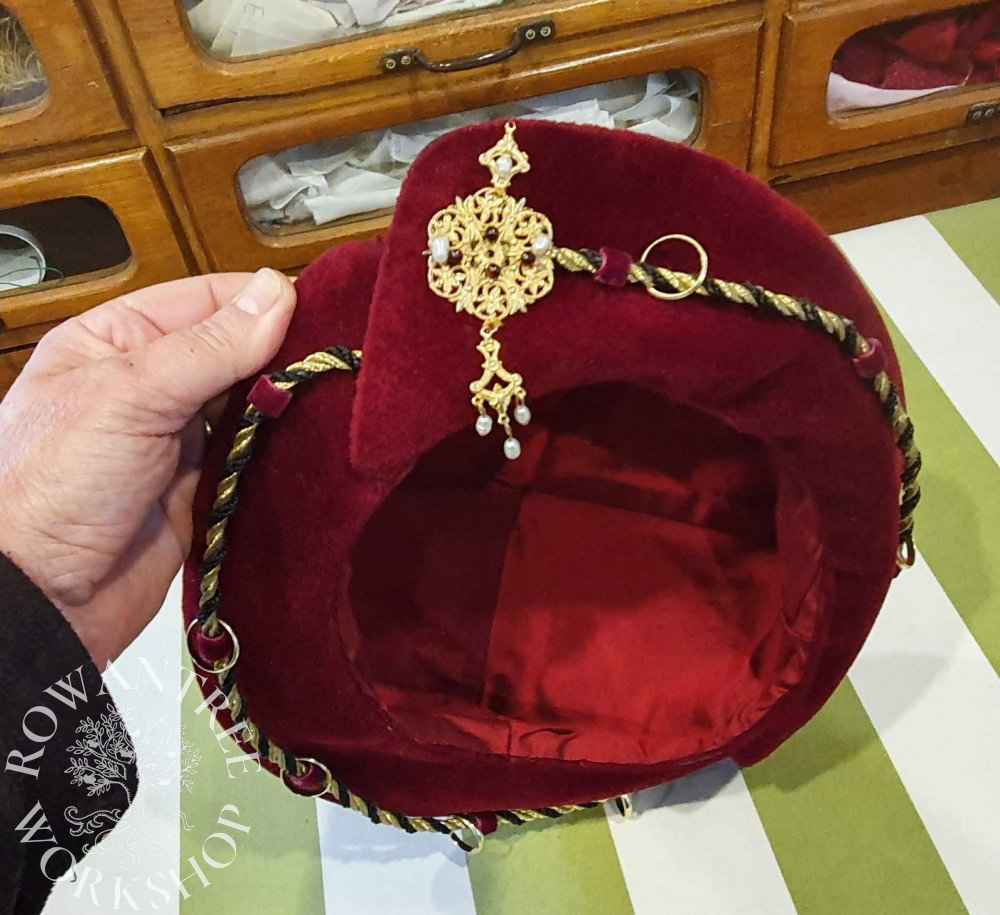
To get this effect, I cut small horizontal slits in the velvet cover and threaded through small loops of red velvet ribbon. This holds the the twisted cord, with rings strung on each section – in my case, cheap costume jewellery!
I made a jewelled brooch from a large gold mount and some small ones, adding garnets and freshwater pearls. The Barett is lined in red silk.
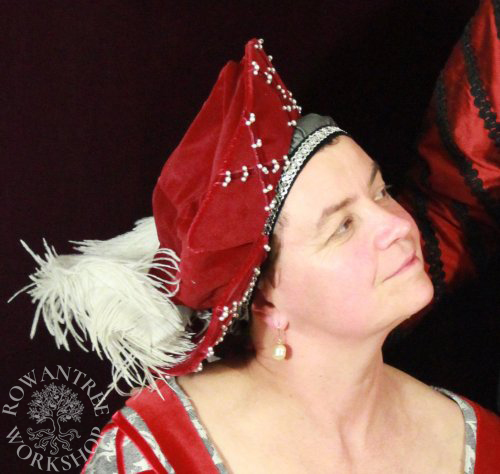
Red velvet with pearls (2011)
This Barett was part of an outfit I made based on a painting of Bianca Maria Sforza, which I photographed in Nuremberg in 1996. I have not been able to find an attribution (pre-digital, so no pic of the label), but it is closely related to a portrait by Bernard Strigel, c1505-10.
The red Haube has 100s of faux pearls on the band and net, and more pearls on the edge. I interpreted the decoration on the brim as laid velvet ribbons embellished with sets of 3 pearls (the Strigel version looks more like knots of floss). It is lined in red silk.

Photo: Robyn Spencer

I’d like to have another go at this one, but only once I can get a clearer image of this painting (and more detailed information).
Green velvet with spangles (2018)
This Barett (and indeed the whole outfit) was inspired by the Mahler portrait of Anne of Hungary and Bohemia. I couched the gold grid onto the brim and couched the pearl loops before sewing it to the crown, then sewed on the spangles afterwards. I made a jewelled brooch using gold plated mounts, a glass ‘jewel’ and pearls.
I made a two layered Haube with gold net over black and red silk and bands of gold braid – a simplified version of the one in the painting.

Source: Museo Nacional Thyssen-Bornemisza
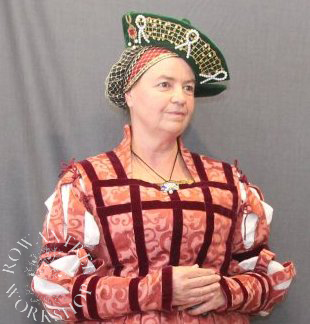
Photo: Robyn Spencer
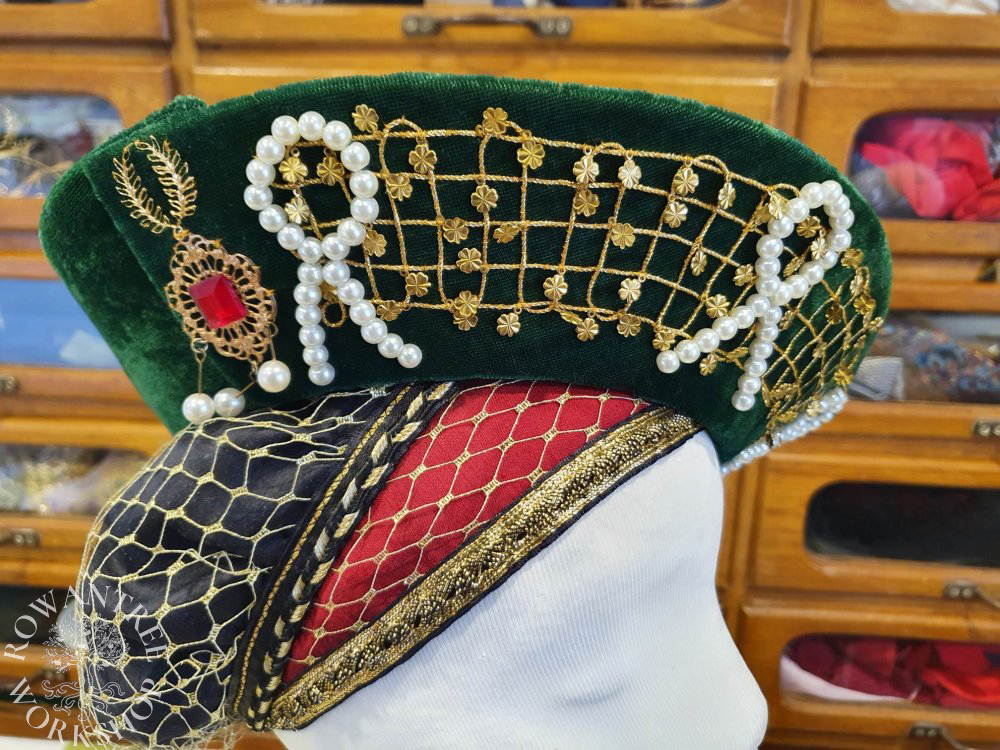
I was running out of time before the event I planned to wear the hat, so I only decorated the front brim. I still need to decorate the back… The hat is lined in green silk.
Green velvet with red silk (2019)
The decoration on this Barett was inspired by the Portrait of a Young Man, by Hans Holbein the Younger, although I used a solid brim, rather than a slashed one. There are some other images of hats with a similar decoration, and I wanted to test my theory on how to achieve the look.

Source: Useum

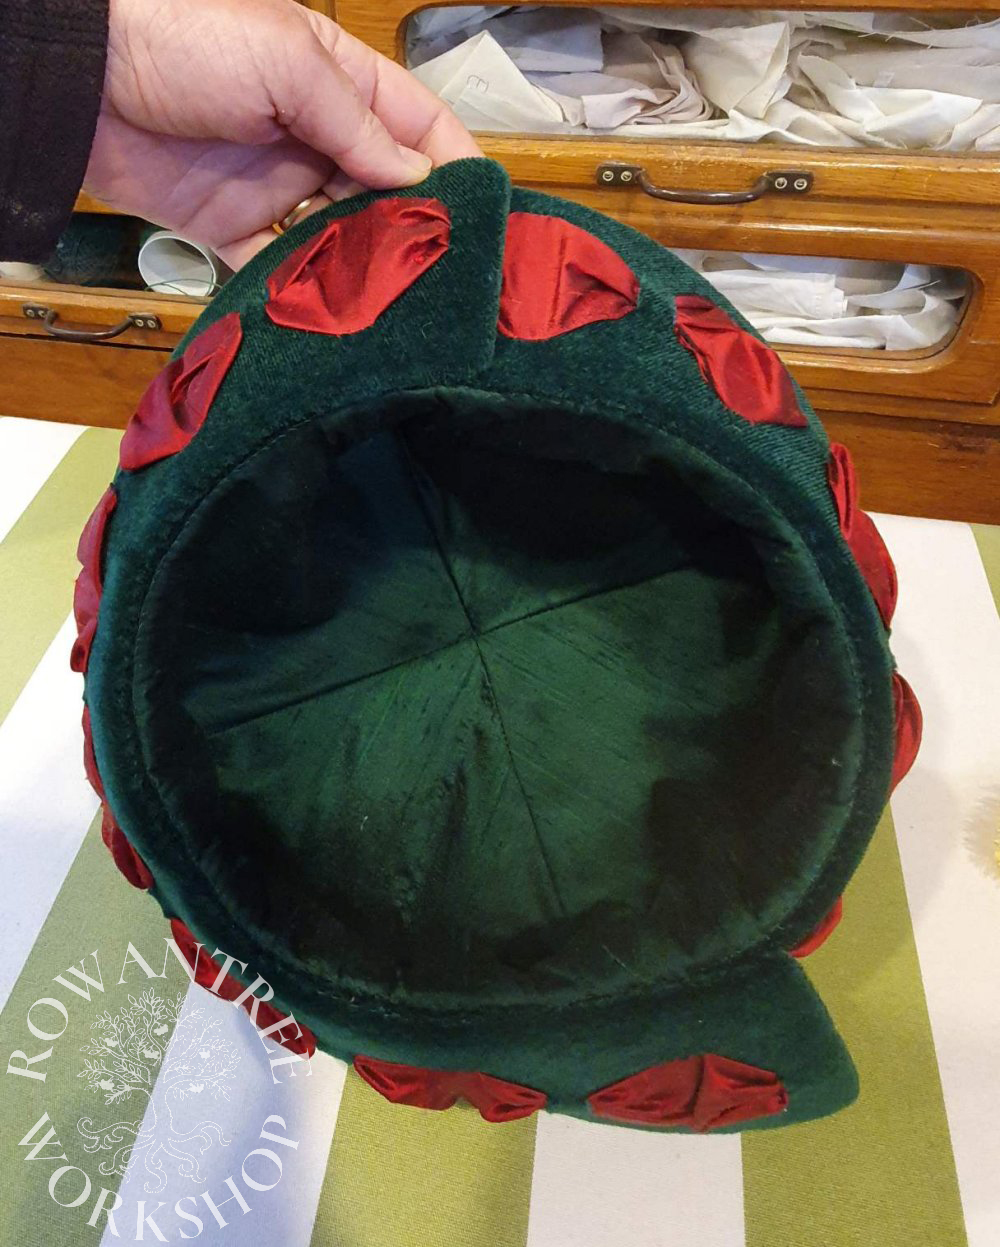
I cut vertical slits in the green velvet, then pulled through a strip of red silk. In between the slits, I spread out the silk strip and stitched it to the brim. Red and green are my favourite colours and I love how they look together, but I think a smaller brim would work better. This one is lined in green silk.