

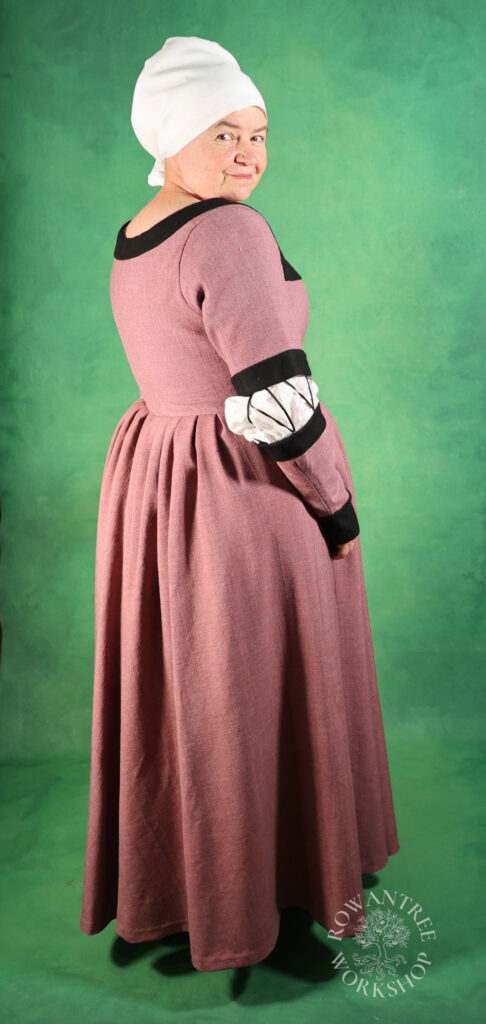
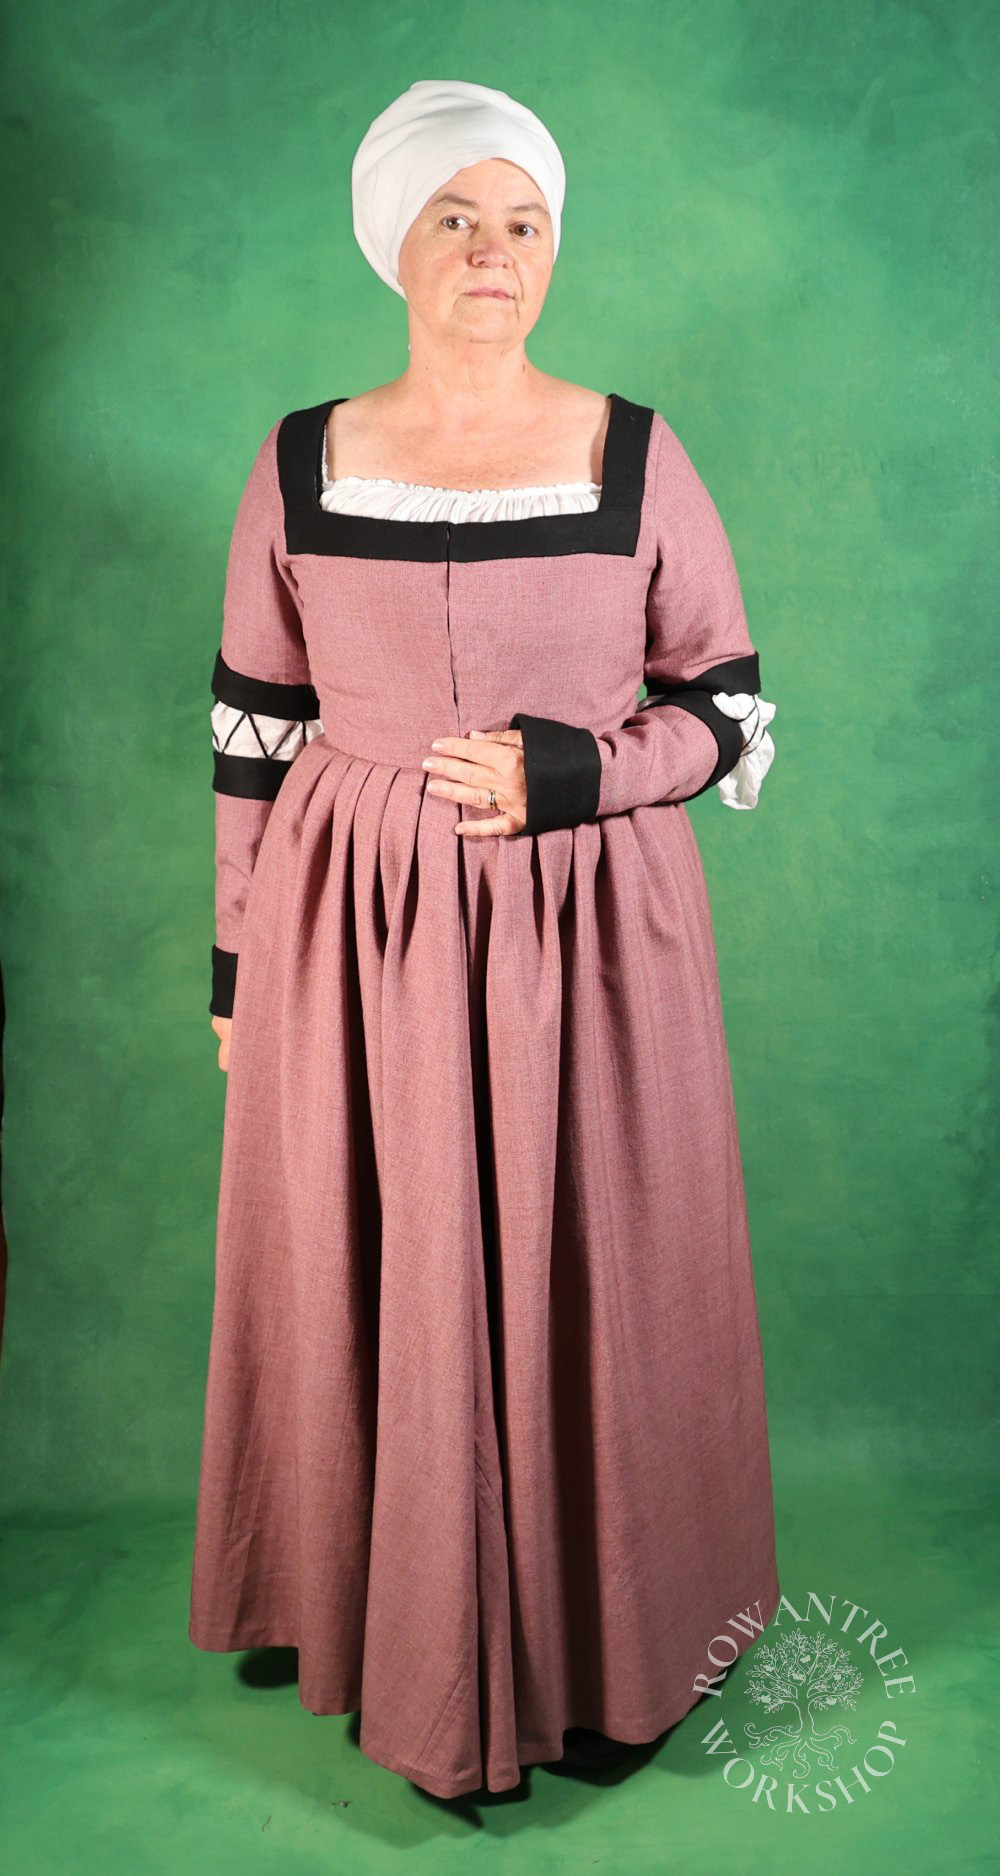
‘Leberfarben’ means ‘liver-coloured’ – a pale version of this colour was common for low status garments in 16th century Germany. This is a lower class woman’s gown from the early 16th century, typically worn by a peasant or servant.
I needed a new lightweight lower class Rock. For many years, my grey linen had been my go-to for hot weather or events where I was cooking or doing other messy tasks. It’s had several rounds of repairs, but it was starting to wear out.
The replacement also needed to be lightweight, but I wanted it to be made of wool, in a lower class colour and with minimal, lower class decoration. I had an overseas summer event coming up, so a lightweight gown would also pack well.
Research & Design
Many of my garments are direct copies of artworks, but this one has several inspirations.
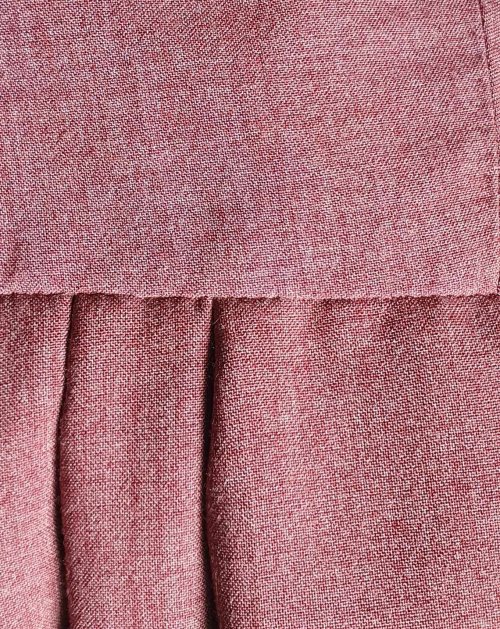
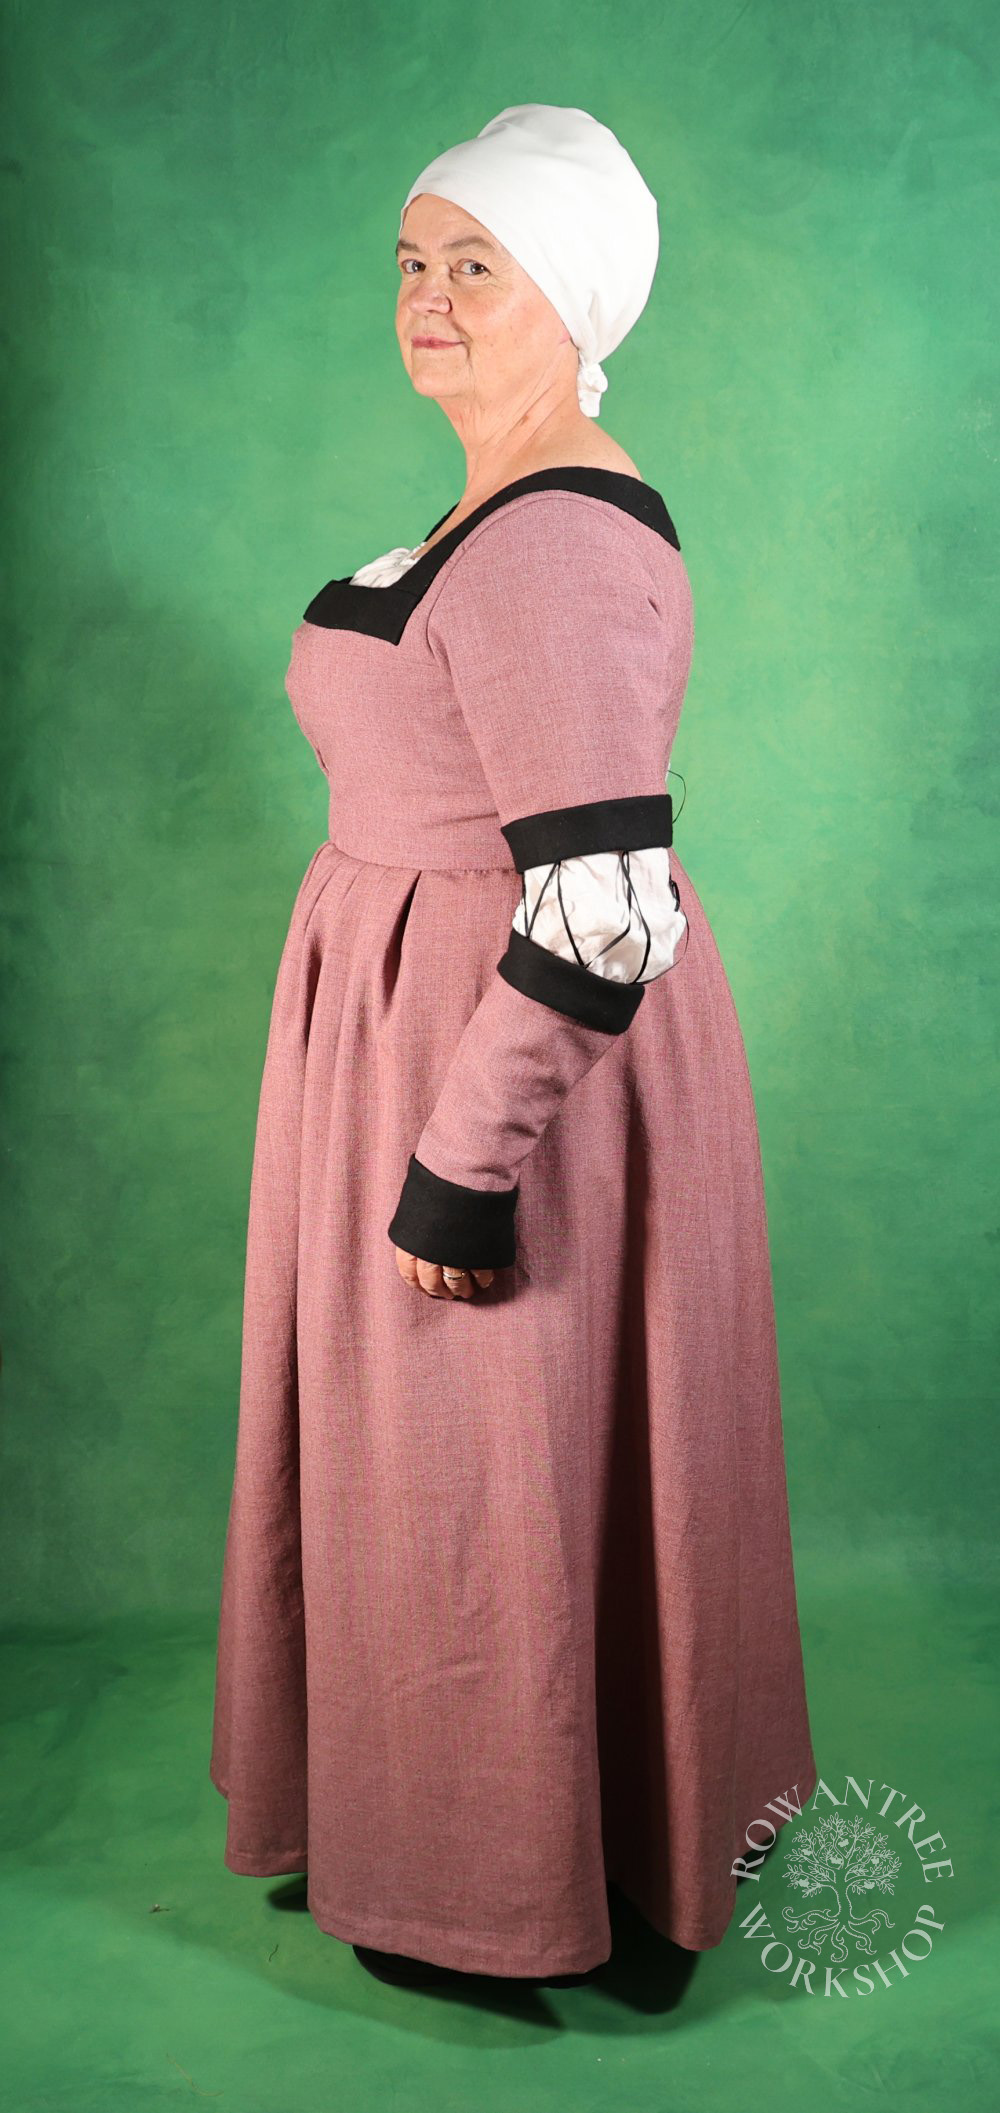
Lower class skirts are often not pleated all the way around, but have a flat, unpleated section at the side, as can be seen in these images spanning. The skirts are also shorter – you can often see the shoes or ankle boots underneath.
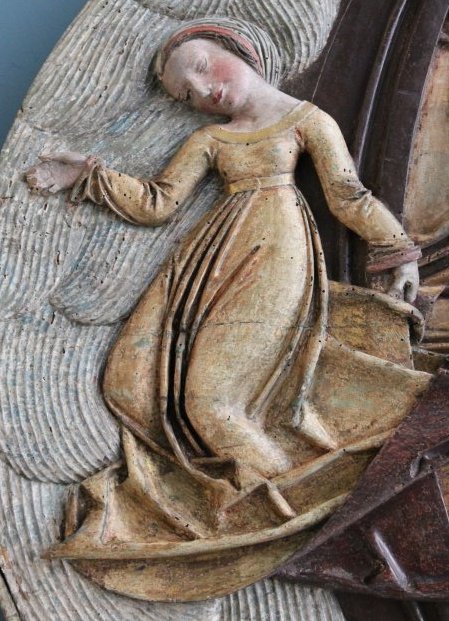
Photo: Robyn Spencer
Source: Gemaldegalarie Berlin
Source: Geisberg (1974)
Two part sleeves are common at all class levels, with and without connecting laces, as seen in the examples below. Some lower class images show the lower sleeves removed for work, such as this sculpture of the servant in the Mariengeburts, by Mauch.
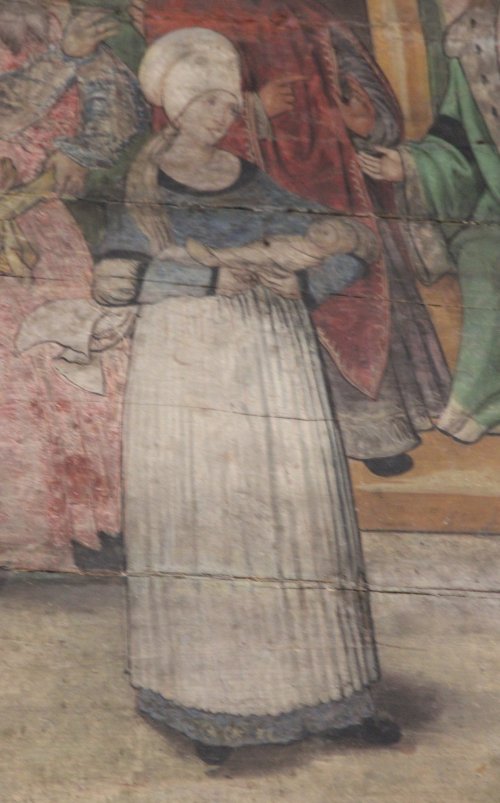
Photo: Robyn Spencer
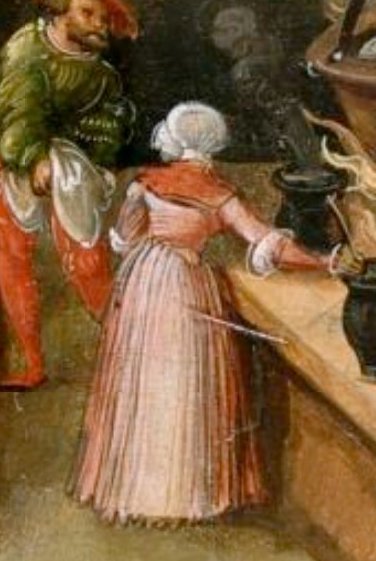
Source: GNM
_Mariengeburt_Liebieghaus_1382.jpg)
Source: Wikimedia
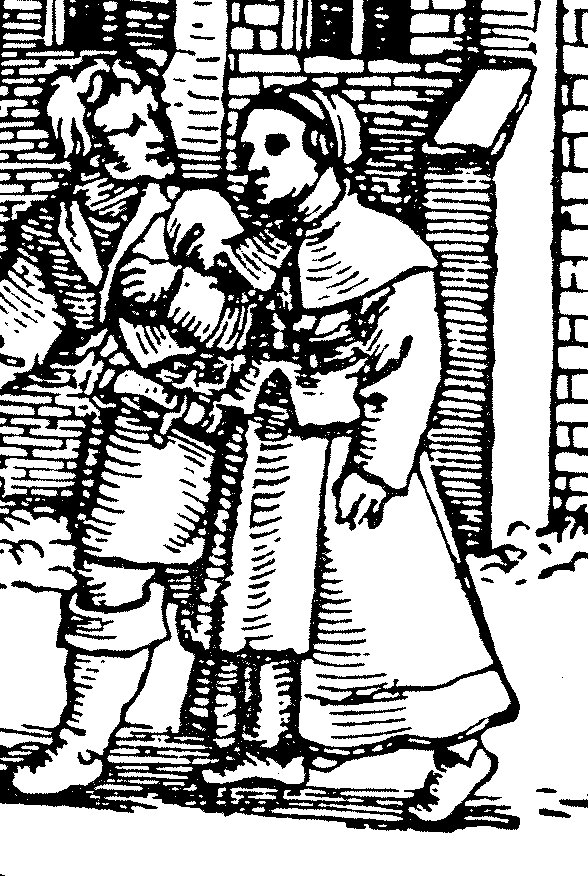
Lower class gowns have little deoration compared with other classes, and these are woolen rather than the high rankjed velvet. A contrast guard at the neck (either round or square) is still common, but this is narrow and the front bodice is usually plain, without a guard. Simple guards are seen on sleeves, as seen in the Judgement of Solomom above, but the hem is often plain.
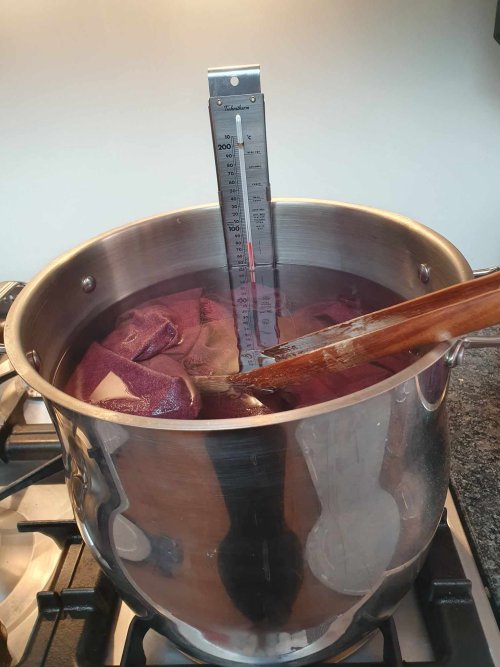
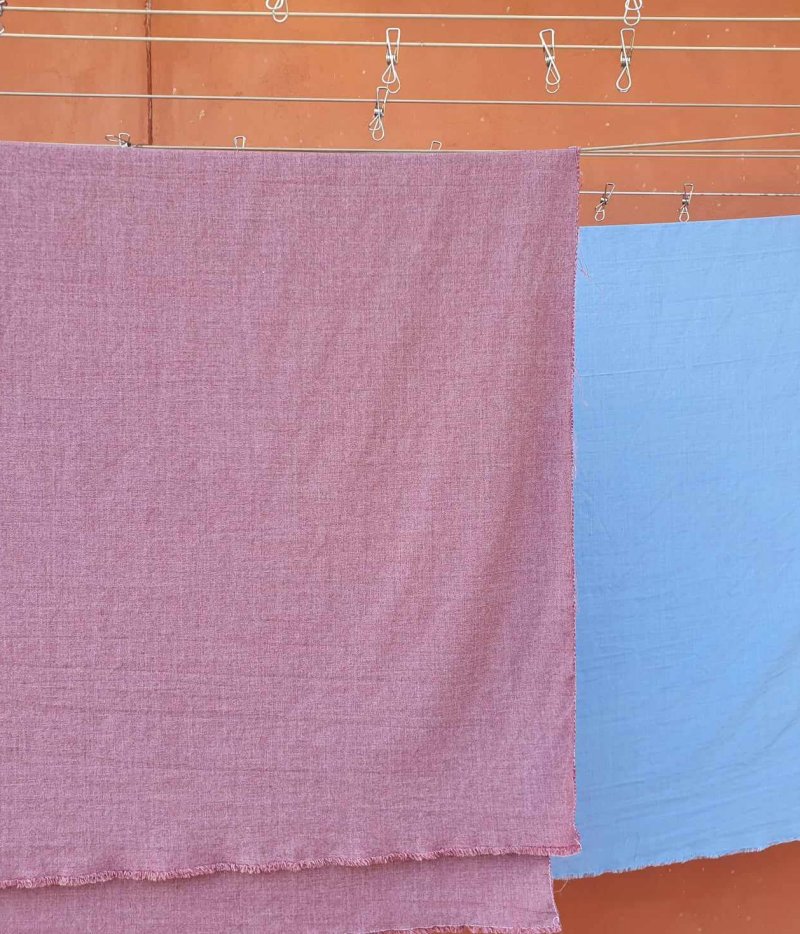
Finally, the colour. Drei Schnittbucher (2015) lists the cheapest colours to dye wool as yellows, light green, ash and light livercoloured. Yellow does not suit me, but I’d been given some baby blue worsted wool which could be dyed to ‘leberfarben’,
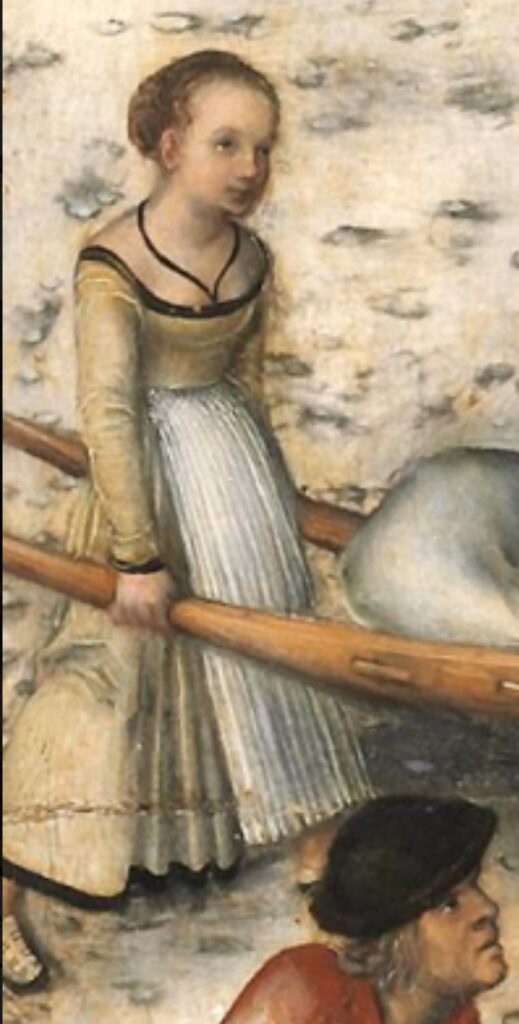
There are many examles of this colour in depictions of the lower class, for both men and women, as can be seen in the paintings below. It is similar to what the English call ‘murray’.

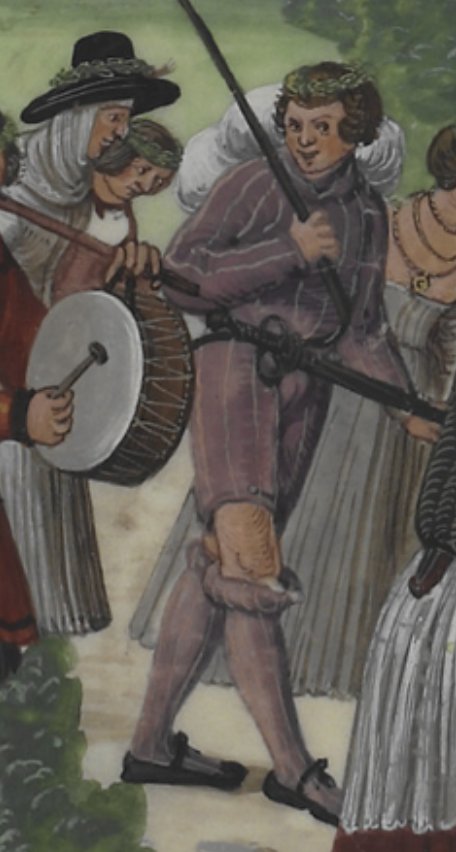
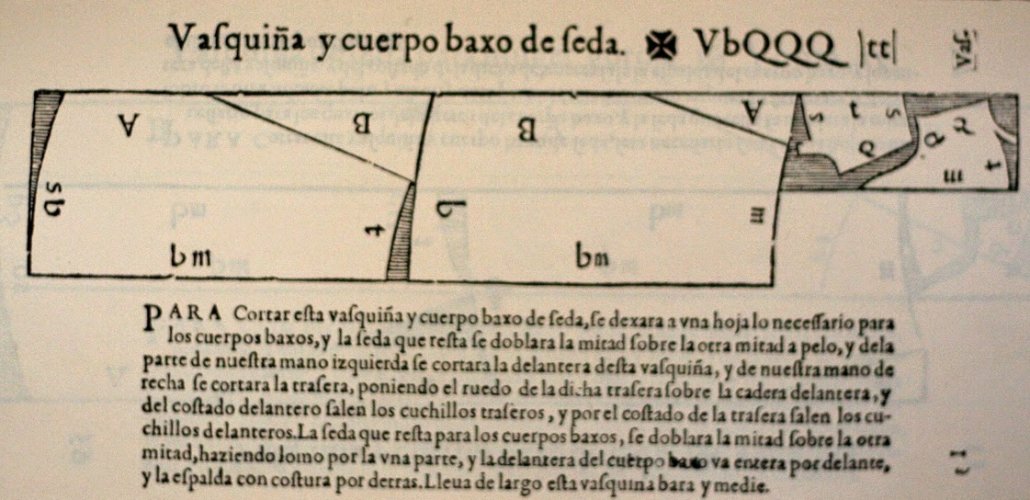
Source: Biblioteca Digital Hispanica fol 173
Based on all this, my plan was for a Rock with a shorter, partly pleated skirt, bodice with a square neck and narrow guards, and two part sleeves (lower sleeves removeable), in a lightweight leberfarben worsted wool, with black woolen guards.
Construction
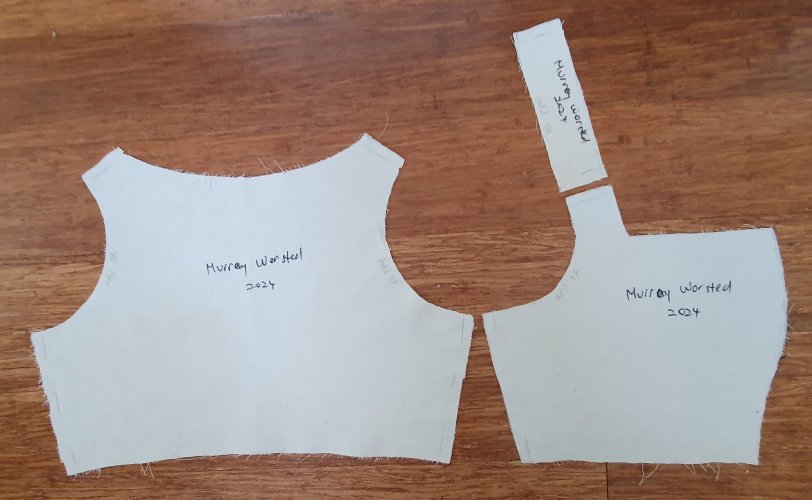
The basic pattern is similar to my Pink Wool, but differences to the bodice and sleeves meant the first step was to draft a pattern and test it. I suspect that most of these lower class gowns were worn without a support layer, but I need one, so I patterned over my worsted Unterrock.
As usual, I cut a test version in cheap fabric, stay-stitched the armscye and neck, assembled it and tested. It needed several rounds of adjustment – take in the sleeves, adjust the front bodice line, change the shoulder strap angle…
It’s worth taking all the time at this stage to get it exactly right. If it doesn’t work as a mock-up, it won’t get any better with the good fabric!
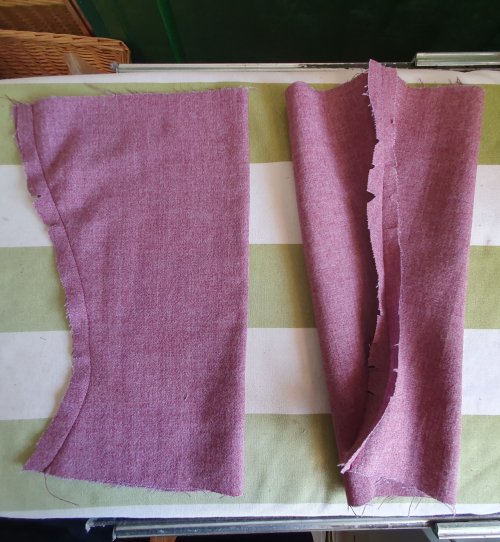
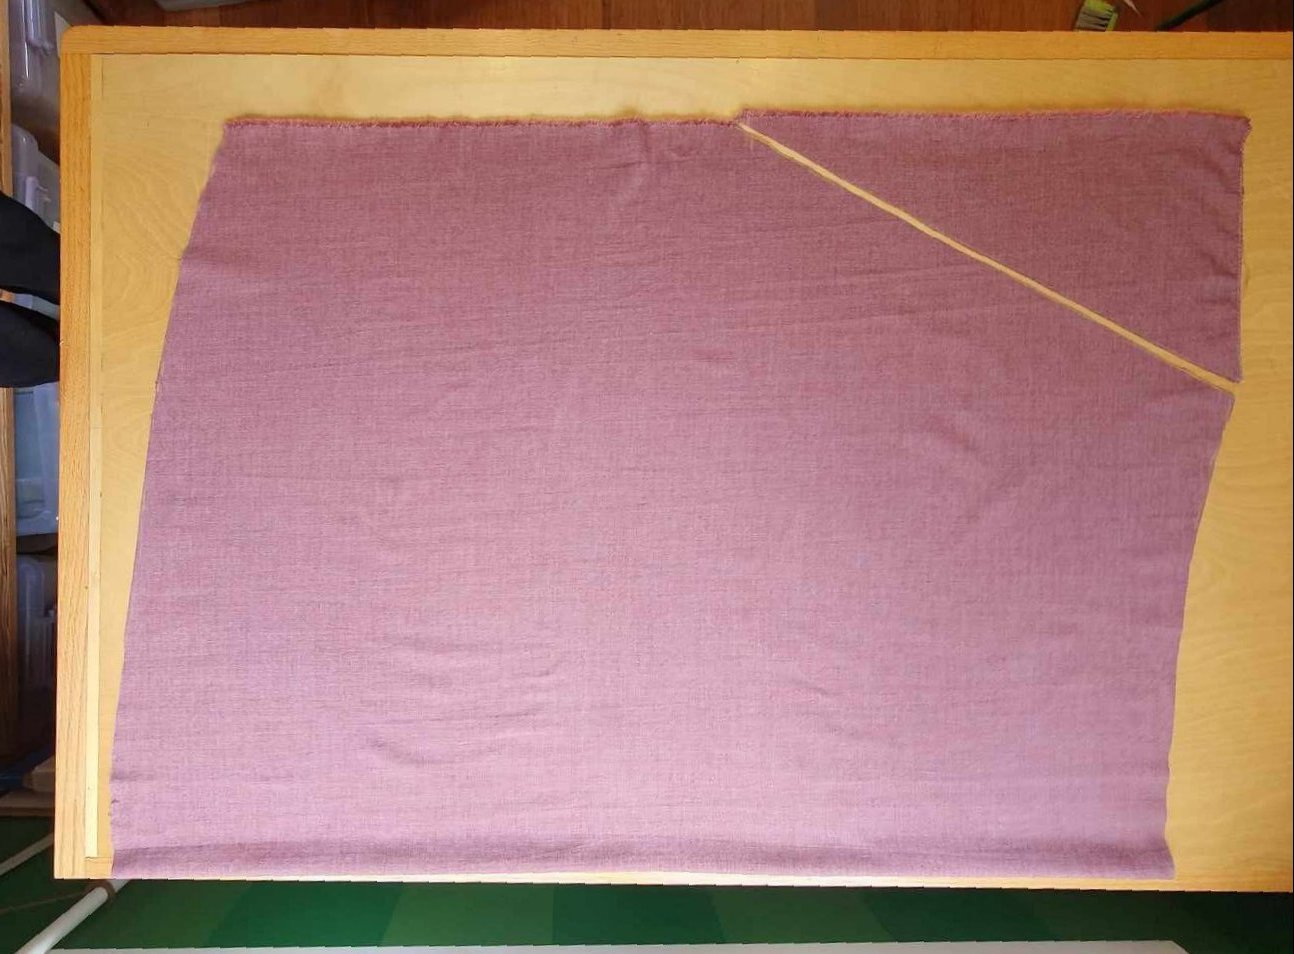
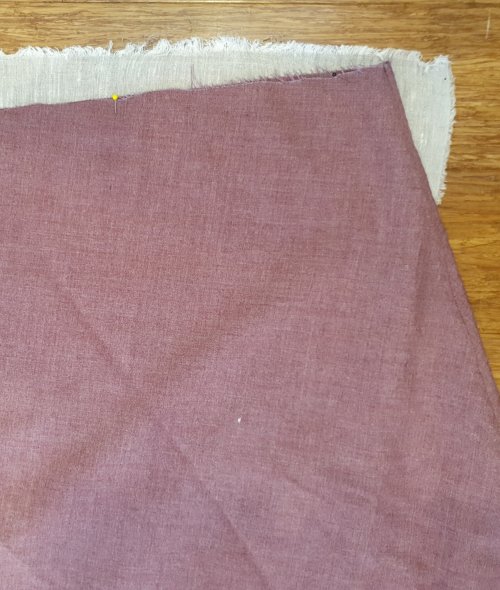
Once I was happy with my mock-up, I could estimate how much fabric I needed to dye. With careful cutting and piecing, I could get the whole garment out of 3m x 1.5m wide worsted wool.
I cut 2 skirt drops of 120cm, and one 60cm piece for for bodice and sleeves and dyed them using red food colour, turning the baby blue into a good 16th century German Leberfarben (liver coloured) wool.
First, the bodice.
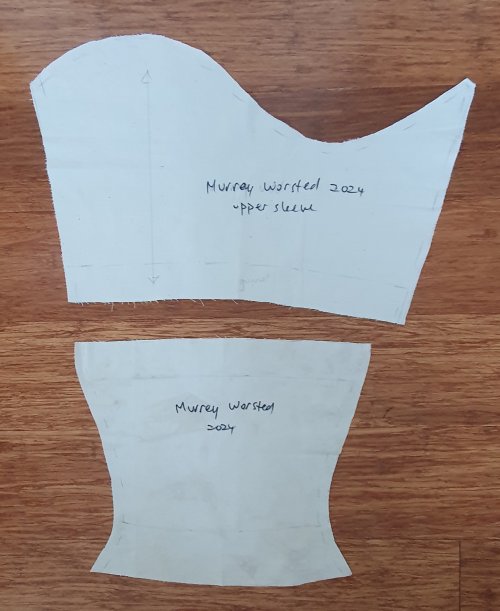
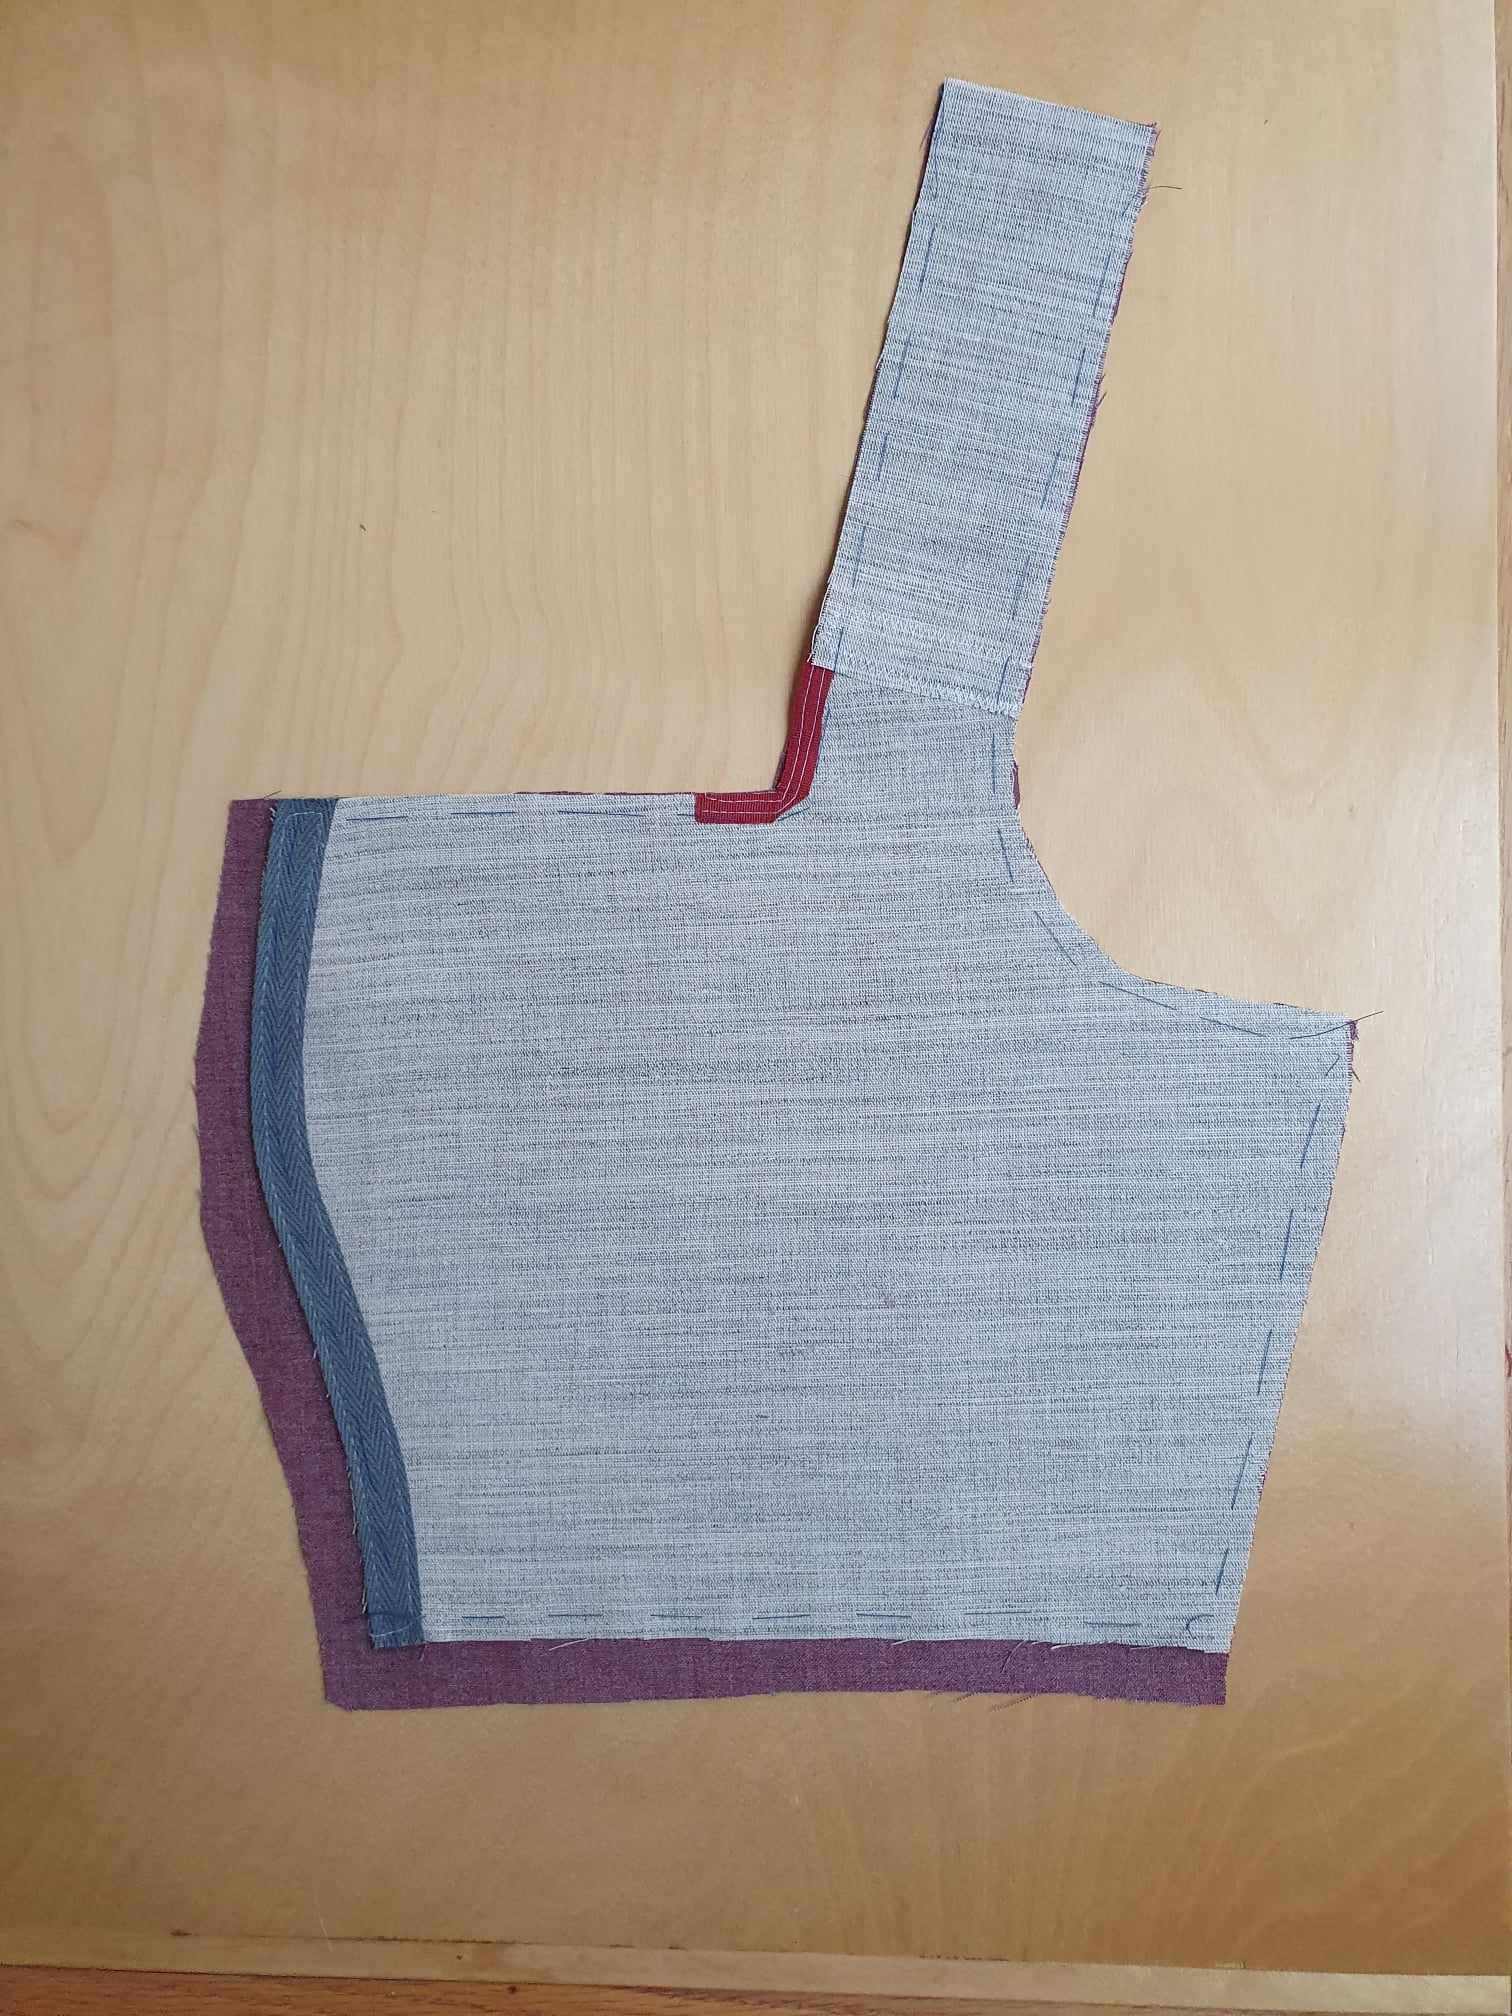
I cut this in canvas with a straight section over the shoulder, as seen in Alcega – this reduces fabric use and places the strain on the straight grain, which is much stronger.
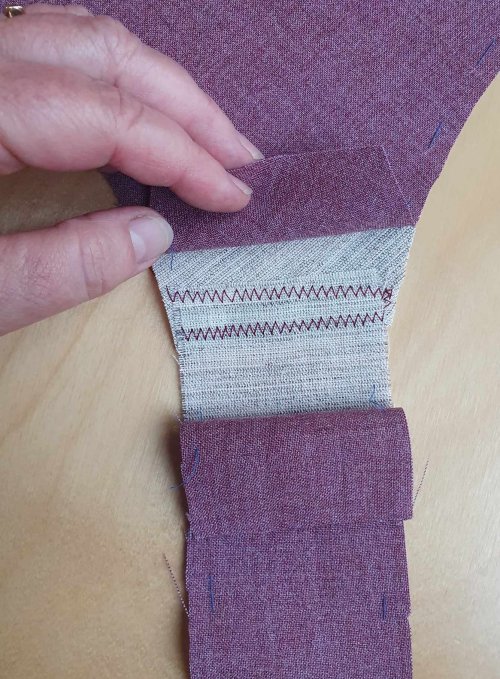
To reinforce the bodice front and support the hooks and eyes, I added a strip of pre-washed twill tape, shaping with the iron and sewing it onto the canvas. I also added finer tape to reinforce the corners of the front neckline, which are a weak point. Then I sewed on the shoulder strip, overlapping the seam allowances to reduce bulk.
I cut out the bodice and sleeves in wool, and also in raw linen for the lining. I sewed the front strap seam and then basted the front and back sections of the wool to the canvas, trimming to match. I hand-stitched the back strap seam – doing this last makes sure the wool lies smoothly over the canvas.
I sewed the side seams, then pick-stitched them to hold the seam allowances flat and stiffen the seams. To finish the bottom edge and front, I clipped, turned and basted the hems, then catch-stitched these to the canvas.
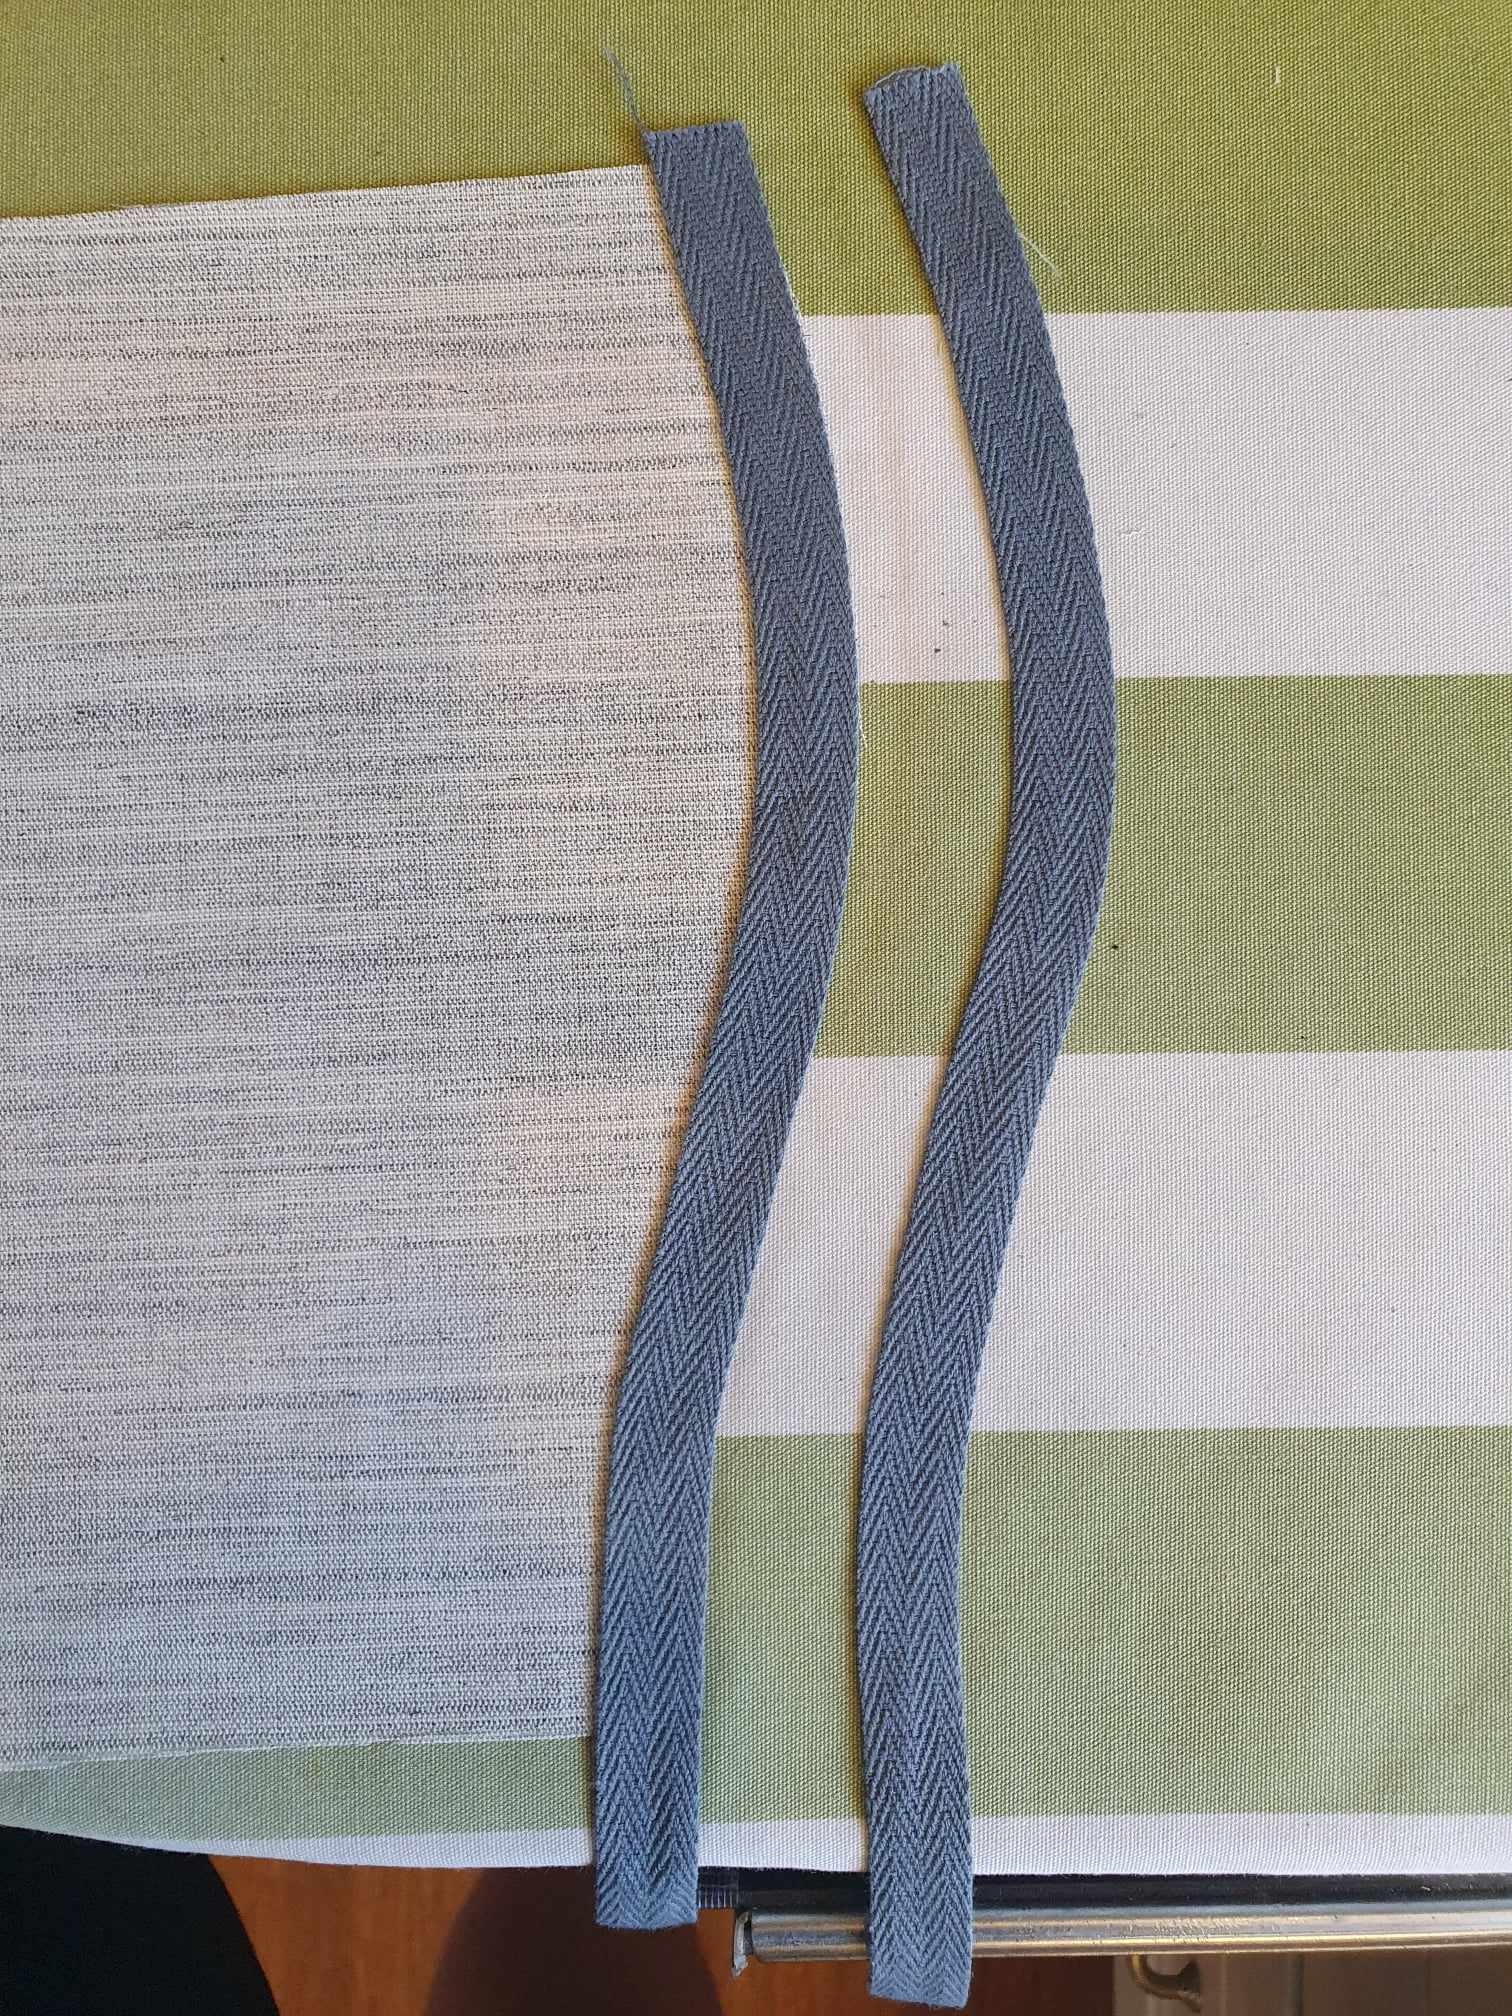
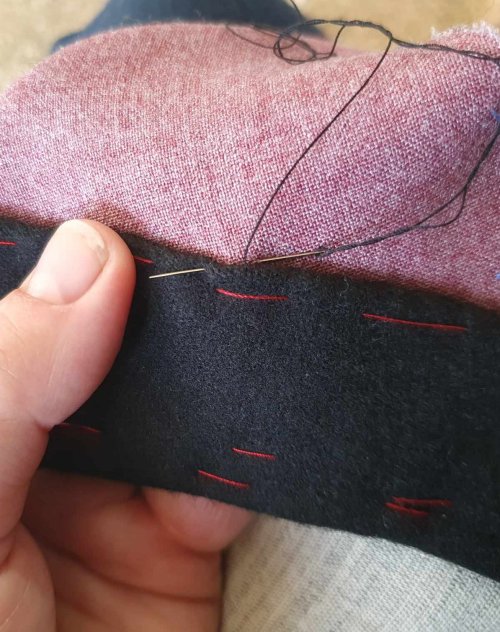
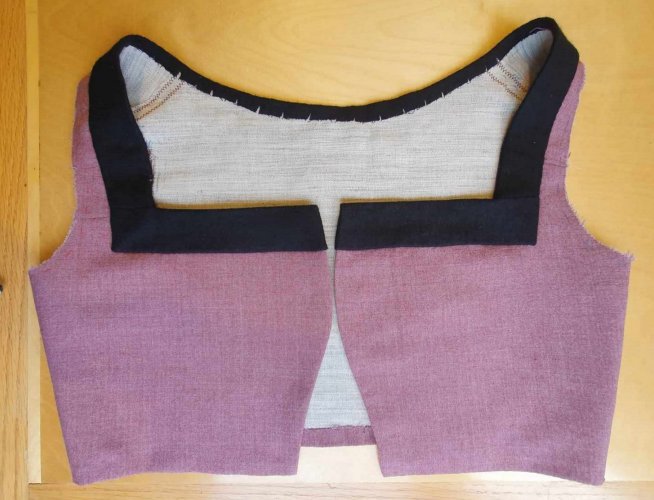
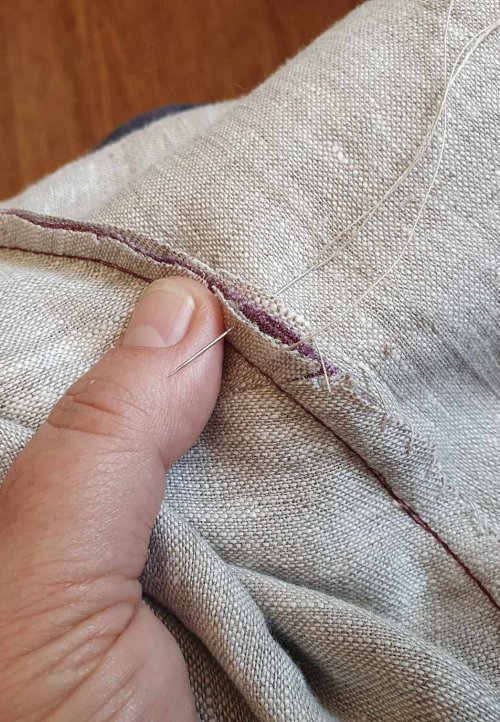
For the black guard around the neckline, I used the bodice patterns to get the right shape and tested the pattern on the bodice. I usually cut these in one piece, but here I cut the front strips separately, which is more efficient. I used the sleeve patterns to cut the simple guards and cuff in black wool.
The guards go on first, and then then lining is sewn over the top. I basted the guards around the neckline, then clipped and folded the hem and basted again, then catch-stitched the black wool to the canvas. For the straight sections, I clipped the seam allowance at the corner, so I could sew the free edges together.
With the neck edge secure, I measured out 4cm, trimmed the hem and slip-stitched it to the bodice.
At this point, while handsewing at a music festival (as you do), I managed to get sunscreen on the bodice front! A couple of rounds with stain release and woolwash did not fix the problem, so I had to unpick the front guard, side seam and pickstitching, catch-stitches and front strap seam, leaving the front bodice canvas.
Then make a new front (not enough fabric, so pieced), then baste, sew, pickstitch, catchstitch and finally sew the guards back on. Many hours later, I had a bodice again. Onwards…
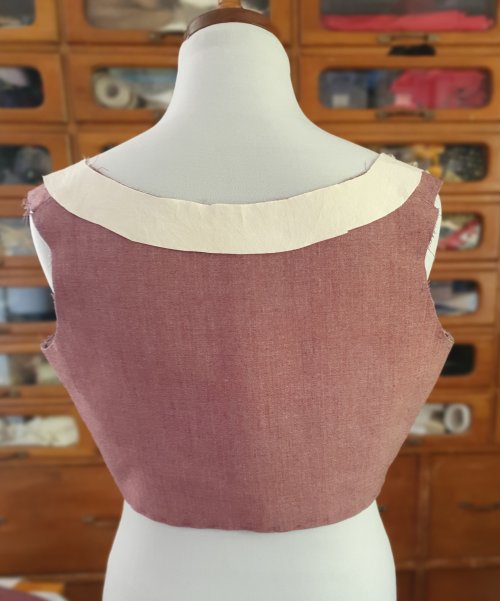
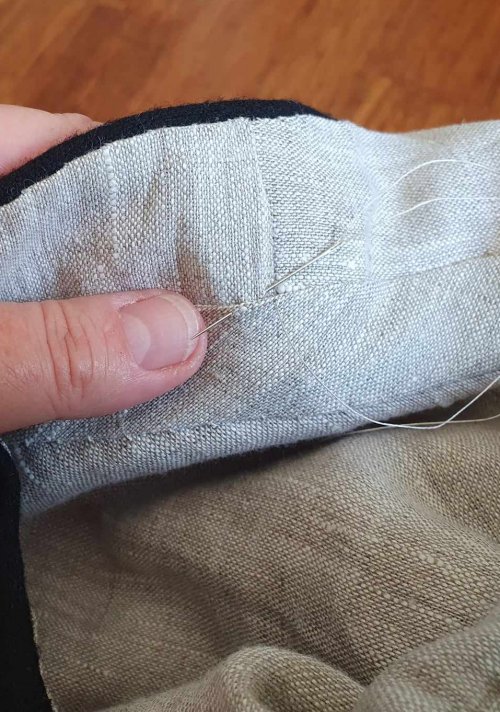
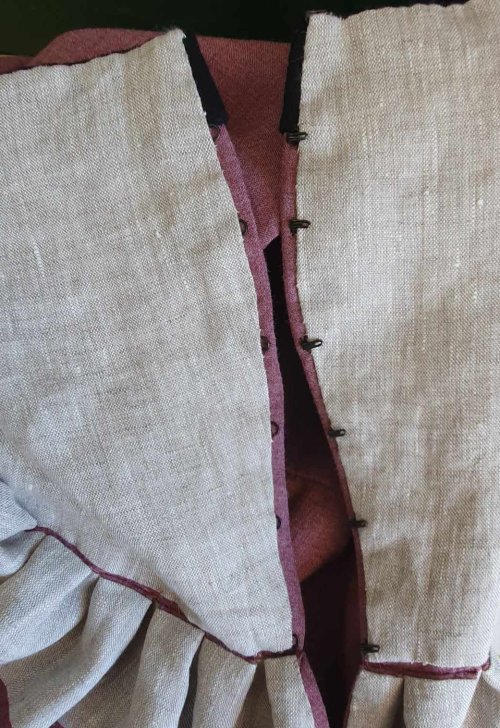
The bodice lining goes on in sections. First the back, basting and slip-stitching and then the front linings – this ensures the lining lies nicely around the armscye. I’ve left the linings basted down the front edge for now, so I can add the hooks and eyes later.
On to the sleeves at last.
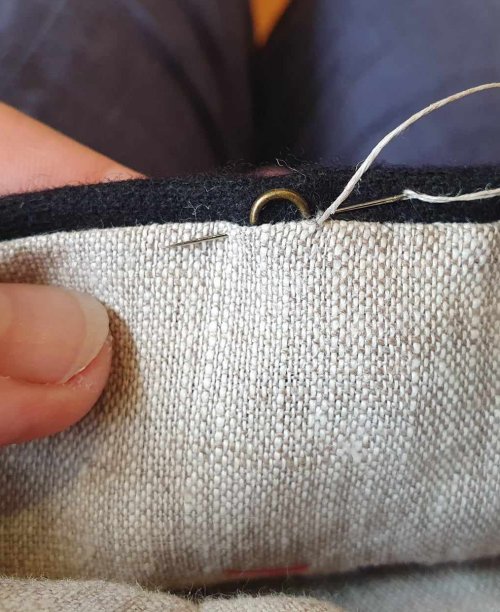
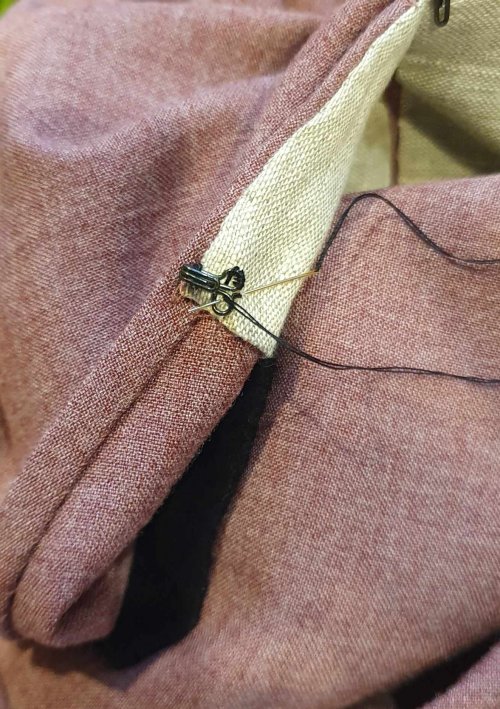
The two-part sleeves are not interlined. For the upper sleeve, I sewed the main seams, then clipped, pressed and turned them. I added black guards, using the same baste and catch-stitch approach, then sewed in 6 small brass rings to hold the lacings. I lined the sleeves in raw linen and basted the top, ready to sew into the bodice.
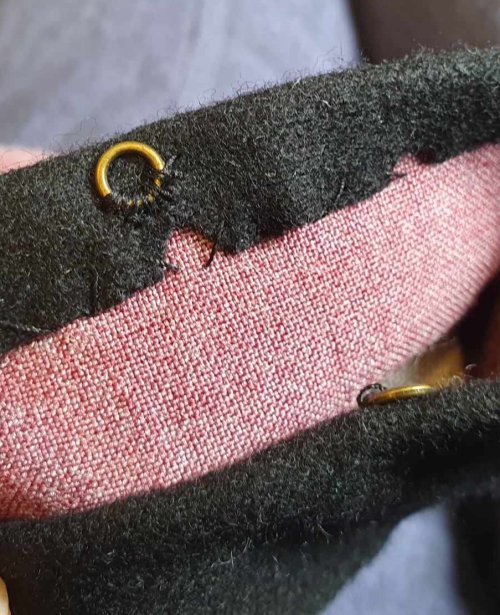
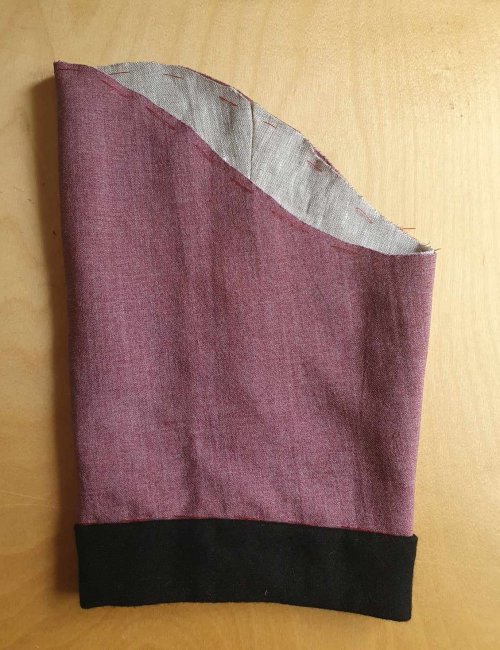
For the lower sleeves, I followed the same approach, but finished the cuff with a wider guard and a black linen lining (to show the diry less). The rings in the top guard are offset, for zigzag lacing.
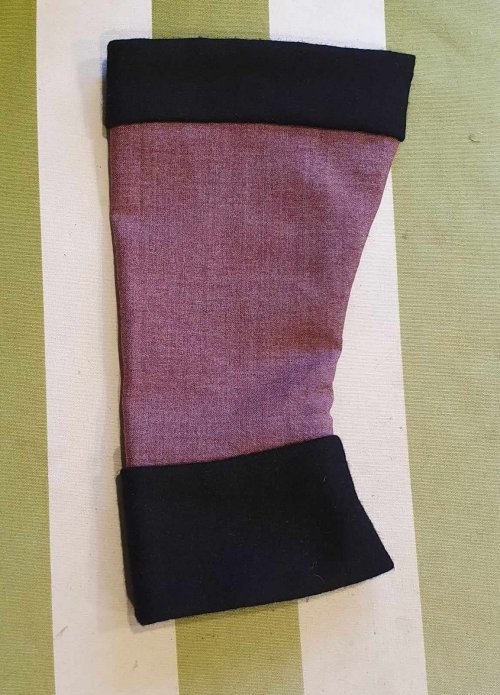
With the sleeves finished, I sewed the upper sleeves into the armscye. I trimmed and whipped the armscye seam down, then covered it with a bias strip to reduce wear. The bodice is now complete, ready for the skirt.
The skirt
I usually use 3x my waist measurement for a fully pleated skirt, but this one has unpleated sections on eash side, so I went with 2.3x my waist. I cut the skirt panels on the fold, with maximum piecing. Using 2.4m of 150cm wide fabric, I end up with a skirt with hem length of 4m and almost no waste.
I sewed on the triangles and felled the piecing seams, using machine basting to speed the process (works best on straight seams) – now I have two large skirt panels.
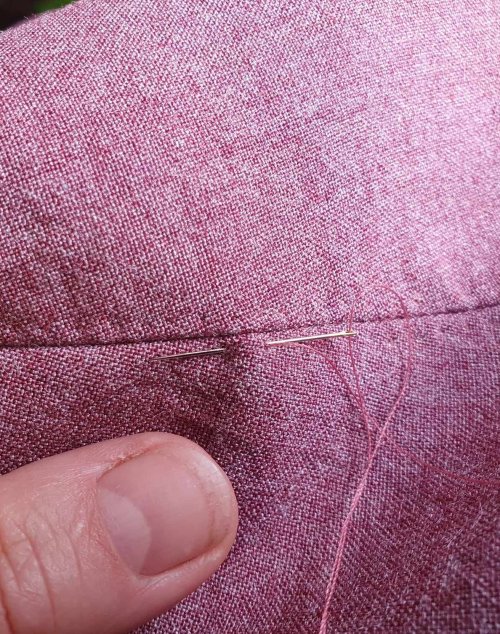
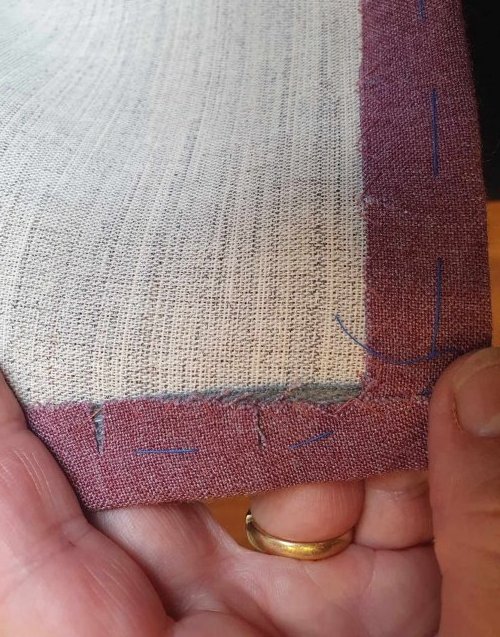
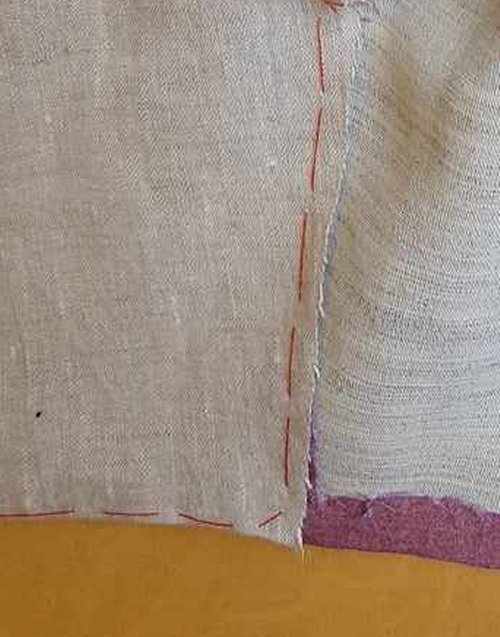
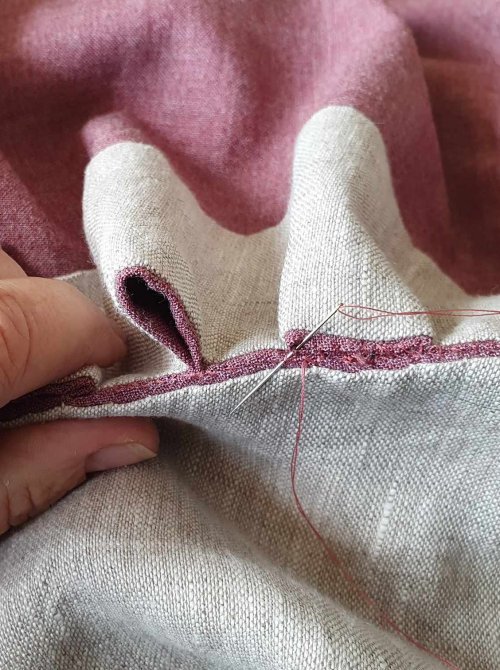
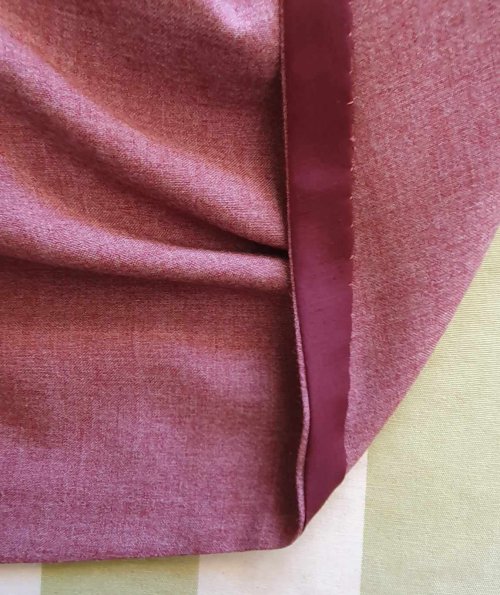
I sewed the top 20cm of the front seam with a long stitch, back-stitched at this point, then sewed the rest of the seam and felled it. Once I’d felled the seam, I unpicked this top section down to the backstitch, and then worked a bar across it – the skirt opening gets a lot of heavy use, and this will prevent rips.


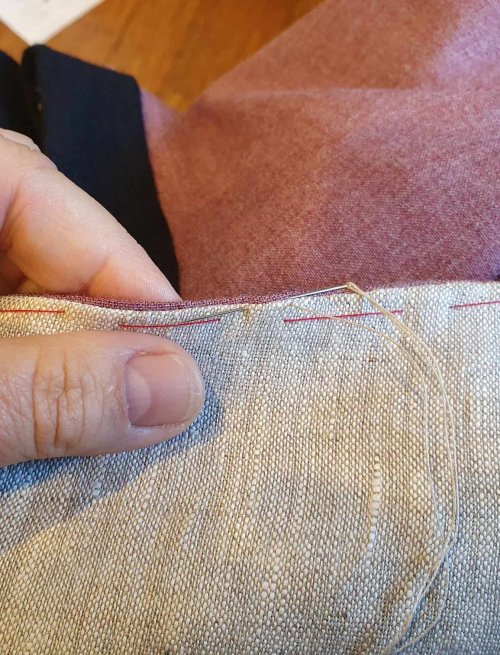
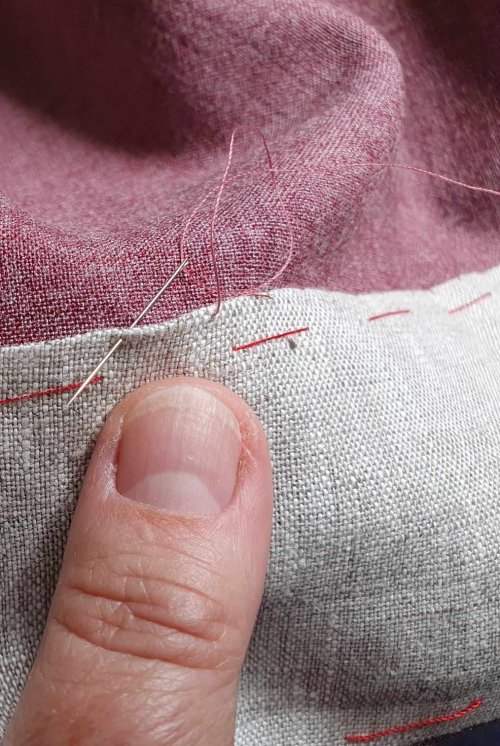
I used the curve of the skirt to cut a matching strip of linen to face the top. I sewed this to the waist, turned, basted and pressed it, then hemmed it down, being careful to just sew into a single thread of the wool, so the stitches are not seen on the outside.
Skirt is done, ready to sew to the bodice.
I usually pleat the skirt evenly around the bodice, but this style has the pleats at front and back, not at the sides. I matched the front, back and sides, then started forming 3cm pleats at the centre back out to both sides until I’d used up all the excess. Then I did the same at the front, making sure I had an inverted pleat at CF to hide the opening.
With the spacing sorted, I whipped the skirt onto the bodice, with an extra stitch at each pleat to secure it. Then I squashed the pleats down and whipped then to the back of the skirt.
I sewed the sets of hooks and eyes down the front opening, into the twill tape, so they don’t show on the outside. I didn’t sew the lining down, in case I need to adjust them.
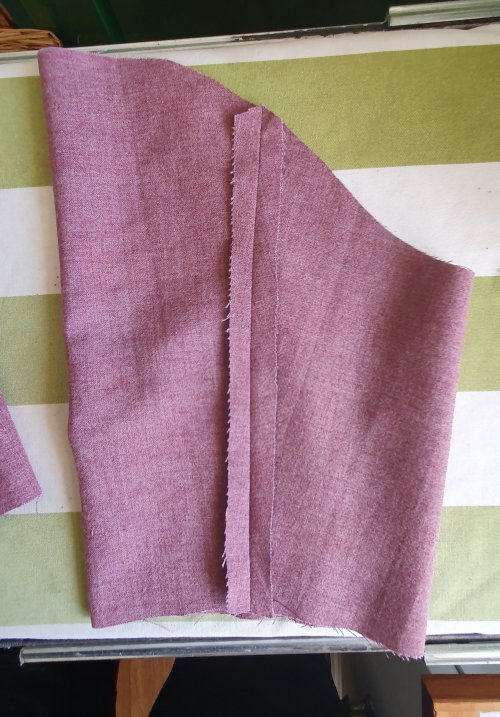
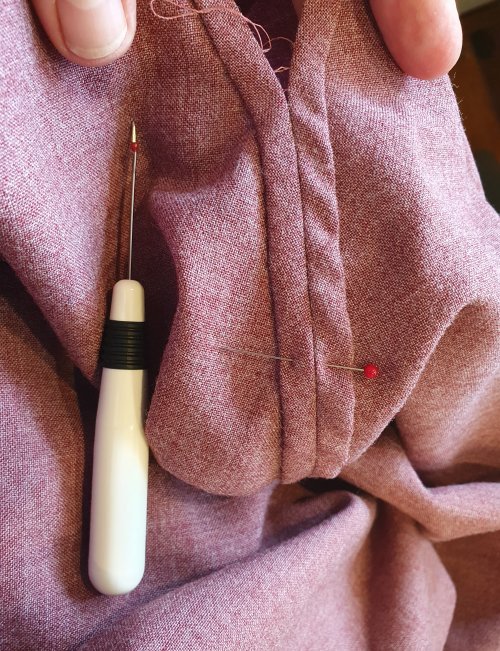
I tried it on over the Unterrock to get the hem length. Rats – I had cut my skirts shorter than usual (to match the shorter lower class look) and forgotten I usually add a guard, which I didn’t want for this Rock. The only solution was to add a facing to the back.
I adjust a few hooks and eyes for a neat closure, sewed down the lining , added another set of hooks and eyes at the top of the skirt facing (to avoid skirt gaping) – and done.
Making this Rock (and dealing with the various issues along the way) took much longer than expected, so I was pleased to finally have this piece completed and in the wardrobe.

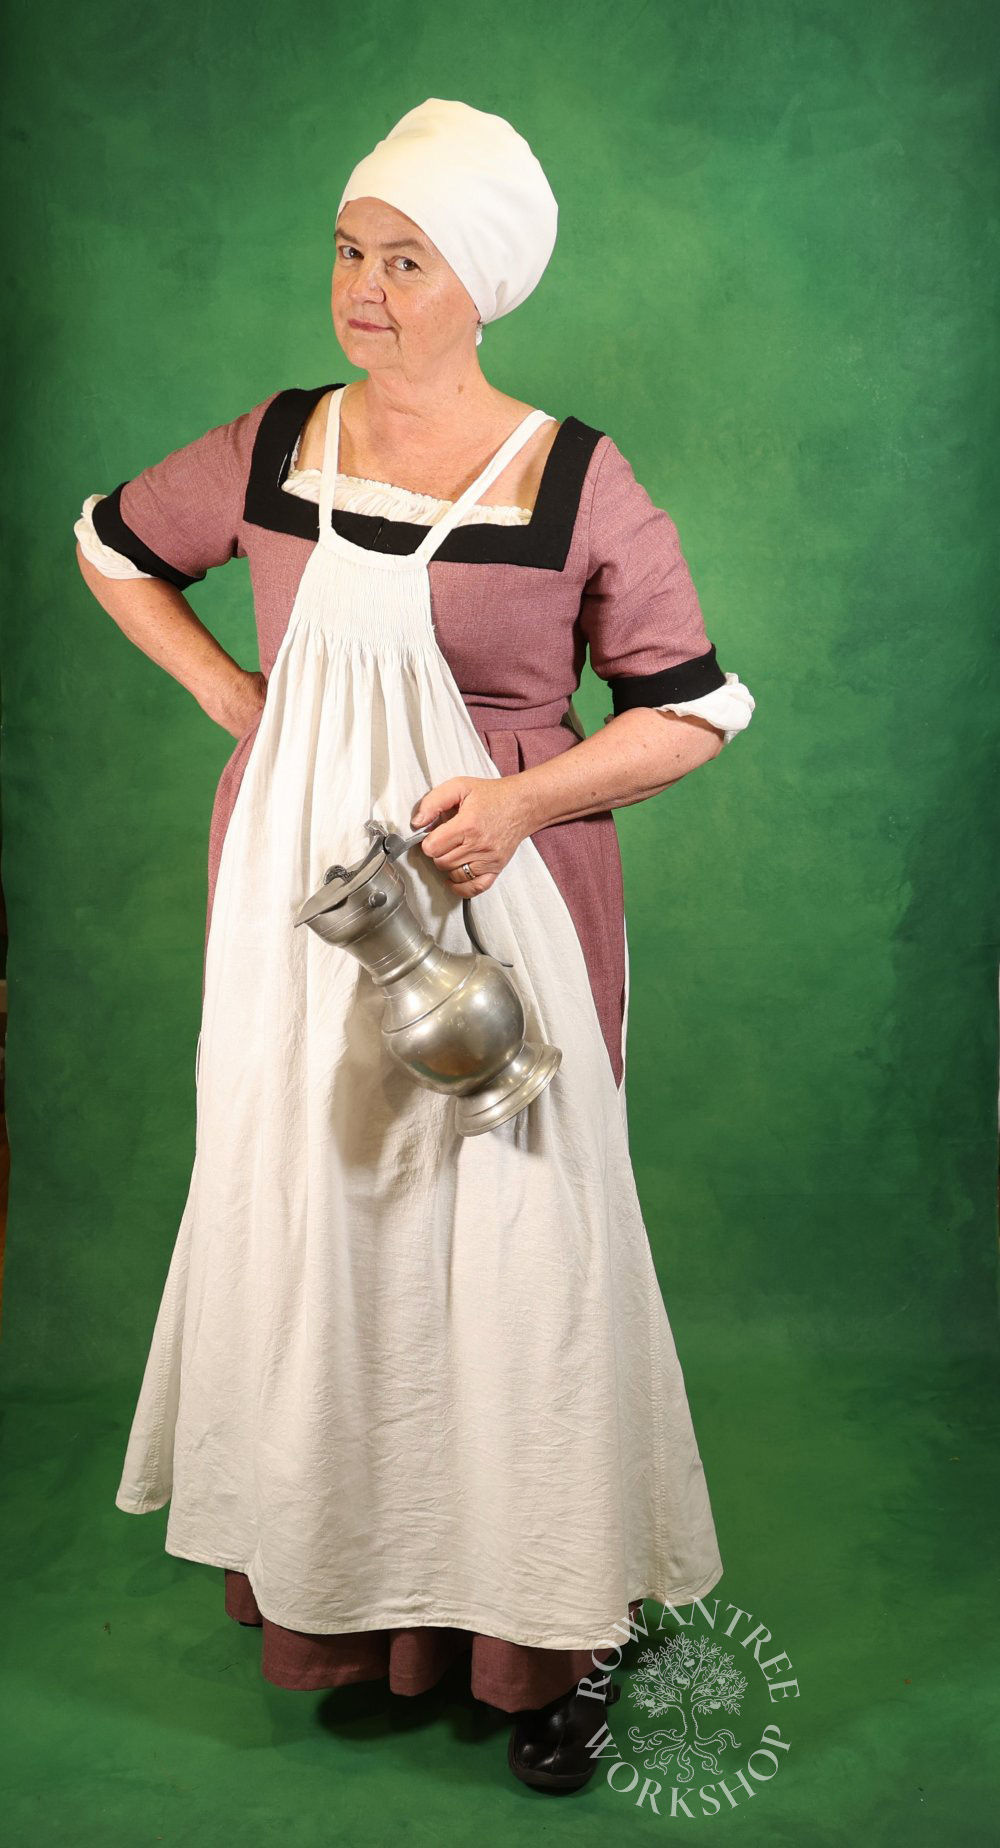
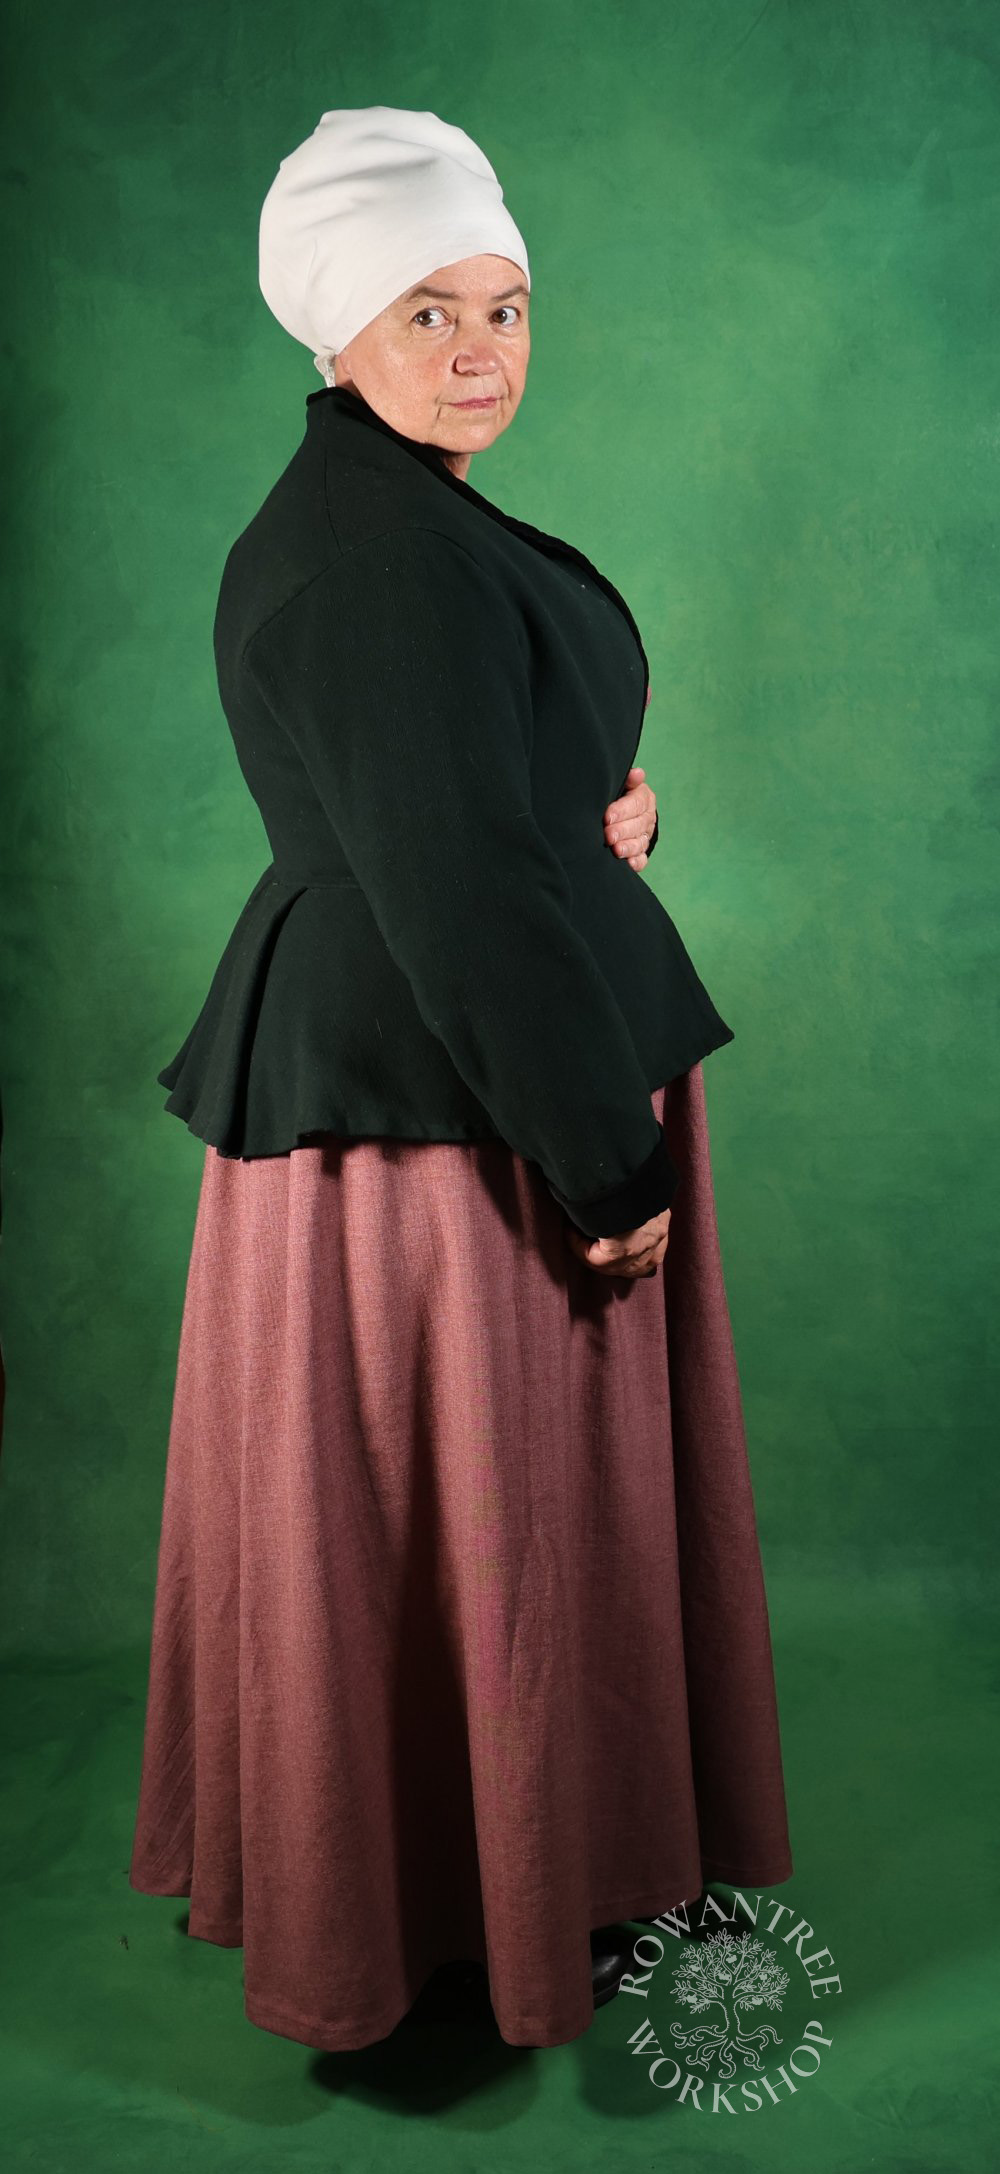
And of course, it goes well with various other working class garments I’ve made over the years – my Doppelschürze (and no sleeves), my Halbschürze and my warm Leib Rock!

Afterthoughts
If I was doing this again, I would cut the skirt longer – the flat side panels hang differently, and ended up being the shortest sections.
And I woukd be more careful with the sunscreen…