

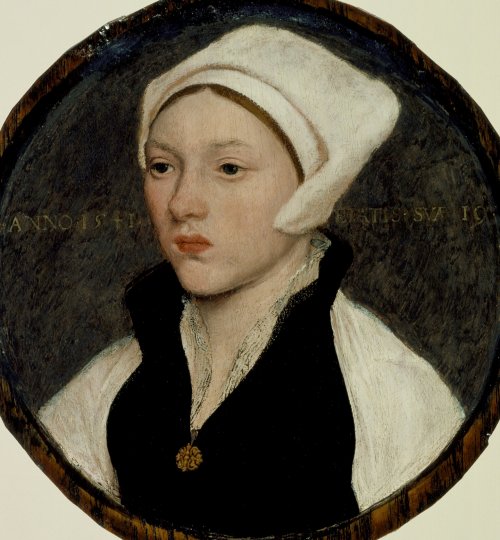
A Lettice cap for a well-to-do Tudor lady. This distinctive fur cap was high English fashion in the first half of the sixteenth century.
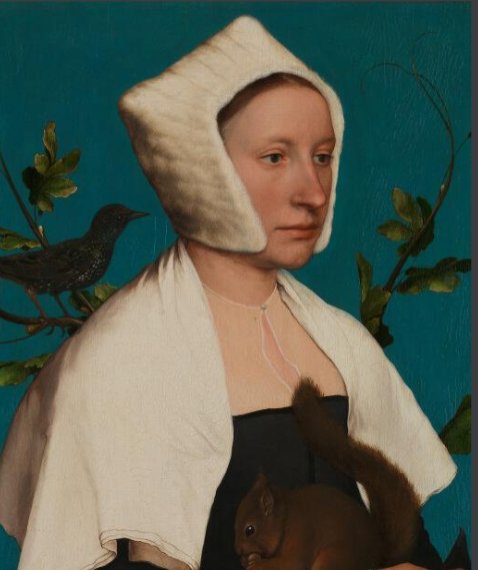
Imogen won the Hat Prize (again!) and requested a lettice cap – specifically, the one depicted by Hans Holbein in Portrait of a Young Woman with a White Coif, with it’s unusual shaped front.
I had wanted to make one of these for some time, although I’d been thinking about the simpler style with the straight front. This will be more of a challenge…
Research
Lettice (with an i) comes from the Old French ‘letice’ and is first cited by the Oxford English Dictionary (1987) in1363, referring to the white fur from the winter coat of the least weasel (Mustela nivalis). It is this fur which was used for the lettice cap, also referred to as a lettice bonnet or lettice fur.
Many sources describe ‘lettice’ as the white winter coat of the stoat, but while the stoat (Mustela erminea) goes white in winter, it retains a dark tail tip. And as the Latin name makes clear, the stoat is in fact the more expensive ermine fur! Lettice was used as a less expensive substitute for ermine in other contexts too.
Although the first images we have of the lettice cap are from the 1520s, the style was known from as early as 1507, where the Wratteslt will lodged at Somerset House lists ‘My secunde cap of letewis’ (OED, 1987).
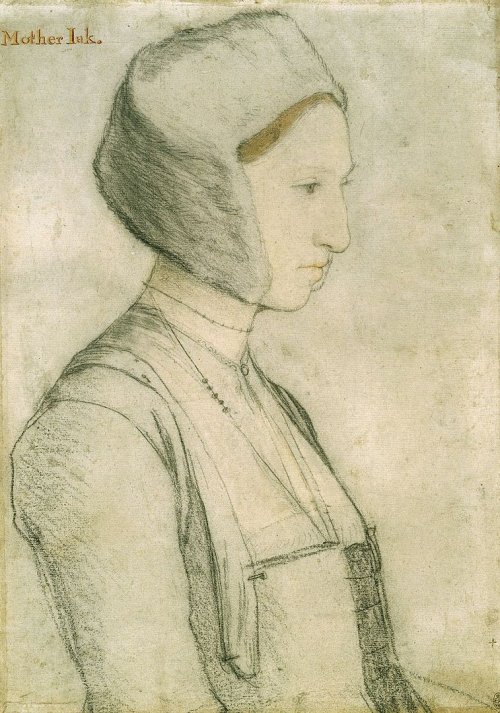
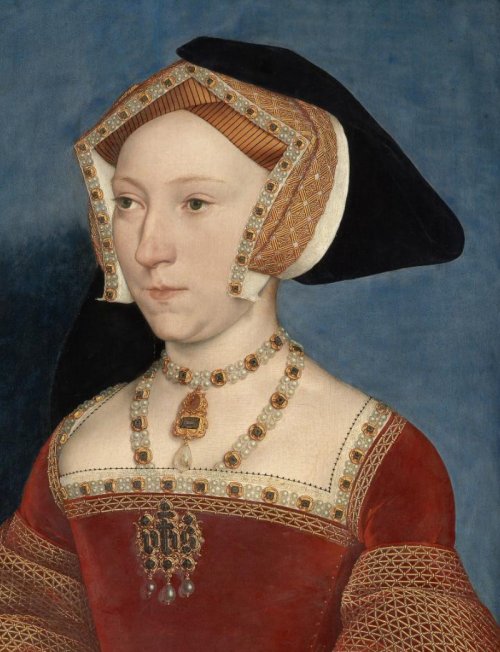
The early versions have a similar shape to the English or gable hood, which was high fashion in the early 16th century, as can be seen in these Holbein paintings.
Source: National Gallery
Source: Royal Collection Trust
Source: KMW
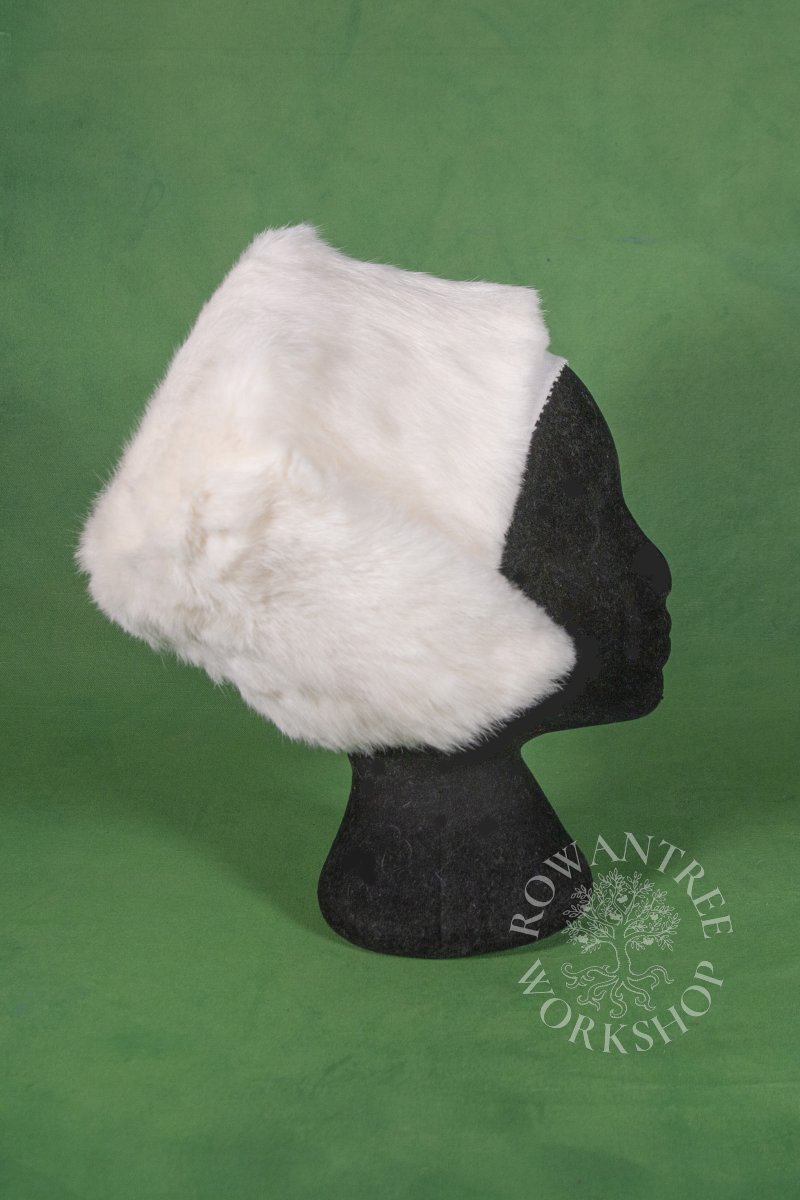
The later versions of the style move away from the simple gable shape: the top becomes a lower smooth curve (more like the French hood), and there is an extension over the cheek. This is the version Imogen has requested.
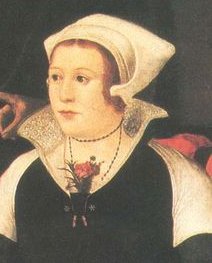
In the Portrait of a Young Woman with a White Coif, this cheek piece is made with a fold of the fur covering, perhaps held in place with a wire support. The portrait of Margaret Tudor shows a similar structure, with more exaggerated cheek extensions. Holbein’s sketch of Anne Bolyn shows a wire stiffening on her undercap, providing a similar profile.

Source: Wikipedia
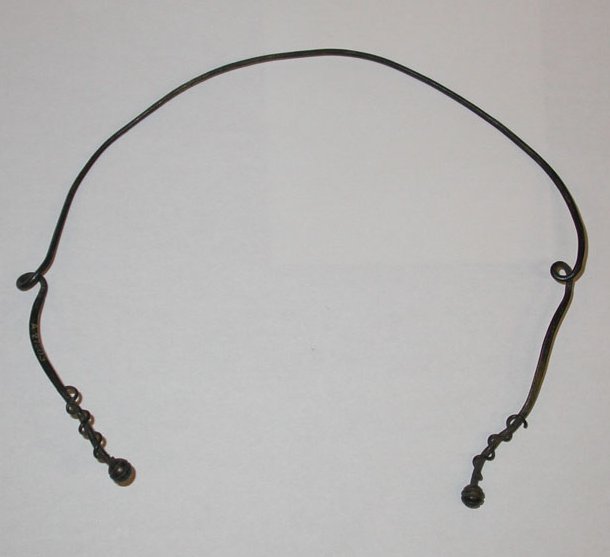
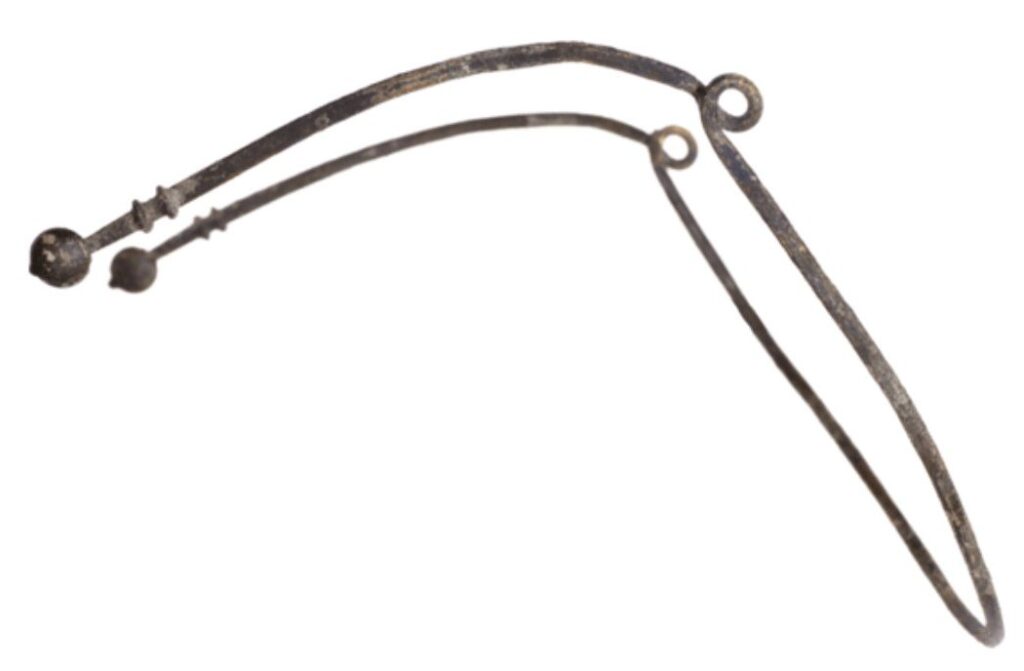
The Museum of London holds an example of this wire support, described as a ‘headdress frame’. A later example from Amsterdam is called an ‘oodjer’ or ‘ear iron’, although it is made of brass. As you can see from the examples below, the similarity is striking.
A ribbon through the loops is tied over the head to hold the wire in place. This arrangement can be seen in the painting by Werner van der Valcket below (thanks to the Elizabethan Costume group for this info). Both have a small knob on the end to avoid piercing the fabric they support.
Source Museum of London

In Tudor Fashion, Lynn (2017) states that lettice caps were worn over a linen coif to protect them from hair oils and provide a foundation. The Margaret Tudor portrait above shows two layers of linen under the cap – presumably a forehead cloth and coif.
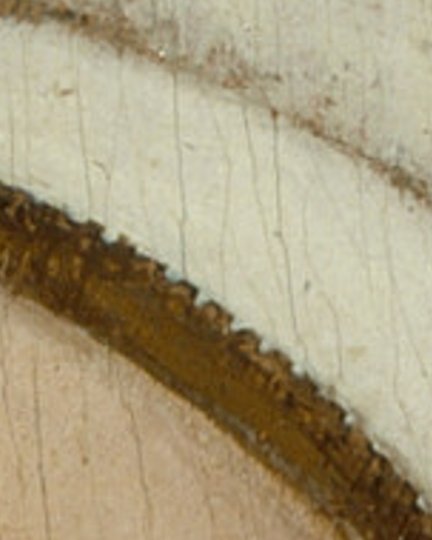
In the Portrait of a Young Woman with a White Coif, we can see the front of the linen layers under the cap. I cannot see a front seam, so I think this is forehead cloth, with the coif hidden under the cap. The front is decorated with a row of ‘purles’, which Arnold (1988) defines as a row of miniature loops or twists along the edge.
Based on all this research, I plan to make a linen coif and forehead cloth with a purled edge. Over this I’ll make a white fur cap over a supporting base, in heavy canvas, paste buckram or stiff felt, with wire supports for the cheek extensions. Since this is a cap for a noble lady, I will line it in silk.
Construction
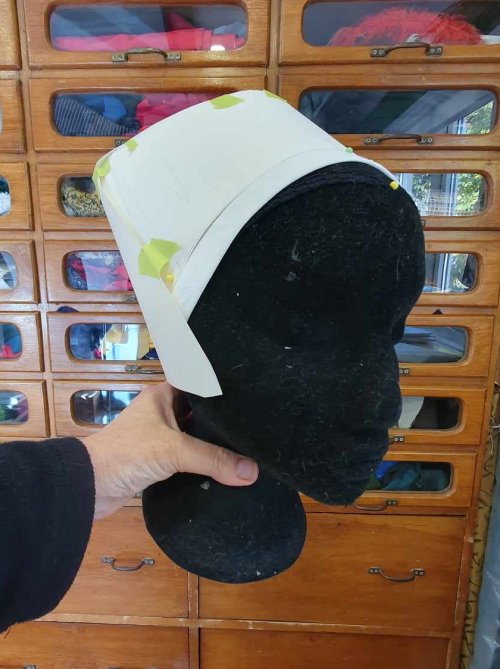
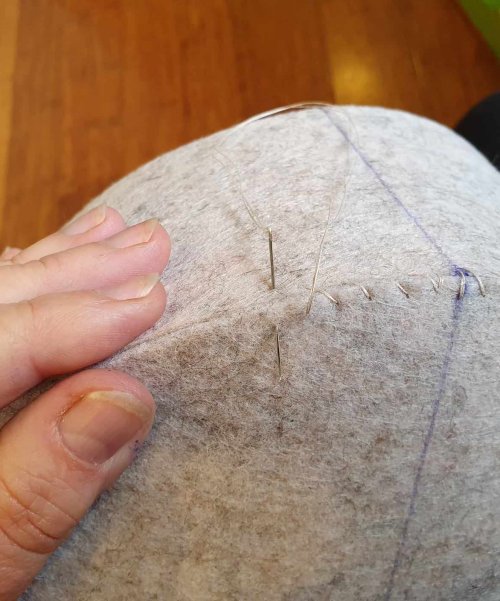
My first step is to pad up my headform to the right size. In this case, I don’t need to add extra felt hoods, but I do need to allow for a small bun at the back, where Imogen will tie her hair back.
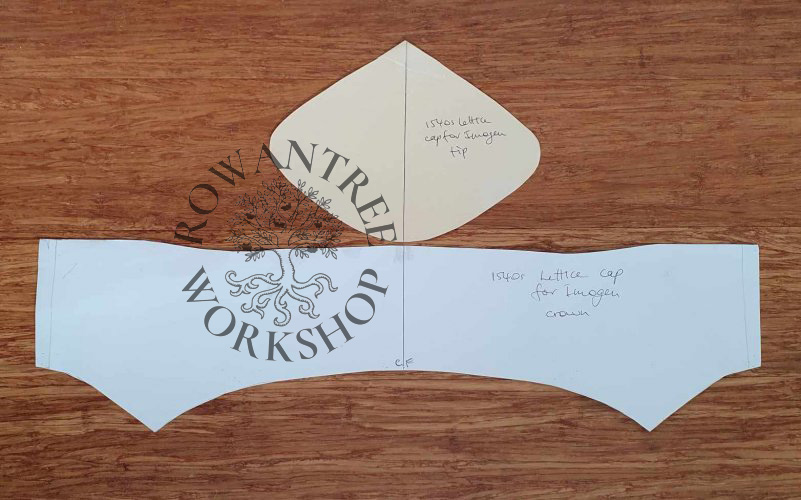
Then a mockup of the forehead cloth to get the line, and the cap in stiff paper – first the overall shape, then the base structure. I based the coif on a previous version, but this is smaller and shaped so it will not show under the cap – only the forehead cloth is visible.
My final pattern was 37cm (45 at the cheeks) x 26cm, including seam allowances. The forehed cloth is half a 22cm square.

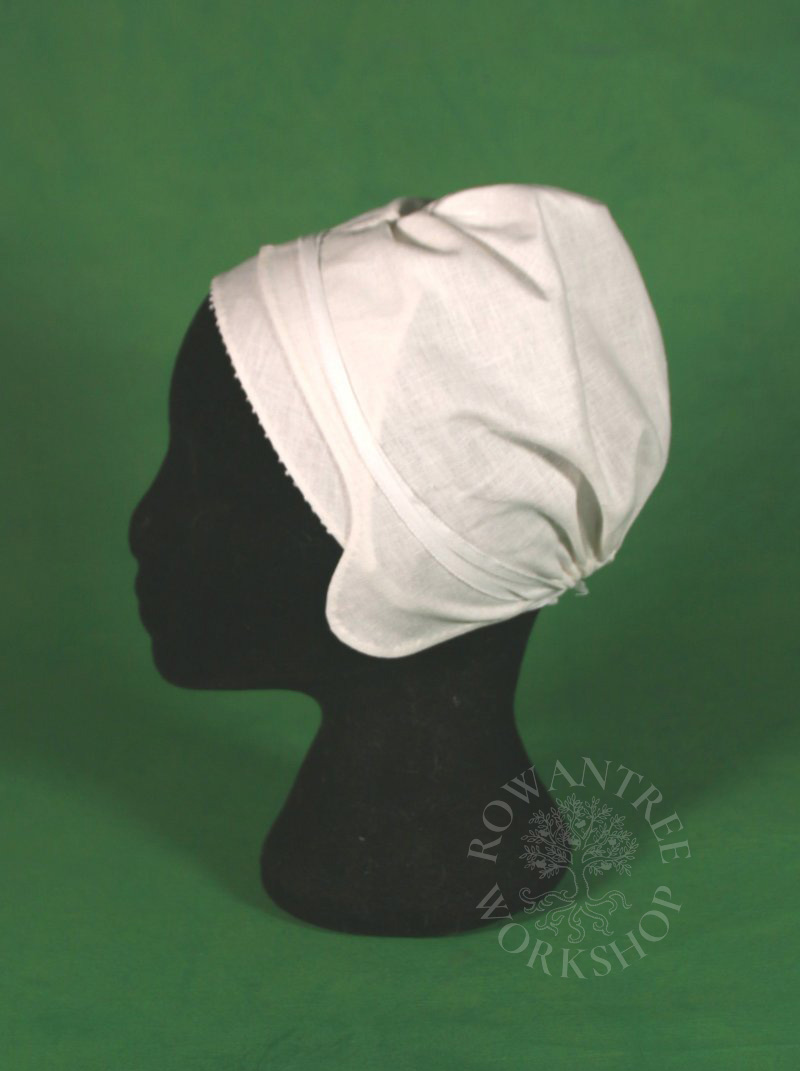
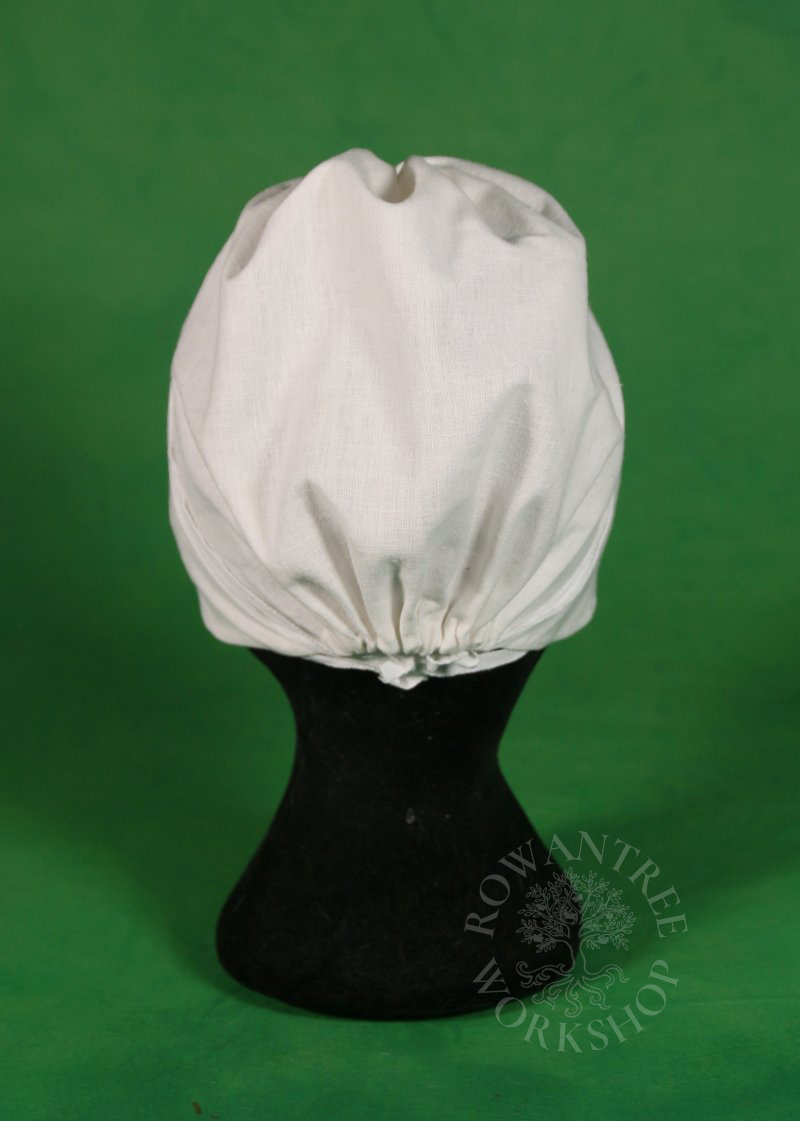
The linens
With the overall patterning done, the next step was to make the forehead cloth and coif in a lovely fine dense linen.
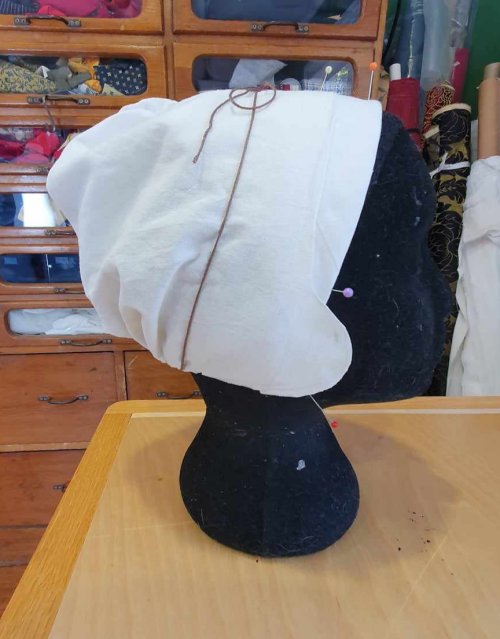
I basted and sewed a fine hem around the sides and top of the coif using fine linen thread, then turned up the casing and sewed this with running stitch. With the hems complete, I folded the coif in half and pinned 6cm from the front edge, then whipstitched the top seam from the front to this point.
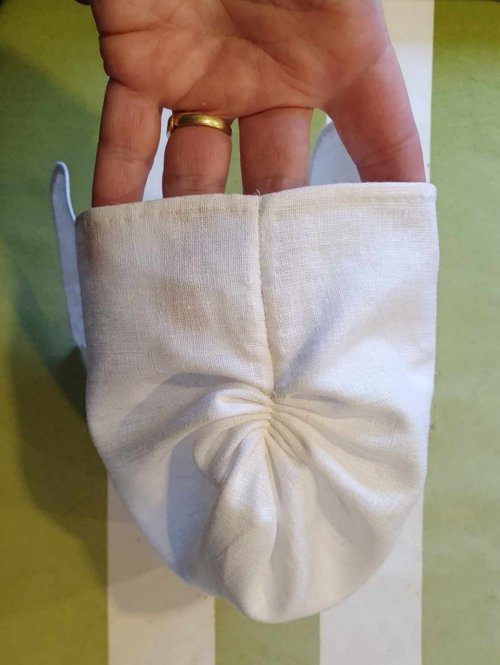
To shape the back, I gathered the remaining top seam in small pleats, then stitched these together. I turned the coif out, threaded tape through the casing and hemmed the tape ends to avoid fraying.
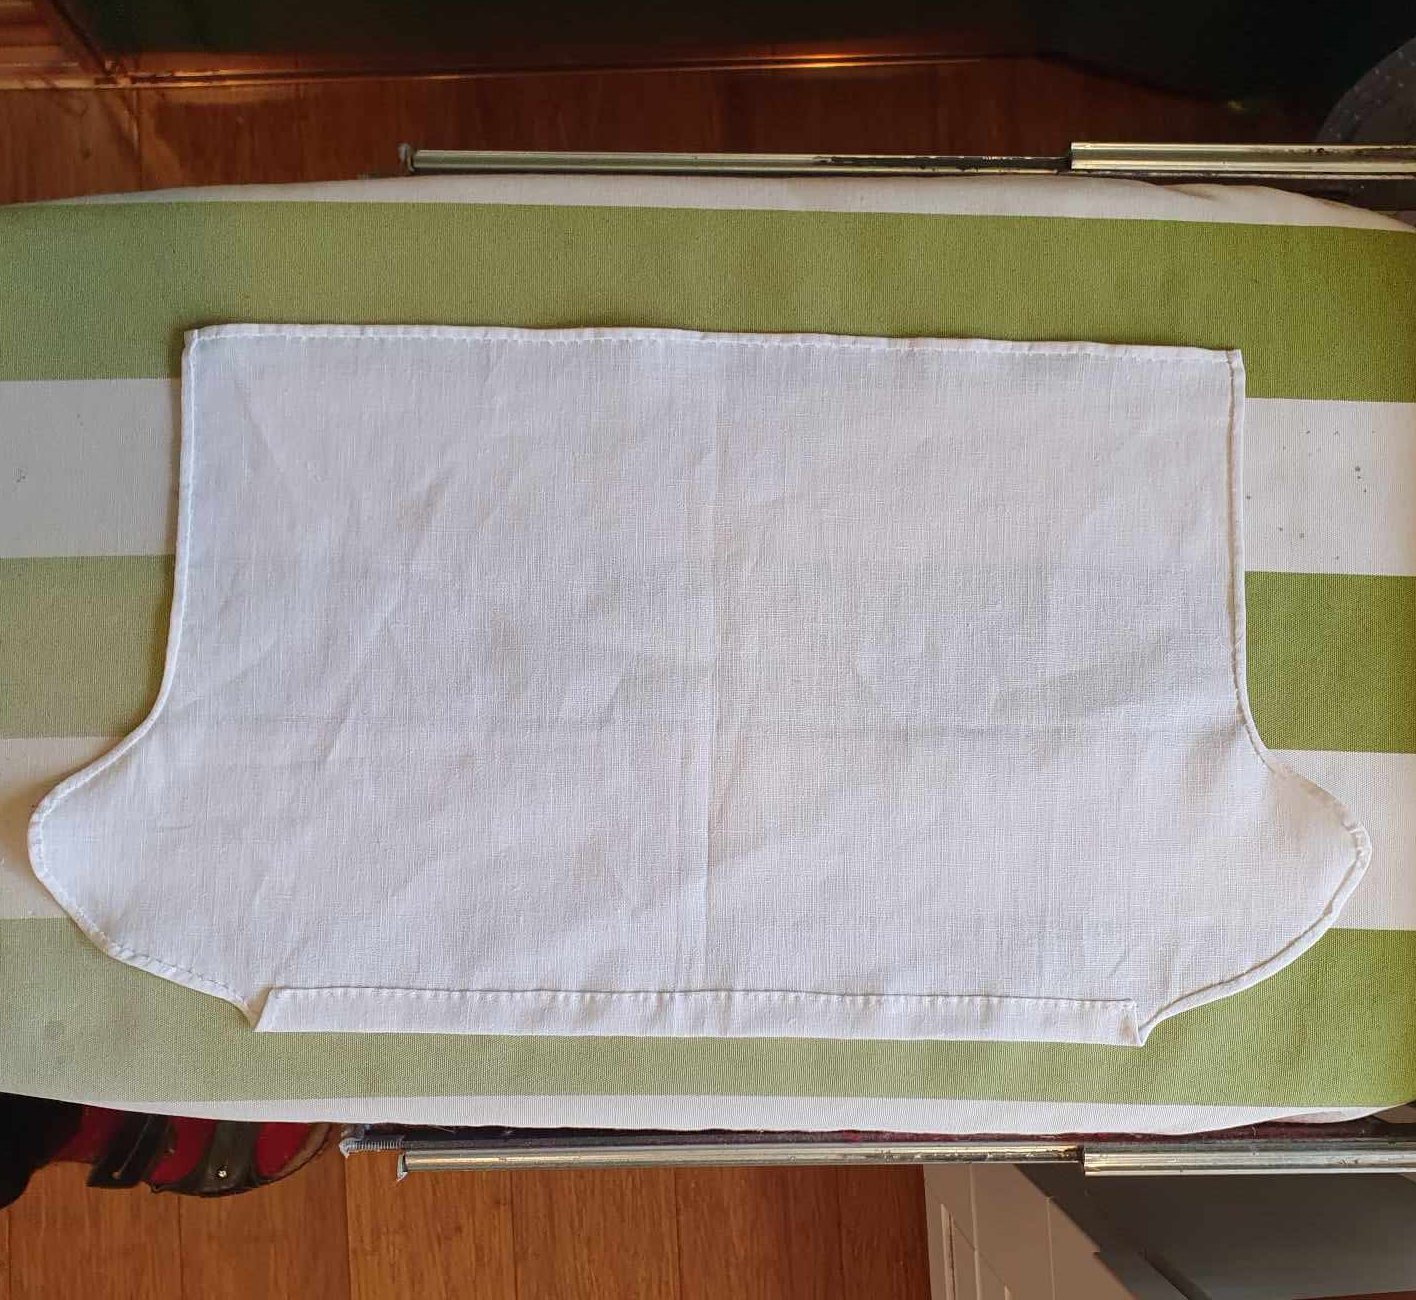
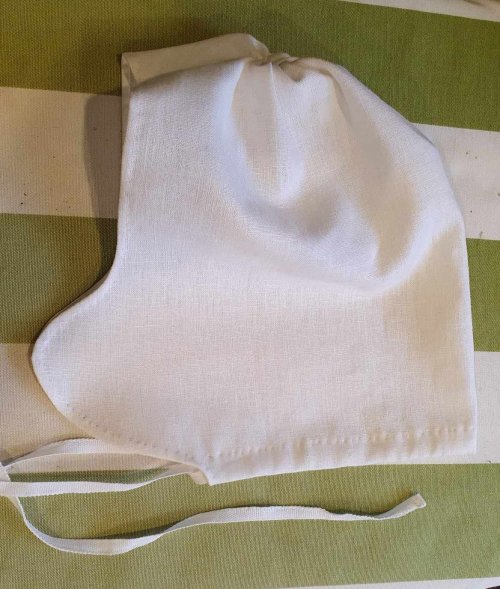
For the forehead cloth, I basted and sewed a fine hem all around, then sewed tapes to the corners and hemmed the ends.
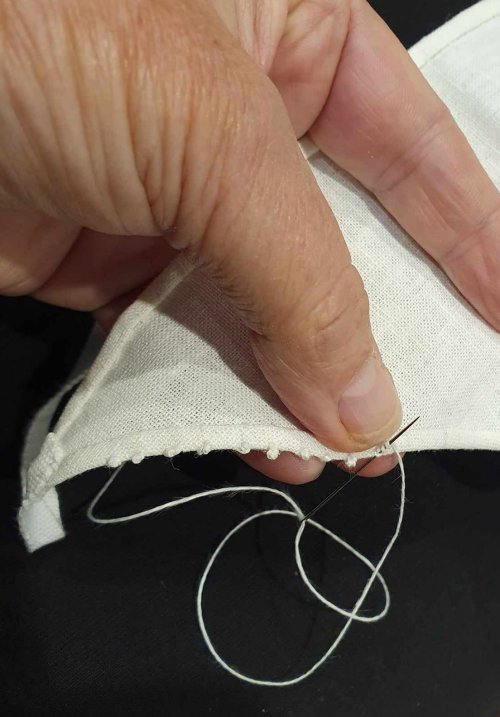
To make the purled edge seen in the painting, I worked 3-wrap French knots in heavy linen thread (35/2) along the front edge, at 5mm intervals. I’d admired this finish worked on a ruff by my friend Leonie de Grey – it was perfect for this piece!
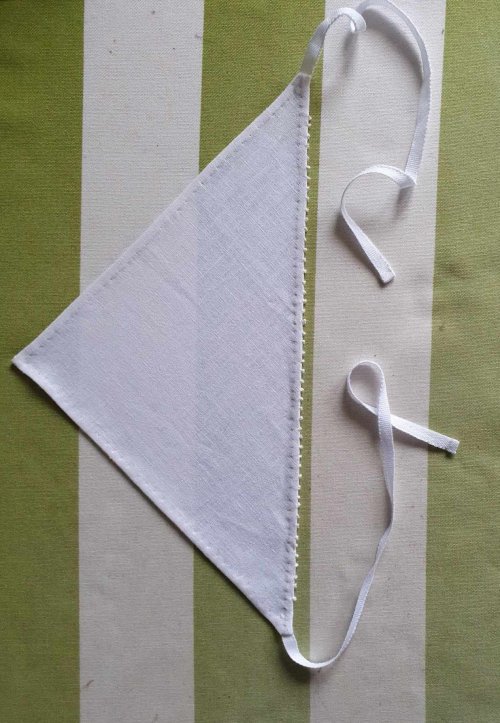
In addition to being the foundation for the lettice cap, the finished linens can be worn by themselves for a less formal look. The drawstrings could also be tied around plaited, taped hair.
The lettice cap
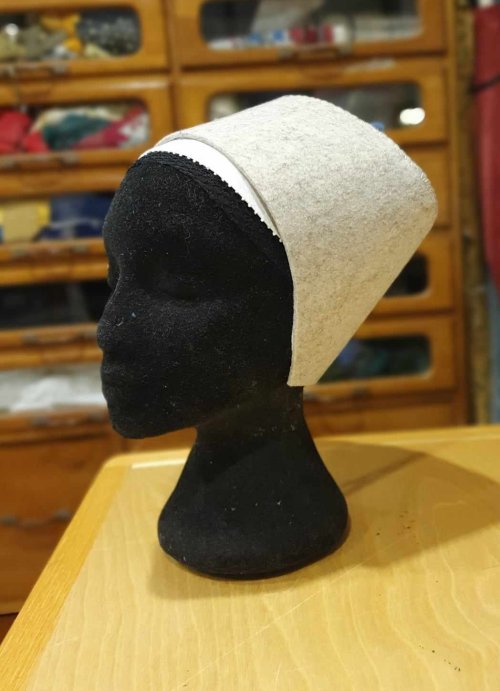
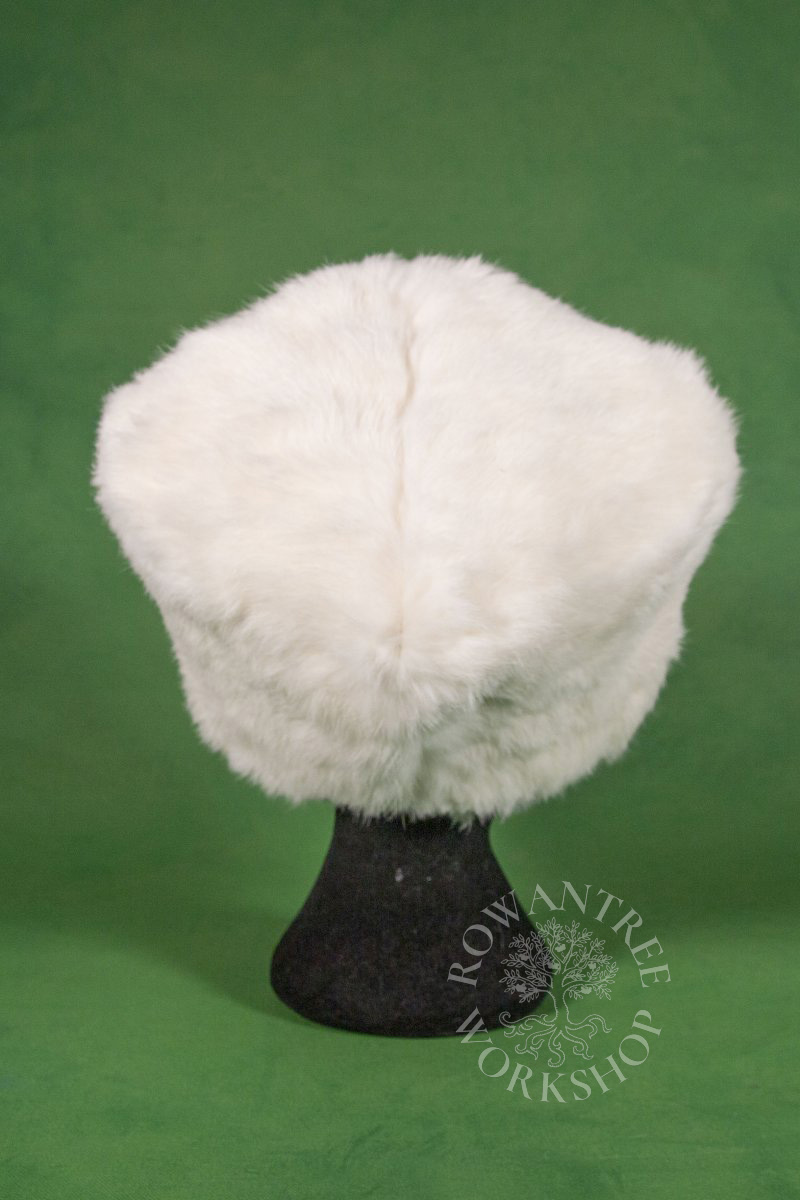
The cap in Holbein’s painting has a very structured look – this is not just fur, but relies on a stiff base to support the smooth curve over the brow and the folded sides.
I considered options for the stiffening: heavy linen canvas, paste buckram (canvas stiffened with hide glue) or stiff felt, but decided to wait until I have a mockup – the structure itself will add some stiffness.
I cut a version of the cap pattern without the cheek pieces in stiff paper, to try over the linen layer. I need to allow room for the fur, which will wrap over the edge and add to the thickness, so I put a layer of wool padding around the headform on top of the linens and tried the paper version.
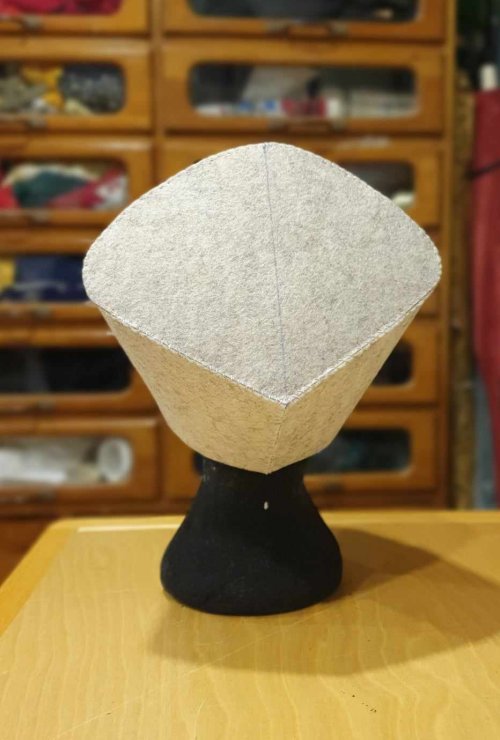
Based on this, I needed to increase the crown pattern by 1cm. I updated the tip pattern to match, then made a final mockup of the base in stiff paper and tested again.
I planned to use soft felt to pattern the fur layer, which needs to be folded and cut precisely. After my first attempt, I decided the stiff paper mockup was not strong enough to allow the wrapping and folding of the fur – I’ll need to build the actual base first.
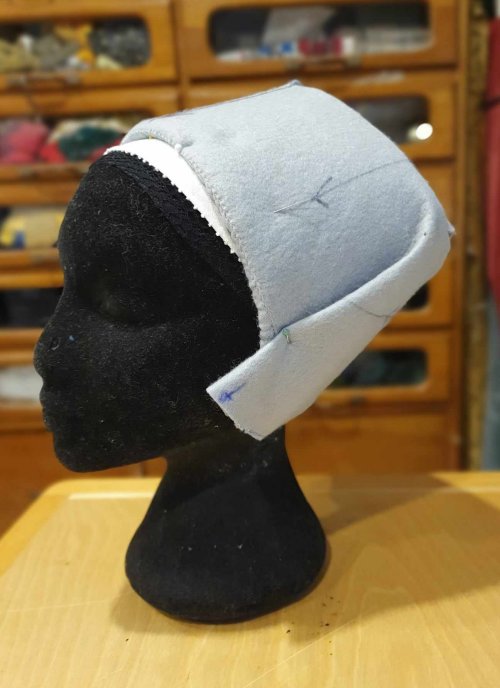
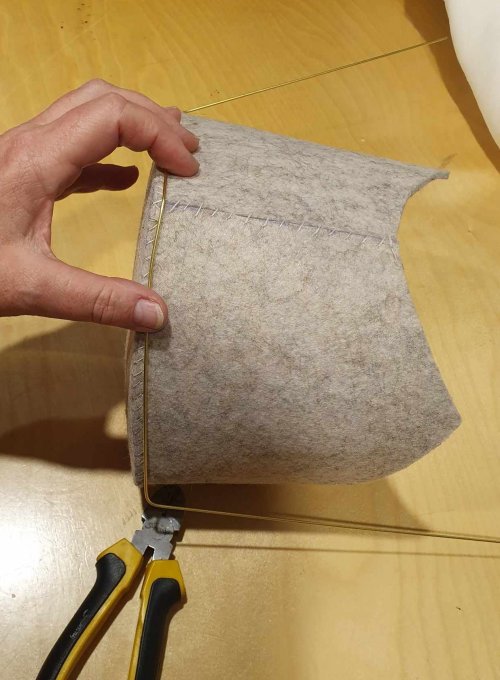
I had made up some paste buckram, but based on this experiment, I decided the base needed to be substantial, so I went with the 3mm furnishing felt I have used for so many hat projects. I cut out the cap support pieces, then whipped them together with waxed linen thread.
Back to the fur patterning.
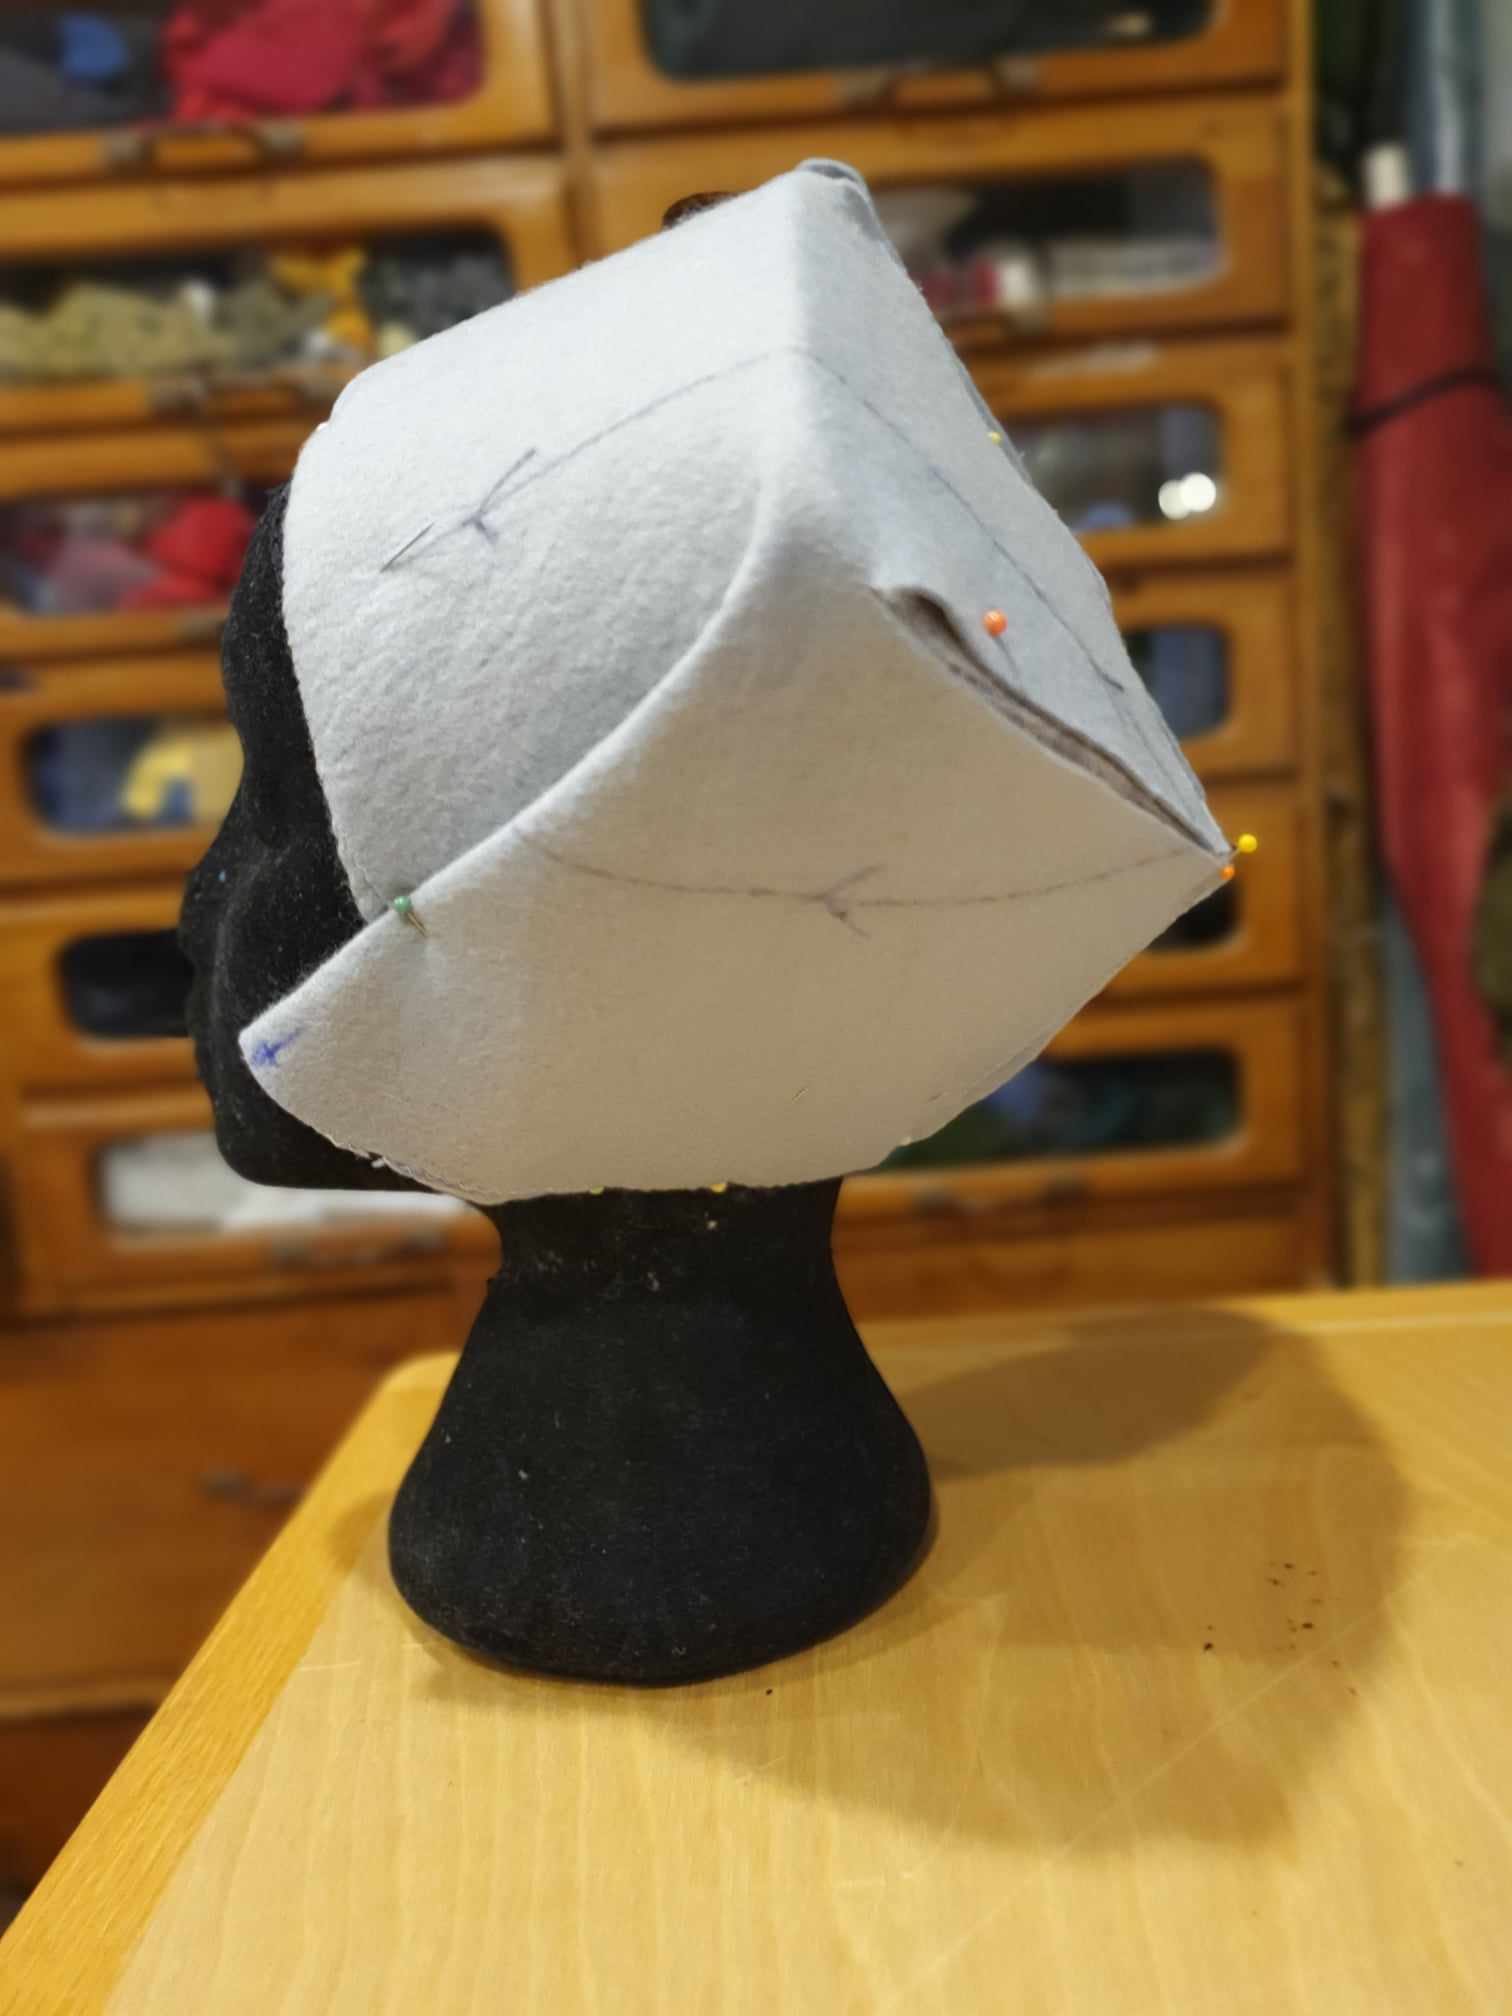
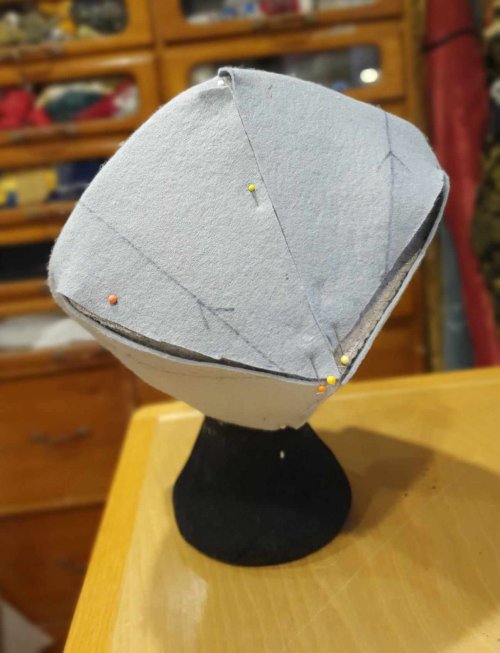
Because fur direction is important, I marked arrows on the felt to show this clearly. The fur needs to flow down to the brim to give a smooth edge at the front, and wrap cleanly around the edges. Most of this worked easily, but the seam near the crown will need a small dart on each side to ensure a smooth line.
I also wanted to check if the fur direction over the cheek pieces will work as a simple fold, or needs to be a separate piece sewn in. The simple fold looks like it will work, altough there will be some tricky sewing to finish the cheek piece as a turned end, then continue smoothly into the wrapped edge.
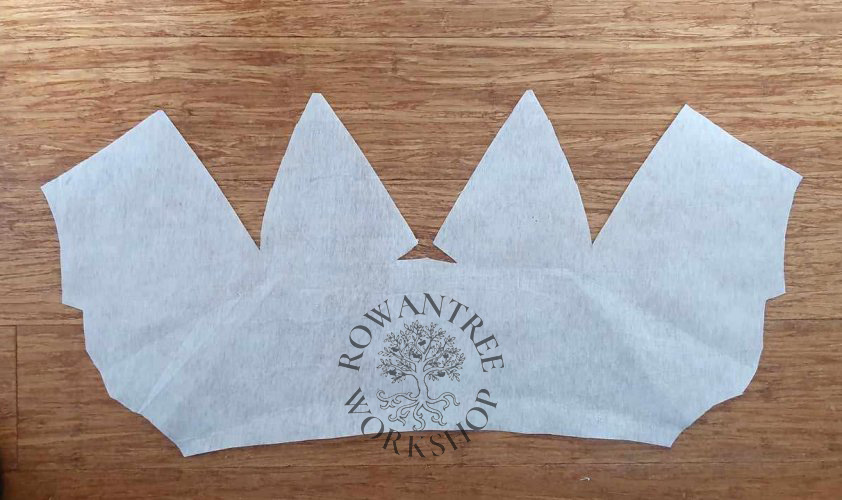
I made a final pattern in non-woven interfacing, which is strong and see-through.
My next step was to prepare the fur.
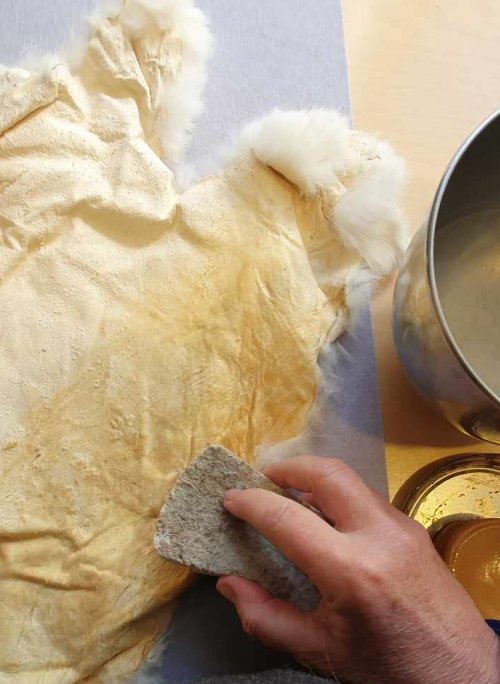
I had hoped to use an old fur coat which had a lovely fine smooth pelt (I always try to use recycled fur), but decided it the colour was too cream. So I’m using some white rabbit skins I’ve had in stash for years. They were creased and needed to be damped and carefully stretched and dried.
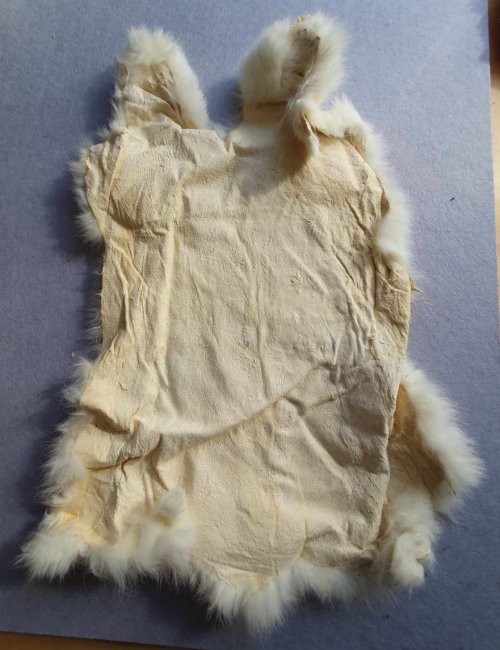
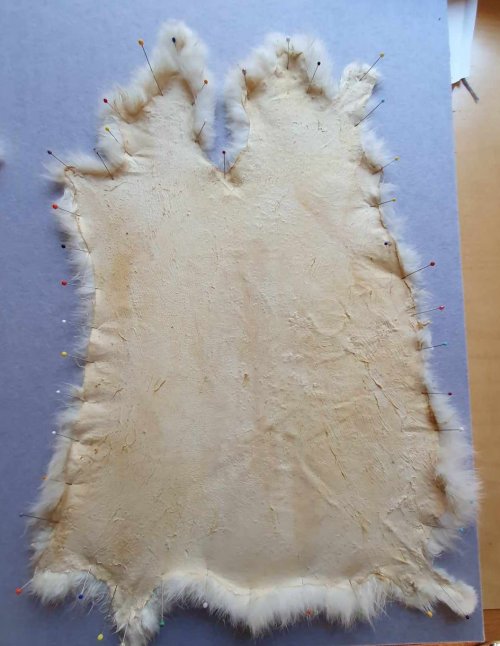
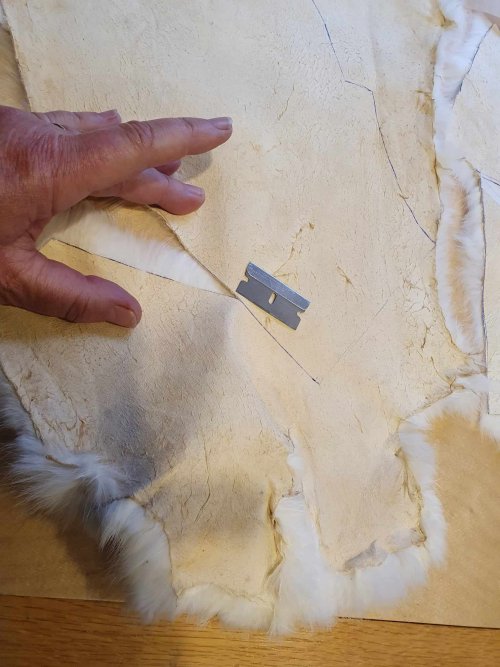
The furs needs to be pieced to make the cover, making sure the fur direction matches. I laid the pattern on the front furs to get the best effect, put pins at key points, then turned over and marked them on the back. I carefully cut them with a razor blade (skin only), then did a ‘dry fit’ to check the seams would match.

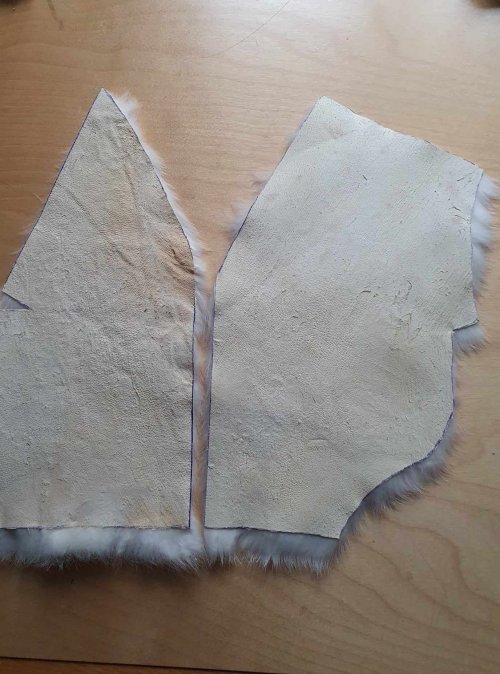
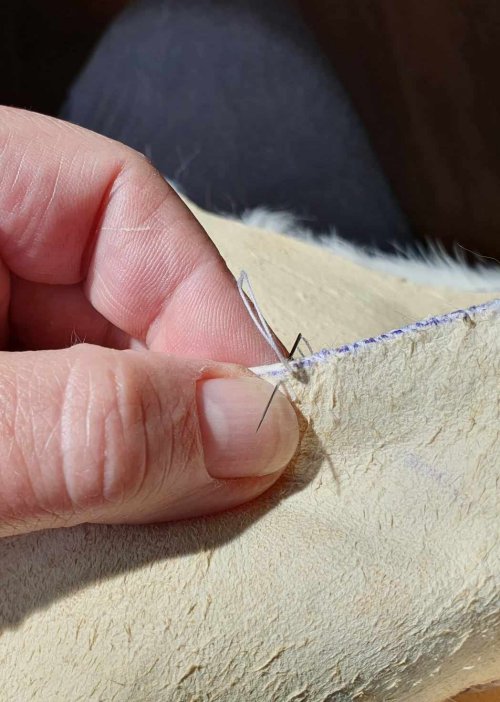
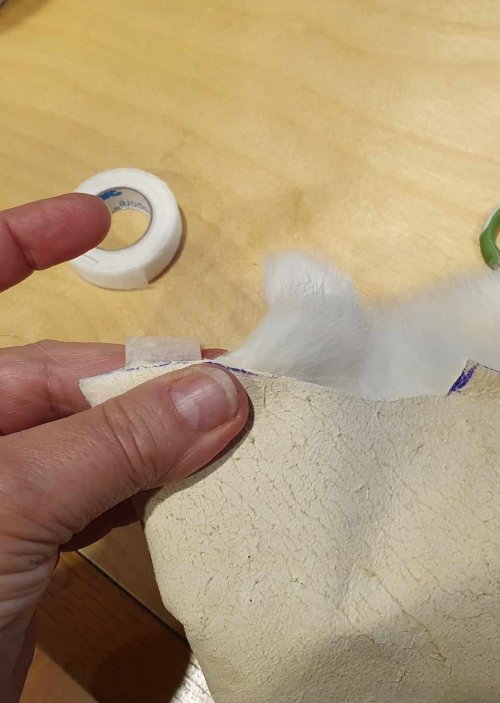
I marked match points along the piecing seams and then joined them with Micropore tape (in place of pins) before sewing with waxed silk and a very sharp needle.
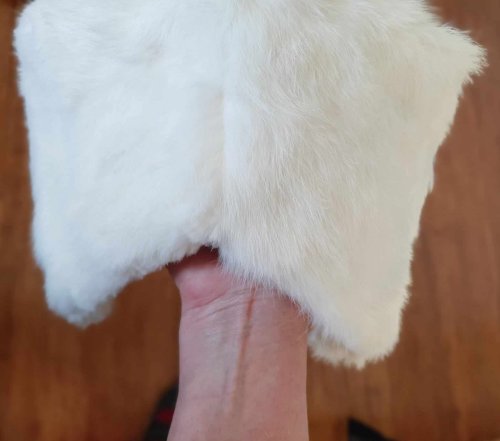
Once all the piecing was done, I did a dry fit over the cap base to check the size. It all looks good, so I sewed the shaping seams in the same way. Another dry fit to check the whole thing, pinning the edges under to get the effect. The fold at the side looks is large, but gives the right effect – very promising!

But very fluffy…
In her version of the lettice cap, Kjalvor Saebjornardottir shortened her fur using dog clippers. I tried hair clippers, dog clippers, and a thinning comb – nothing got through the fluff.
Disheartened, I put the project aside for a couple of weeks and worked on the Frauenhemden.
Back to the project from a different angle.
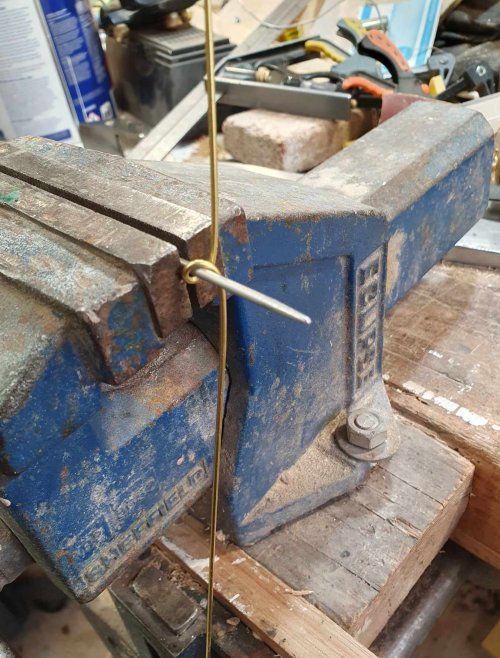
Based on the extant examples, I made an ear-iron using 1.5mm brass rod and brass end beads. I formed the loops over a nail, shaped the brass in my hands to fit the headform and soldered on the beads. The wire runs around the nape of the neck and a narrow tape goes through the loops and over the top of the head (shown here with a fake braid).

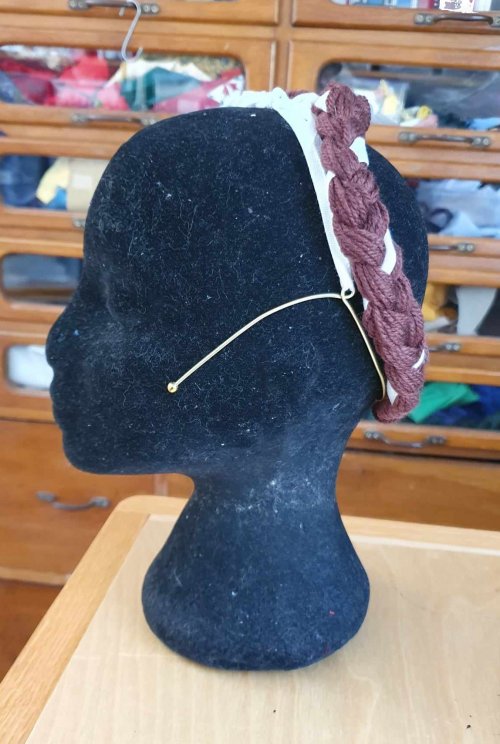
It looked great, but it was clear that once it was tied on, I was not going to be able to thread the ends into the ends of the fur cheek pieces. And if I did that first, I couldn’t tie it on…. Rats.
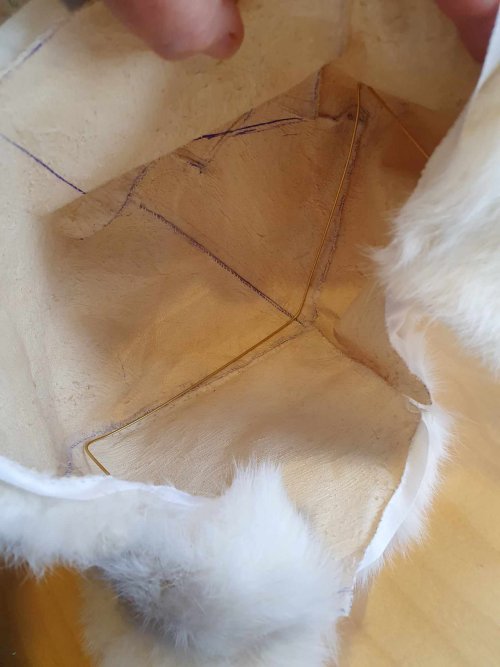
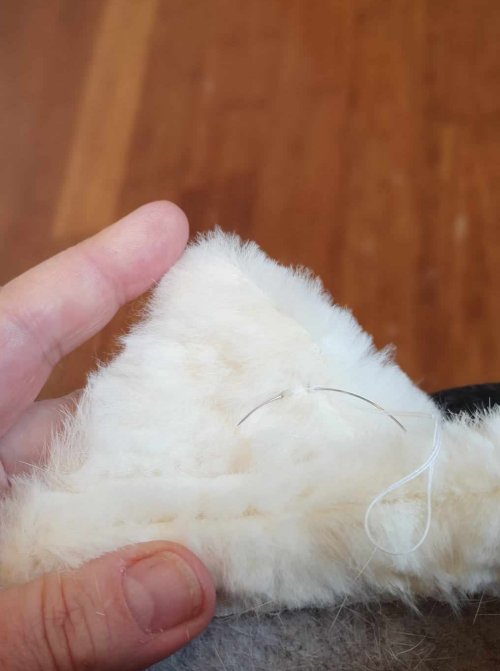
So I used some more brass rod to make a stiffener that will be built into the hat. Like the ear iron, it wraps around the back of the head and then projects forward to match the side folds. Since it won’t be seen, I simply folded over the ends of the brass. Less fun, but more practical.

And back to the problematic fur…
I had found a synthetic white ‘mink’ blanket which had the right thickness of pile and I thought would work. I checked back with Imogen – would she rather have fluffy real fur, or fake fur with the right thickness? She wanted real fur and would cope with the fluff. Onwards…
Now to finish the fur cover, starting with the side folds. I pushed the fur back into the seam with a pin, then held the pieces together with Micropore tape and sewed over, removing the tape as I went (I could have left it in place, but the edges were not close enough). Then carefully turned out the corners.
To make it easier to attach to the felt base, I whipped cotton tape along all the fur edges.
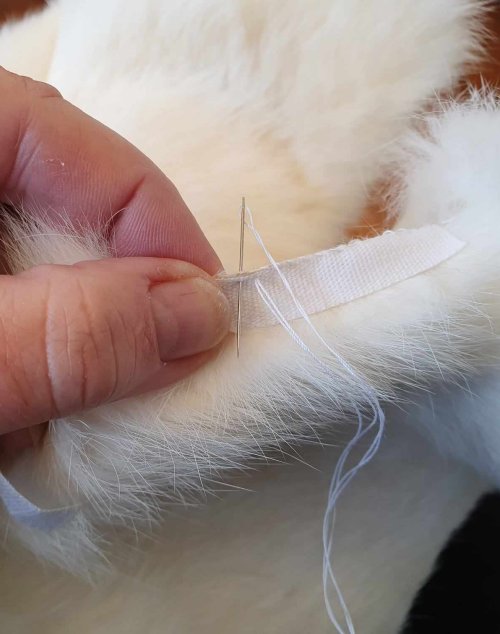
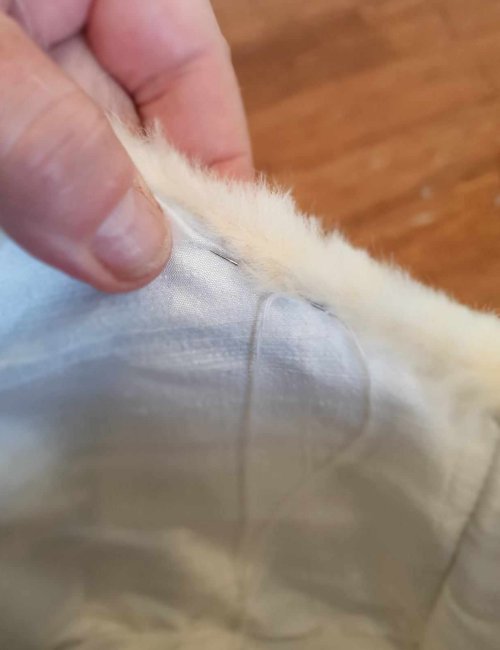
Once the edges were finished, I eased the fur over the felt and wire, and sewed the tape to the felt.
With the fur in place, I was still not happy with the fluffiness (despite Imogen’s assurances). A couple more trials on scraps showed that by using my embroidery scissors to make small feathered cuts along the edges I could reduce the fluffy look. So I did that – and got fur on everything – but was happier with the effect.
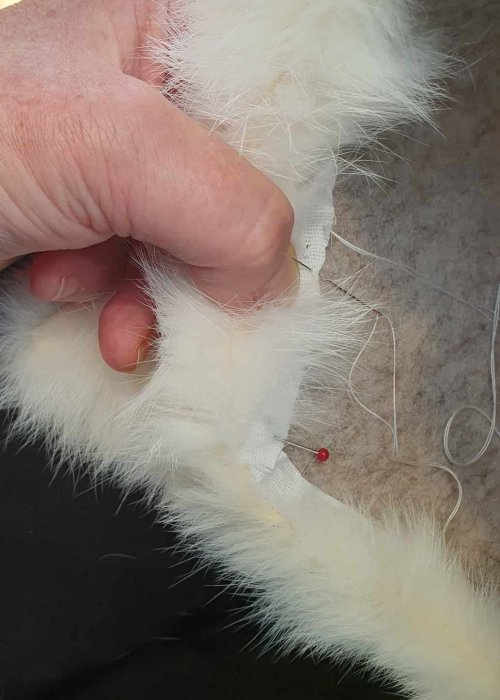
To keep the side folds in place, I sewed the folds to the felt using a fine curved needle.
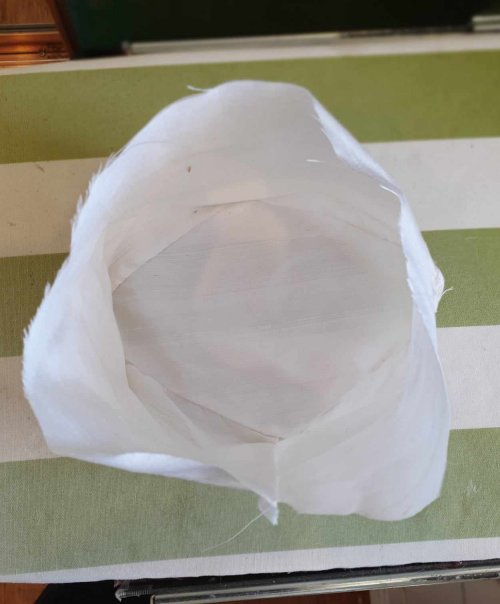
To finish the cap, I used the base pattern to make up a lining in white silk, then sewed this to the cotton tape at the edge of the fur.
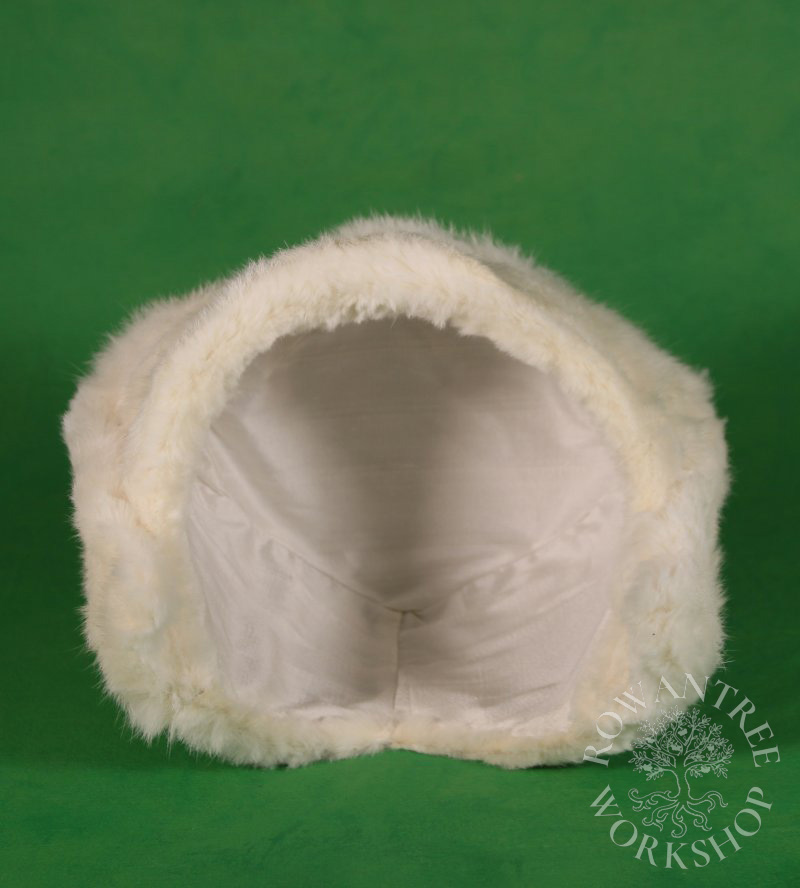
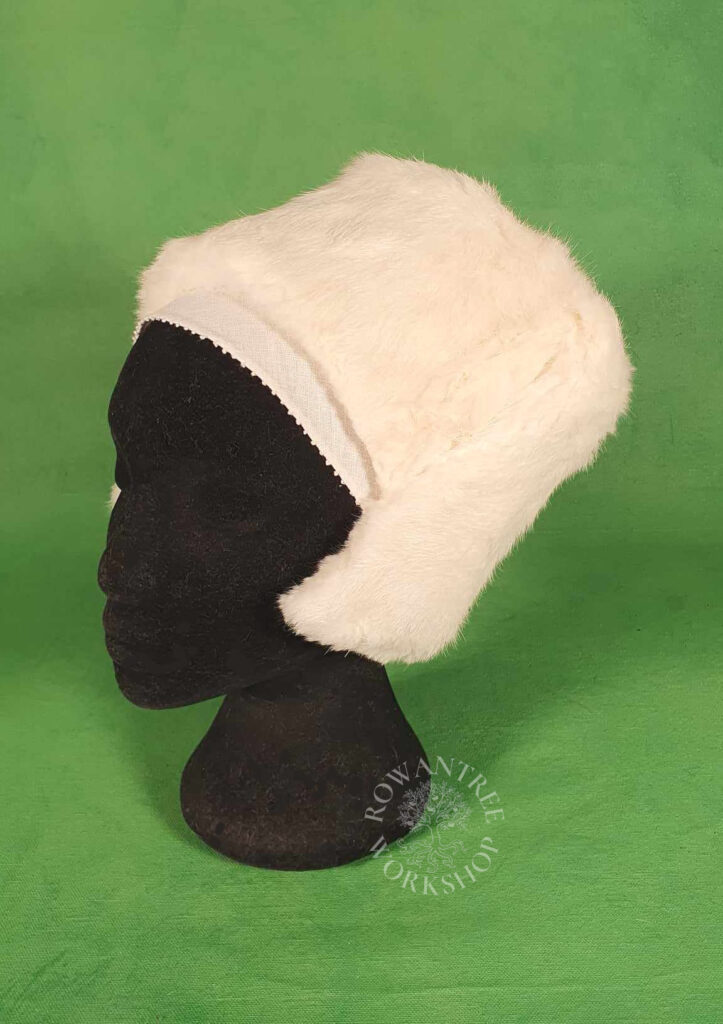
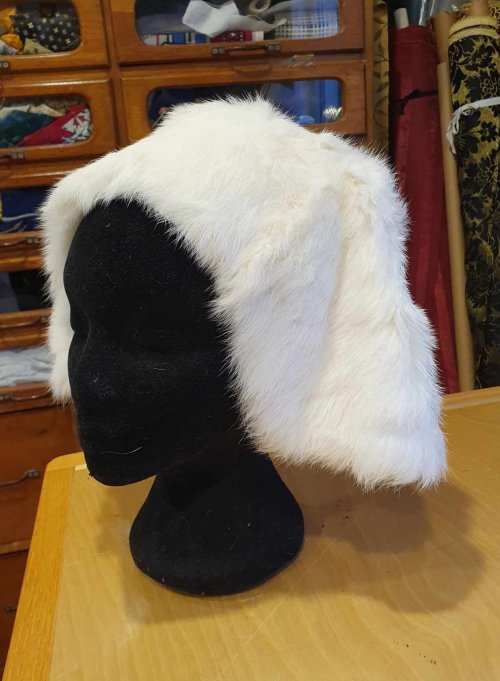
And done at last!
The rabbit fur will never look as good as real lettice or ermine, but I am pleased with the end result. It sits well, is an interesting shape, and the linens underneath add a nice touch.
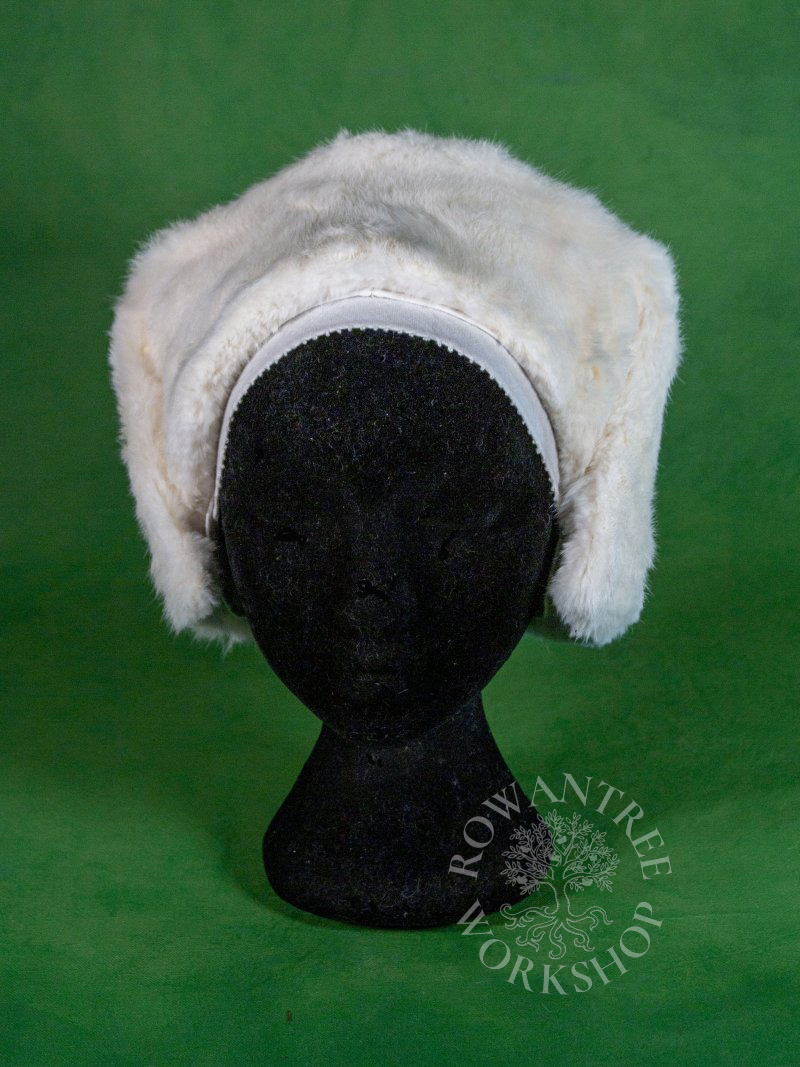
Imogen loved the cap, and I look forward to seeing it in use!