

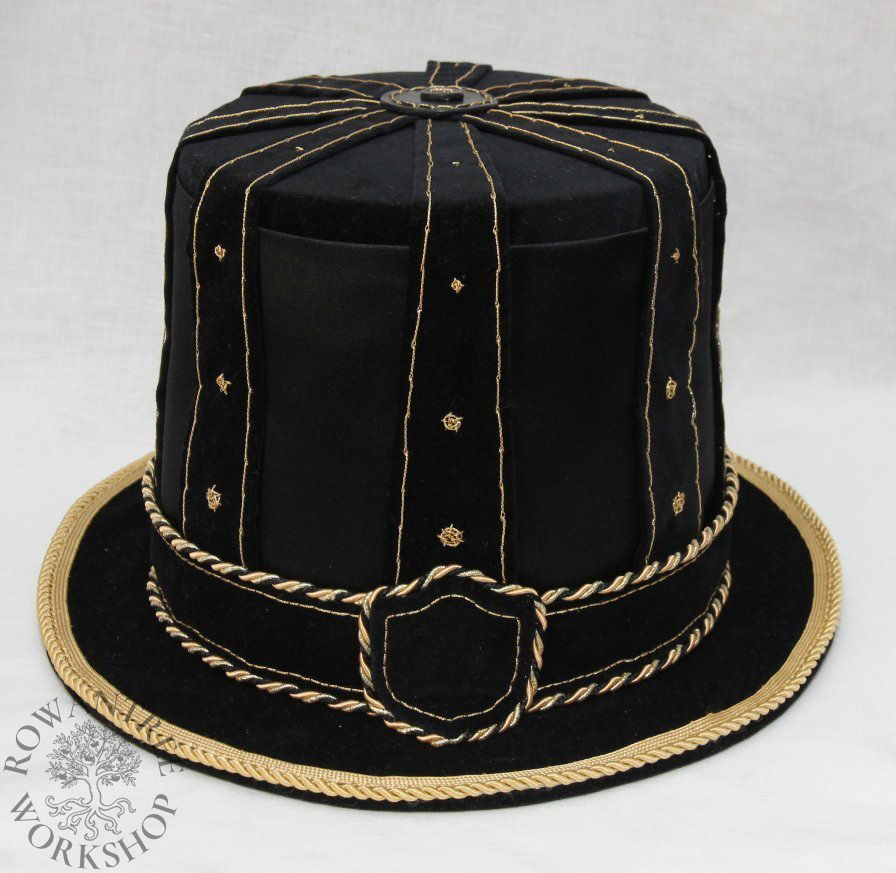
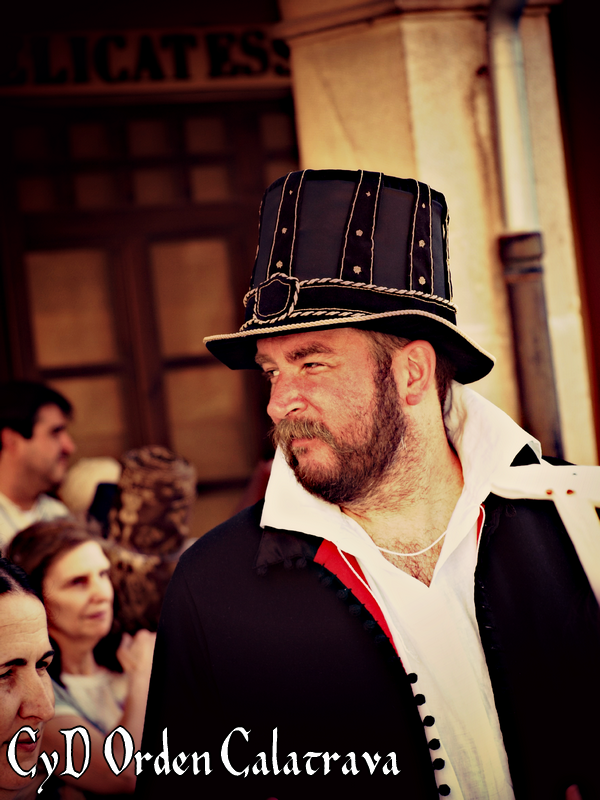
A replica of an extant Spanish hat from the turn of the 17th century, originally made in brown silk velvet and satin. My version has a stiffened felt base and is black, but is otherwise as close as I could make it to the original.
I made this hat for my friend Gabriel, who was heading over to Lerma, Spain for a major re-enactment event with his wife Constanzia. She had made the rest of their clothes, but he needed a hat…
Research and Design
The inspiration for this piece came from an extant hat c1610, held in the Museu de l’Art de la Pell, Barcelona. Constanzia sent me this image, which comes from La Moda Española en el Siglo de Oro (2015).
According to the description, the hat is made of brown velvet and silk over a base of leather and pasteboard, with twisted cord and metallic thread, and a linen lining.
Stylistically, it sits between the narrow brimmed Gorra Alta of the late 16th century, and the larger brimmed hats fashionable a few decades later.
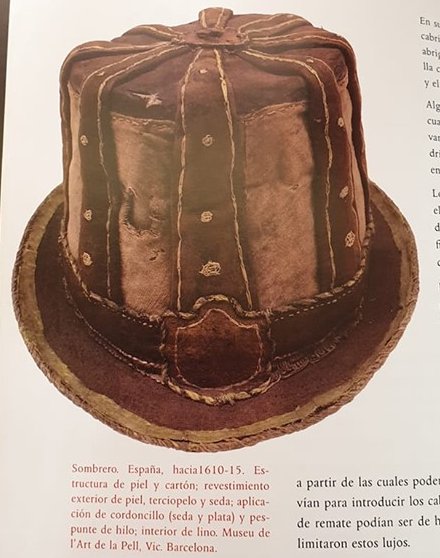
Source: La Moda Española en el Siglo de Oro (García Serrano, 2015).
Source: WGA
Gabriel asked for the hat to be made in black and gold, rather than brown and gold.
Construction
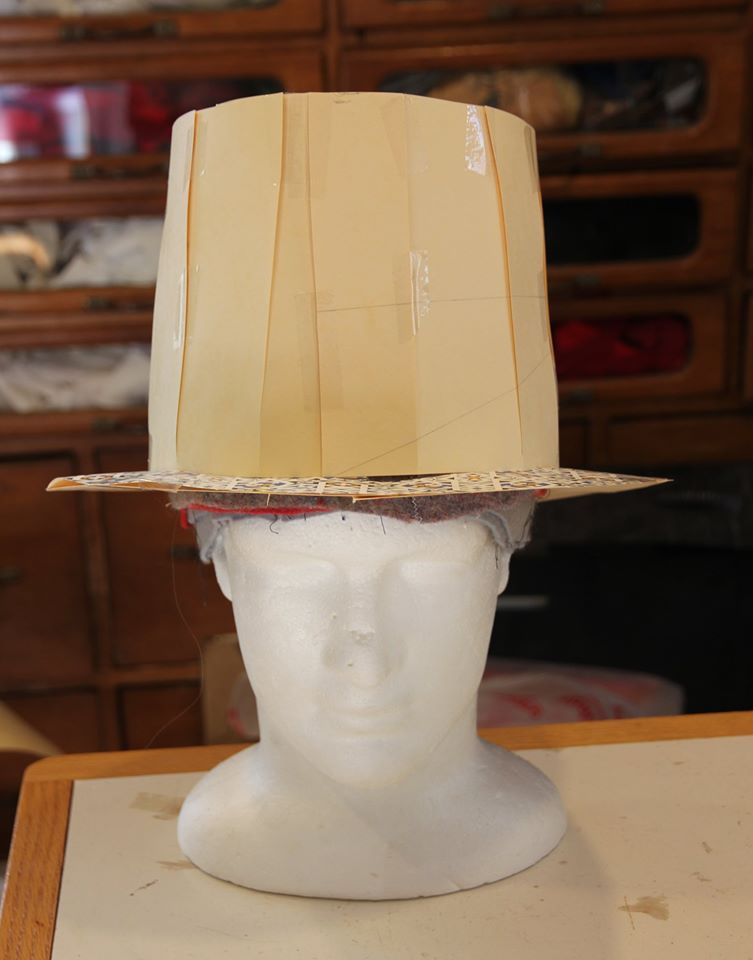
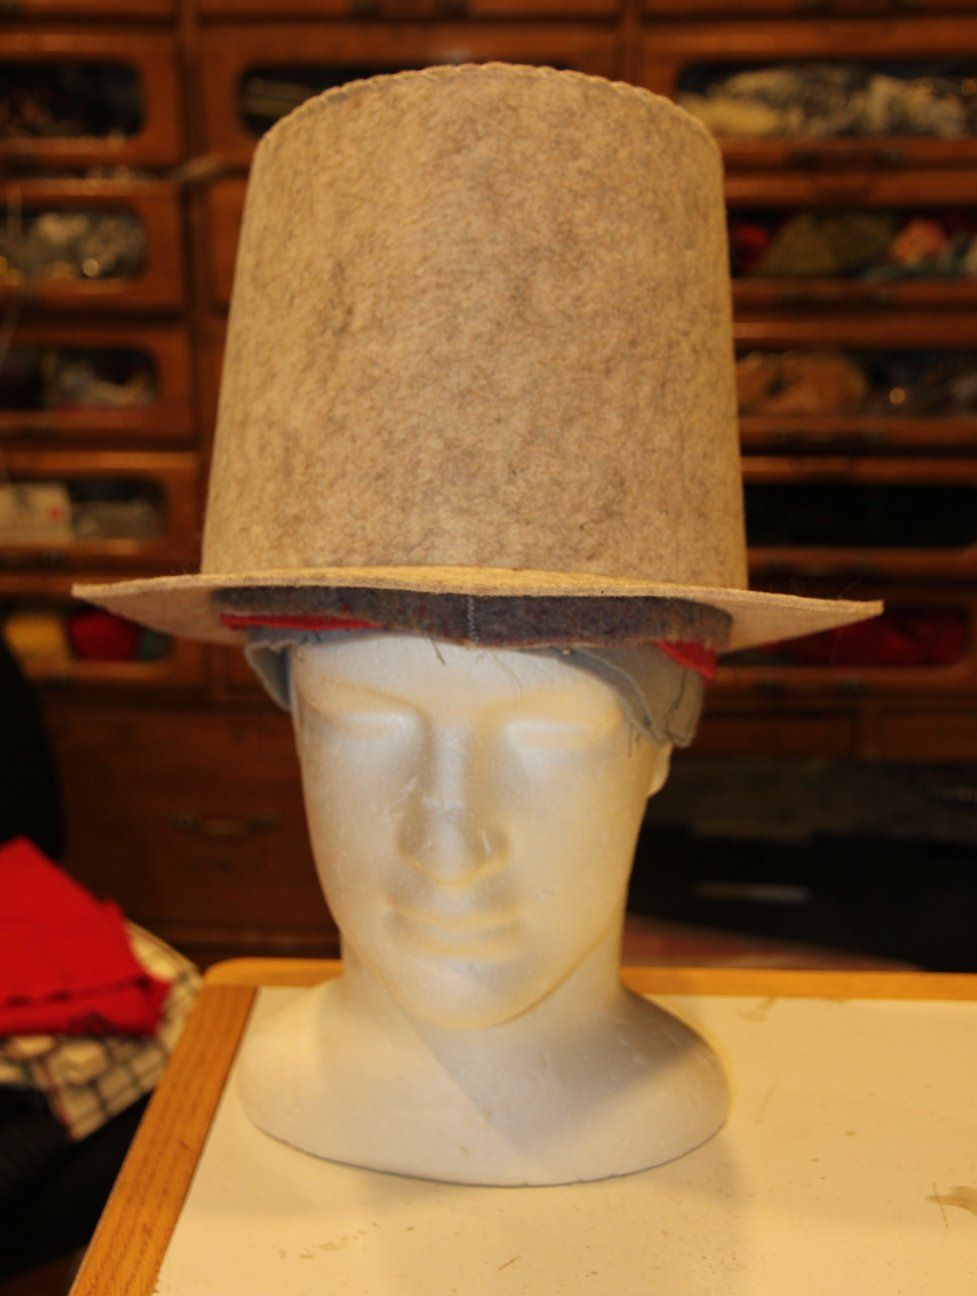
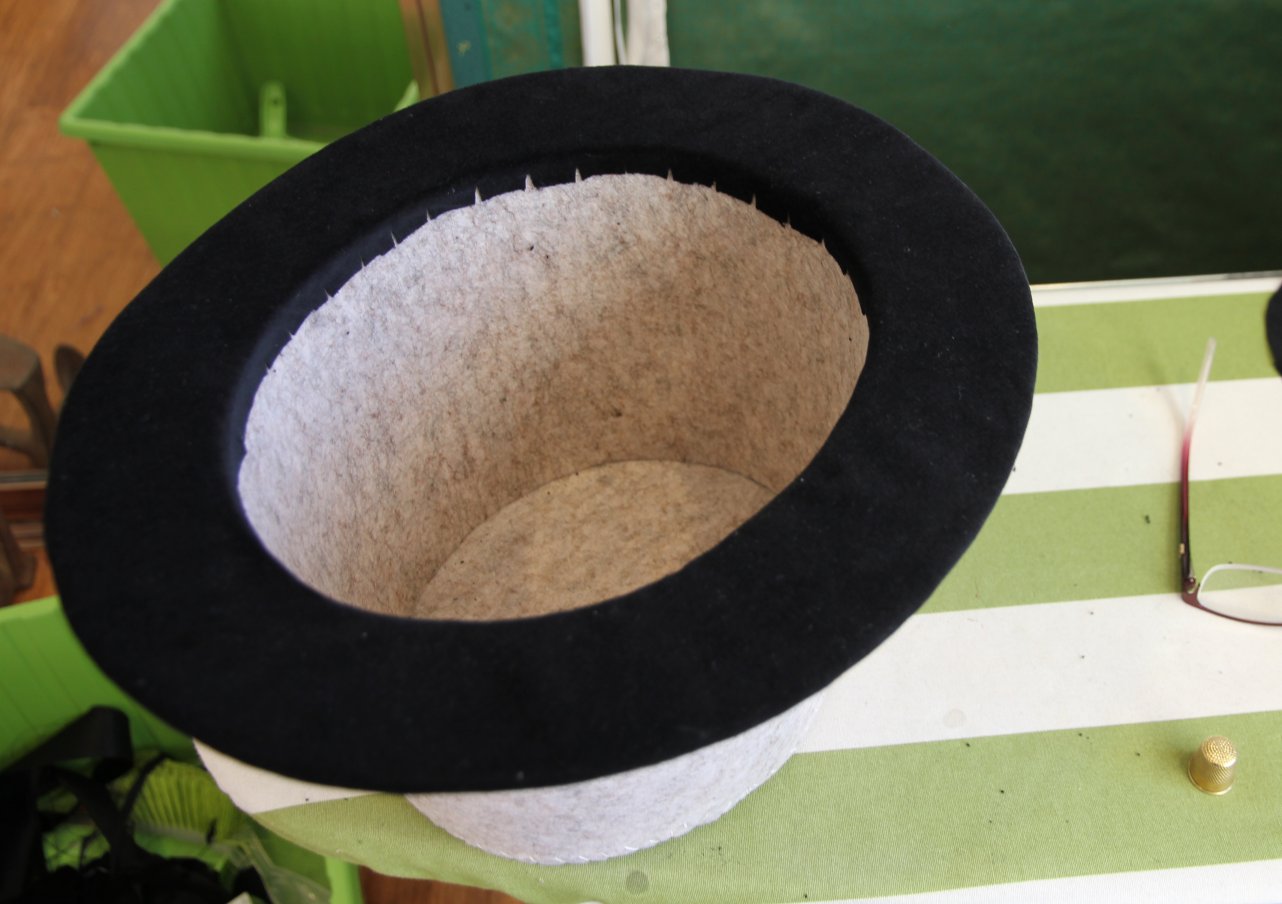
Patterns of Fashion 3 (Arnold 1985) noted that foundations for tall hats in the 16th and 17th century might be made of several materials, including pasteboard and moulded, stiffened felt. Gabriel asked for a felt base, so since I did not have the right hat block to mould the base, I decided to make it in sheet felt.
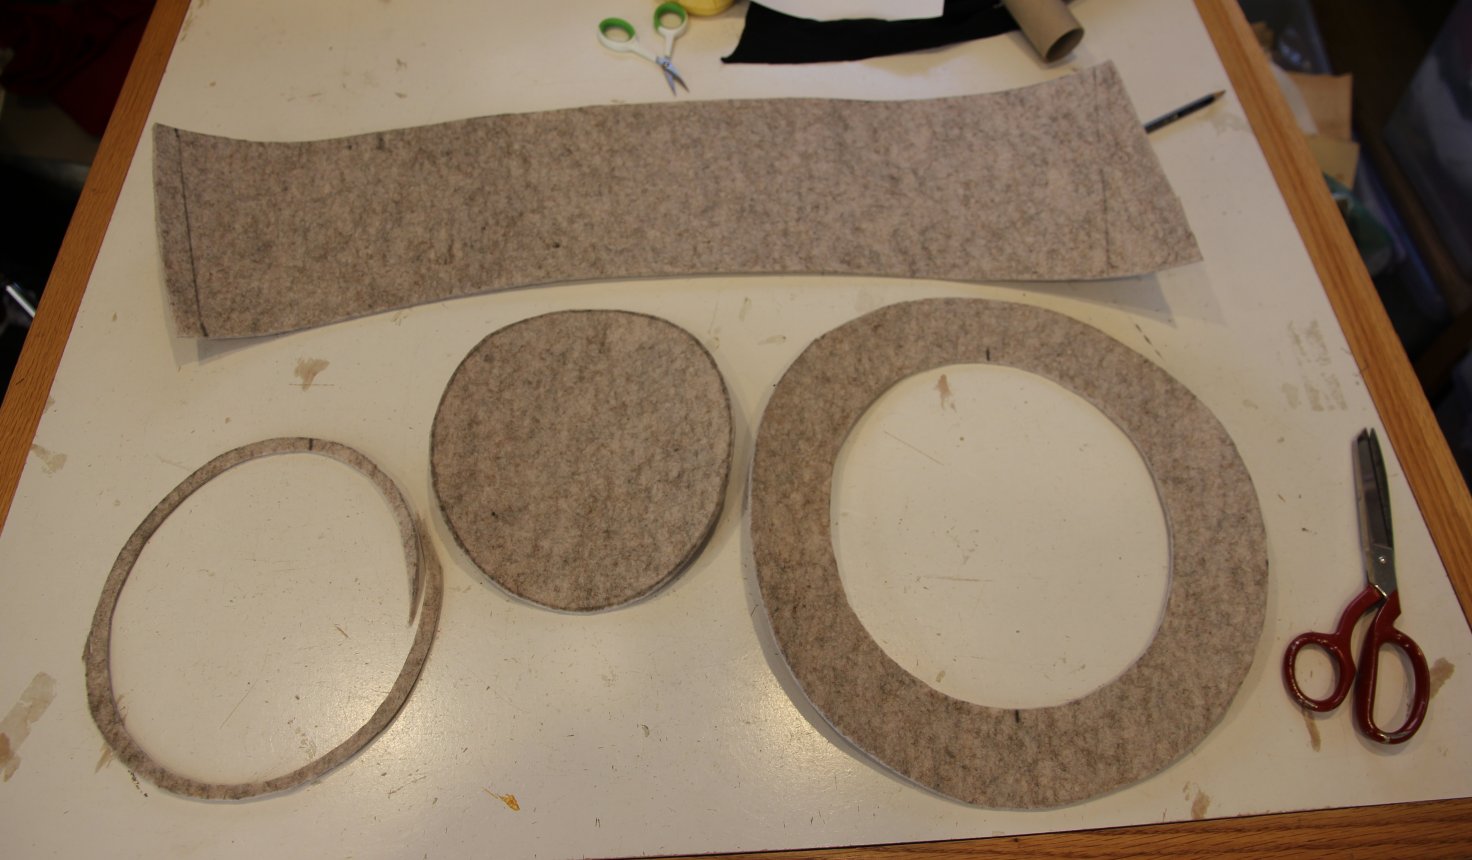
First step – making the pattern. I padded up my headform to 24 1/2″ (enormous!) and made up the initial test run in light card. I needed to reduce the height a little, but otherwise, looking good. Once I was happy with the shape, I cut the pieces from 3mm furnishing felt and did a quick size check.
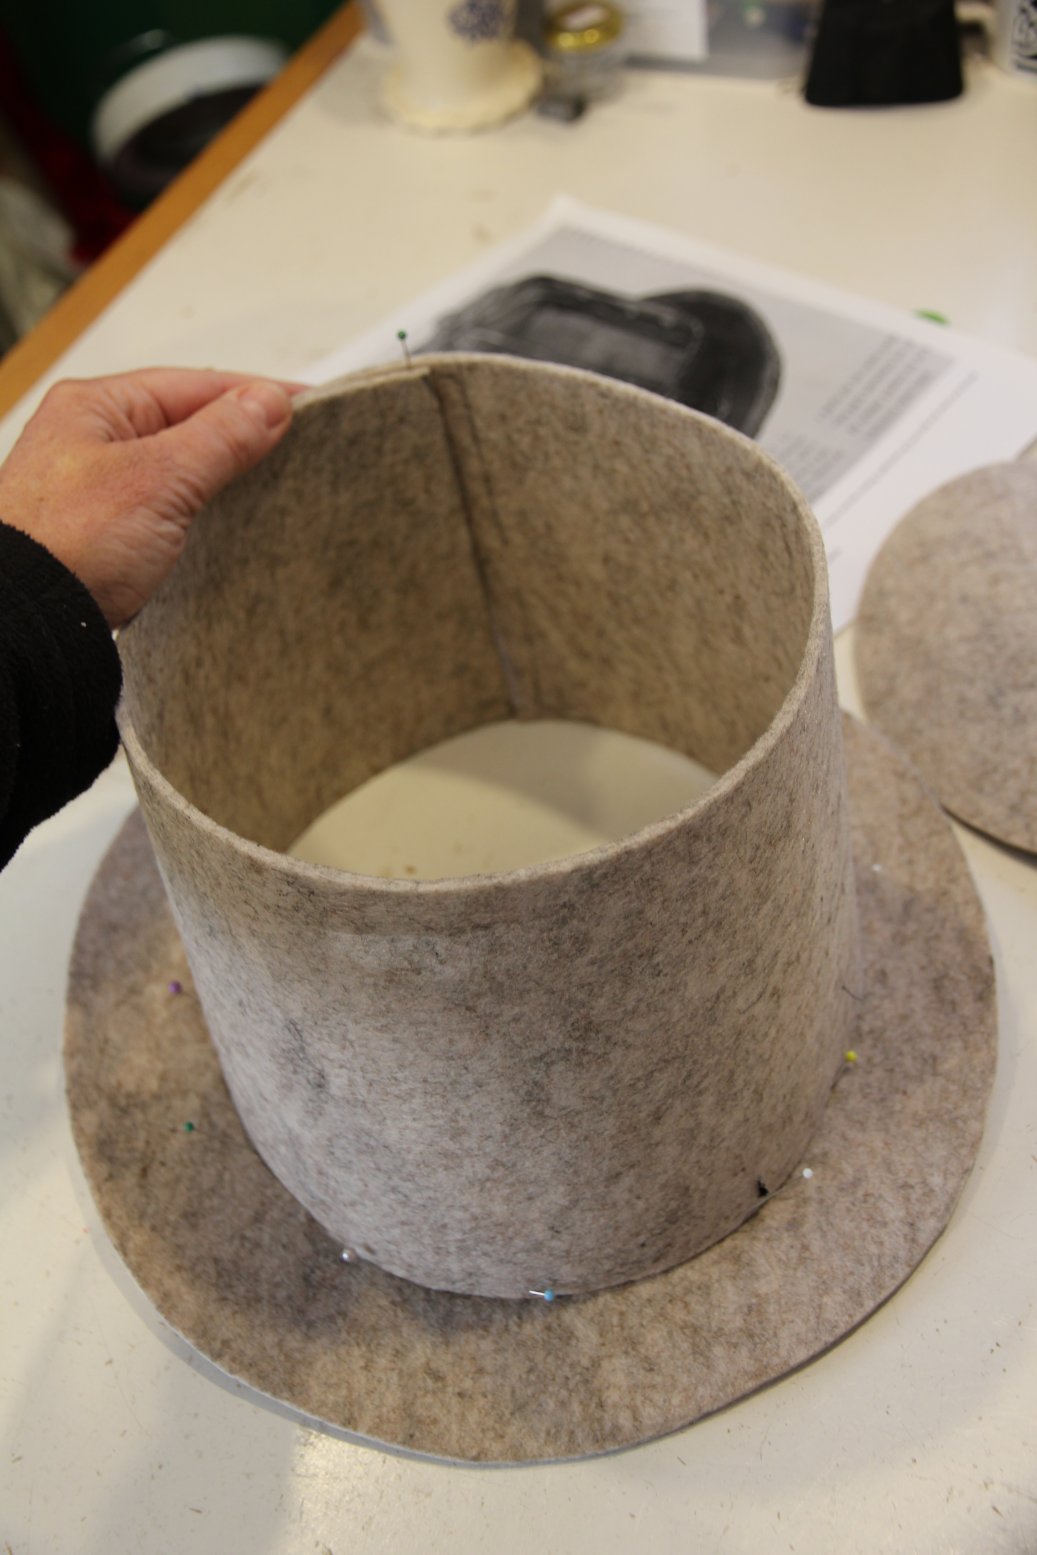
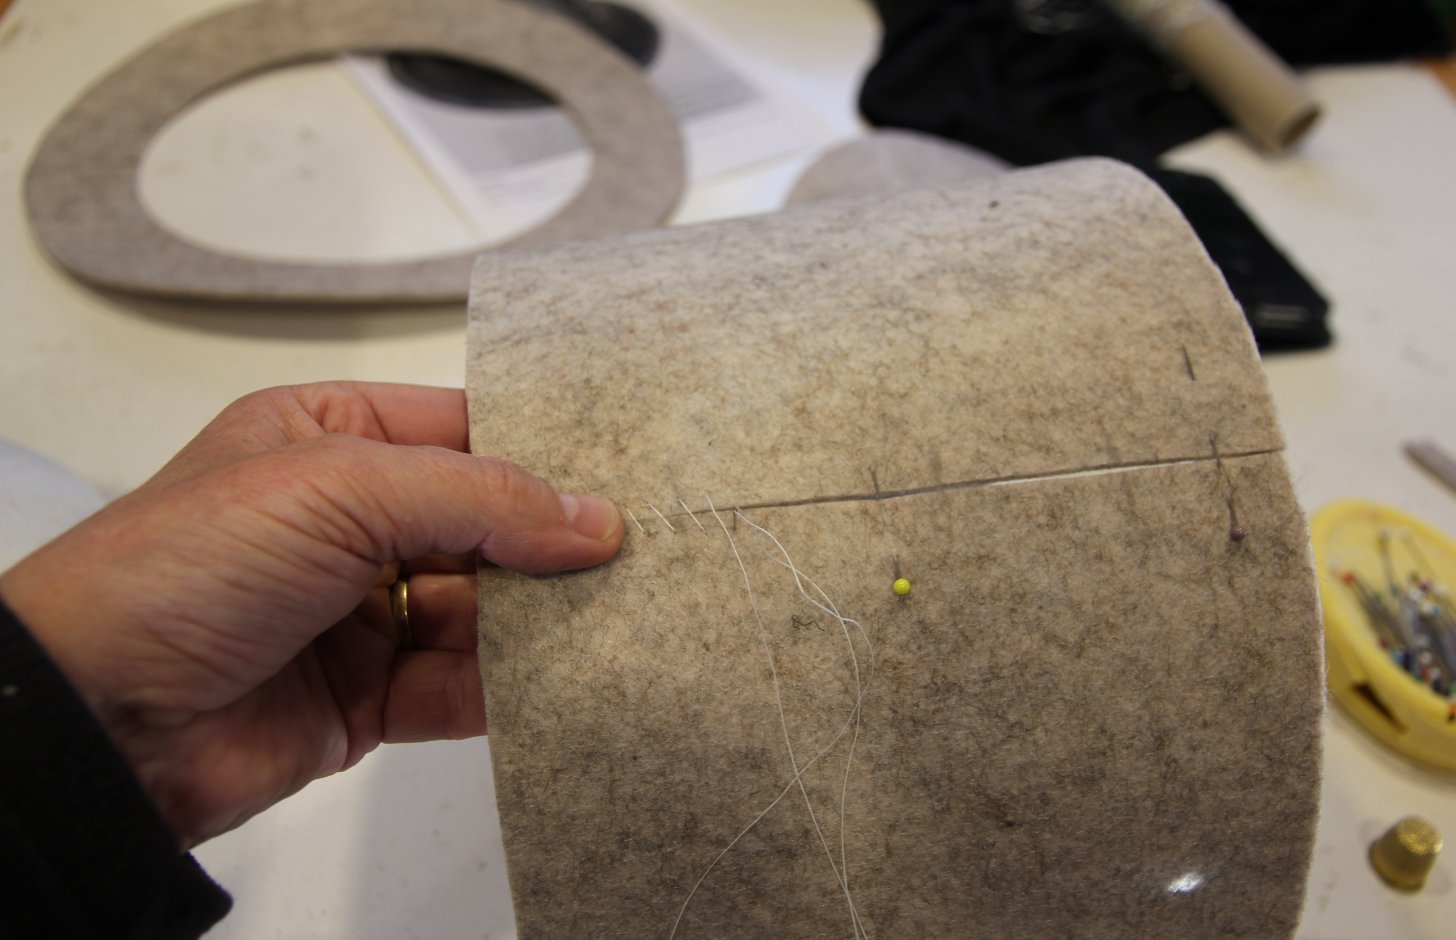
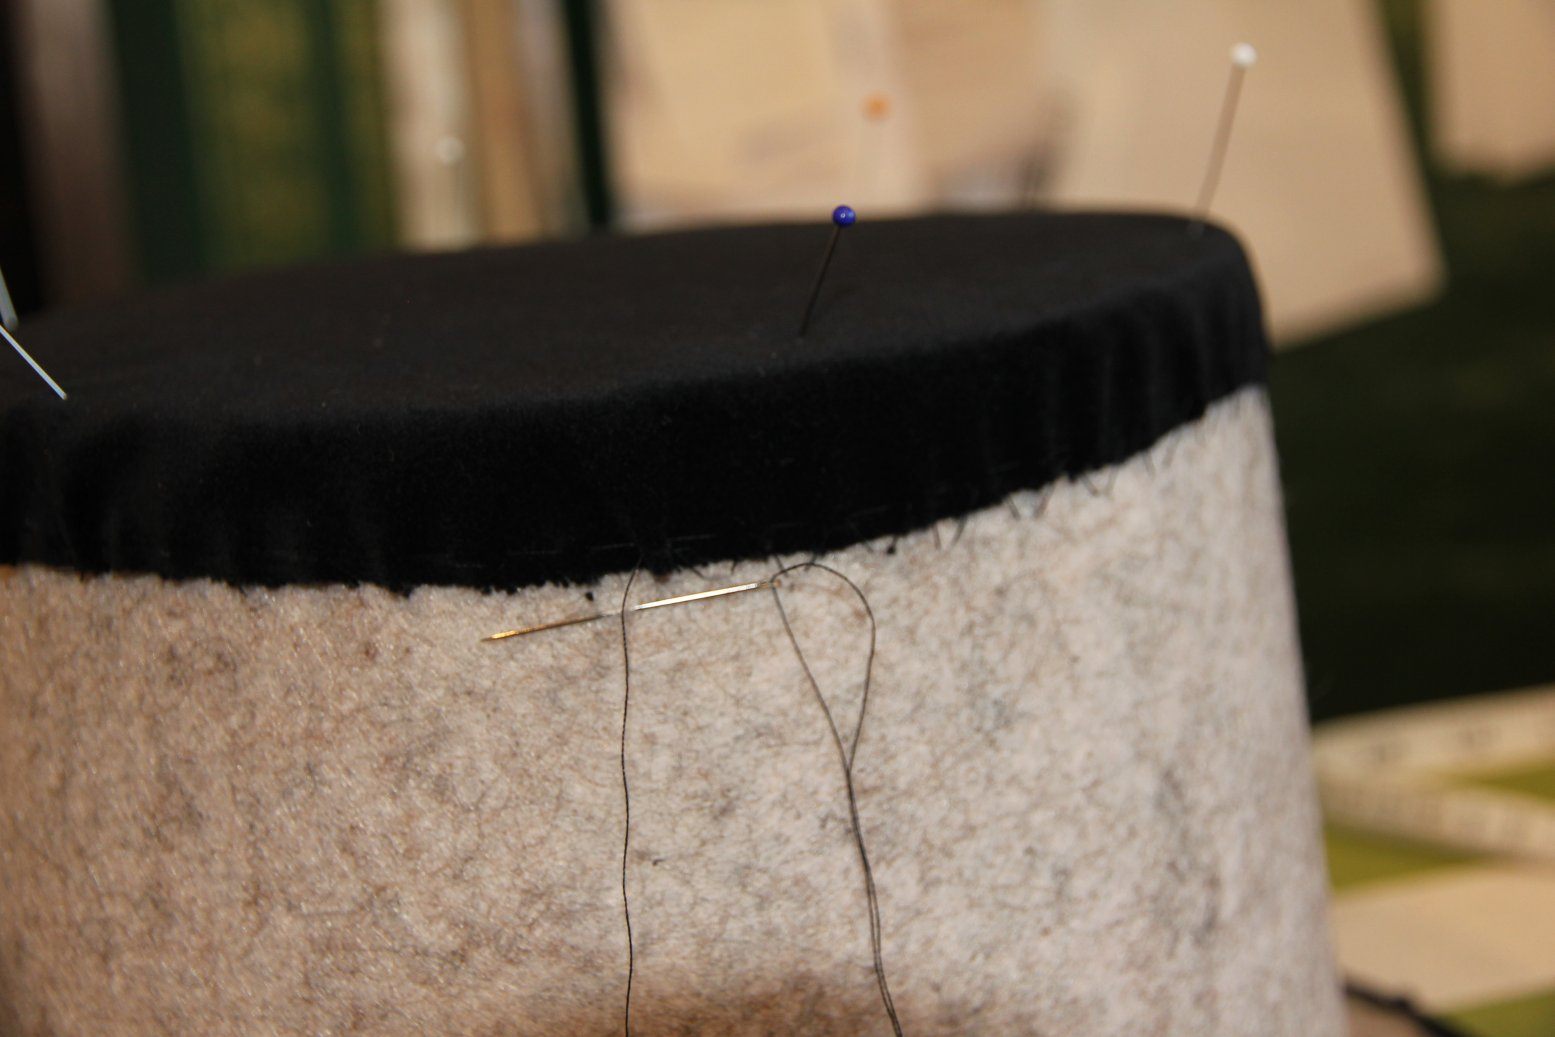
I sewed the seamat the back of the with waxed linen thread – whipping up and then back again to stabilise the seam. I whipped the brim onto the crown with waxed linen thread. With the hat now stable, I trimmed the tip so it exactly matched the crown, then sewed this on the same way.
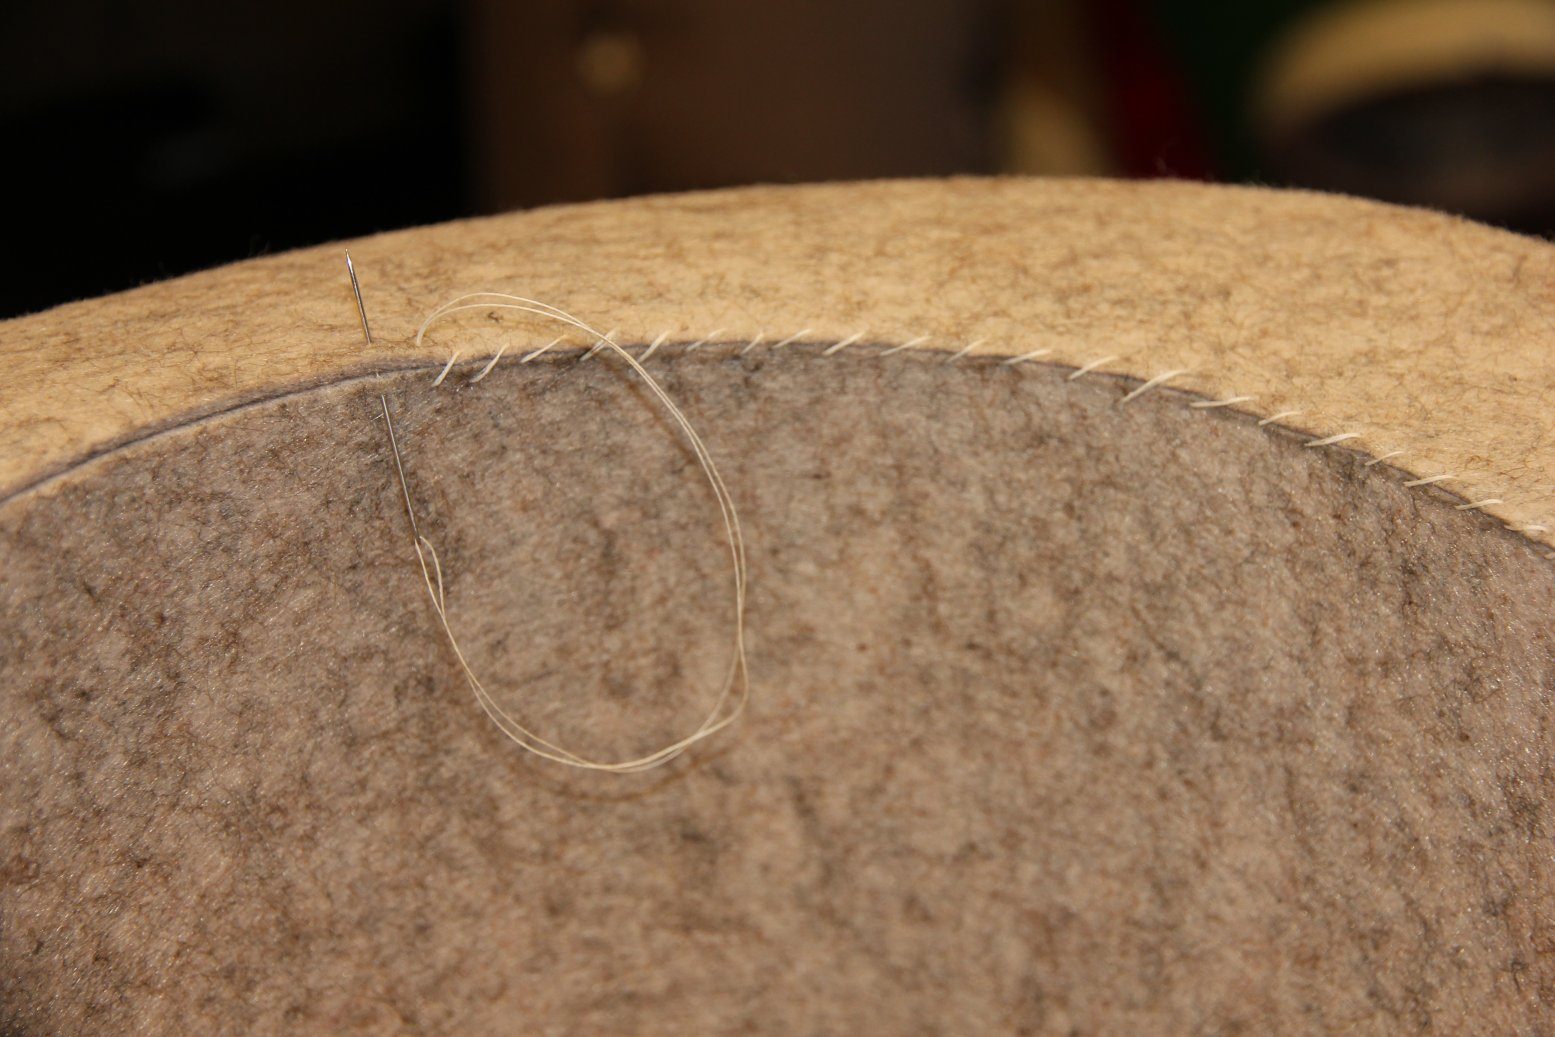
I decided the brim needed a bit more stiffness, to help protect it against being bent or damaged, so I treated the brim with commercial felt stiffener (highly toxic – now I would use Hide Glue instead).
I used the brim pattern (plus seam allowances) to cut the velvet covering, leaving the lower brim whole (ie not cutting out the inner circle). I basted this to the top of the brim, through the upper later of felt only, so no stitches show through.
With the outside secure, I marked the opening to cut out – adding a seam allowance, which us then snipped so it will fir the inside. Sewing the brim covering into a concave surface is a pain, so I’ve used a water soluble glue, which can be wiped off it gets on the velvet.
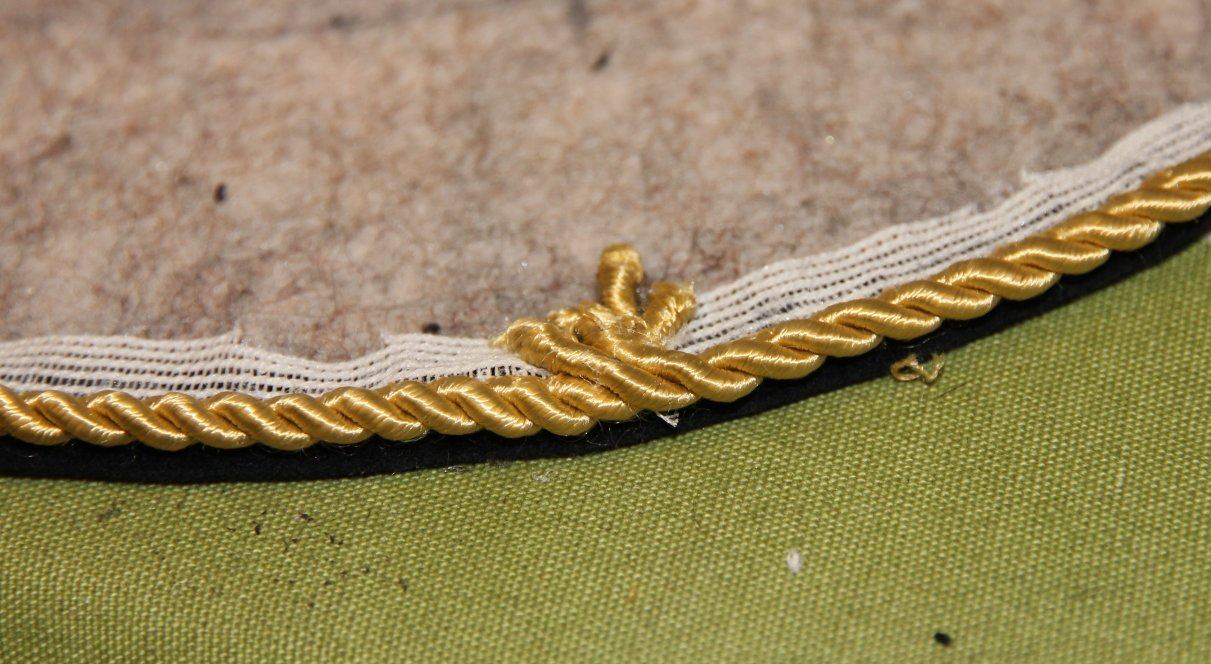
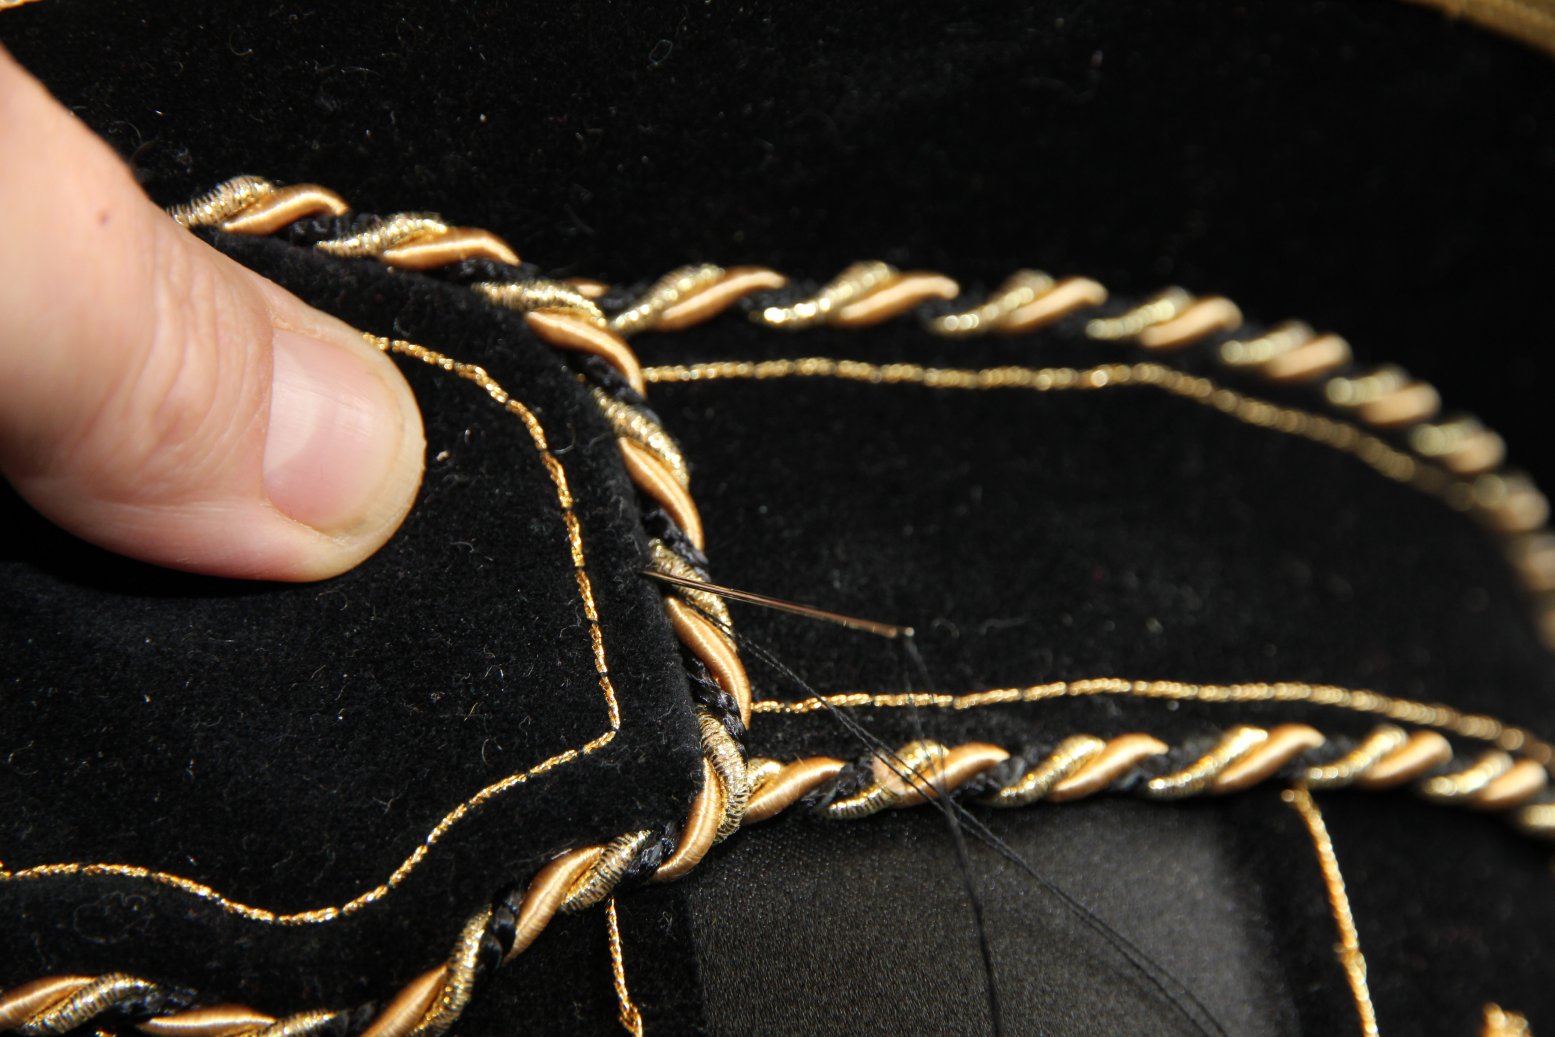
I basted the twisted cord trim to the top edge of the brim, untwisting and reweaving to hide the seam. Then I added the velvet covering, clipping the inner seam allowance to it fits over the crown and trimmed the outer one to lie just inside the cord. I sewed on the gold braid to the brim edge and to the gold cord.
I cut the tip cover oversized, since some velvet shows above the silk band. I catch-stitched the velvet to hold it in place on the crown.
I used the crown pattern to cut the silk band, then pin-fitted this in place. I sewed it and fitted it over the crown, turning under the top seam allowance for a neat finish, but not sewing it – the bands will hold it.
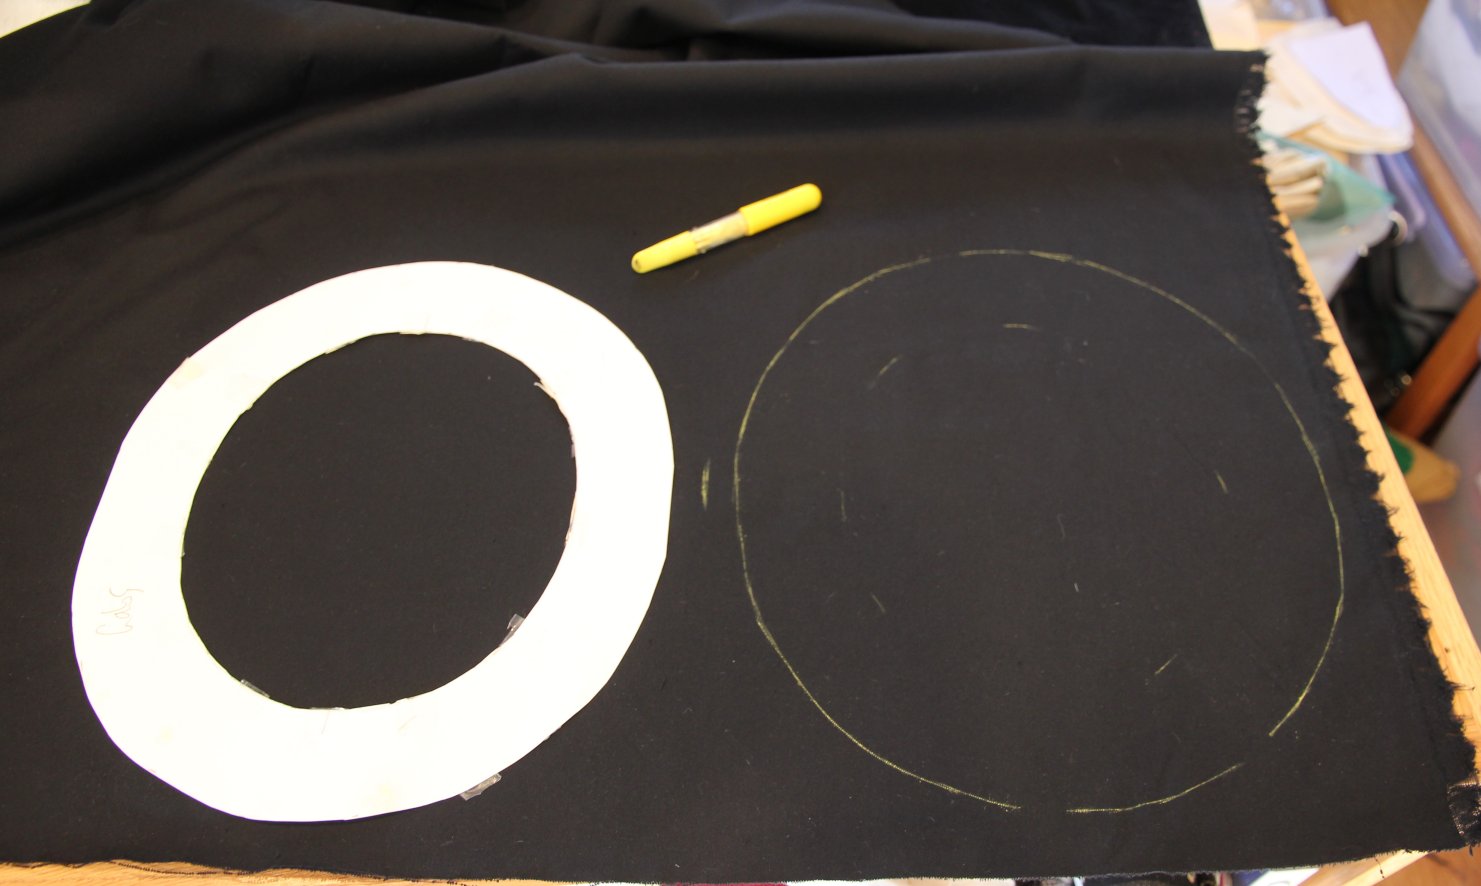
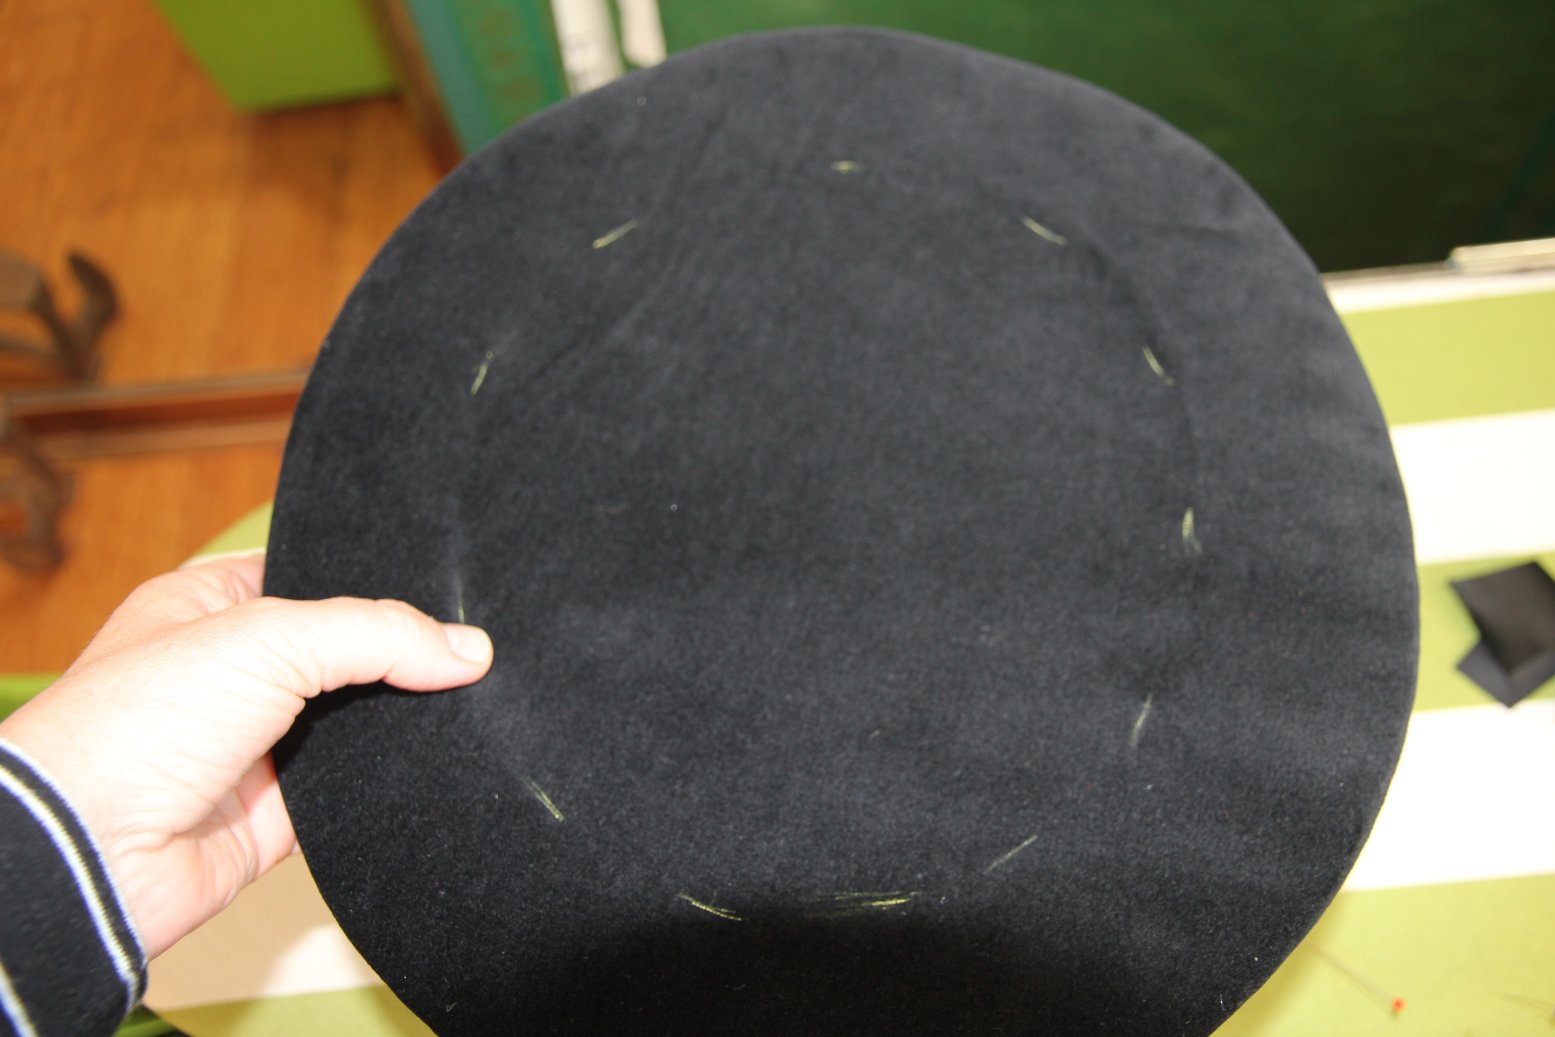
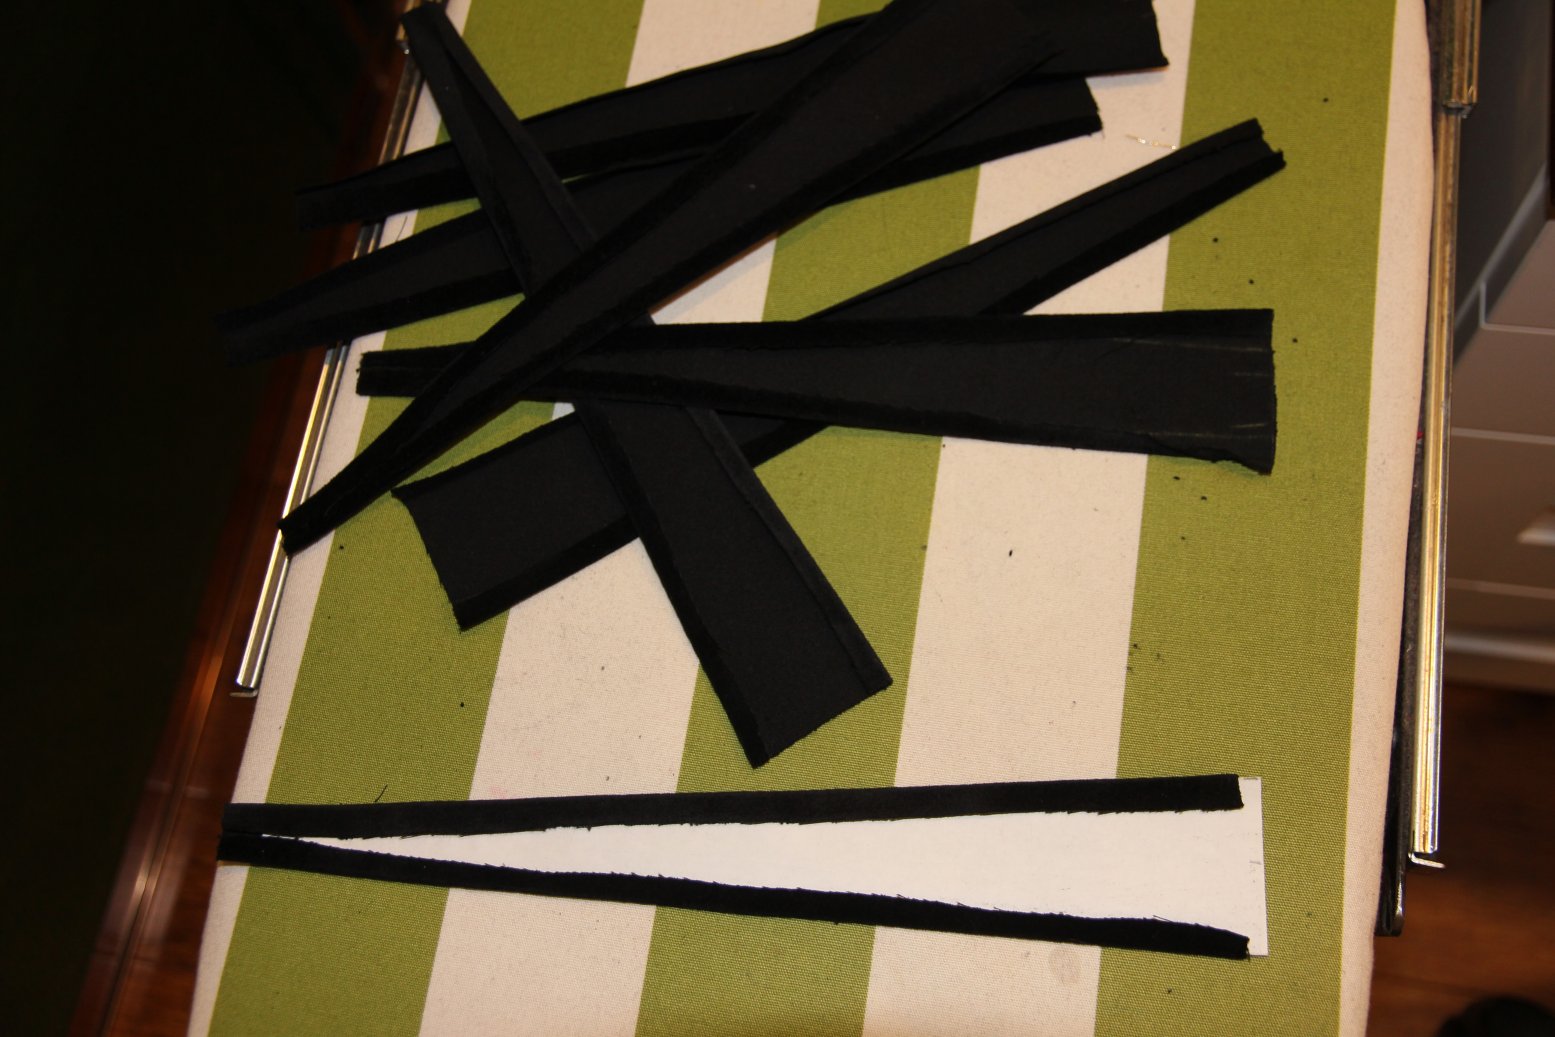
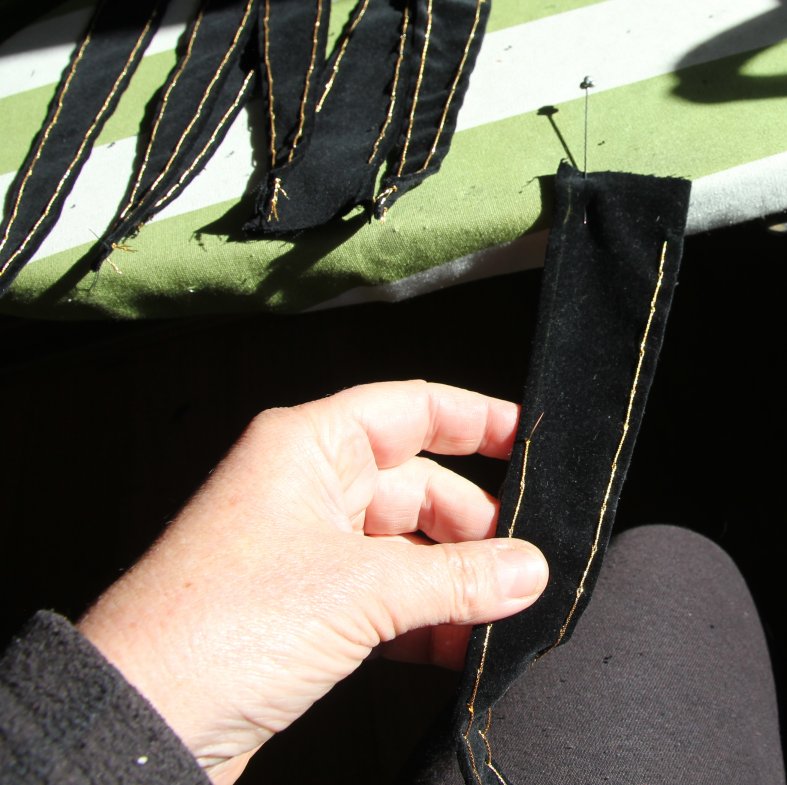
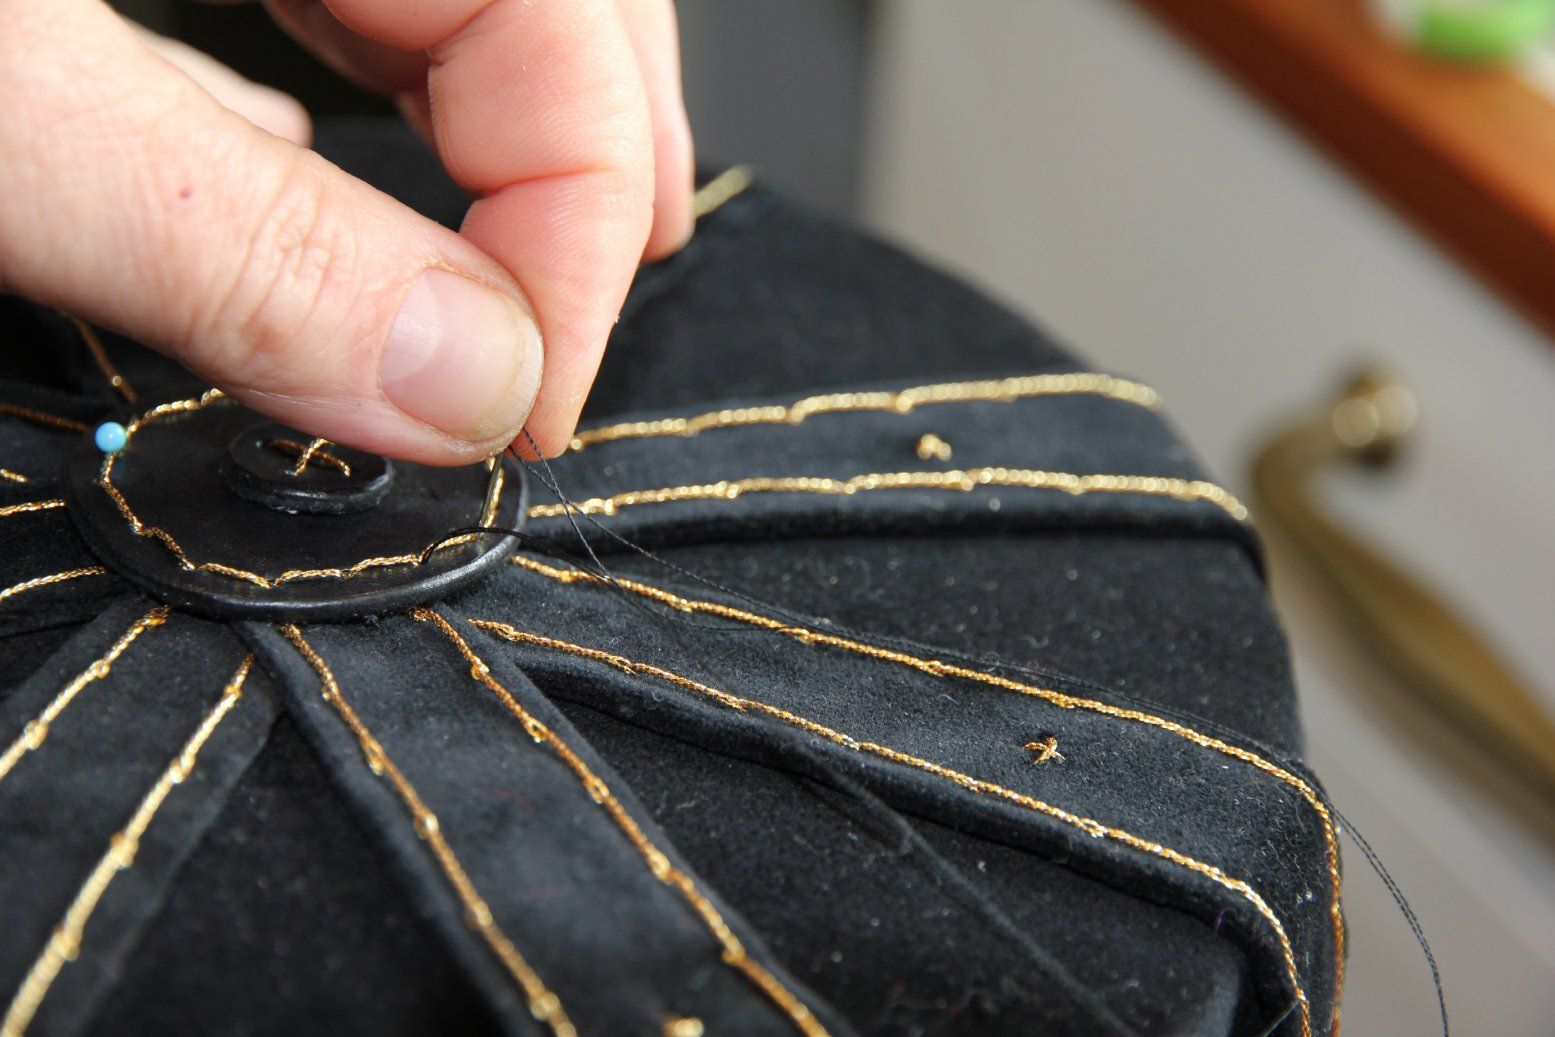
The hat is decorated with 8 velvet stripes in a wedge shape. I made a cardboard template to iron the velvet over, to perfect shapes. I sewed a line of gold twist along the edge of the wedges – after a few test pieces I decided a long splitstitch looked the closest to the original.
It is not practical to put these pieces in a hoop or frame, so I pinned one end to my ironing board to tension the fabric as I sew. I also sewed the decorative ‘spiderwebs’ in gold twist, getting smaller at the top to match the original.
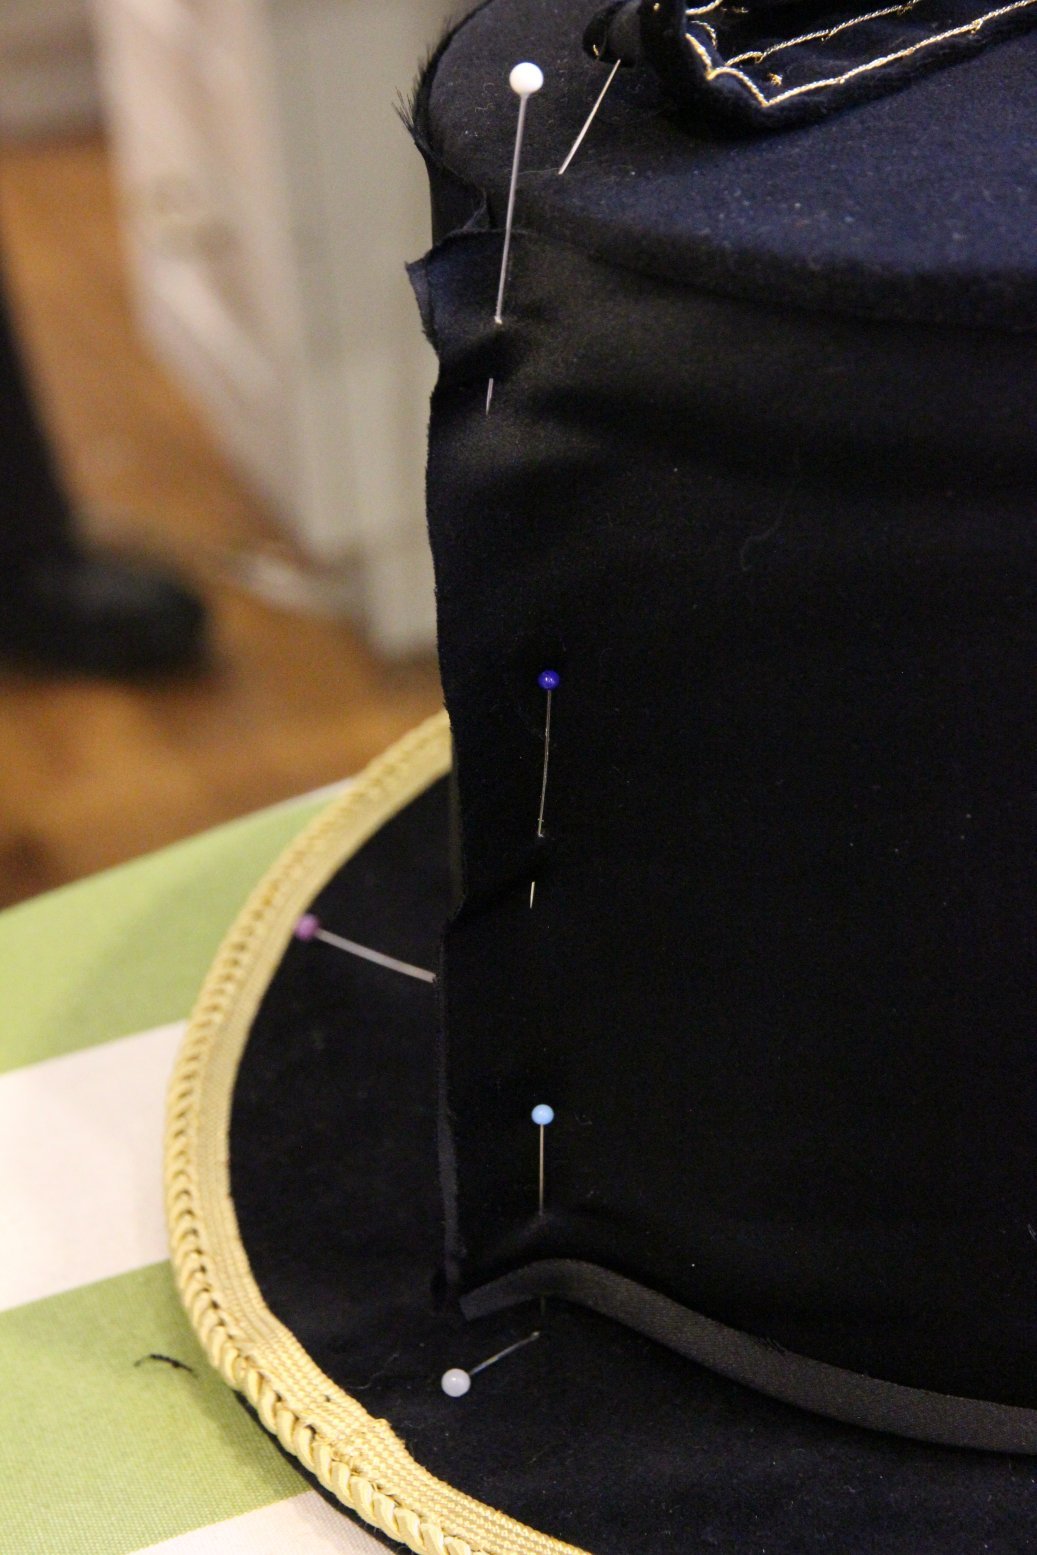
I spaced the 8 wedges around the hat, and tacked them in place at the base and half way up the wedge to keep them flat against the band, with the tips meeting at the top.
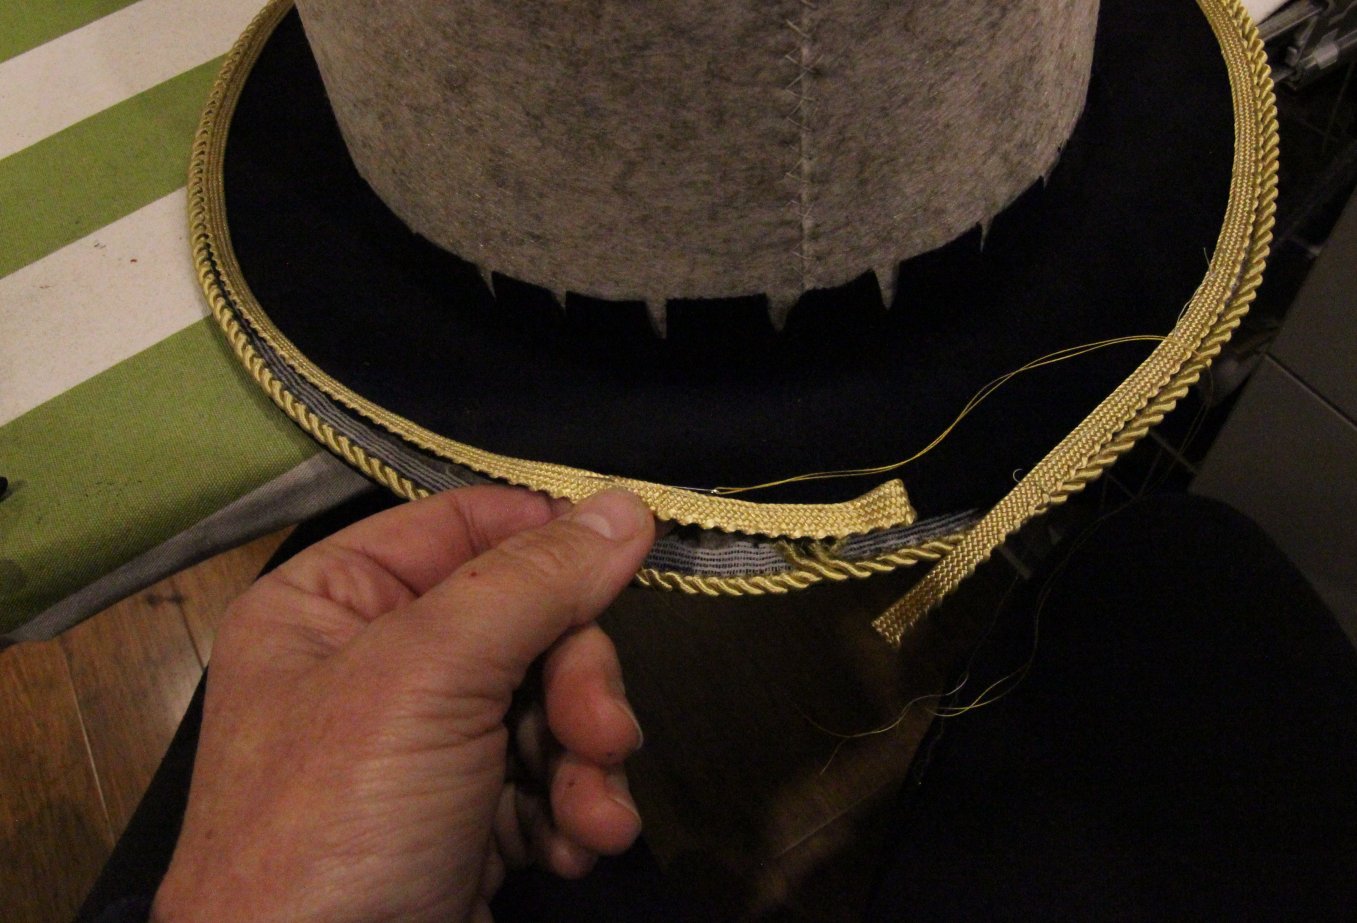
Now for the hatband – a strip of velvet, edged with 3 colour twist and a line of gold embroidery. I couched the line of gold twist first, tensioning it by pinning, as above.
I could not buy a 3 colour twisted cord on gold and black, so I made one by untwisting 1 strand of gold and replacing it with black from another cord, then sewed this along the edge of the hatband. I put the hatband in place and tacked it lightly at a few points.
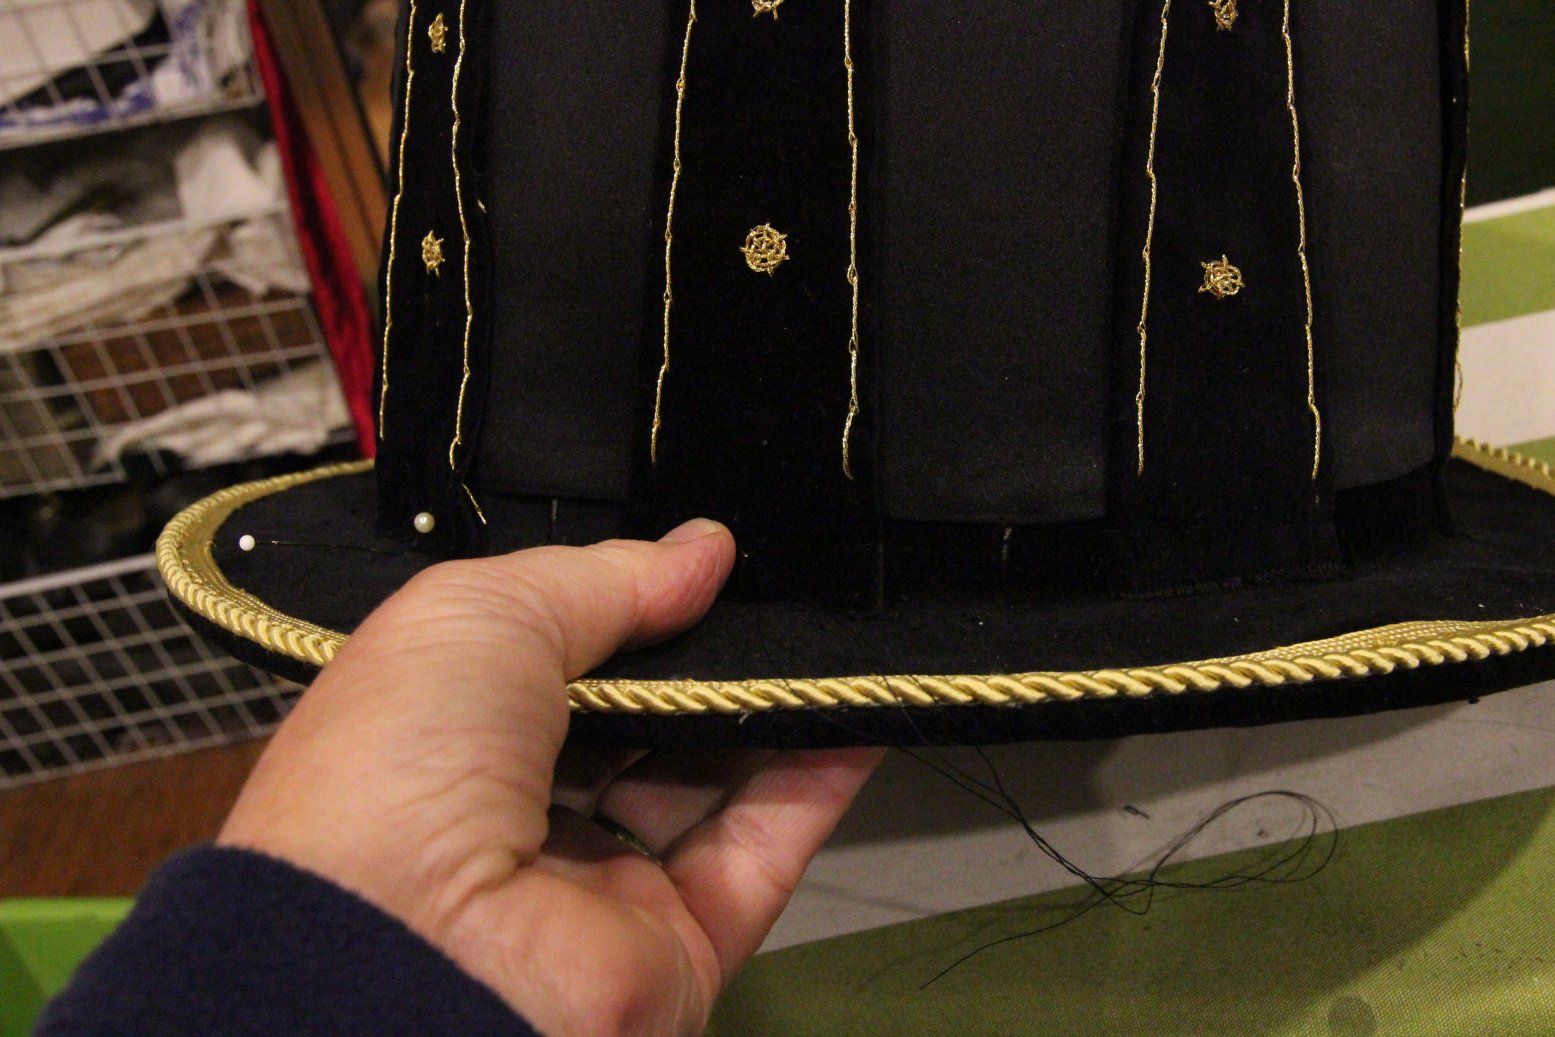

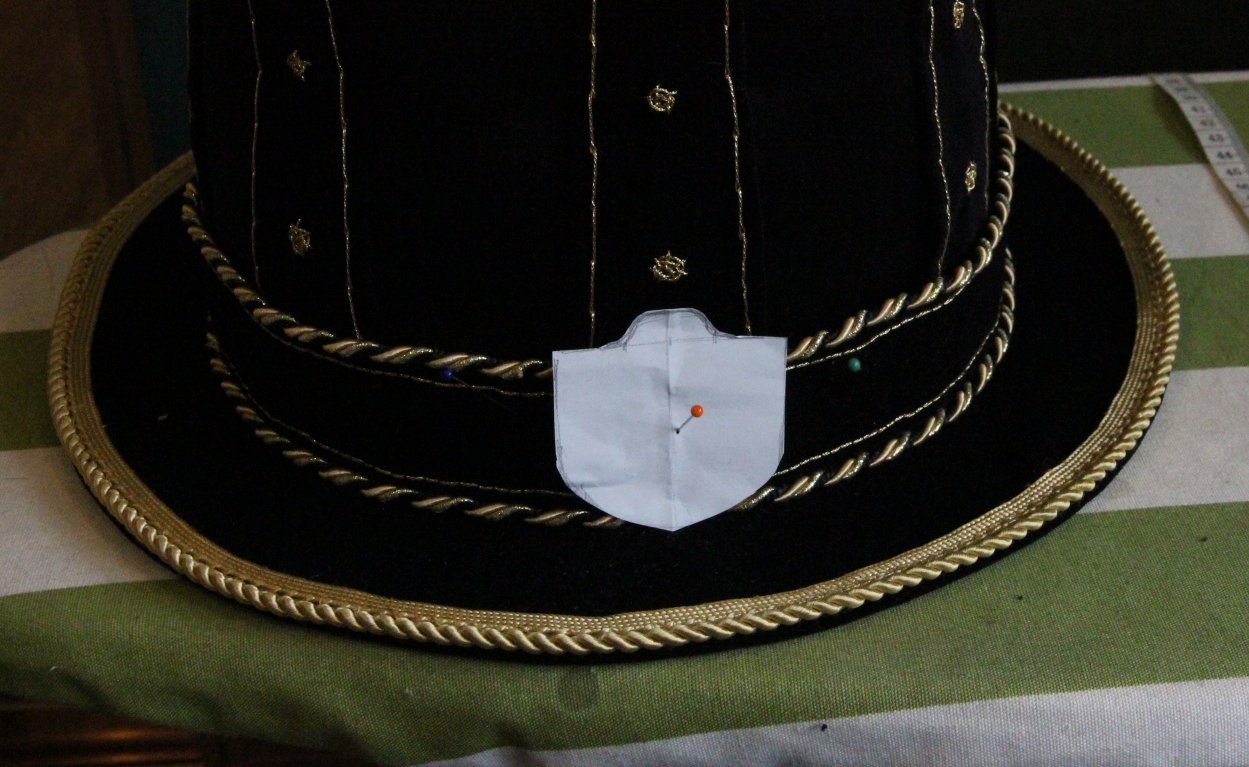
The front seam of the band is hidden with a shield shaped emblem. I made a pattern to check proportions, then cut a shield of stiff felt. I couched a line of gold twist on the velvet cover, tacked this around the felt piece, edged it with the cord, then sewed onto the front.
The top button is made of 3mm leather, which I dyed black and polished. I made holes with an awl and sewed around with gold twist. In the middle I added a smaller leather button, as per the original, then sewed the layered button to the centre of the tip to hide the messy ends of the wedges.
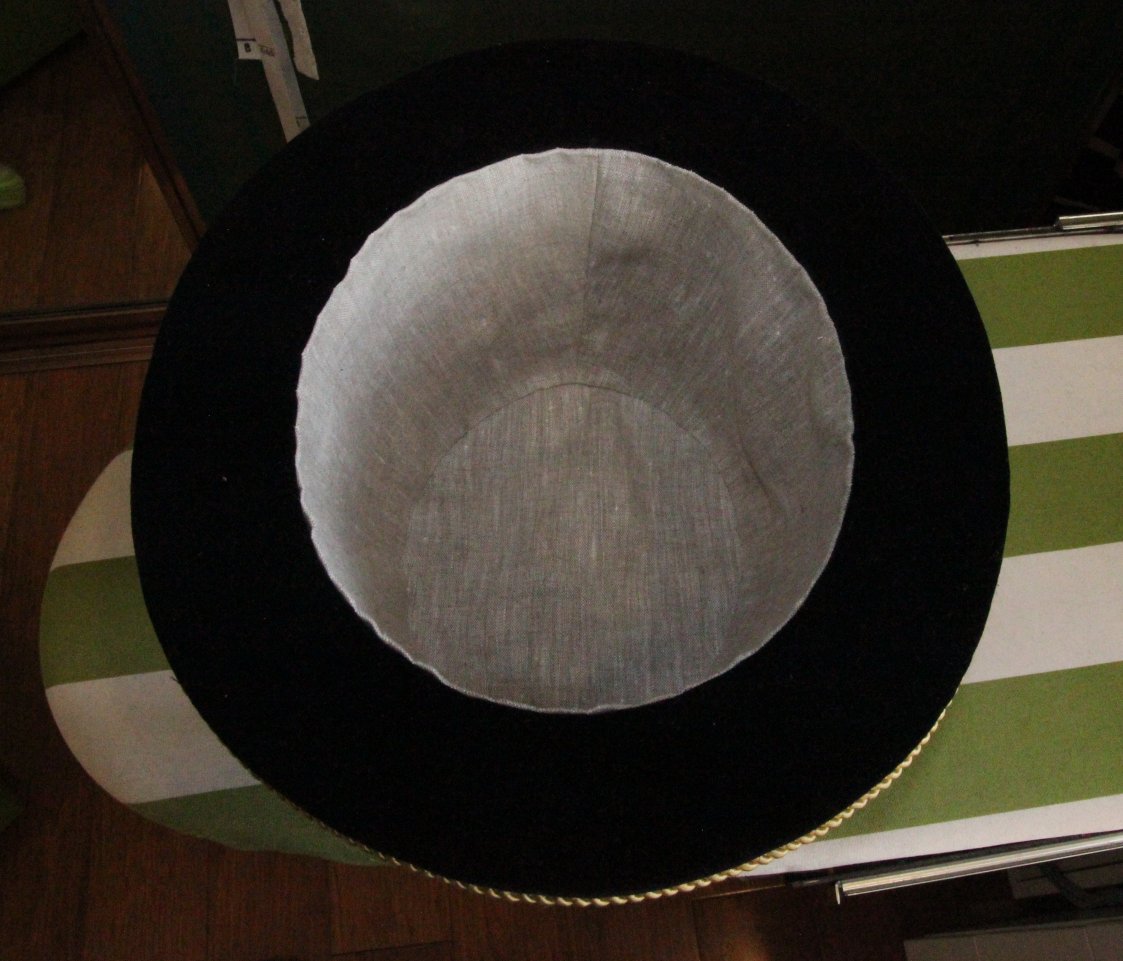
Finally, I lined the hat in raw linen (as per original), cut using the same pattern and slip stitched in place.
DONE! And I was very pleased – it really does look just like the picture of the original.
Gabriel is very tall, and with this hat he is even taller…
Afterthoughts
After the hat was delivered and worn to the event in Spain, Constanzia found a Flikr album showing the hat in great detail. I can’t display the pictures here (not Creative Commons), but they are excellent – and I wish I’d seen them before making my version!
I got much right – the shape, decoration and overall impact. But the extra images show a curved brim, with silk ribbon decoration on the lower brim, and a tie cord with decorative ends, which I did not know to include.