

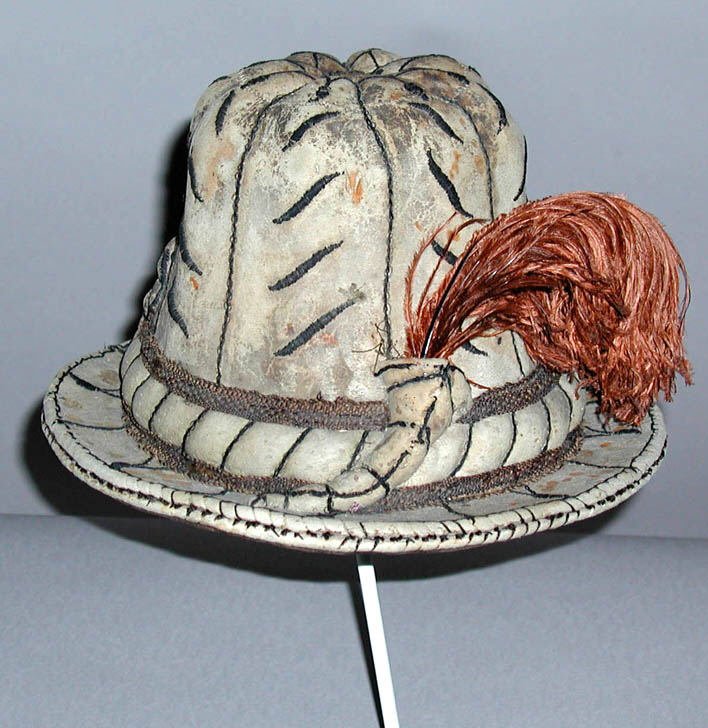
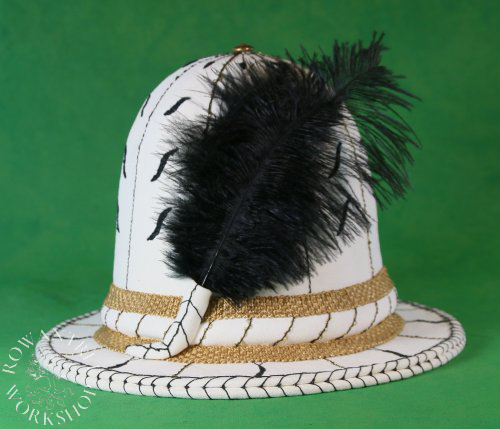
A late 16thc century man’s hat of felt covered in embroidered leather..
My Hat Prize for Canterbury Faire 2021 was won by Grim, who requested a late 16th century tall hat. After some discussion he chose this style, to my delight – I’ve been wanting to make this hat ever since I first saw the images of extant examples in Patterns of Fashion 3 (Arnold 1985).

This style of hat was worn by high class men from the mid 16th century to early 17th century, across much of central Europe, including Italy, Germany and France.
Research and Design
There are several extant examples of this style of hat in various museums, as well as depictions in art, showing a light coloured sueded leather, embellished with embroidery, braid and feathers.

Source: GNM
Source: The Met

Source: Museo Bagatti Valsecchi
Although the decorations differ, the examples I have seen are remarkably similar in many ways:
- All are made of embroidered leather over a stiff foundation, with a silk lining (some have other layers)
- The embroideries are in black silk; some with metallic thread and/or narrow braid
- The leather covers are light coloured (white or buff) with a suede texture
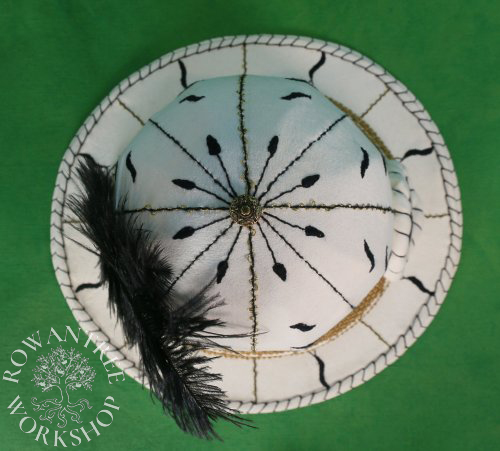
- The crowns are decorated (and presumably formed) in 8 sections
- The edge of the brim has 2 visible layers, whipped sewn together and whipped around with the silk thread
- The hatbands are embroidered with slanted lines and stuffed behind
- They are decorated with an embroidered device at the front, inside a stuffed leather cartouche
- They have a leather cornet at the back,tail to one side, to hold a plume (a few still sport an ostrich feather).
Rather than copy one example exactly, I took elements from several examples. The hat shape is based on the example from the Germanisches Nationalmuseum, the main decoration from hat in The Met, and the simple cartouche from the one in the Museo Bagatti Valsecchi.
Although at least one of bases was made of leather, I planned to make this from 3mm furnishing felt – stiff, workable and available. I considered a few options for the leather cover- it needed to be white/buff, with a suede finish, and fine/soft enough to be embroidered. I settled on oil-tanned chamois and was pleased to find several matching skins (just wide enough) in the local K-mart auto section!
Construction
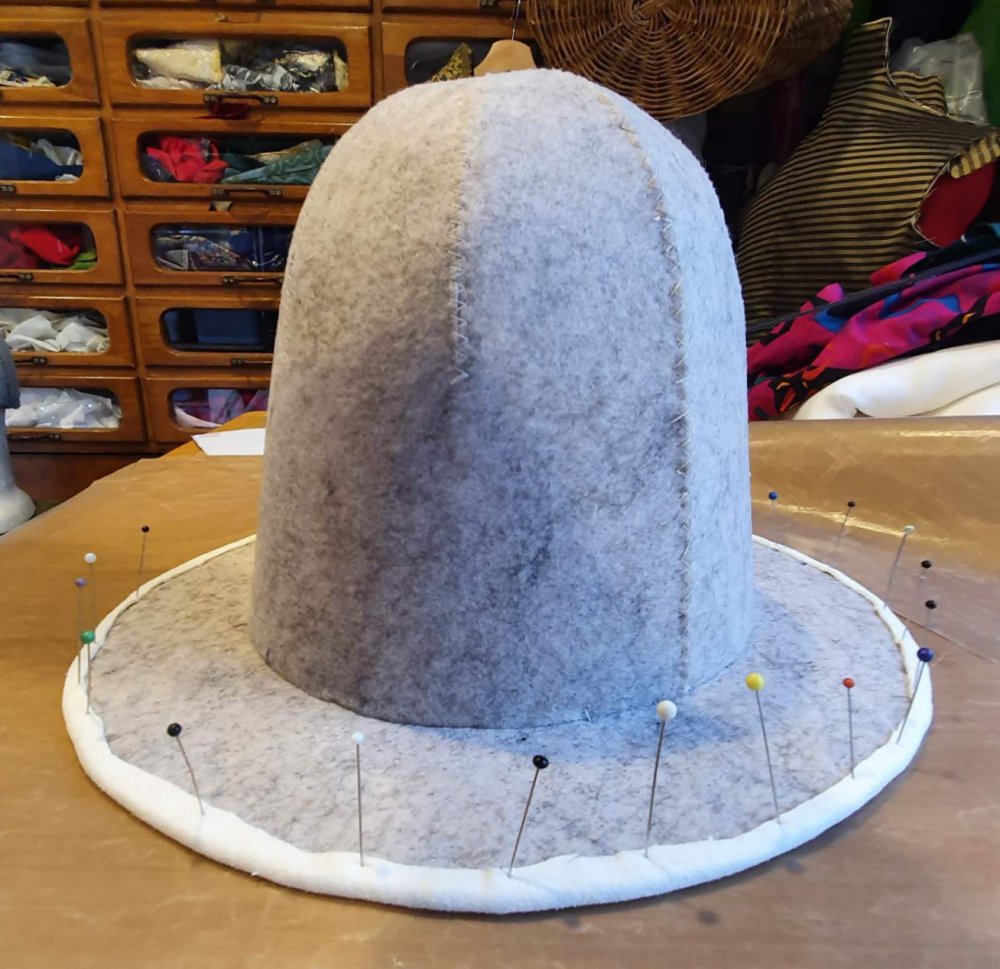
I padded up my head form to the right size, cut the brim in light card using the headsize oval, then estimated the height. I made a card cylinder, cut in 8 ‘petals’ and folded them at the top to make a crown, then marked the overlaps, cut and stuck them together – not right, but a good start. After some more refinement to get a fair shape, I send a picture of the mock-up to Grim for approval.


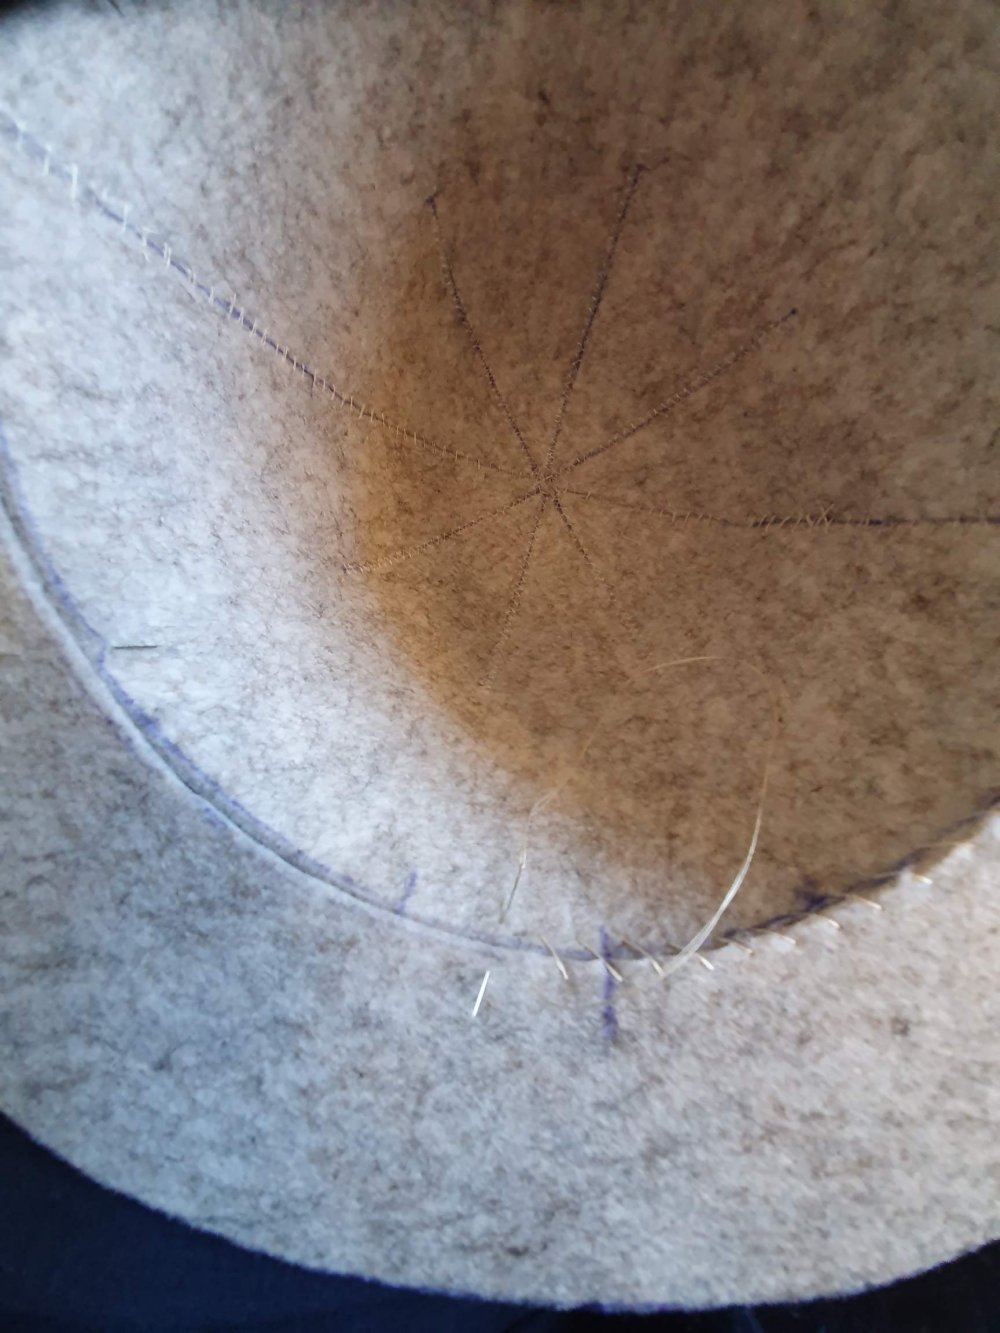
Next, the felt base. I cut the shapes in 3mm furnishing felt, with the crown in two pieces to allow for adjustment. I sewed the tops together using machine zig-zag – smooth, strong and quick. I fitted the two halves together and checked against the brim – all good.
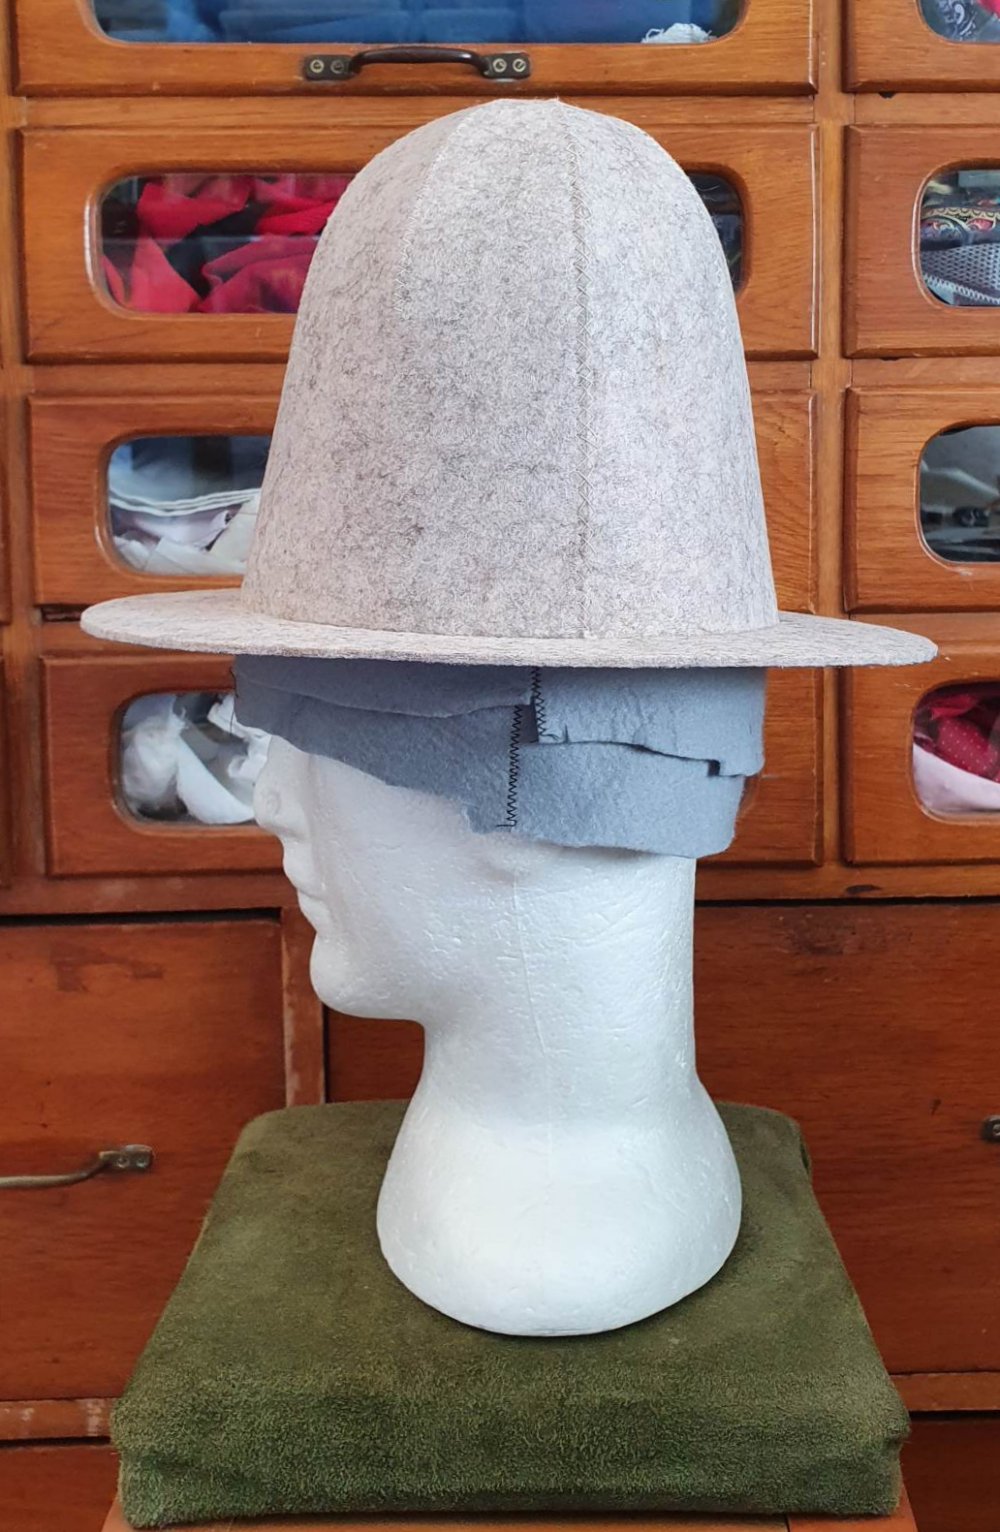
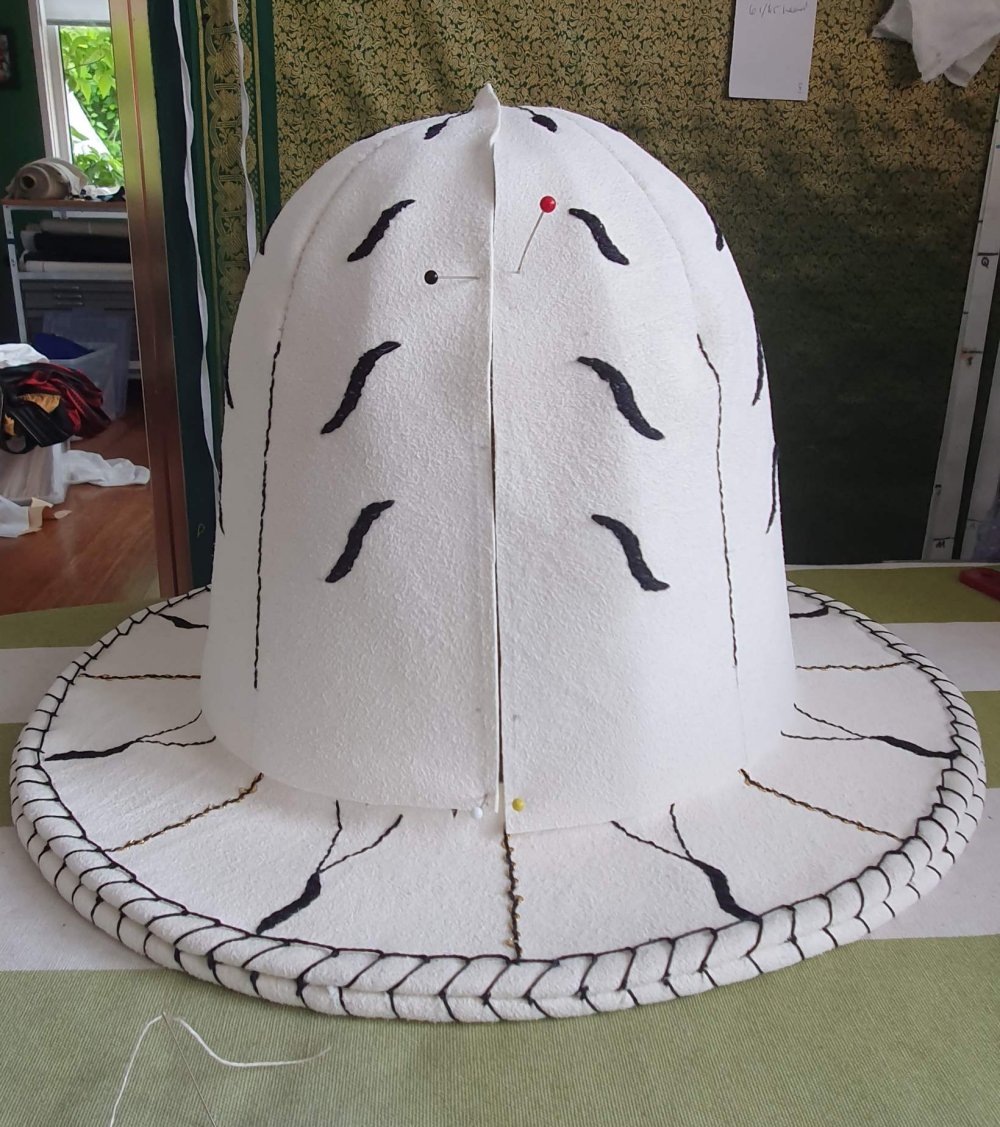
I thread-tied the two halves together (pins would fall out) then hand sewed with waxed linen thread, whipping up and back for strength. Then I whipped the crown onto the brim to complete the base.


The brim needs stiffening to stand up to use – I soaked it with hide glue and let it dry overnight. I checked the hat back on the form – looking good! Next step was to damp the leather pieces and pin them out to remove any creases before use.


I covered the brim in plain leather, gumming it over the felt edge to hold in place until I could sew it (tacking would leave marks on the leather). Once dry, I measured, marked and then whipped around the brim edge using a glover’s needle and heavy silk thread, in two passes. Then I carefully cut out the centre, clipped the seam allowance and gummed it up into the crown.

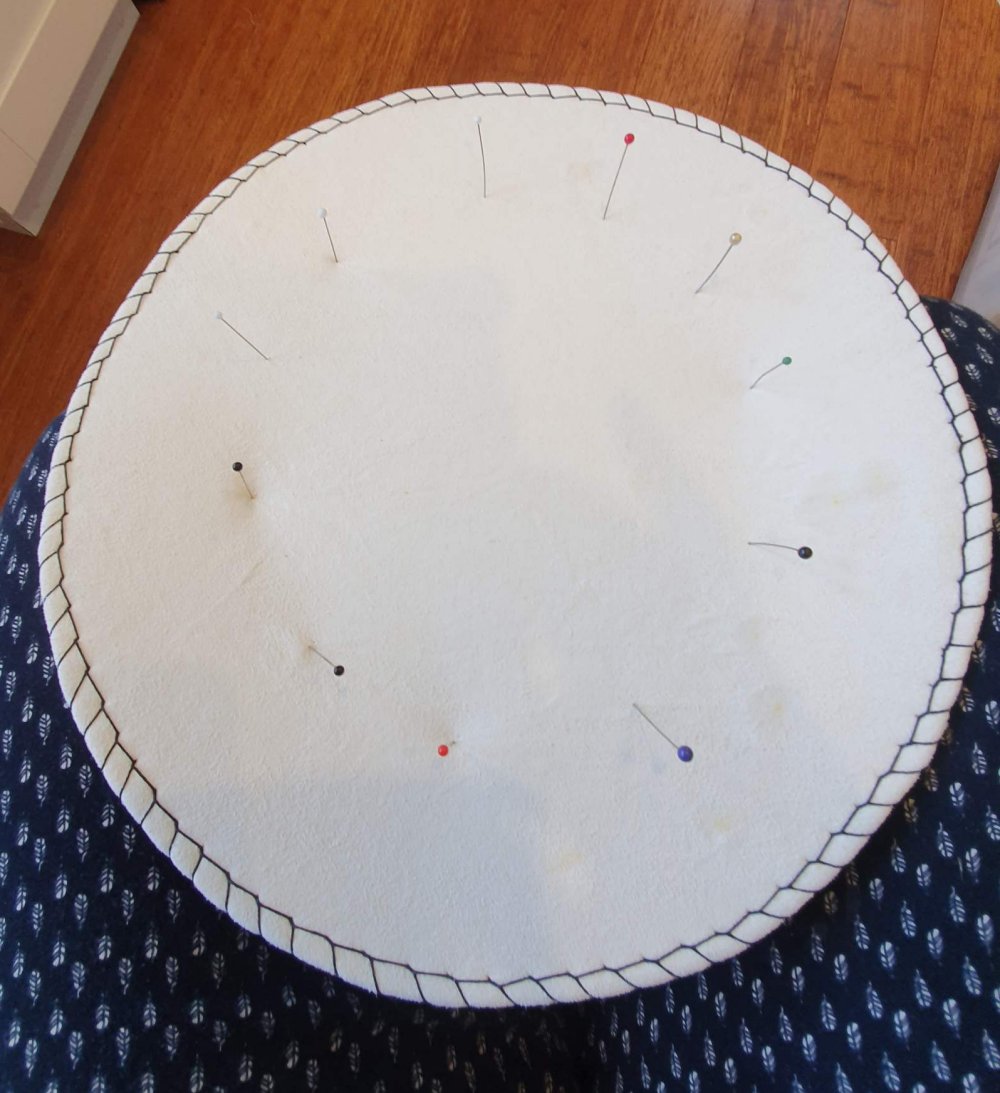
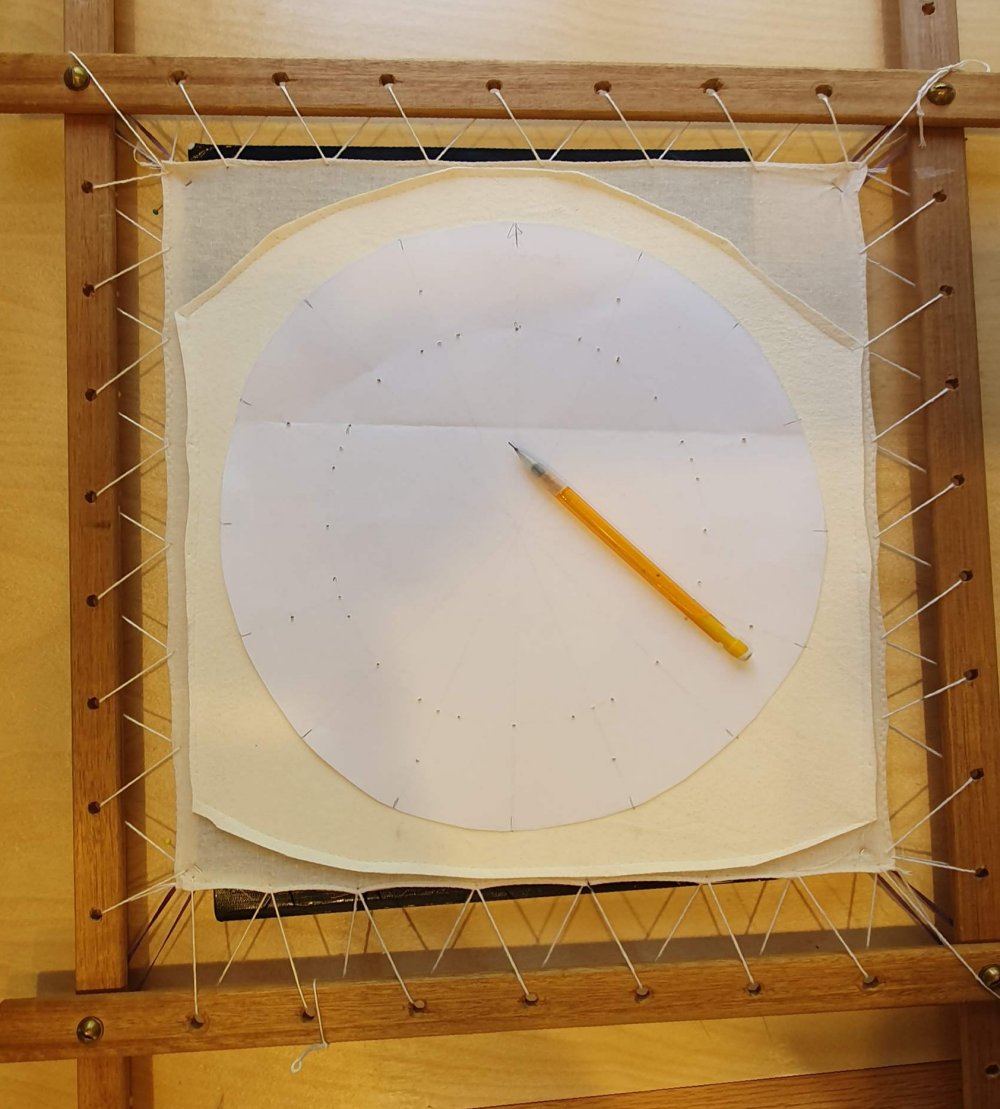
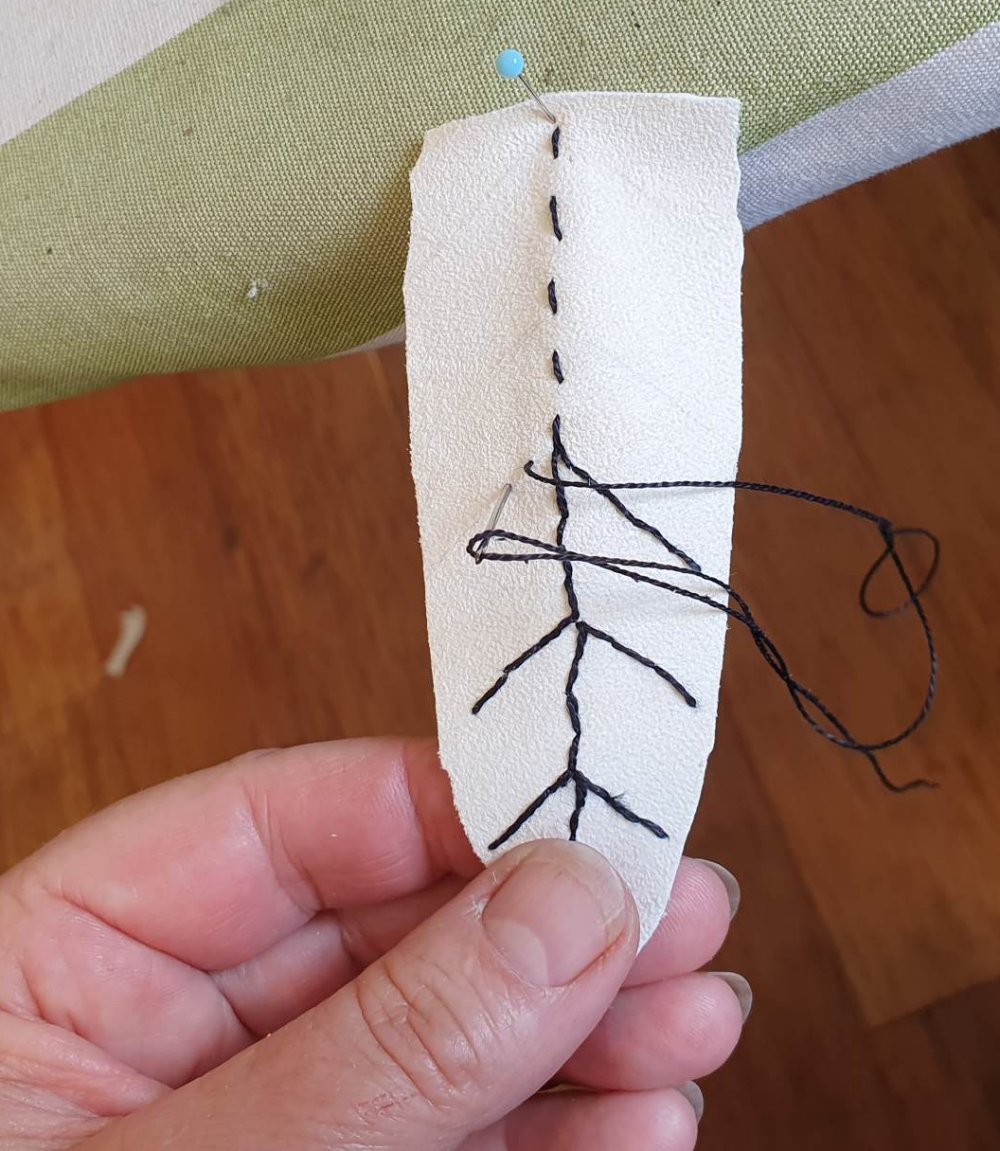
On to the embroidery! In order to ensure the leather was stretched evenly on the frame, I machine-basted the leather to a backing fabric, then cut this away behind the leather. I whipped it into the frame and transferred the key design points, using pencil marks through holes in the pattern (and supporting the leather, so as not to stretch it).
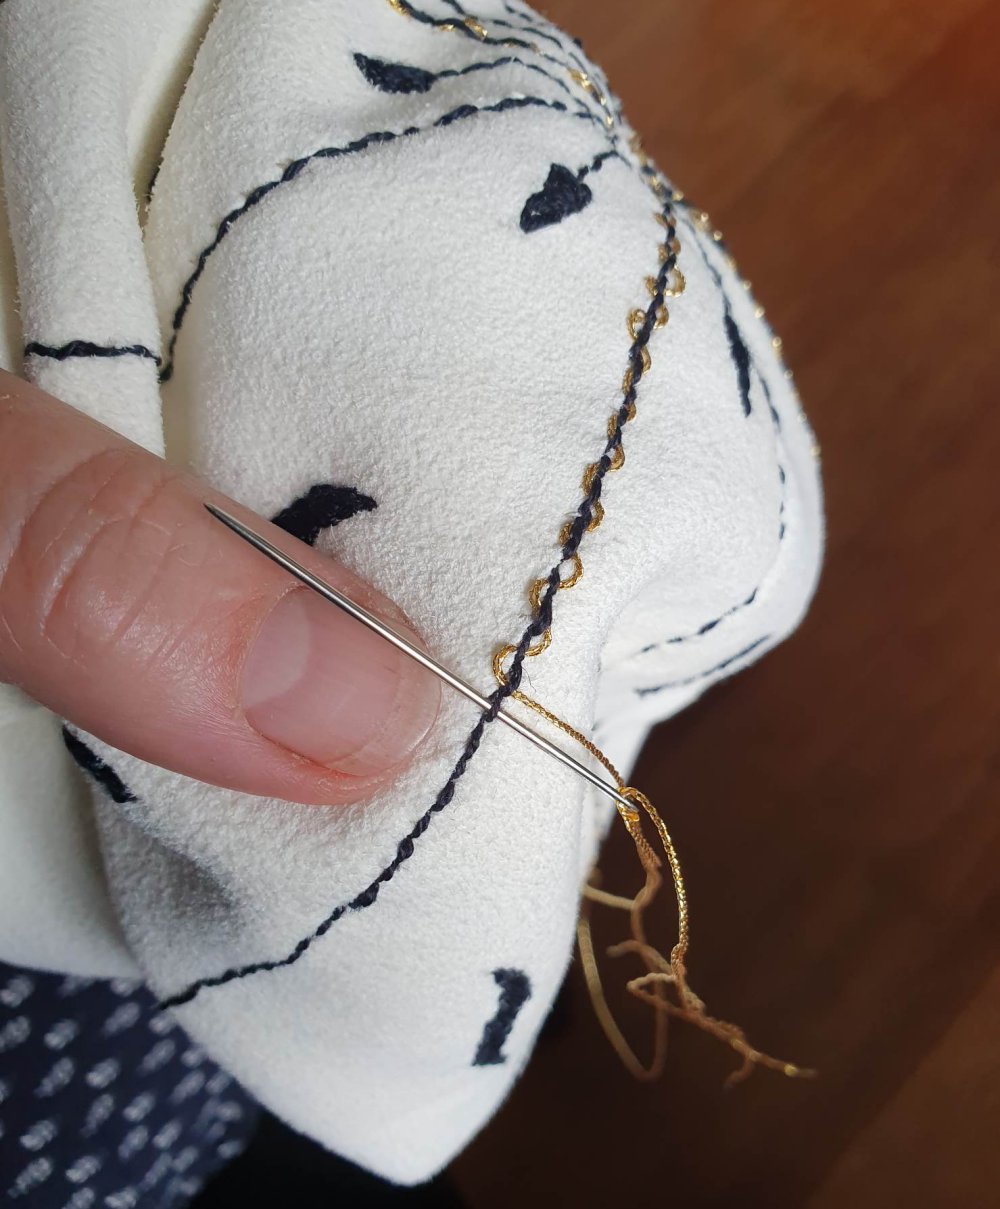
I embroidered the brim in Holbein stitch (double-running), with the squiggles in Elizabethan satin stitch (no thread at the back). I laced the straight lines with gold twist, as seen on The Met example. This was hard work – even with the glover’s needle and thimble, I could only work an hour at a stretch!


To finish the brim, I needed to cut out the centre of the top cover, sew it to the bottom layer and whip the edge. I did several tests before I got a brim treatment that looked the same as the originals. I ended up using a slip stitch to join the upper leather to the lower at the whipping point, then whipped over the edge as before.
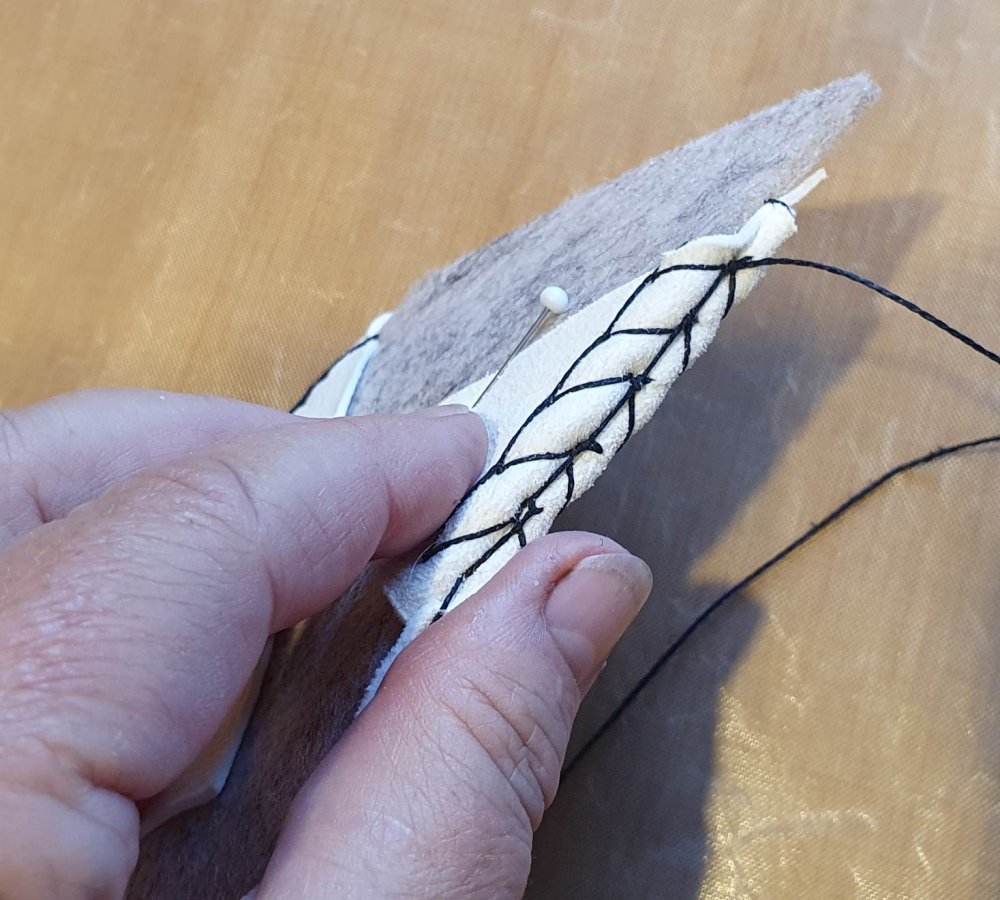


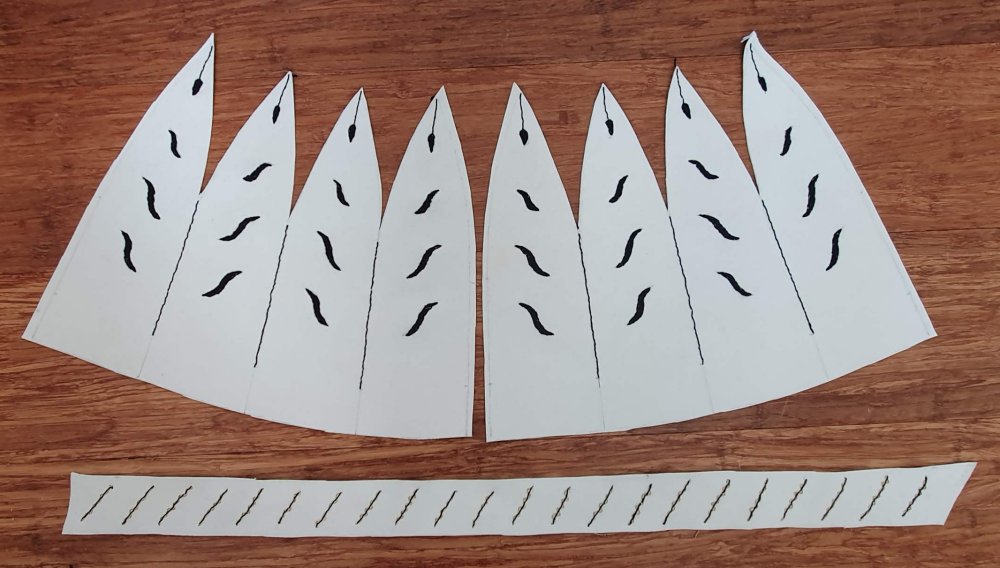
Time to re-set the frame for the crown embroidery! I used the largest skin and laid out the crown in two halves to allow for adjustment, and fitted the hatband along the long edge. I embroidered these sections over several days to avoid hand cramps, then cut them out – allowing extra at the sides. I sewed each half, whipping the tops of the sections together using waxed linen thread.


I tested the completed sections on the felt base – good call, I needed the extra! I trimmed the tops to match, then whipped the two halves together. I embroidered over the seam in gold-laced Holbein stitch to match the other seams.

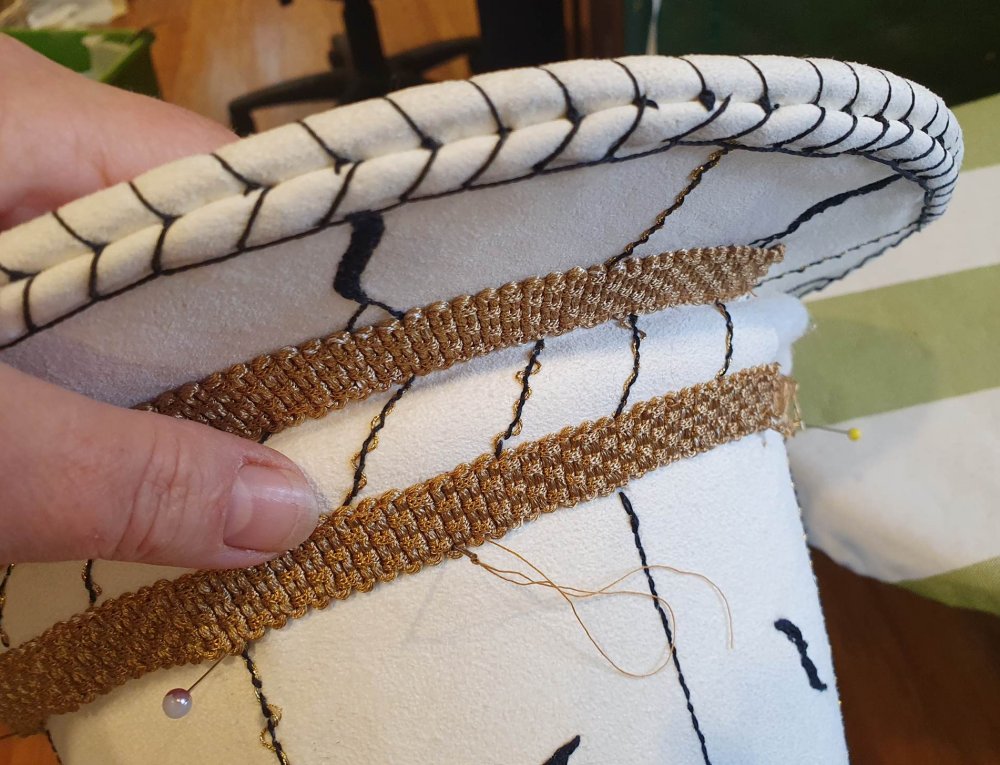
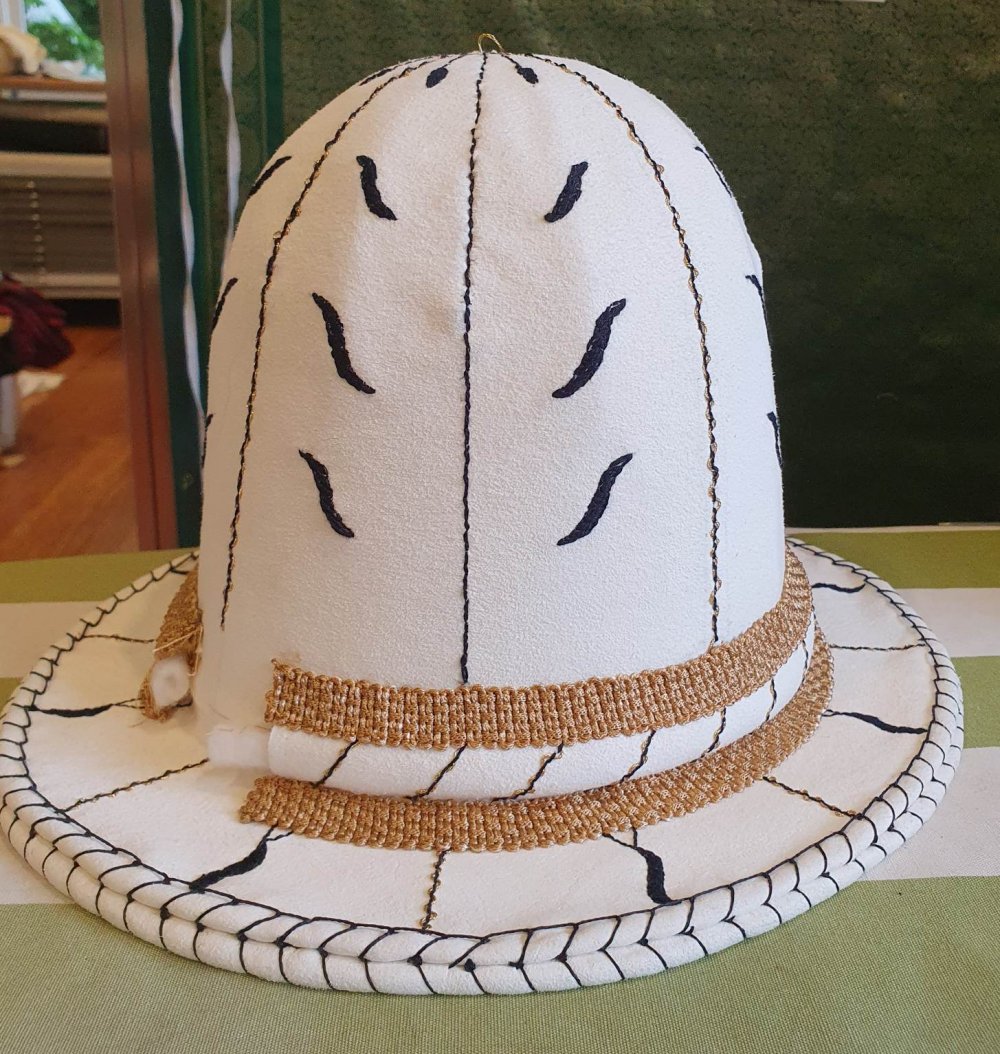
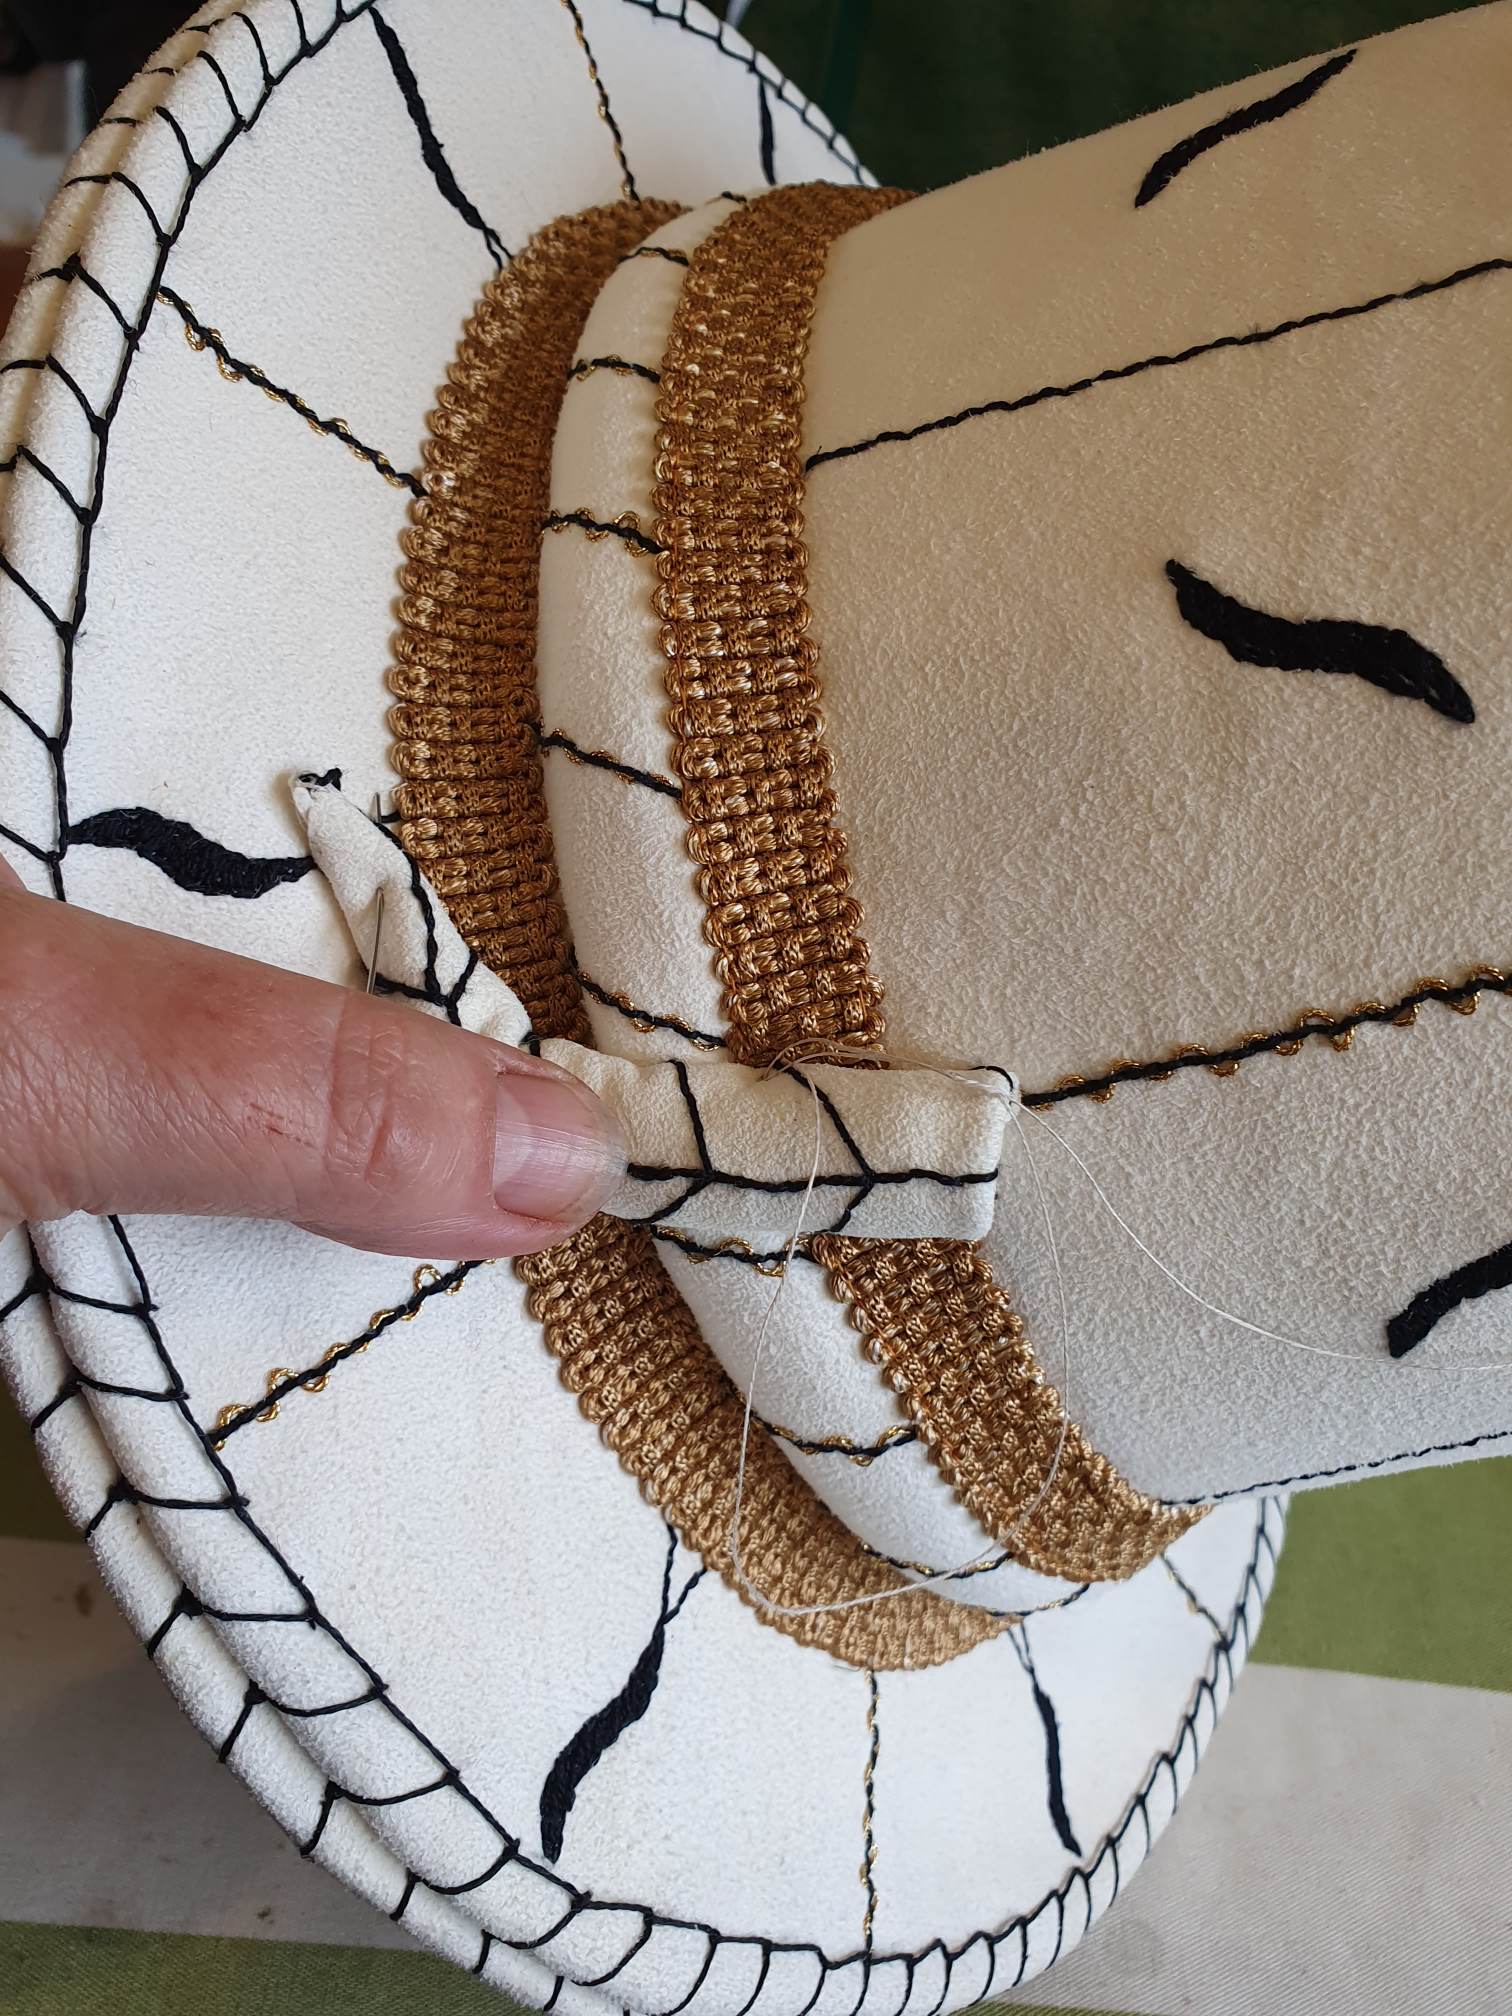
Once the crown cover was sitting smoothly over the base, I basted around the base of the crown to secure ii. The hatband is curved, so I shaped it using the crown pattern as a guide, then sewed gold braid top and base. I sewed the base of the band on (thought the crown not the brim), stuffed a roll of wool behind, then sewed the top. There is a bigger gap at the front than ideal, but the cartouche will be large.

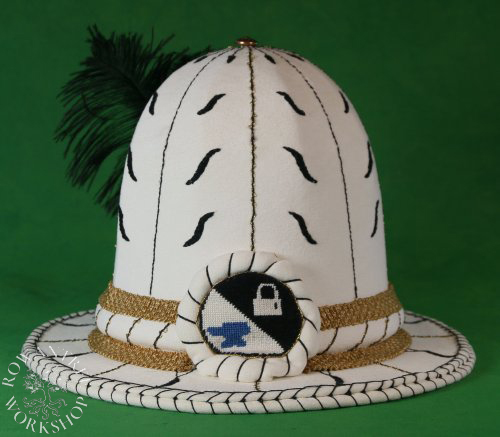
For the front cartouche, I charted Grim’s device, then worked this in tent stitch, using Madiera silk on linen canvas. I sewed it onto the brim cut-out over a layer of wool padding, then laid gold twist in the seam. I gathered the edge of the leather and drew it in, stuffed the edge with wool and whipped over with silk, before sewing it over the gap in the headband.

Next, the feather holder. The German example has been damaged, revealing this was made with leather padded with hair over a parchment core. I rolled and glued a scrap of parchment to make a holder large enough for a feather, then did a quick fabric mockup to get the cover shape.
I embroidered this pinned to my ironing board for tension (too small for a frame), then wrapped it around some wool padding and sewed up the back seam. I inserted the parchment core, then sewed it to the back of the hat, careful not to sew through the brim.

I glued a black ostrich feather into a decorative aglet and inserted into the holder – perfect! This approach means the feather can be easily replaced or removed for transport.
And finally, the lining. I used the Crown pattern to cut this out of gold silk taffeta, to match the braid. I sewed the two halves up, adjusted the fit, and completed the seam. Then I inserted it into the hat and slip-stitched in place. This was really hard – I’m not surprised the originals were glued in! I considered this approach, but did not want to stain the silk, so…


I was really pleased with the end result. It had been hard on the hands and took many hours to complete all the steps, but it was worth it. Another favourite hat!
Afterthoughts
About a week after I completed the hat, I found some additional information about some of the extant examples. My guess about the chamois-tanned leather was correct, although made from deer (probably) rather than sheep.
However the base was more complex – leather glued up with linen/bast fabric, with paper reinforcing at the top (and in one case, strengthening ribs of whalebone!) – and the leather cover may have been glued to this framework. All this would have made the hat much more robust in use.
So, if I ever make another one…