Painted beakers in the style of 16th century enamelled glassware.
I had admired these enamelled glasses in museums for years, taking endless pictures. I thought it would be fun to paint some in this style, but finding suitable glassware was difficult.
On a trip to the UK in 2008 I found some well-shaped glasses for sale in a department store – good shape, slightly green and with some period details, such as the decorative trailing. I bought the five they had in stock and took them back on the plane as fragile hand luggage.
Perfect – I had several friends with significant birthdays coming up…
Research & Design
I have seen some wonderful Roman glassware with coloured enamels, but after the fall of the Roman Empire, there was a hiatus until the craft re-emerged in the 10th century (Wikipedia). Museums all over the world exhibit glasses (or fragments) from the middle ages and renaissance, such as these examples.
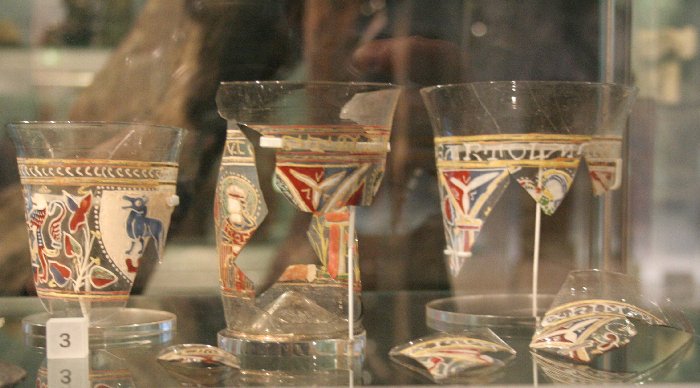

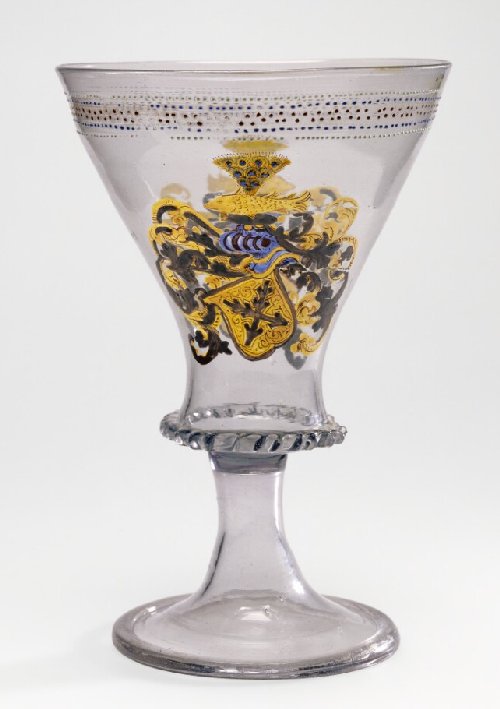
The earlier designs tend to wrap around the whole glass, and often include foliage as well as arms and other design elements, as in the Museum of London examples. By the 16thc century, there are still examples of wrap-around design, now often pictorial, rather than foliate or geometric.
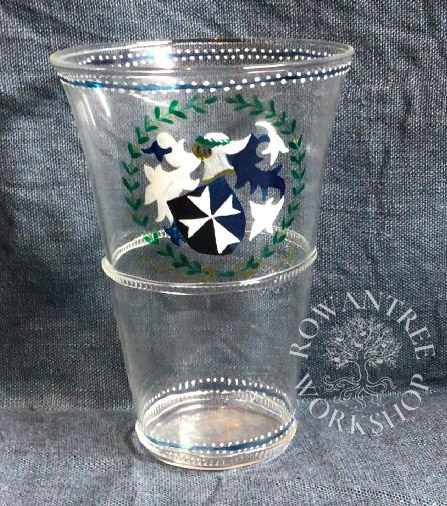
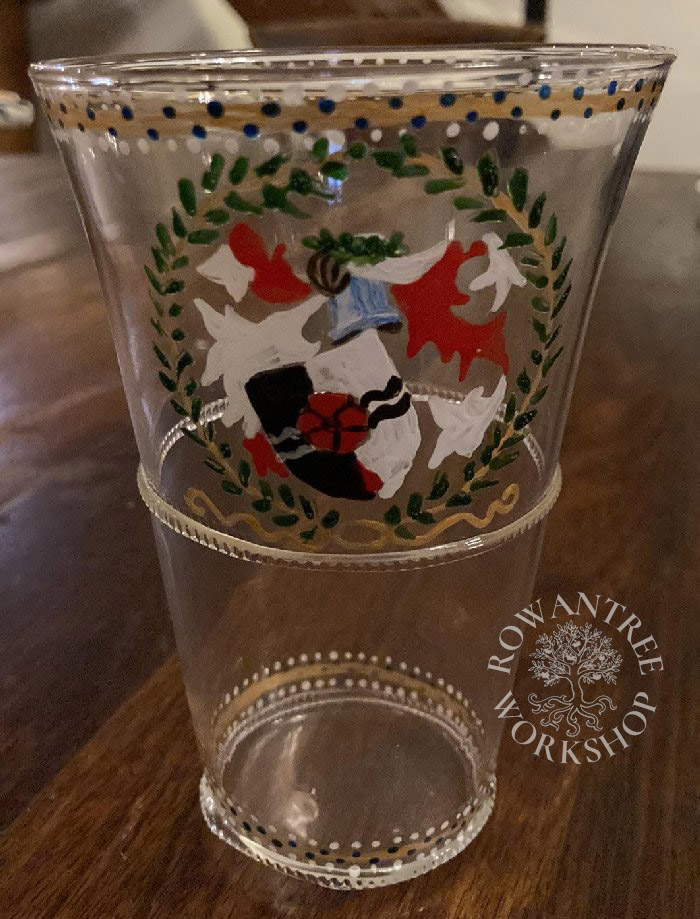
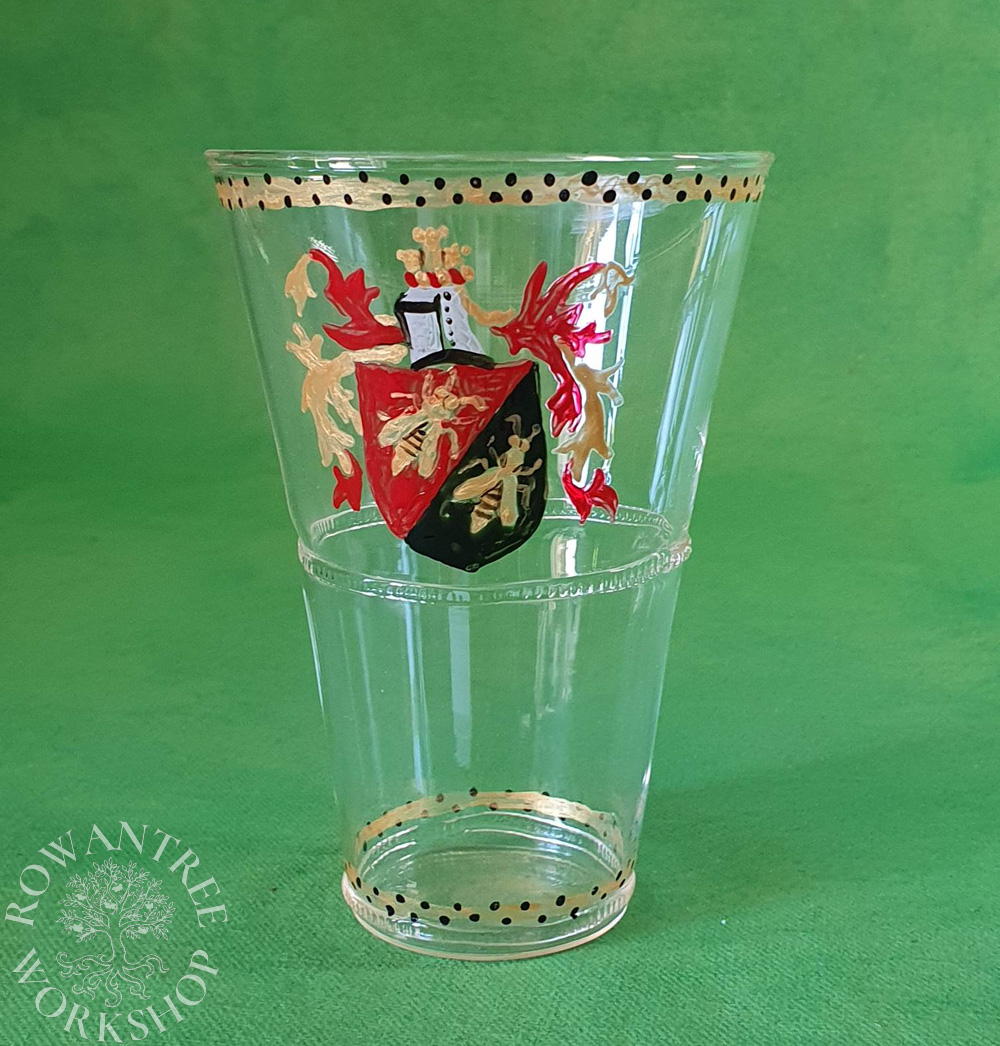
The most common style for 16th century beakers seems to be the full achievement of arms (with helm, crest and mantling). Borders with dots at the rim (and sometimes the foot) were common – as in the examples above. In all, a style well suited to the beaker-style glasses I had found.
Construction
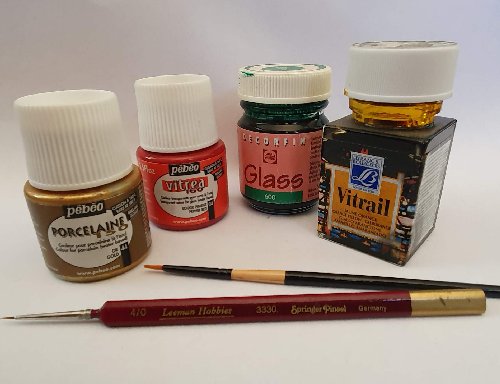
The original glassware was decorated with glass powder in a gum medium, which was then fired to bind it to the glass. In my case, I needed something that could be used with a domestic oven – vitreous glass paints. I tried several varieties, which all worked well.
This was a new technique for me, so I did some testing on a glass plate, and quickly learned you can’t paint adjacent spaces at the same time – the colours run into each other. I also experimented with different brush styles and sizes.
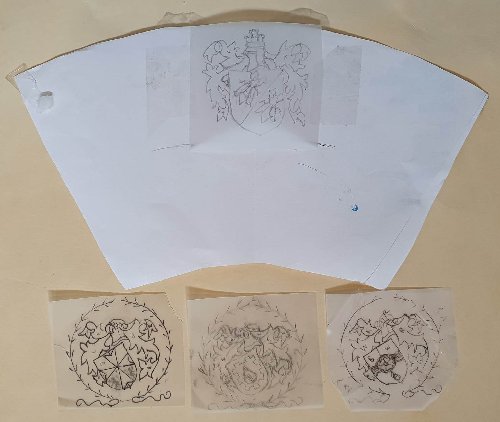
For the design, I started by making a paper sleeve to fit tightly inside the glass – this defined the design area. Since I planned to make several versions, I drew the actual design onto tracing paper. With this taped inside the glass, I had a clear image to paint over.

I started with the borders, to frame the space. Once dry, I painted the colour fill areas in stages and let them dry, then filled in the remaining areas. Then I painted details over the top – as with the extant examples.
Once dry, I fired the glass on a tray in the oven at 150C, in line with the product instructions. Once cool, the glass is safe to use and can be washed (by hand, rather than dishwasher).
Filippa loved the first glass, and so did other friends over the next few years. I only wish I had been able to buy more glasses at the time – I keep looking…