

About Aglets
The aglet is the hard point on the end of a lace which makes it easier to thread through holes to lace up your clothing, armour or shoes. Making your own is easier than you think!
Aglets are known from archaeological finds as early as the 5th century, both in England and Western Europe (Timby, 1996). In the middle ages they were called aglets (aiglets, anlettes, aiguillettes) or points (poynts, poyntes) – the term was then also used for the laces they were attached to (Egan & Pritchard, 1991). Modern publications use the terms lace chapes or lace tags.
Source: Museum of London
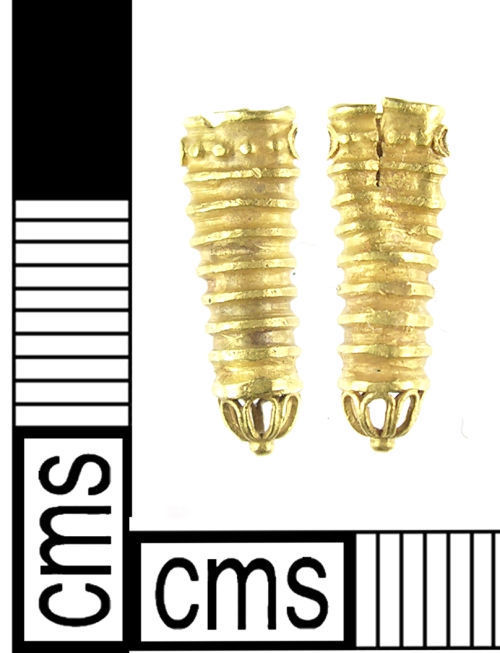
Source: Portable Antiquities scheme
In Aiglets: Medieval, Post Medieval, and Modern, Livings (2017) details a number various types, but for practical purposes, the most relevant are:
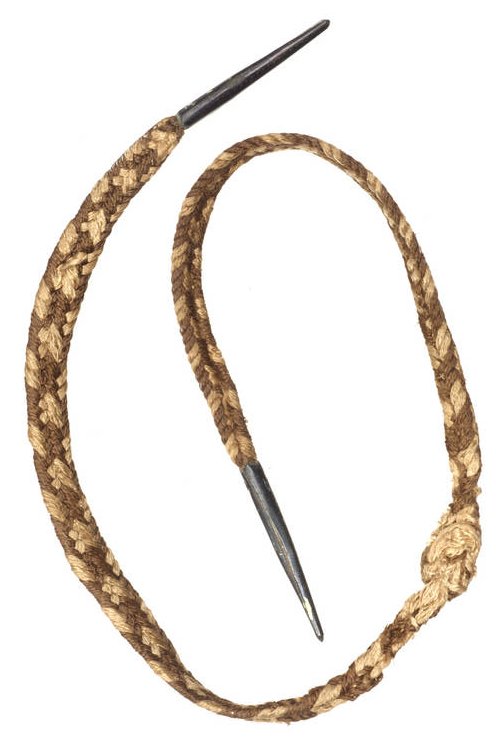
- Type 1 – (most common) butt joined, sometimes with an iron pin through the blunt end. Formed directly on the lace, used for both round and flat laces.
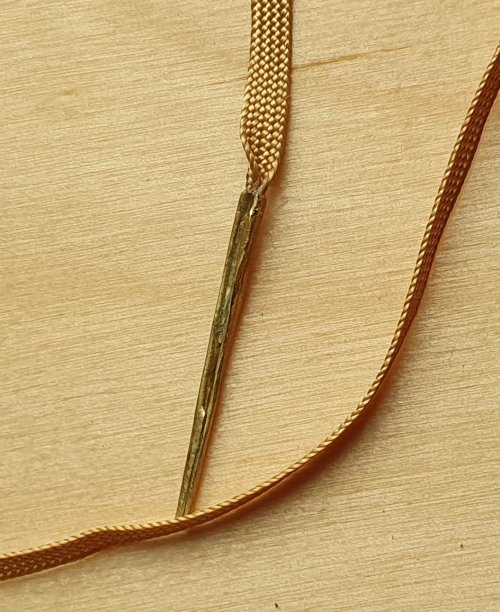
- Type 2 – joint edges rolled under from both sides, not pinned. Formed directly on a flat lace.
- Type 3 – decorative, not used with an eyelet, may be sewn onto ribbon etc. Increasingly common from the 16th century.
Purchased, pre-made aglets are either decorative, or need to be sewn on to your lace. The historical method of forming directly on the lace is more secure, cheaper – and (with some practice) easy. I first learned this technique from my friend David Robb and his site includes more information on aglets.
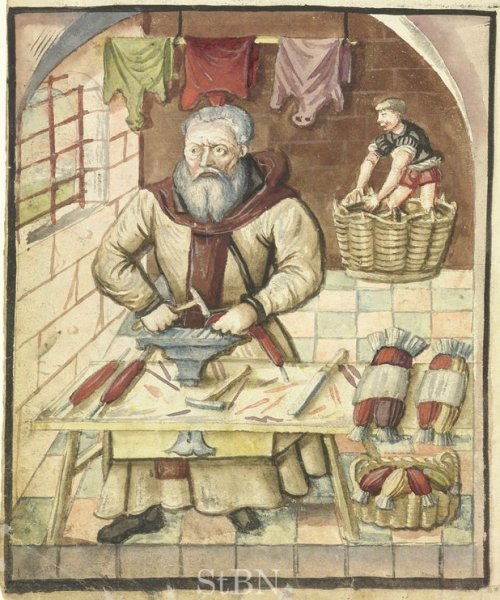
There are several contemporary images of Lacemakers at work – you can see their tools and leather hides being softened before use.
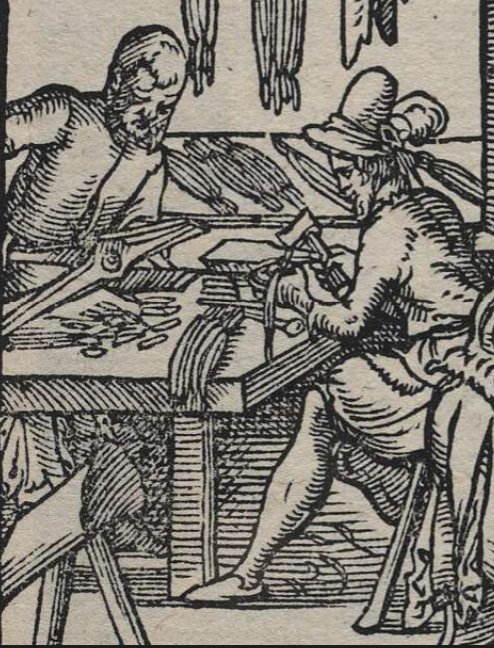
Source: British Museum
Source: Germanisches Nationalmuseum
Materials
Materials are simple – your laces, and metal sheet to form the aglets.
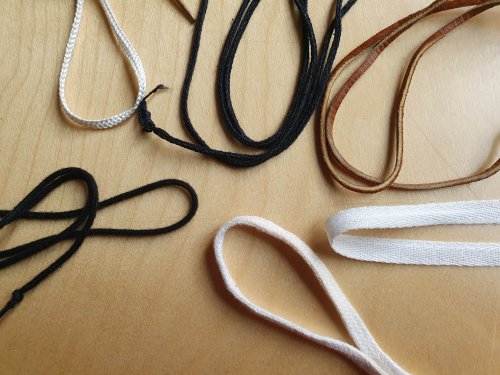
Historically, laces were made from many materials, which are still appropriate:
- Leather thongs in various weights
- Cord in silk or linen – fingerloop braid, plaited, tubular tablet woven
- Flat tape in silk or linen – fingerloop braid, plaited, woven ribbon.
If you can’t make or buy suitable laces, commercial cotton shoe laces are a good option – hard wearing, cheap, available in many sizes.
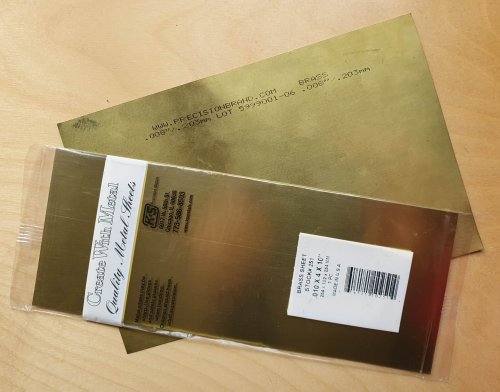
Type 1 and 2 aglets were made of copper alloys of various types. The practical modern choice is thin brass sheet available from hobby stores or online.
- For Type 1 – approx. 0.2 – 0.25mm thick (0.008 – 0.01”)
- For Type 2 – slightly thinner: 0.2mm (0.008″).
Tools
The most important tool is the swageblock or die to form the aglets, with grooves in various sizes – as you can see in the woodcut and Hausbücher images above. I made mine from a small cheap anvil, using a hacksaw to make an initial cut, then a rat-tail file to shape the grooves.
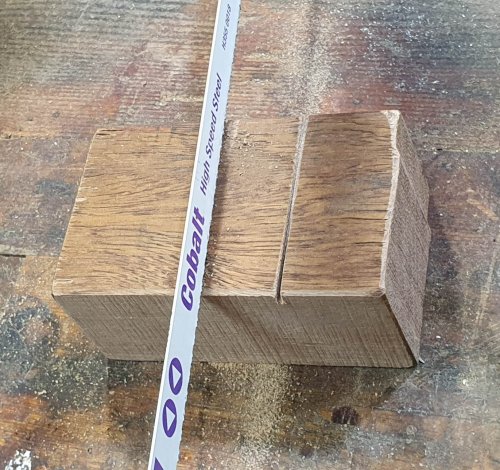
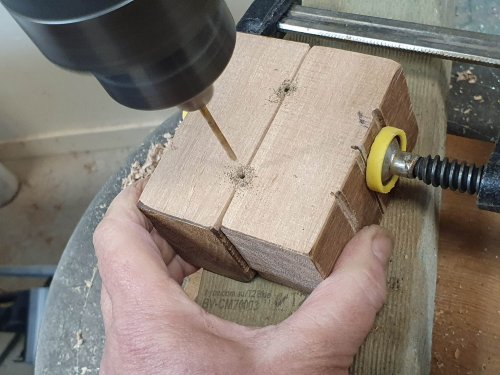
You can also make them from a block of dense wood such as oak, using the same approach – cut and file. If you are making more than one, you can clamp a pair of blocks together, then drill with a 2 or 2.5mm bit and smooth with a file and sandpaper.

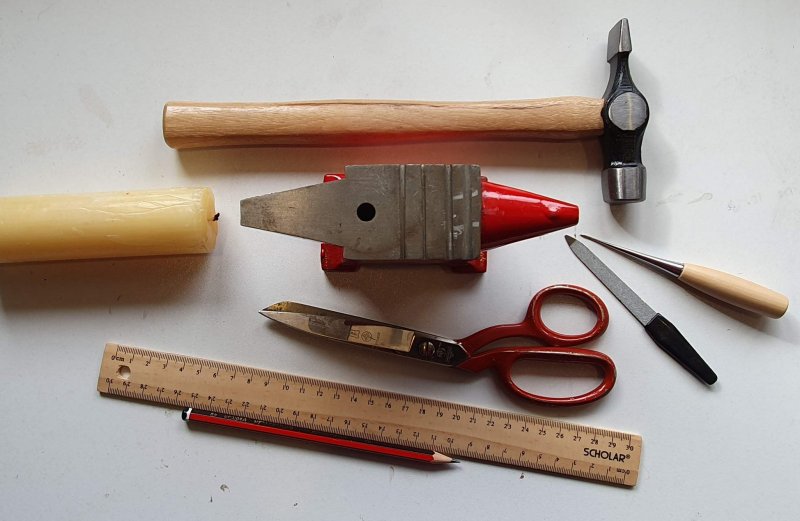
You will also need:
- Ruler and pencil – to measure and mark the brass
- Heavy duty scissors or metal snips – to cut the brass
- Small cross-peen hammer
- Awl – useful for opening and shaping
- Fine file or emery board, for smoothing points
- Beeswax candle (optional) to help shape and secure the end of the lace.
Type 1
I find Type 1 aglets perfect for my needs (and have not got Type 2 working reliably!). Allow some time for your first attempt – you will get quicker with practice.
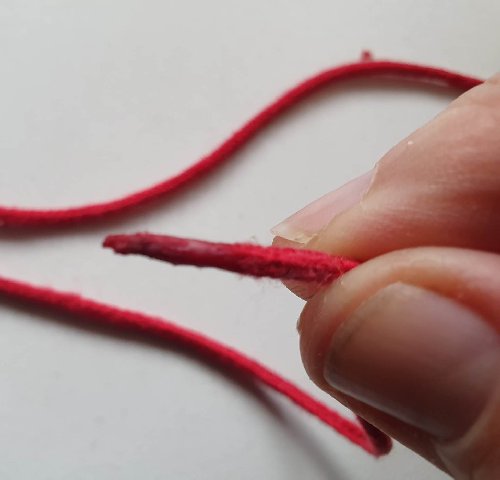
- Prepare your lace, cutting the end with a long angle to taper it.
- Optionally dip the end of lace into beeswax to reduce fraying and improve grip in the aglet – smooth off with your fingers
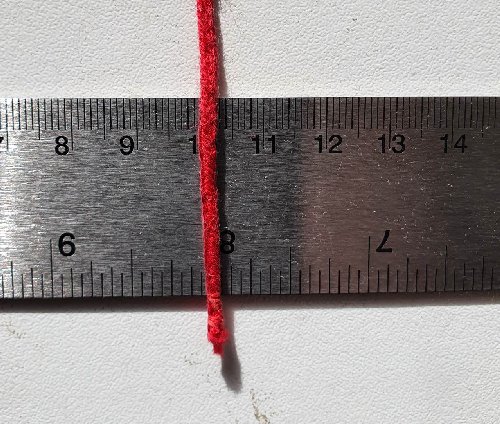
- Measure the diameter of the lace. Allow 2.5 – 3 times this measure for the base of your aglet, depending on how much compression your lace has (eg larger for leather thong, less for soft cord).
- Mark a line across your brass sheet the height of your aglet – 25-30mm is a useful length.
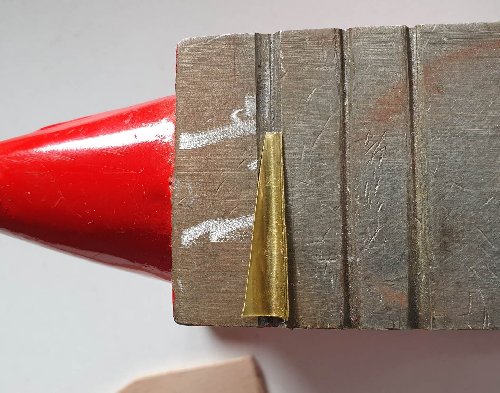
- Mark a trapezoid on brass, making the top about one third of the base width, and cut it out

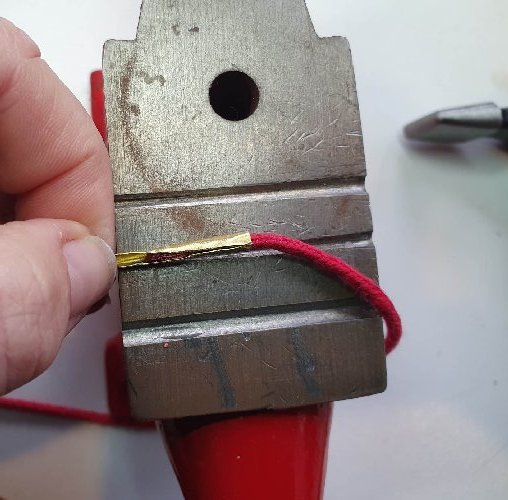
- Place the brass on the grooved anvil and press the initial groove along the centre with the hammer or a shaped wedge
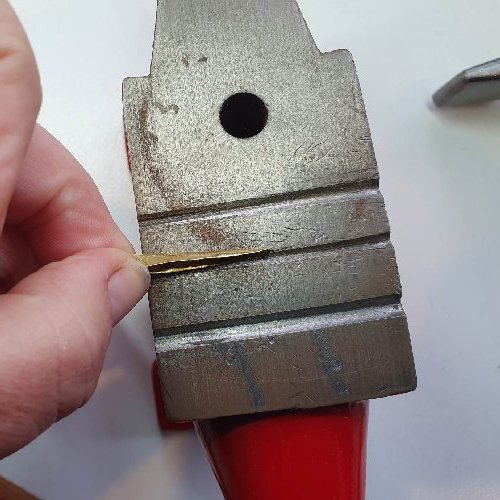
- Rotate the brass in the groove and use the hammer to peen over the sides a bit, starting to form the tube
- If you close it too much, you can use an awl to gently open the aglet again
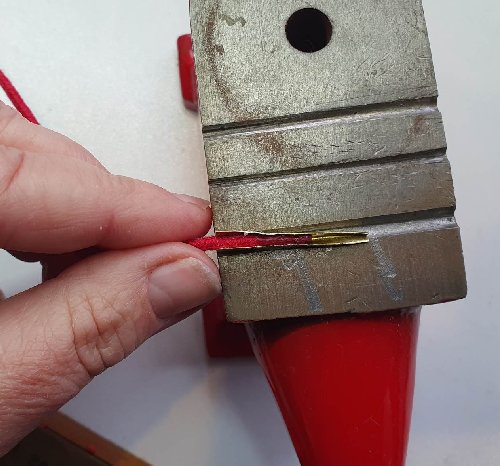
- Insert the lace to about 2/3rds of length (not all the way to the point, so it can taper)
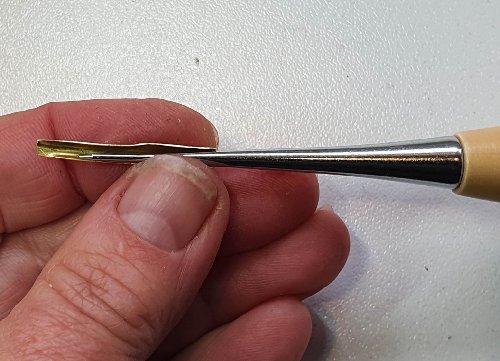
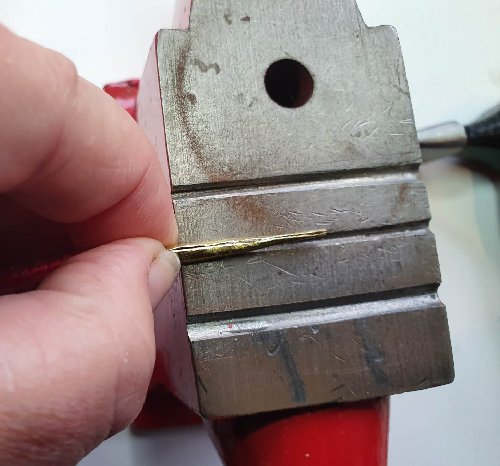
- Curve the edges to meet in teardrop shape, rotating in the groove as needed
- Tap the butted edges down to form a tapered cylinder
To finish off:
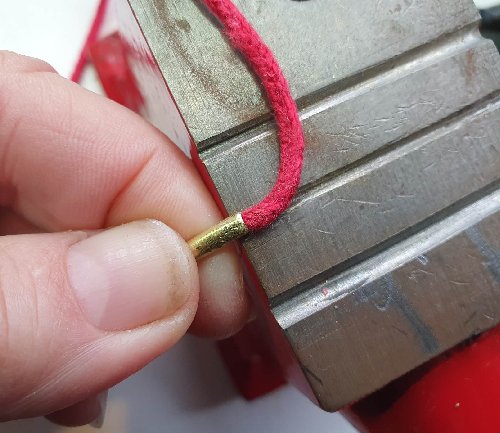
- Hold the aglet on edge of anvil, to support the edge of the base, where the lace emerges
- Tap all around the base to grip the lace – this helps hold it on, and reduces drag when you unlace
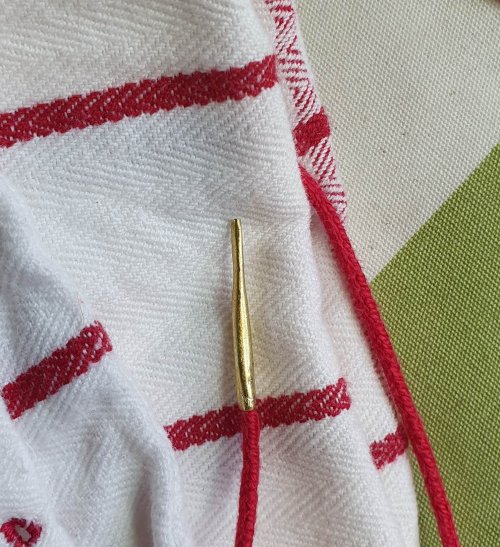
- Feel the point – if rough, smooth off with a file or emery board.
For extra strength, you can pierce a fine hole through near the base, insert a 1mm soft iron wire and peen to form rivet. I find my aglets stay on without this extra step.
It is obviously more efficient to mass produce aglets. Once you know the properties of your lace (thickness, squishiness), you can cut alternating trapezoids of brass in advance, prepare your laces, and then form all the aglets as a production run.