

An easy, inexpensive way to make a custom hat block for moulding felt hats.
I make a lot of hats using flat-patterning techniques, but nothing beats wool felt to get a smooth curved shape. Felt has no grain, so once softened with heat and moisture, it can be stretched in any direction – and will hold its shape once dry. This process is called blocking.


You can also block other materials which have some ‘give’, such as straw, buckram, leather or leno.
About Hat Blocks
In order to block a hat, you need to have a mould or form – the ‘block’. Professional milliners use wooden blocks, which are sometimes available second hand, but are very expensive – and may not be the size or shape you need.
If you have a woodworking shop, you may be able to make your own blocks – I have made blocks with a bandsaw and lathe, but most people don’t have access to these tools and skills. And it is only worth the effort if you plan to make a lot of hats that size and shape.
Snce I make a lot of one-off hats, I wanted a process that was fast, cheap and easy!
I searched online and found a stack of approaches – everything from expanding foam to sawdust and glue. I discovered XPS foam, but was unhappy about the cost of crafting blocks. Then I found I could buy sheets of it in my hardware store for insulation….
Pros and Cons
Using XPS foam is easy and cheap, but is has some limitations.
Advantages
- Cheap – less than $10 per block
- Easy – you can make them using minimal tools
- Quick – the whole process only takes a couple of hours
- Solid enough to really work the felt, even re-steam on the block
- Light – you can store them high up
- Ideal for making blocks for a one-off hat or limited run.
Disadvantages
- Using sheet foam is more fiddly than large blocks
- The finished hat blocks are not very robust – easy to damage
- You need to be careful pinning into them – they won’t take much strain.
Supplies
To make a hat block using this method you will need:
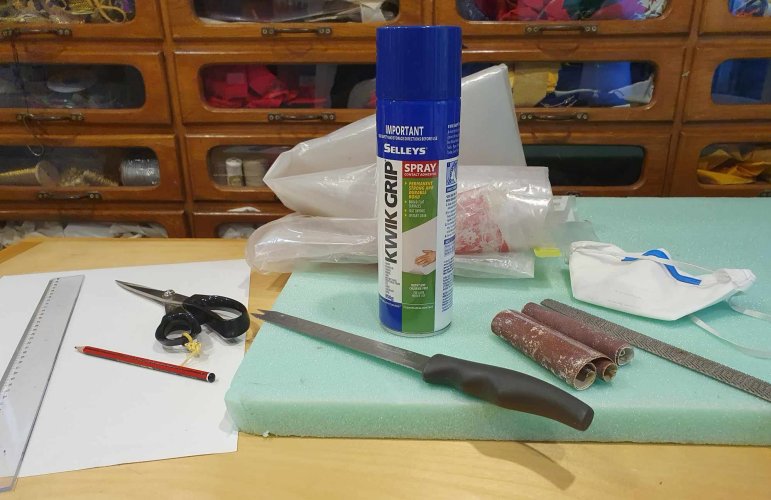
- Stiff paper, pen, ruler and scissors for templates
- Sheet XPS foam – see below
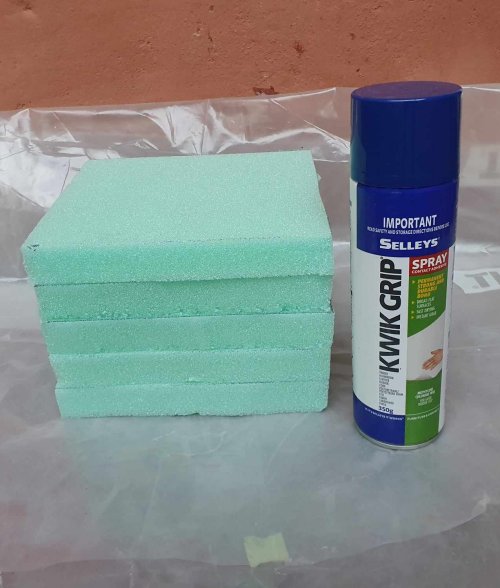
- Spray glue, eg Sellys Kwik Grip – it must be compatible with the XPS foam
- Dropcloth or plastic sheeting – this is a messy process
- Stool or small table to cut on
- Bread knife (and/or bandsaw or jigsaw)
- Sharpie or similar marker
- Wood rasp or coarse file – for detail shaping (a pattern-makers rasp is ideal)
- Sandpaper in course and medium (eg 80, 120 , 240) – for final smoothing
- Dust mask
- Plaster patching compound – for filling holes, if needed
- Water-based varnish – to seal over plaster, if needed.
XPS foam
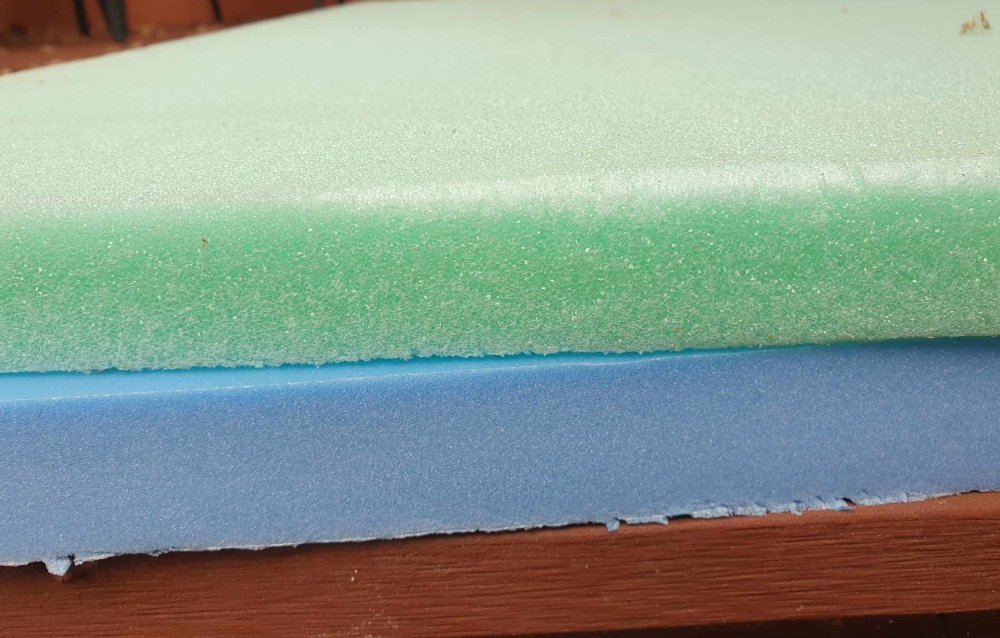
XPS stands for eXpanded PolyStyrene – a stable, waterproof, closed cell foam, commonly used for insulation. The foam board comes in two types – use either or both:
- Light – Has a more open grain, easier to cut, but damages easily
- Dense – Has a fine closed grain, harder to work but more resistant to damage.
I buy the foam in sheets 1200 x 600 x 30mm, which cost about $20 – one sheet will make 3-4 hat blocks. You can sometimes buy 50mm sheets for about $30, which build up faster.
Block design
The first stage is to design the hat, and confirm the dimensions.
I start by padding up my headform to the right size, and then doing some quick paper mockups to check dimensions – height of the crown, shape, brim width etc.
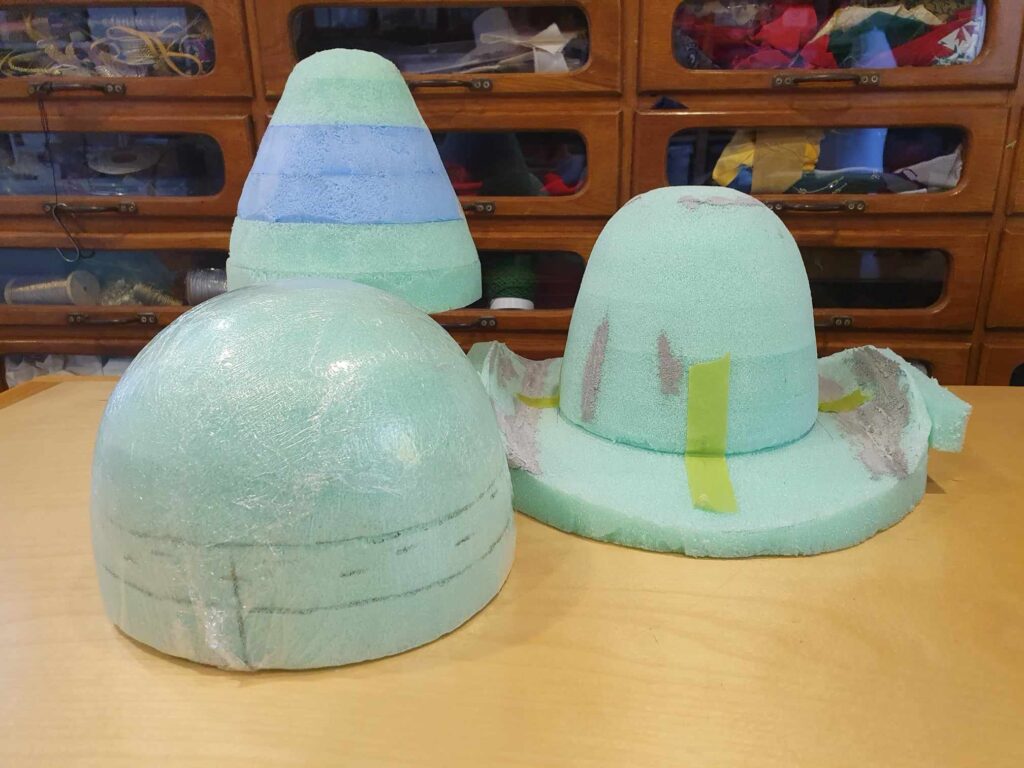
Simple crown block
Most hats will use an oval block to match the headshape, with a different profile for the front and side of the hat. The easiest approach is to make a rectangular block and then carve it to shape using templates.
It can be tricky to measure the width and length of your head, so here is a quick table, based on headsize:
| Size (inches) | Size (cm) | Width | Length |
| 21 | 53.5 | 15 | 18 |
| 21 1/2 | 54.5 | 15.5 | 18.5 |
| 22 | 56 | 16 | 19 |
| 22 1/2 | 57 | 16.5 | 19.5 |
| 23 | 58.5 | 17 | 20 |
| 23 1/2 | 60 | 17.5 | 20.5 |
| 24 | 61 | 18 | 21 |
| 24 1/2 | 62 | 18.5 | 21.5 |
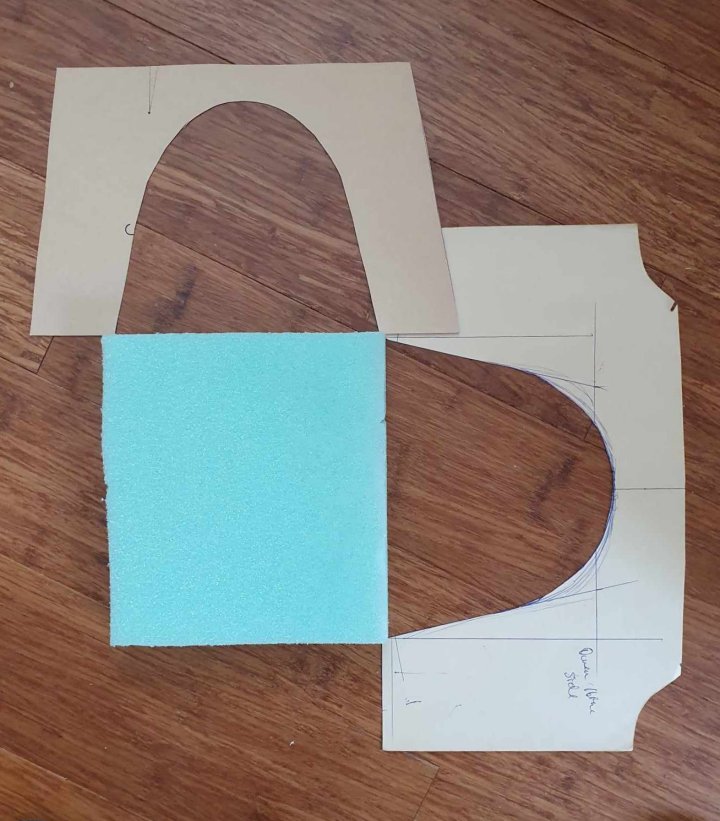
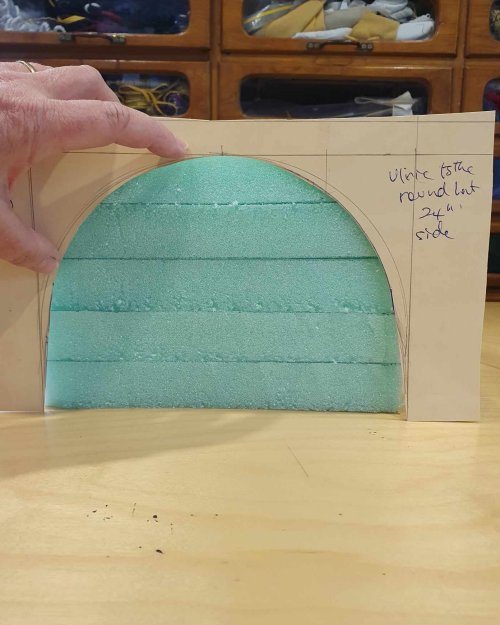
Once you know the basic size, you can draw the templates for the front and side views (elevations) of the block.
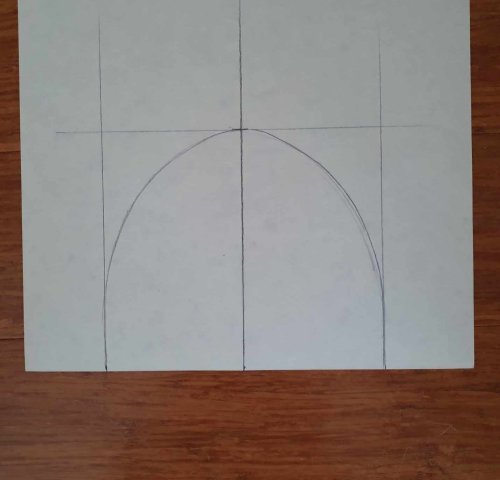
- For the front, draw a baseline onto stiff paper, mark the centre point and draw a vertical line
- Mark the head width along the base – half each side – and rule vertical lines at each side
- Mark the height of the crown above the browline and draw a horizontal line
- Draw the outline of the front view of the hat and refine it until you are happy
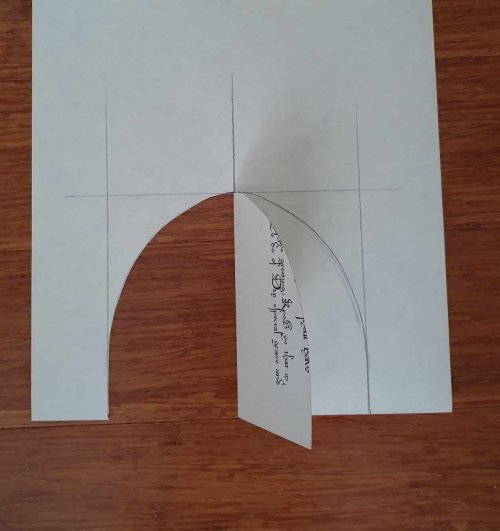
- To get a perfectly symmetrical shape, pick the best side, cut out, fold along the centreline and cut around the other side
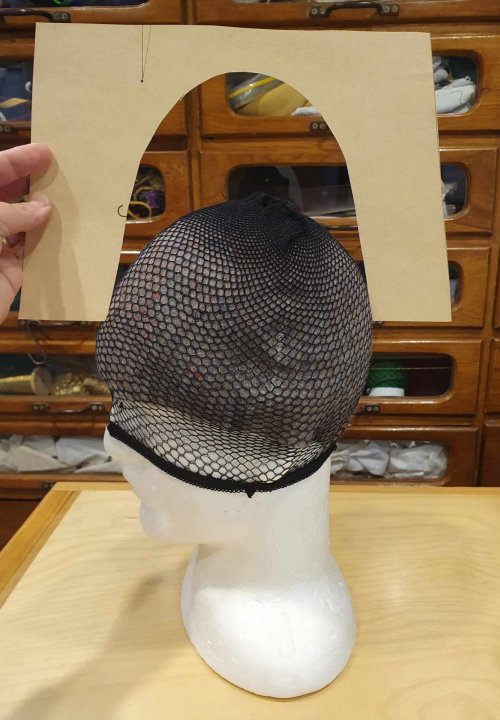
- Check the template on the headform – if needed, repeat until you are happy with the shape
- Repeat this with the side elevation, using the head length (make sure the height matches)
- Calculate how many layers you will need to build the right height block.
Brim block
You can build the brim shape into your front and side elevations, carving it all as one. But in general, it is easier to make a separate block for the brim, once you have made the crown block.
Building the block
Once you have your templates, the next step is to cut the layers from the foam board.
Simple rectangular block
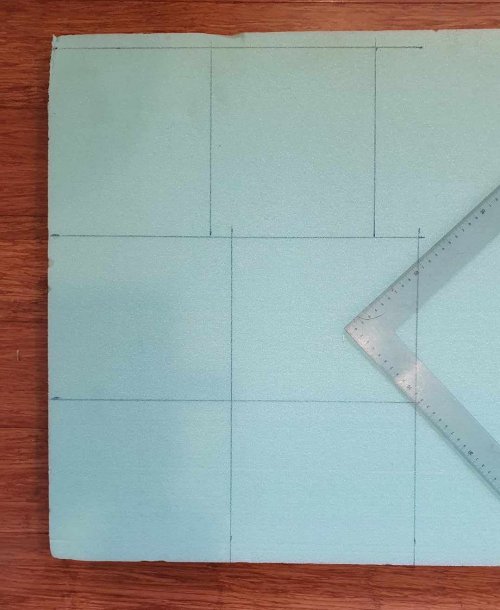
The simplest approach is to build up a rectangular block with all the layers the same size. This makes it easy to transfer the front and side elevations to the foam for cutting – but it does use more foam. It is important to make the block a little larger all around to allow room for error!
- Draw the rectangles onto the foam, for as many layers as you need to get the required block height.
- Put down a groundsheet to catch all the foam bits
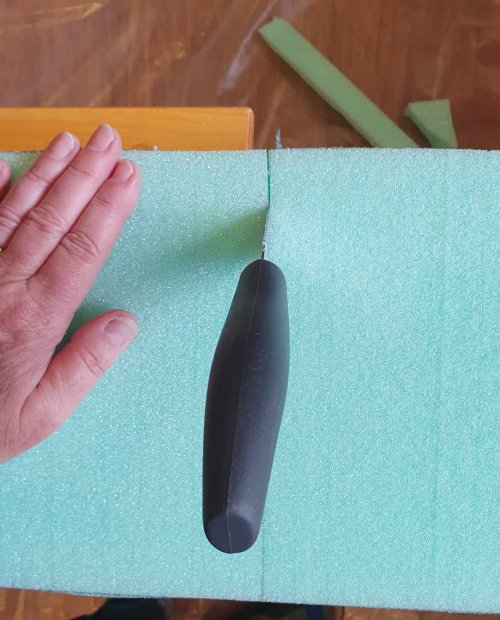
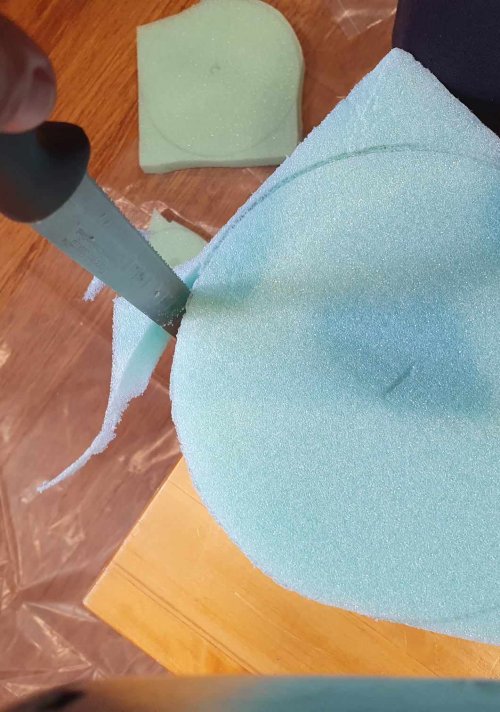
- Using a stool or small table for support, cut the foam shapes out with the breadknife, keeping it vertical.
Take care to support the foam as you cut – it breaks very easily (you can glue bits back on if needed).
A less wasteful approach
You can save foam and reduce the amount you need to cut off by shaping each layer – like a contour map.
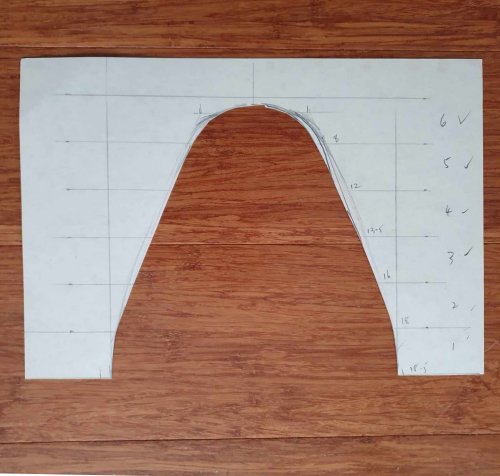
- When you have completed your elevation templates, mark them off in layers to match your foam sheet depth and number them
- Measure each layer at the widest points – and add a bit for safety
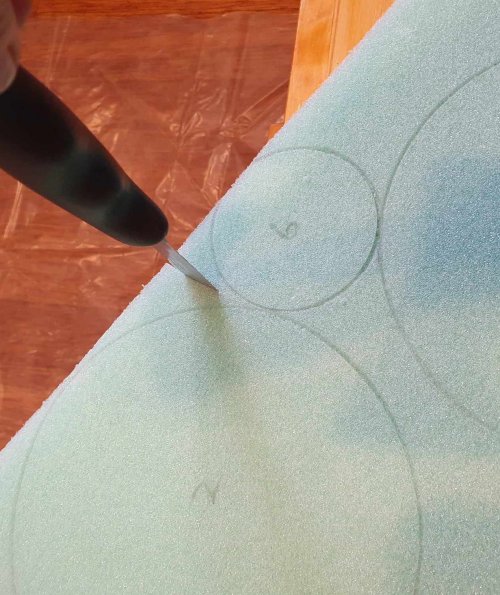
- Mark out the shapes on the foam and number them
- Cut out roughly – it is hard to make curved cuts in the foam board
- Trim off the shapes.
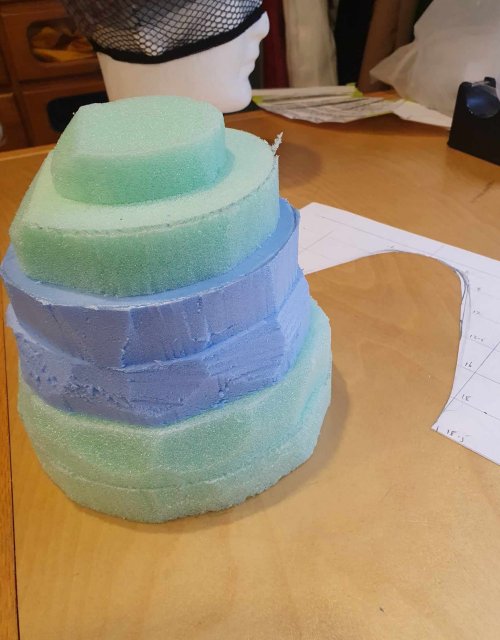
Glueing up
- Once all your pieces are cut, lay them out on plastic/groundsheet outside in pairs – if you have pre-shaped the pieces, be carefult about the order
- Shake the can of spray glue well and then spray on the open surfaces
- Wait until touch-dry (5-10 mins) and then carefully align the shapes and press together firmly
- Continue to lay up the shapes until the block is complete
- Turn the can upside down and spray the excess glue (against scrap paper or similar) until it runs clear – this will ensure the nozzle stays clean for next time.
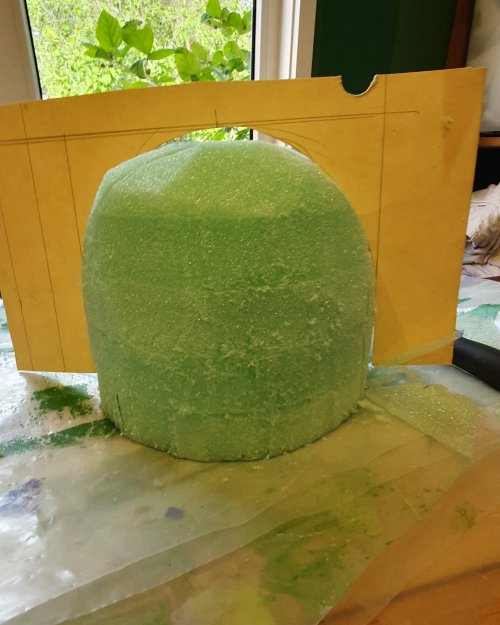
Shaping
Back to the dropcloth for this step – and your small stool or table for support…
- Hold your elevations against the front and side, and draw onto the block using a marker
- Using the breadknife, cut off the excess in one dimension, being careful to stay outside the line
(you could also do this step with a bandsaw or high-throated jigsaw) - Turn the block and repeat, so the shape is roughed out in 3 dimensions
- Refine the shape with the breadknife, checking with your elevation guides at every step
- You should also check the cirumference of the block against the headsize
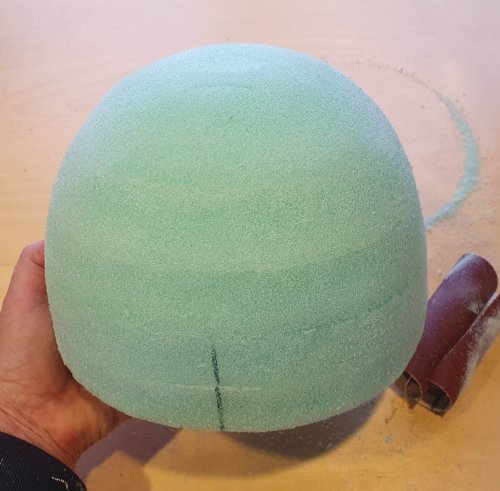
- Once it is the right size and shape, hold the block up and roll it away from you in all dimensions, to check for uneven spots – sand these off
- Sand lightly to smooth the surface (use a dust mask to avoid inhaling plastic particles)
- Brush the block lightly to remove any loose particles
- Brush down the stool – the foam bits tend to cling with static
- Carefully gather up the dropcloth and dispose of the foam bits
- Admire the result!
Your block is now ready for use!
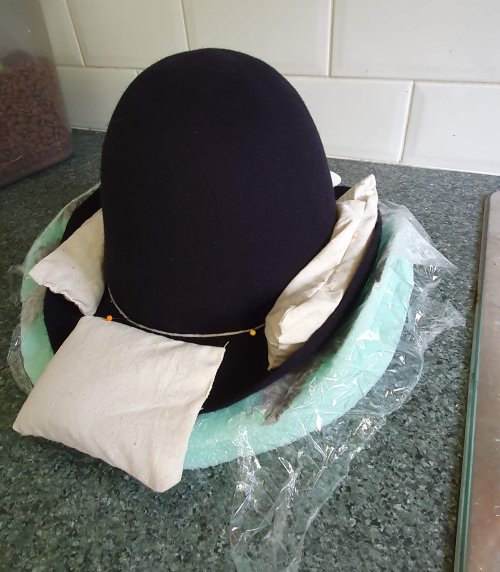
I usually cover my blocks in cling-film to avoid getting any foam dust on the felt, and to reduce friction so the felt comes off easily.
Beyond the basics
Mounting the block
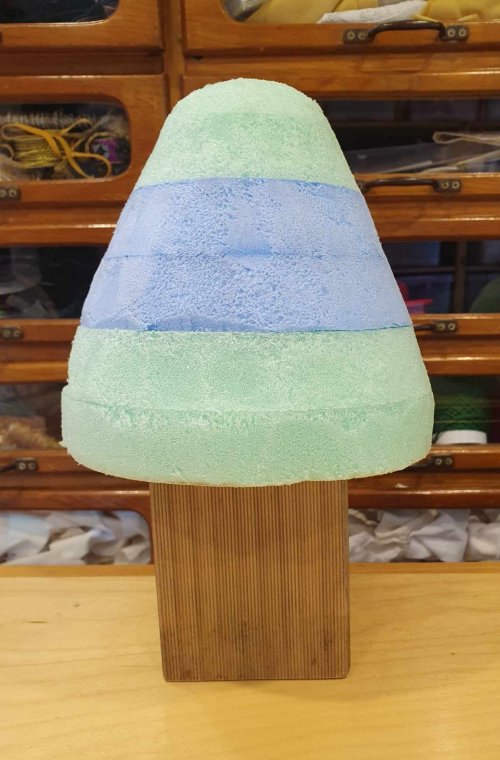
When using the block, you will need to raise it off the bench, so you can pull the felt down below the rim. There are three solutions to this:
- Make the block taller – allow extra height when you build the block, so there is plenty of room below the final crown line. You can even do this as an afterthought, gluing on more layers once the block is finished.
- Sit the block on something – a piece of wood, an upturned bowl, a jar…. A quick solution, but not very stable.
- Mount it on a base, which the block locks onto. Worth doing if you plan to make a lot of blocks.
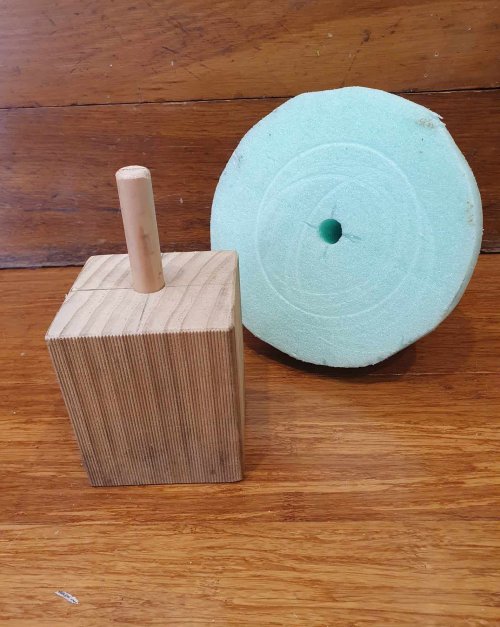
It is easy to make a simple base:
- Cut a block of wood smaller than the base of your blocks – I used a fence post offcut, 9cm square
- Cut a piece of dowel – I used a 10cm length of 15mm dowel
- Drill a matching hole in the block – mine is 5cm into the wood
- Glue in the dowel and smooth off all the edges
- Carefully drill a matching hole in the base of your foam block
- Place the block onto the base.
You can re-use the base for future blocks.
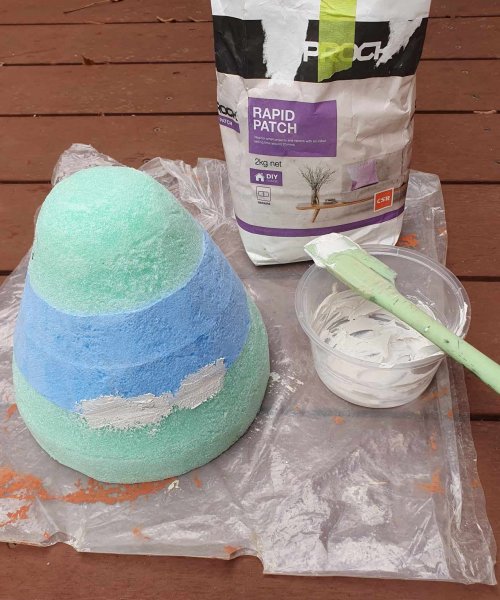
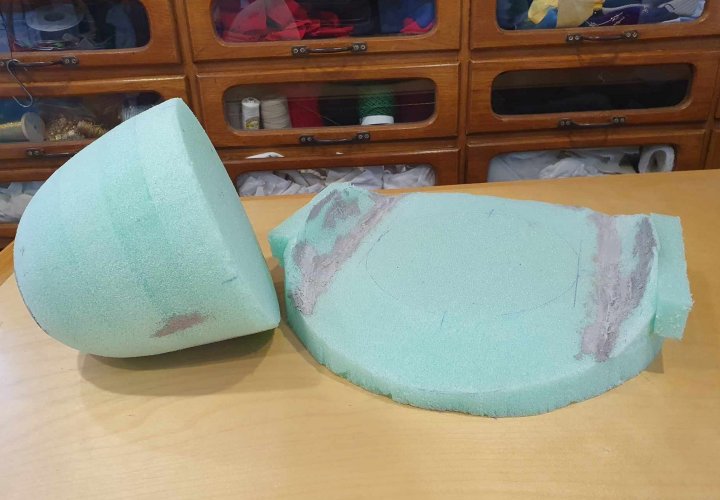
Filling holes
You can ignore most small holes or gaps – the felt is stiff enough to span across them.
If you need to fill holes to get a true line, you can do this using something very soft, like plaster patching mix. If the filler is harder than the foam, you will not be able to smooth it off without damaging the foam around (I found this out the hard way).
Mix the plaster, fill the holes with as little excess as possible and let it dry. This will take much longer than usual, because the foam will not absorb any moisture. Once the filler is fully dry, you can sand it to shape.
The problem with this is that plaster is not waterproof, so blocking a damp felt over the top will soften the filled sections. To deal with this, you can seal over then with a water-based varnish (some solvent-based varnishes will dissolve the foam -test first).


Sealing the block
For a one-off I would not bother with this step, but if you want to use the block more often, you can seal it with several coats of water-based varnish. As noted above, some solvent-based varnishes will dissolve the foam (test first).
To make the block even stronger, you can add a layer of papier-mache over the top. Note that this process will make the block slightly larger in diameter, so if you plan to do this, allow for the extra when you are shaping the block!
- Put a thin layer of plaster fill all ofer the block – scrape back well (papier mache will not stick to the foam)
- Sand back the block to remove any excess plaster – the foam should be just visible
- Dip strips or small pieces of newspaper in diluted water-based varnish (1:1 varnish:water) covering the block smoothly (don’t use PVA – it will rehydrate when blocking)
- Let the first layer dry and apply another layer of paper strips in the opposite direction
- Apply a couple of coats of water-based varnish over the top and dry.
Two part block
If you make hats with integral brims, you can mix and match your crown and brim blocks.
- Make the crown block first
- Make sure the centre of the brim block is completely flat and large enough for the crown block – easiest to do by starting with a flat sheet and then gluing on side blocks and shaping
- Mark both blocks with centre lines front-back and side-side
- Line up the blocks and use low-tack masking tape to join them together.
You can also make a wooden base with 2 dowels to go through the base and into the crown block, so they stay aligned without tape. If you do this, make a template of the dowel spacing, to ensure the blocks match.
Time to make another hat….