

Accurate cutting starts with well-pressed fabric.
However, pressing large amounts of fabric – especially wide fabric – can be a frustrating exercise on a regular ironing board. The angled ends mean you have the choice of pressing in small width increments, or making two passes along your fabric. Neither solution is ideal!
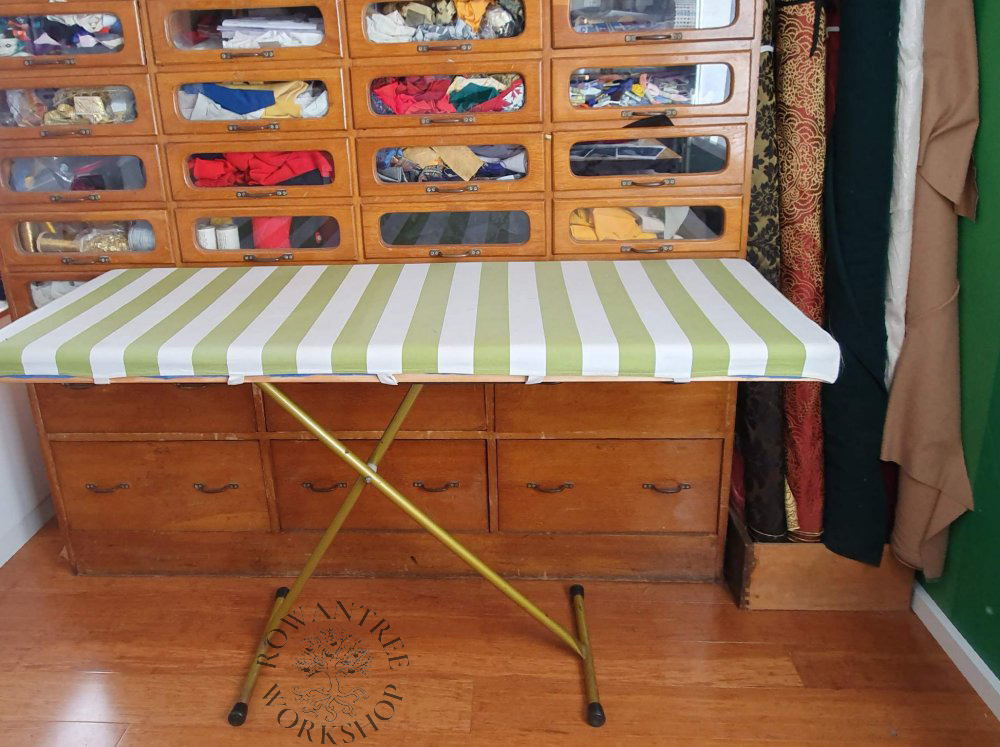
When I fitted out my sewing room in mid 2017, I wanted a yardage board that I could fold up when not in use, just like a regular ironing board. My ideal board would be 150cm long and 40-50cm wide, with firm padding and a cover that would not wrinkle or move under heavy use.
The simplest solution was to adapt an old ironing board by making a larger new top from plywood, with a solid wooden frame around the edge.
If you have access to some basic woodworking tools, this project is a great addition to your sewing room.
- For the board you will need: plywood, framing timber, wood glue and screws
- For the top you will need: felt padding, cotton fabric, twill tape, heavy cord and thumbtacks (or staples)
- You will also need: a saw, drill, plane/router/file, sandpaper, screwdriver and optional staplegun.
Note: I gave my husband the dimensions and asked him to make the wooden top for me, which I then covered. He made it out of materials we had on hand, which made it quite heavy (but solid!). I’ve included instructions for an alternate approach, to make it lighter.
Frame
In this construction, the new top is screwed to the sides of the old ironing board frame. This avoids any risk that screws might poke through into the ironing surface.
- Strip the ironing board of its cover and padding (I saved the padding for future projects)
- Measure the top of the frame (mine was a 124 x 38cm)
- Decide how large you want the board (mine is 150cm x 45cm)
- Cut the plywood to size (mine is 8mm ply, because we had a leftover piece in the workshop, but 5mm would be thick enough and lighter)
- Check the difference in width – in my case, this was 7cm
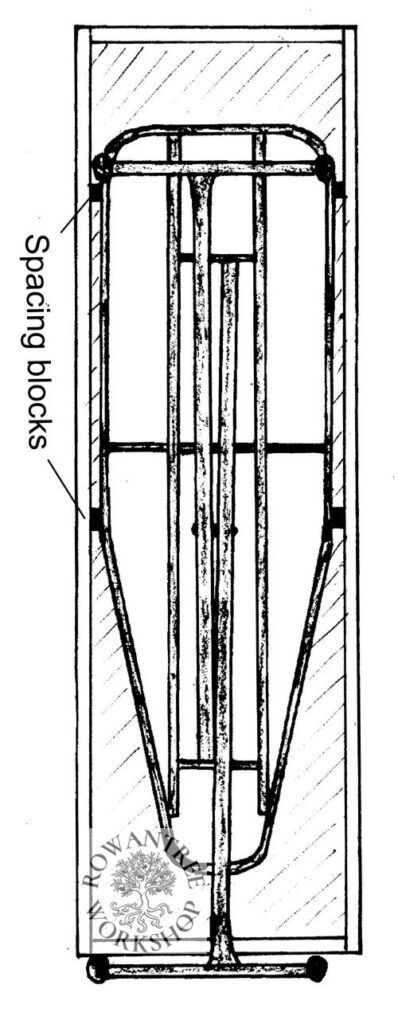
- Cut solid edge strips to frame the top, with simple butt joint at each corner. In my case, the strips were 35mm x 40mm, so the old ironing board frame fit tightly into the space (option 1).
You could use narrower edging with 2 extra packing blocks on each side between the edge and the ironing board frame, to fill the gap and support the screws (option 2).


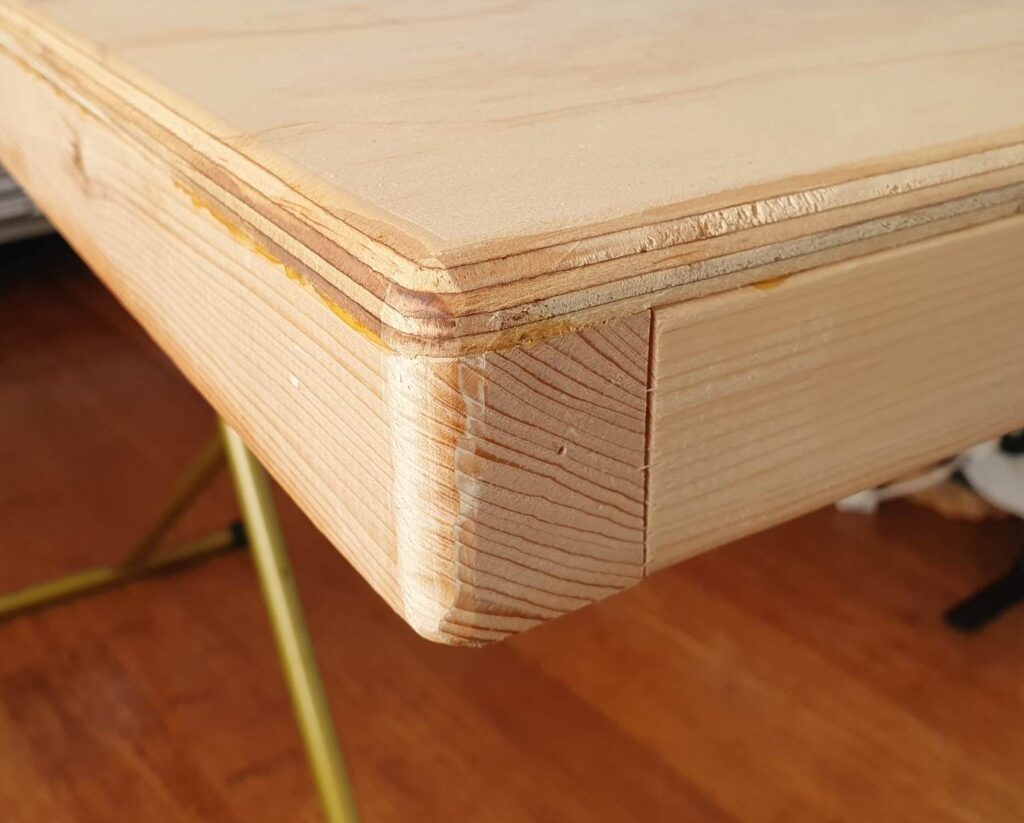
- Glue the edges around the plywood top (and extra blocks if needed), clamp well and let dry
(If you used a narrow frame, you might want to screw it on as well) - Round off the top edge and corners using a plane, router, file or electric sander
- Sand the frame smooth
- Place the folded ironing board into the frame and check position – the feet should stick out from the end, for easy storage
- Mark the screw positions on the ironing board and frame
- Remove the ironing board and a drill the holes in the sides (using a metal drill bit) and pre-drill holes in the wooden edge
- Put the frame back in place and screw it in.


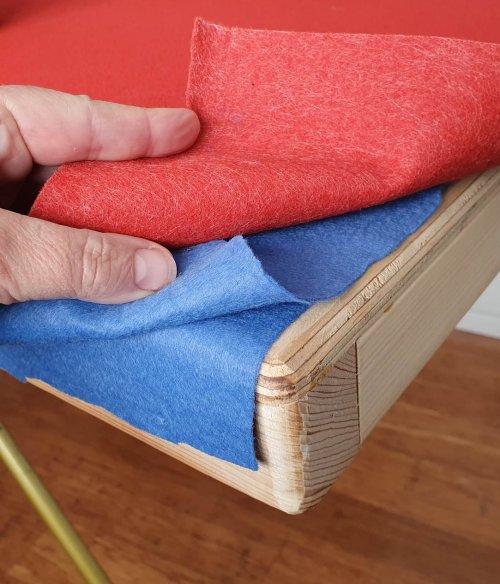
Padding
I used several layers of felt as padding. Since some were not large enough, so I needed to piece them. A regular seam would leave a bump, so I butt-joined them with twill tape underneath for a smooth finish.
- Cut under layers of padding to fit the top (I used sheet felt)
- Cut top layer oversized, to cover the edge and sides, trimming corners
- Secure to the felt to the wooden frame with thumbtacks or staples to stop it shifting
(You could also cover the padding with calico (muslin), stapled to the wooden frame).
Cover
The cover needs to stand up to heat and lots of use – I used a heavy weight cotton fabric. Pre-wash to avoid shrinkage.
- Cut your fabric to size, allowing extra for the depth of the frame and a bit more (mine was 175 x 75cm)
- My fabric was 150cm wide, so I added an extra strip at each end – or you could cut lengthwise
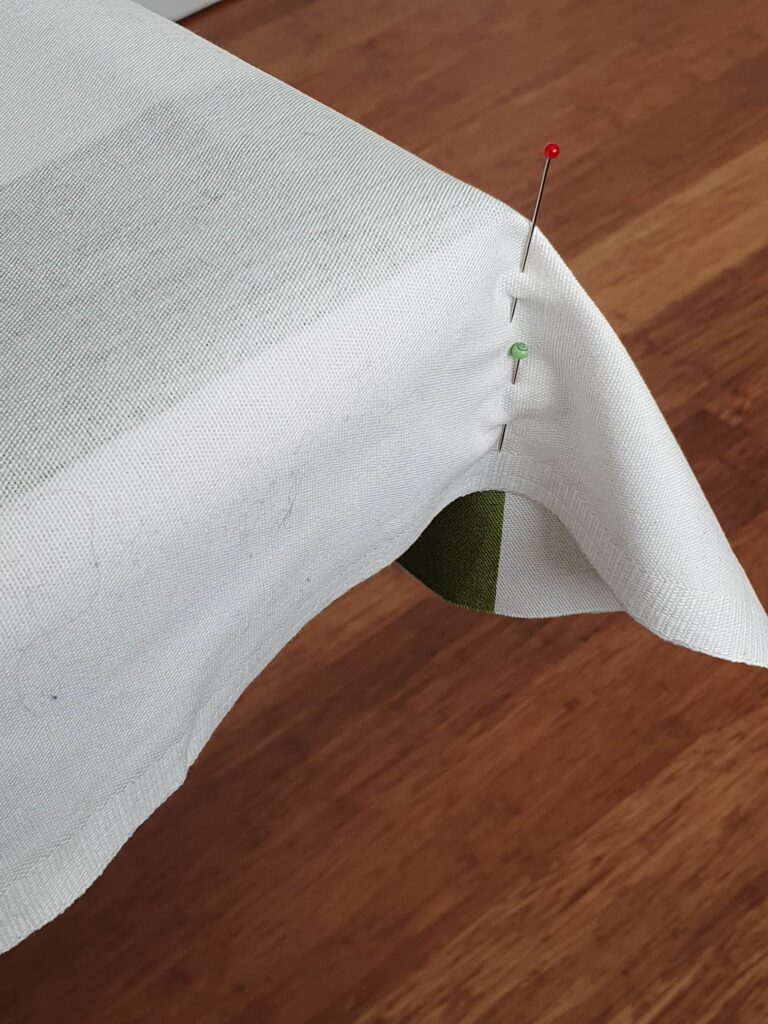
- Drape wrong side out over the top and pin-fit the corners
- Remove and sew the corners, trim excess
- Put the cover back on (still inside out), turn up a hem to match the wooden edge, mark and remove
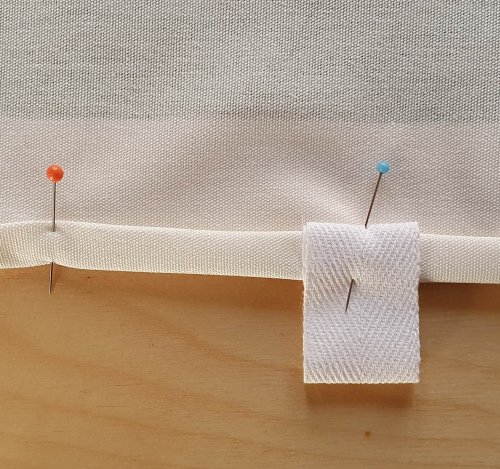
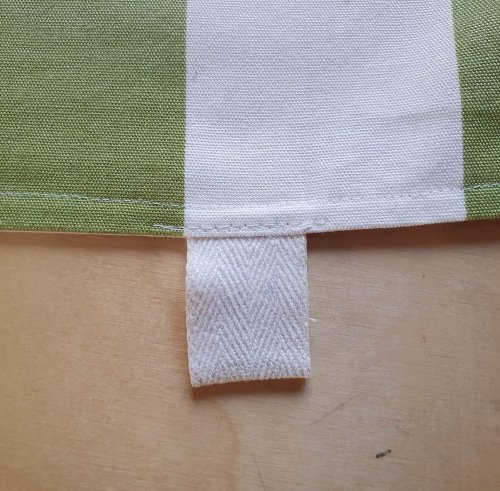
- Turn a double hem and pin
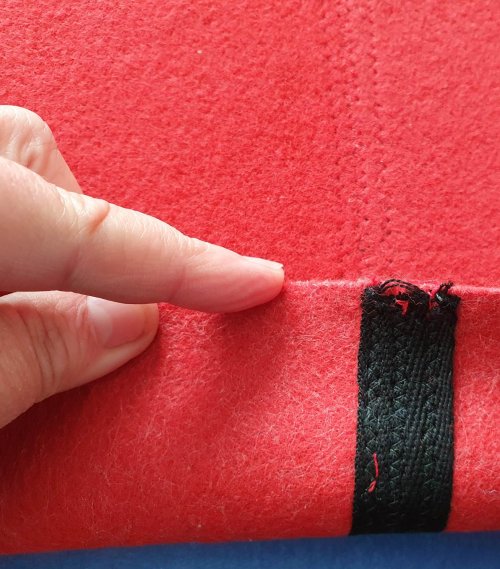
- Cut 12 x 10cm pieces of twill tape (or similar) and pin in place around the edge, tucked into the hem and folded over, as shown below
- Sew the hem all around, then top-stitch along the edge to hold the loops.
- Put the cover on the board, turn over and collapse the frame
- Thread heavy cord between the loops, crossing under the middle in a couple of places, where the frame make this possible

- Tie the cord off tightly and turn the board over
- Ready to use!
With a steam iron (especially a continuous steam iron), this will make short work of endless meters of wrinkled fabric!

