

This medieval tool for laying goldwork has fallen out of use, but is surprisingly effective at holding the metal threads neatly, while they are couched down.

Several years ago, I did a lot of research on the tools of the medieval embroiderer. I came across references to a broche or spindle, and set out to find out more about this unusual tool. Some time later, I gave some classes on medieval embroidery tools, where I was able to show examples of all the other tools – but not the broche.
Since I do goldwork myself, I thought it might also be a useful addition to my kit. So I set about making one…
Research
My initial forays into researching this tool brought descriptons, but not images.
The broche has many spelling variants – broach, broch, broche, brotch, brooch, brodse (Dutch) and Bretsche (German)…
According to the Oxford English Dictionary (1987), the word comes from the Latin, via Old French, with meanings of both ‘spike’ and ‘fork’ (the same root word as the brooch you pin to your coat). The OED notes the use of the term “broche of threde” meaning ‘spindle for threads’ c1440.
Groves (1996) identifies the broche or spindle as a wooden implement about 8″ long formerly used by embroiderers for laying gold. The handle had a triangular base to stop it rolling on the stretched ground. Metal threads are wound over the centre section, then pass through the cleft end, holding the gold without the need for constant handling. Sadly, there was no image.
The Encyclopedia of Needlework described a spindle as “about 9 inches long, made of hard wood, for winding the metal threads upon and directing them as you work, that they might not suffer on contact with the hand” (de Dillmont, ?1930). The illustration depicts the forked top, but with a rectangular base, and the thread wrapped around an open beak.

Bess of Hardwick’s accounts from Harwick Hall for 1548-1550 include a significant quantity of threads for embroidery along with embroidery tools, including broches: “the thynges that the yembrother wyndes hys golde on“, at a cost of 16d. (Levy, 1989).
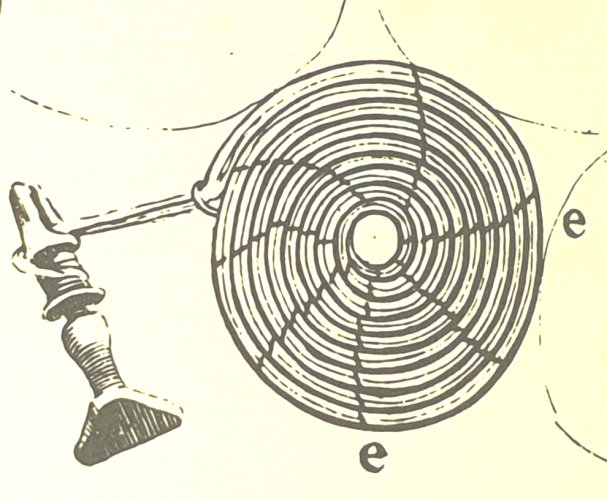
When the Broderers Company received its Charter from Elizabeth I in 1561, the arms included a depiction of the tools of the goldworker: two quills wound with gold and two crossed broches (Fox-Davies, 1915). Finally, a pre-1600 image!
And then in 2008, I visited Hardwick Hall and was thrilled to I spot two examples of the broche in the design of the Tobit Table Carpet, along with other tools of the embroiderer and painter. Levy (2007) identified these broches in her description of the 1579 carpet border, along with other tools including an embroidery frame, scissors and spectacles.
Both these sourcces showed the triangular end referred to by Groves.

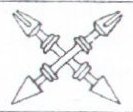
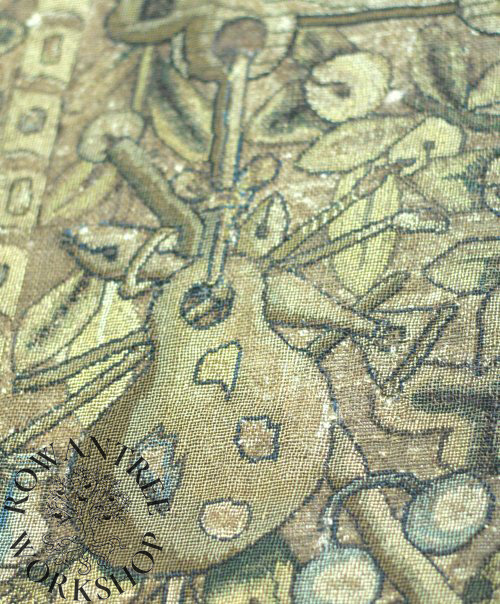
Photo: Robyn Spencer
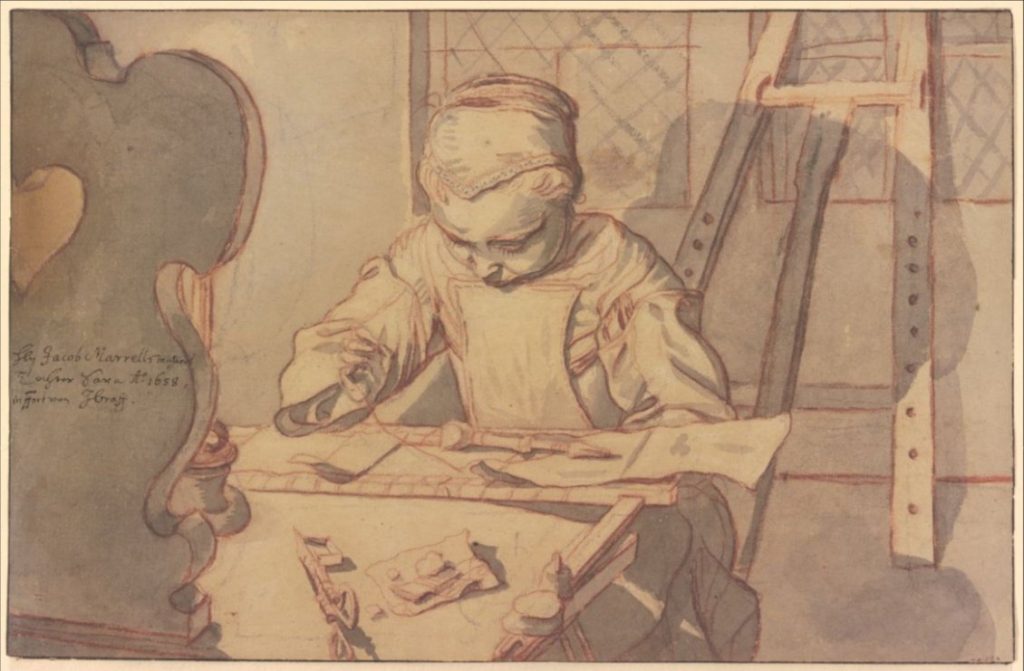
I have not found any depictions of the broche in use before 1600, but this sketch from the mid 17th century shows a girl at her embroidery, with the broche holding the threads lying on the work in the frame.
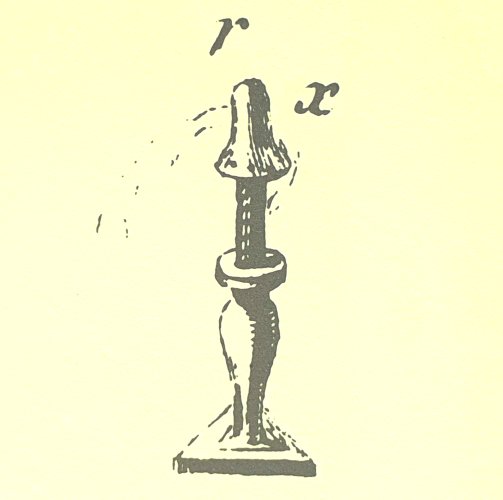
The broche or spindle was still in use in the 18th century. In Saint-Aubin’s treatise Art of the Embroidery (1770), the author describes how the Master gives the Workers several broches, some wound with waxed thread, others with gold thread. His illustrations also show the beak holding the thread, and a triangular end.
After I had made my version, I discovered that the Museum Boijmans van Beuningen holds an extant 14th century example from Dordrecht, which is listed in their online collection without an image. They very kindly sent me an image, with permission to include it in this article:
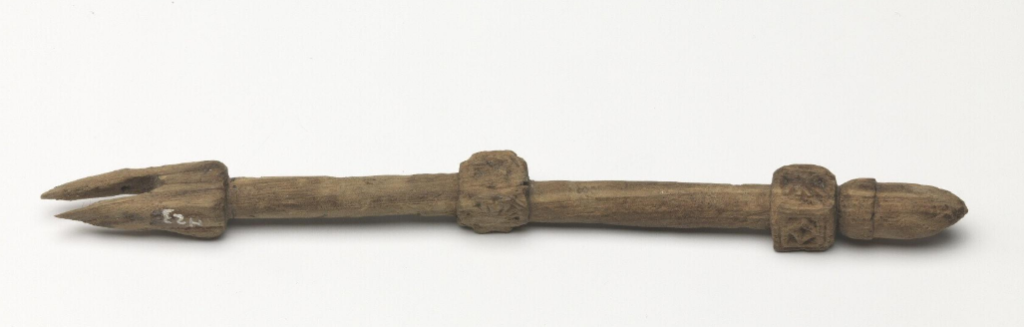
This medieval version has a squared end – simpler than the 16th century version, but still effective in stopping the tool from rolling about. This example would not hold much thread, and clearly the beak is worn, but it is wonderful to see the connection to the later versions!
Construction
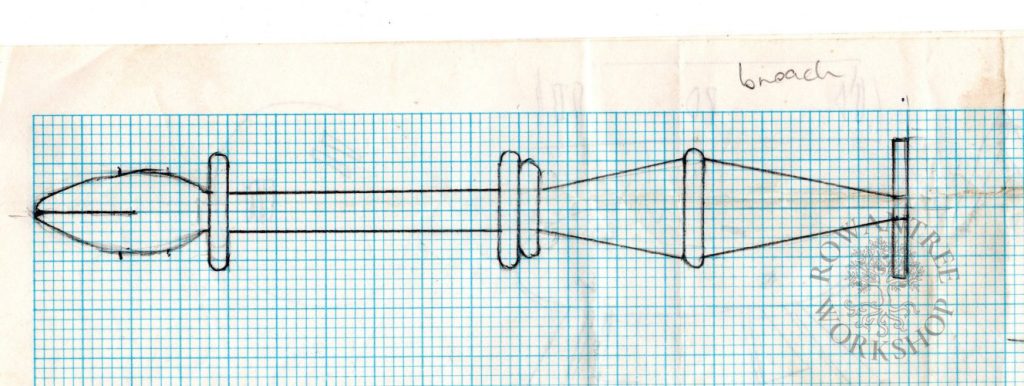
Based on the Levy’s description and the depictions on the Tobit table carpet, I drew out my design on graph paper (all my other research came later!).
I cut a small length of fine grained fruitwood and then roughed it out on the lathe. Using callipers to check the size of each element, I refined the shape to match my design.
At the time, I was not taking progress pictures of my projects, so there is no step-by-step on this one!
I was pleased with the result, but did not have time to finish it off, so I took it to the class as a ‘work-in-progress’. And then, with the deadline incentive gone, packed it away unfinished…
Some years later, I was planning to teach the same class again, so I updated my research and notes, pulled out all my sample tools – and found the unfinished broche. Time to finish it off!
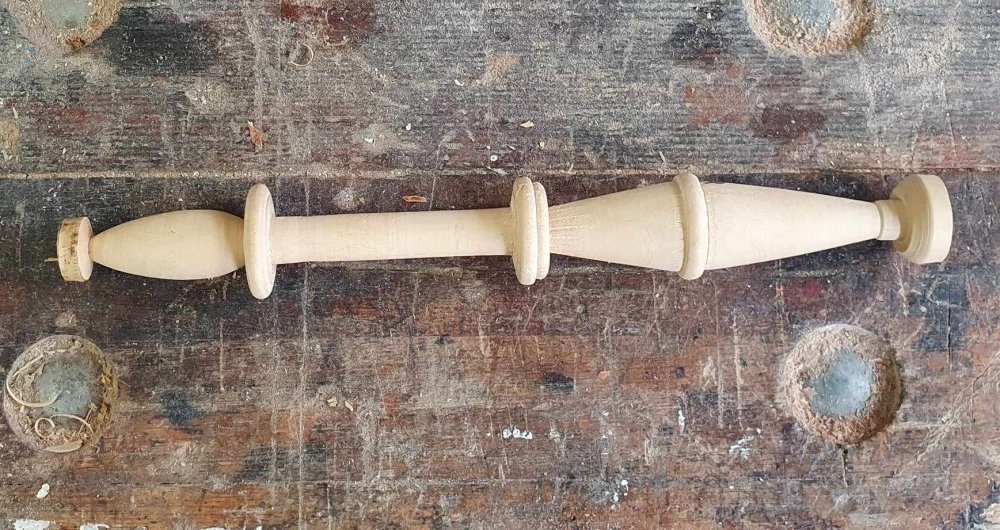
I cut off the ends (used to hold the piece in the lathe chuck) and smoothed them. To finish the beak, I made a cut halfway through the end with a fine saw, then smoothed this off with fine sandpaper.
For the other end, I sanded the stub smooth and checked the diameter. I made a pattern for the triangular end, drilled a centre hole, then cut this out of thin beech scrap.
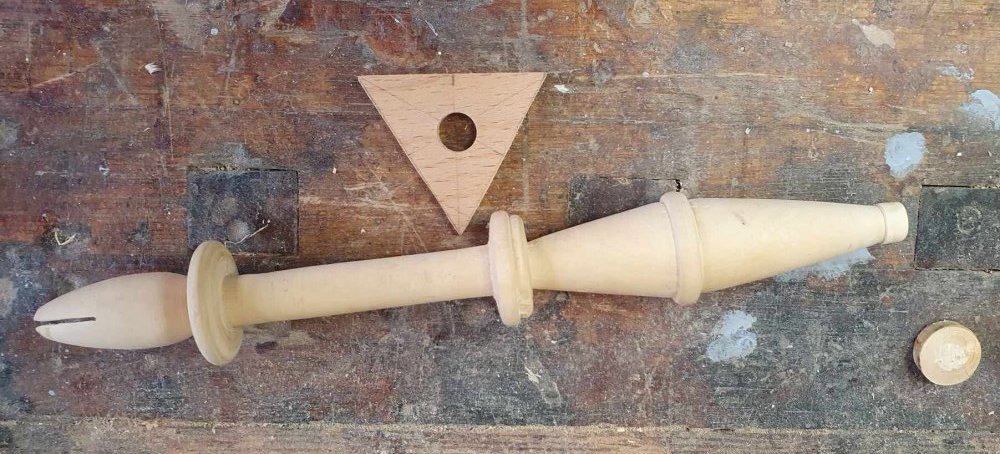
I glued the end on with hide glue, and pressed it home tight – at which point it broke along the centre…
Rats. Another triangular end with a larger hole – success!
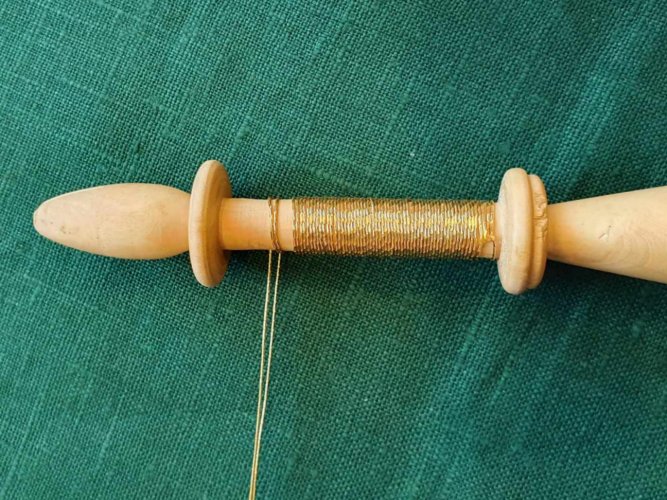
Once the glue was dry, I loaded up with a few meters of gold passing – doubled, ready to couch in pairs, as shown in Saint-Aubin’s illustrations. A bit of beeswax at the base helps hold the initial gold half-hitch grip while winding on, and I’m taking care to keep the pairs flat.

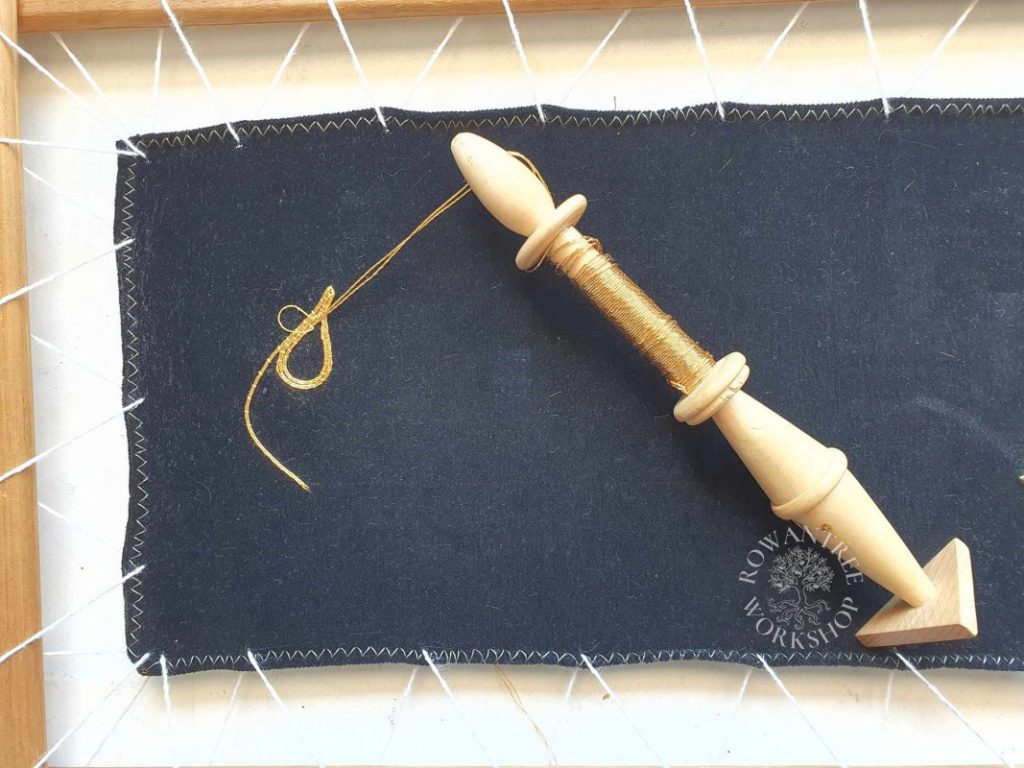
The broche works really well in practice, holding the gold nicely in pairs and staying where I want it on the embroidery frame. Although it is easier to use on a large frame, it works well even on a small one like this (which I set up for a class on couching).
For those of who do goldwork, I think it is a tool worth reviving!