

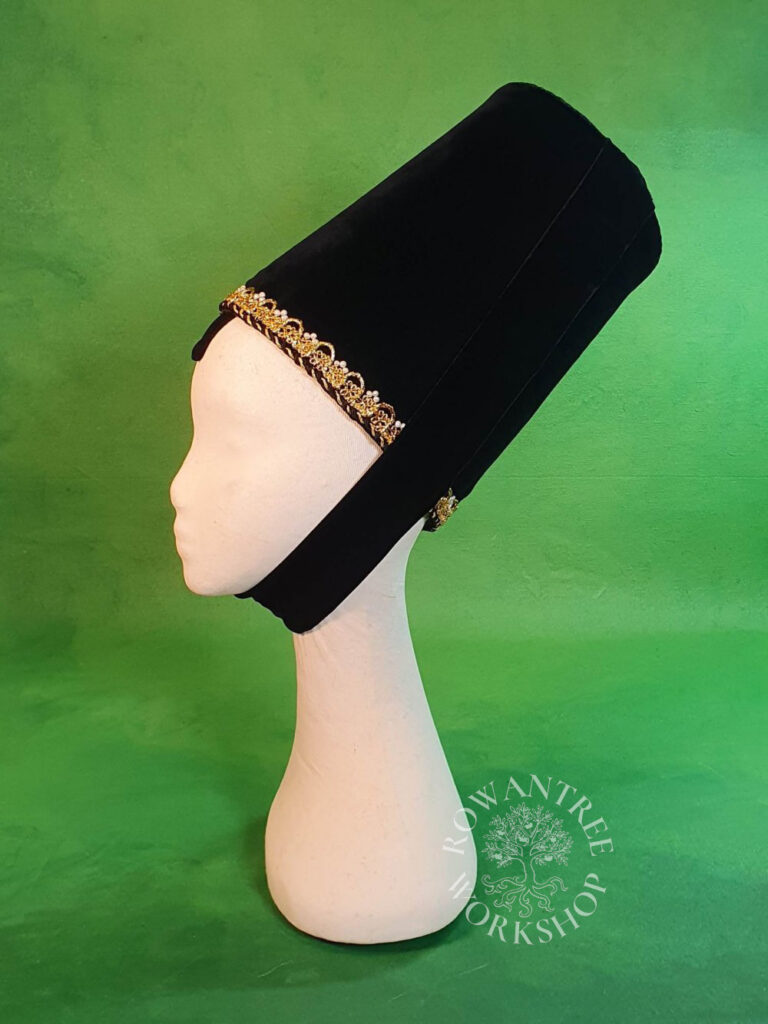
A mid 15th century truncated henin, for a Netherlandish noblewoman. This style of headwear was in vogue in the Netherlands, France and England from the 1450s to the 1480s, replacing the previous fashion for horned escoffion.
Many years ago, I made a truncated henin with a foundation of buckram and wire – theatrical hat-making techniques, based on my knowledge at the time.
Since that time, I had developed some new ideas about henin construction and I was keen to make a better version. So I was well pleased that Imogen requested one as her prize hat (won at Canterbury Faire 2023).
Research & Design
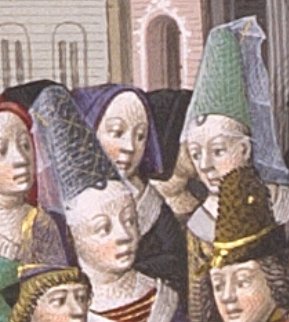
Artworks from the period show many variations on the henin, typically a cone or truncated cylinder covered in black velvet, brocade or embroidery, as seen in the manuscript Mirior historial below.
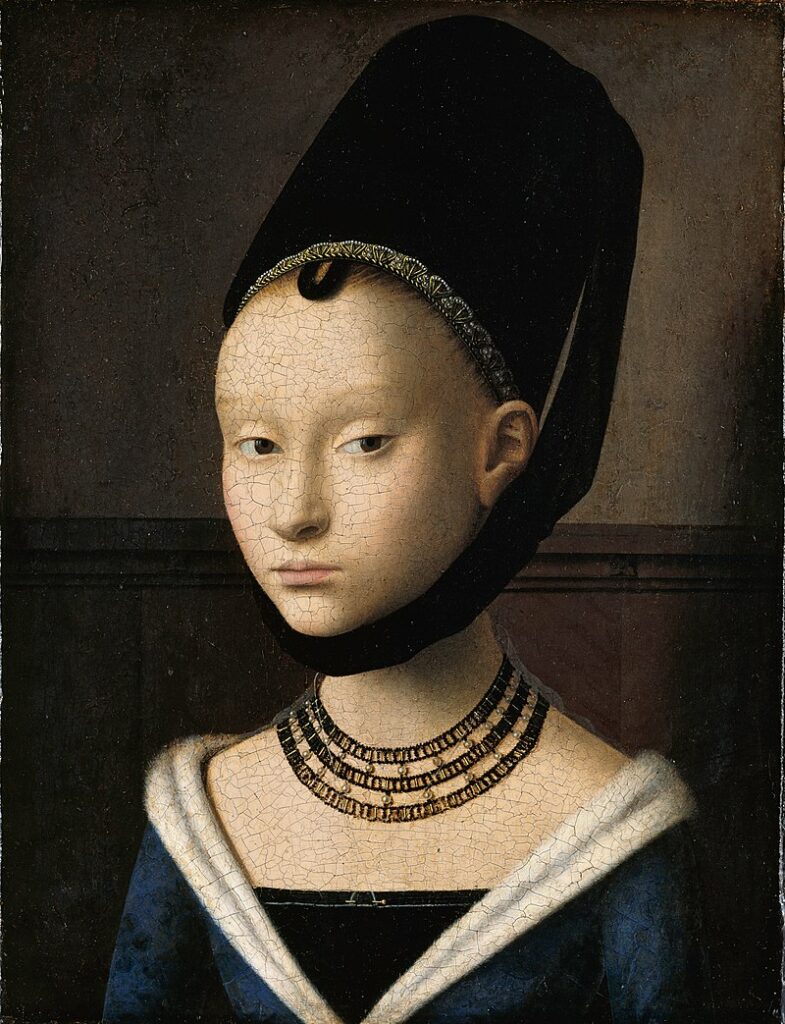
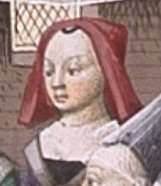
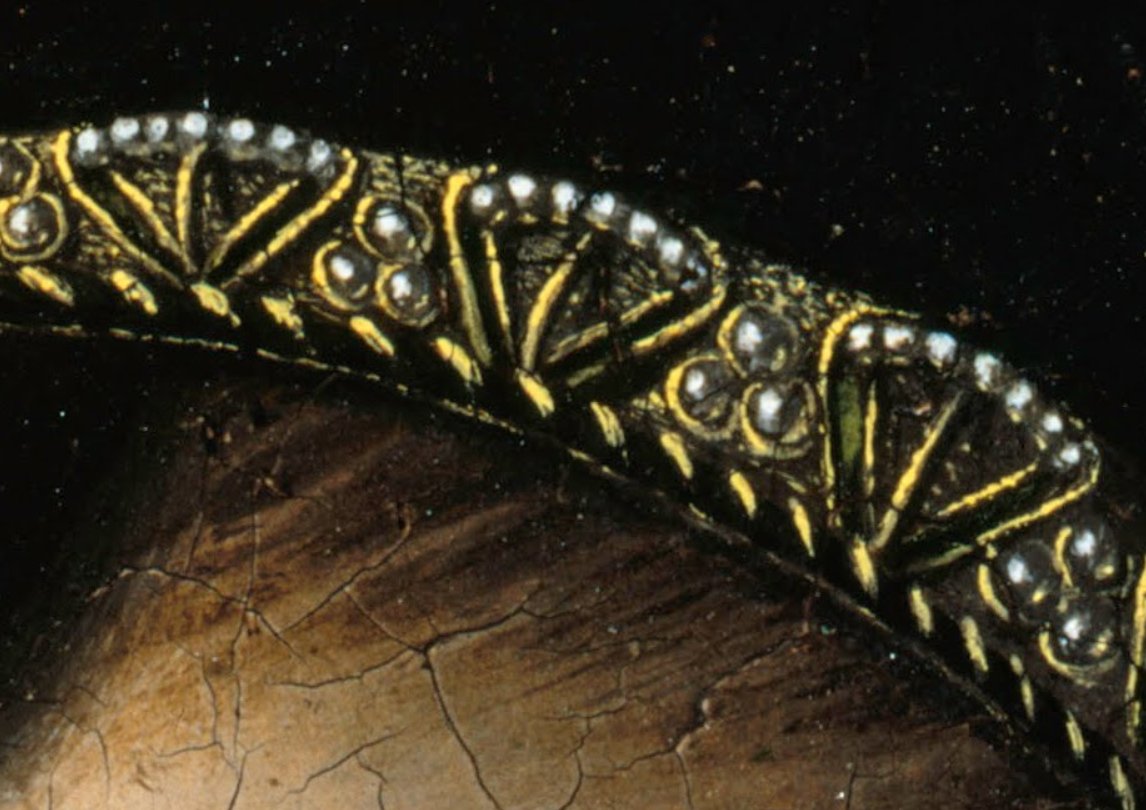
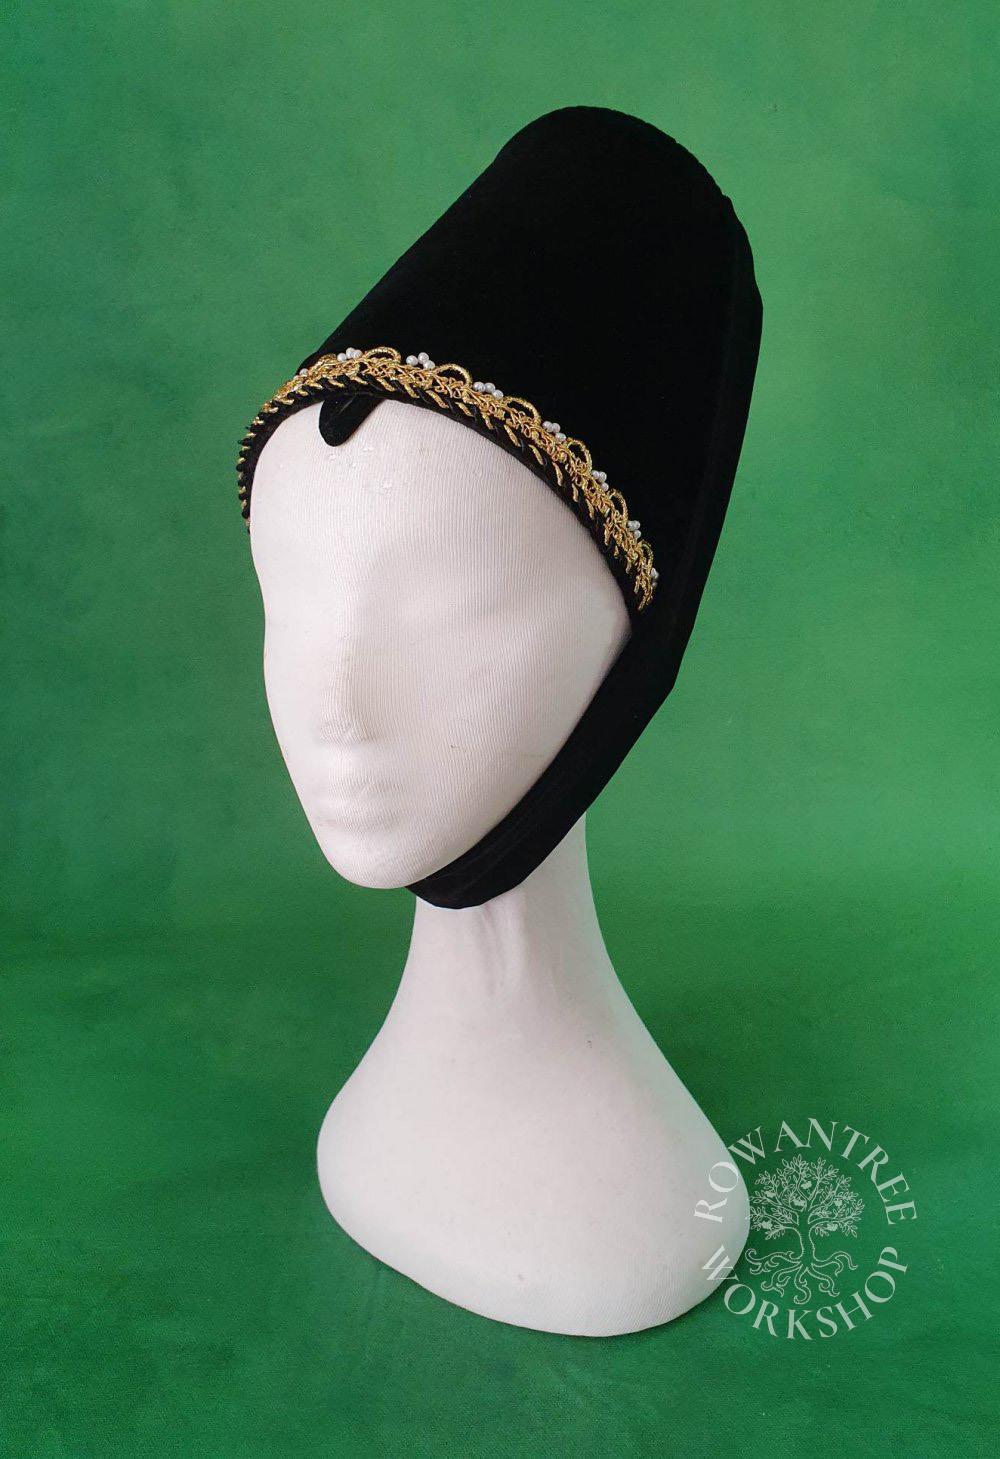
Imogen specifically wanted the style depicted in the Portrait of a Young Girl by Petrus Christus. This painting shows a tall black henin with a slight taper, and a decorative border in gold with small pearls. It also has a draped wrap under the chin, reminiscent of the liripipe on a chaperon. There are other examples of this wrapped style, such as the anonymous painting of St Catherine below.
Source: Biblissima

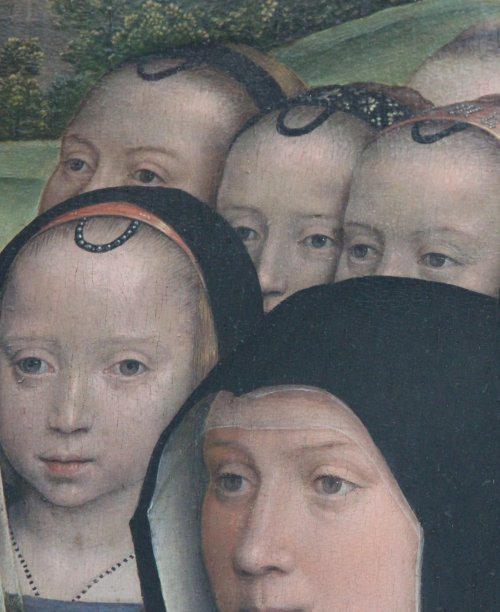
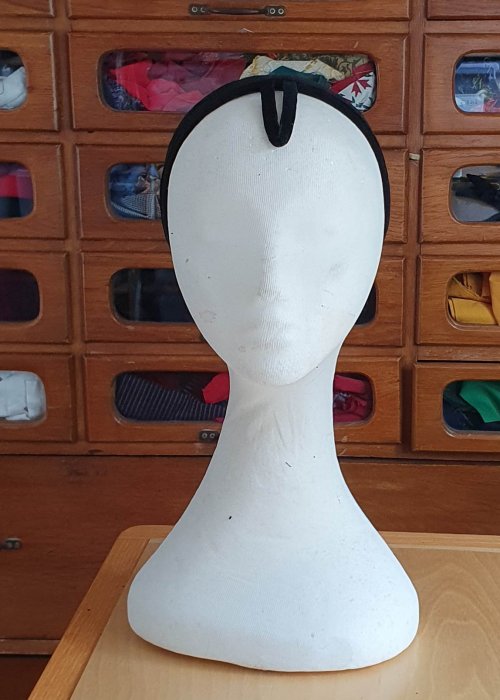
Although not all henins are worn this way, these examples show the distinctive U or V shaped black loop over the forehead. While this could perhaps be attached to the henin, many artworks clearly show this as an separate layer – a ‘headband’, worn alone or under another headdress.
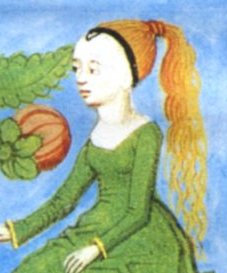
The band is sometimes seen worn alone by girls, as seen in the Somme rurale de Juan Boutillier image below. It may also be worn under other contemporary headwear, such as the St Catherine example above, or the red hood in the Mirior historial below. The Hans Memling Moreel Tryptich shows yet another variation, with a rich brocade band worn alone or under a hood.
Source: Biblissima
Source: Groeningemuseum
These images also show the fashionable high forehead of the late 15th century. The hair is clearly pulled back tight from the face and probably plucked back at the hairline to achieve the look. The long hair would be dressed to support the henin, sometimes worn at an extreme angle.
Imogen has a natural hairline and short hair, which poses some challenges to getting the look! The henin will need to sit a bit further forward than we see in the artwork, and I hope the black band will provide a useful foundation.
Construction
Usually I would start by padding up my headform, but Imogen has such a small head that I could use the form as is. I have the same size head and short hair, so I was able to try things on to confirm my modelling.
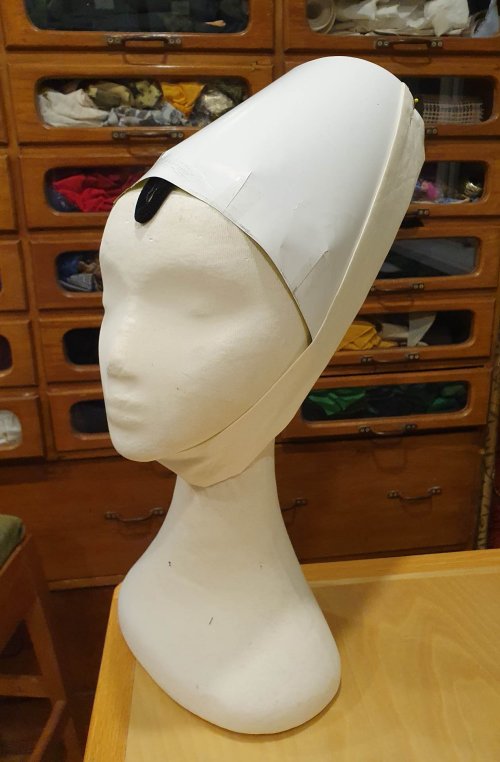
The band
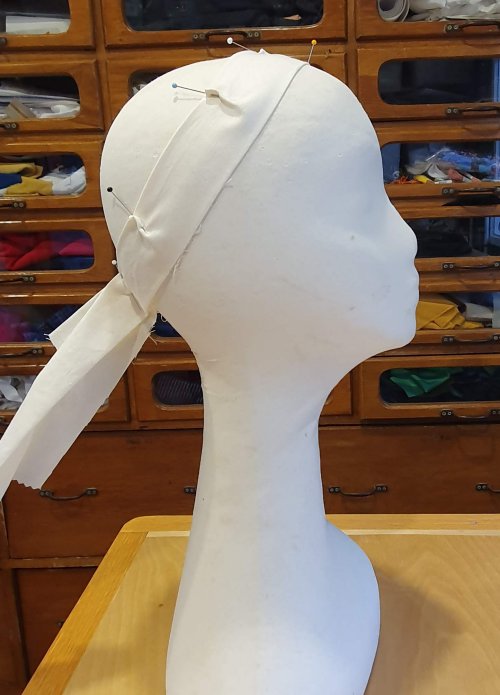
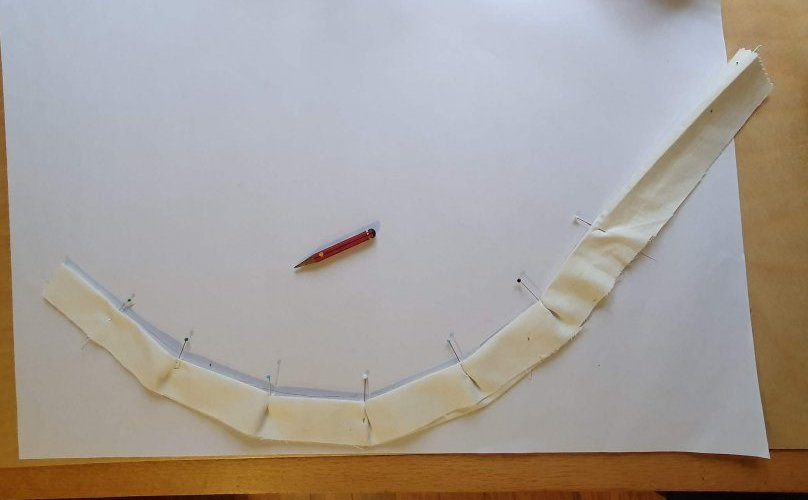
I started by mocking up the band, which needs to sit quite far back on the brow, to clear the ears. My first attempt was a straight band cut off-grain for stretch, which gripped well at the front, but flared at the back, adding too much bulk. So I made a toile on the headform, pinned it to shape and drew off a pattern. But this was too curved – it slipped off my short hair when I tested it.
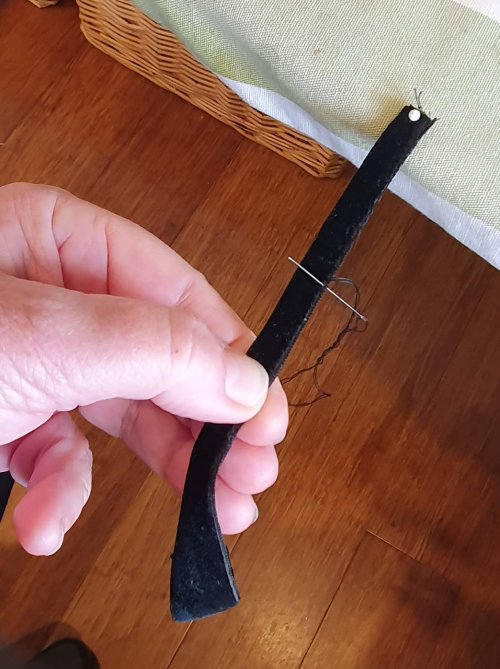
Half way between was perfect! I made up the band in black velveteen – the short nap is less bulky and should provide a good grip on both hair and henin.
For the front loop, I made up a test in millinery wire, then a second version with longer arms, shaped to curve around the brow. I tried a strip of velvet to cover, but even tiny seams were too bulky, so I used velvet ribbon, whipping the edges together.
To support the wire and avoid it showing, I sandwiched the loop between two strips of heavy linen canvas, and then sewed this into the black band.

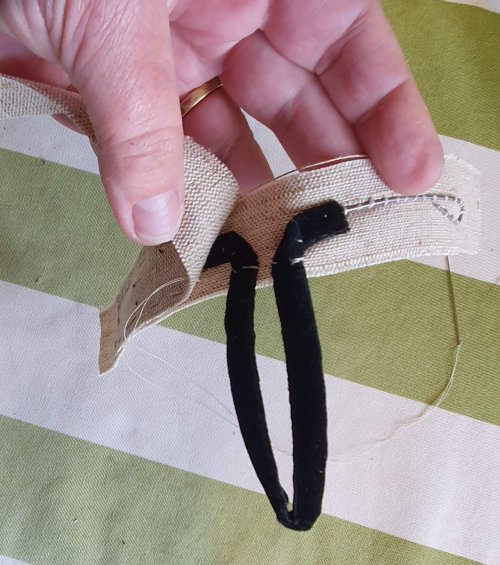
Experiments showed the band needed to be open to fit it onto the head securely (not closed as per my original plan). I had planned to pin the band at the back, but this was too bulky, so I worked a couple of eyelets in one end and sewed on a pair of black tape ties to the other.

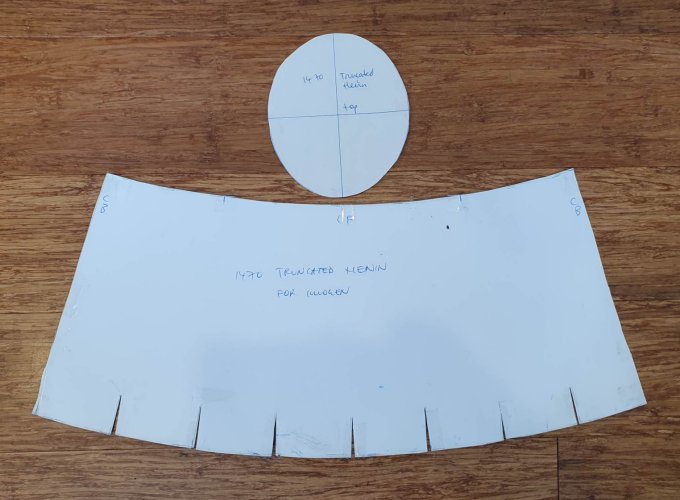
The henin
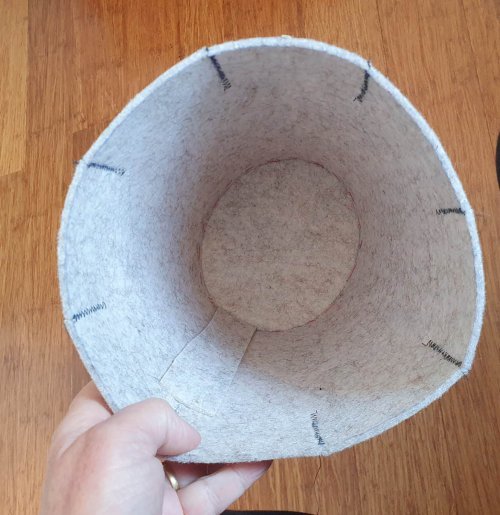
With the band tied onto my headform, I patterned the henin in light card. Due the thickness of the band, my initial truncated cone flared out around the face too much – not ideal. A closer look at the Petrus Christus painting showed that the brim actually curves in very slightly around the face, so I added some very small darts – perfect!
I cut the foundation in 3mm furnishing felt, which is stiff, light and easy to work with – ideal for hat bases.
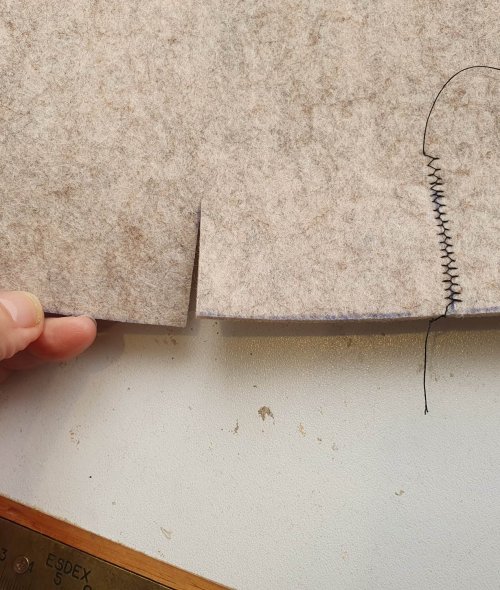
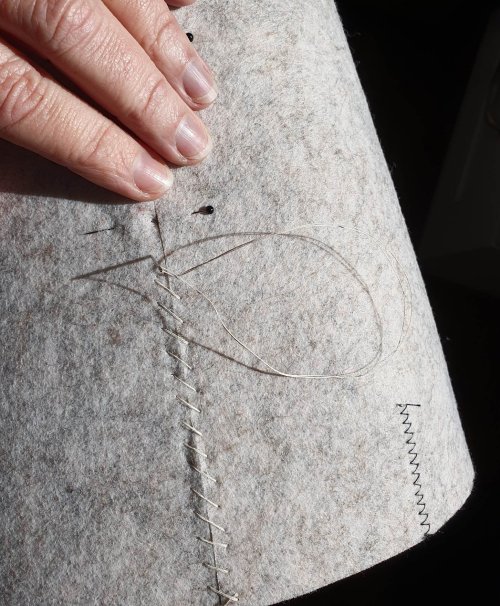
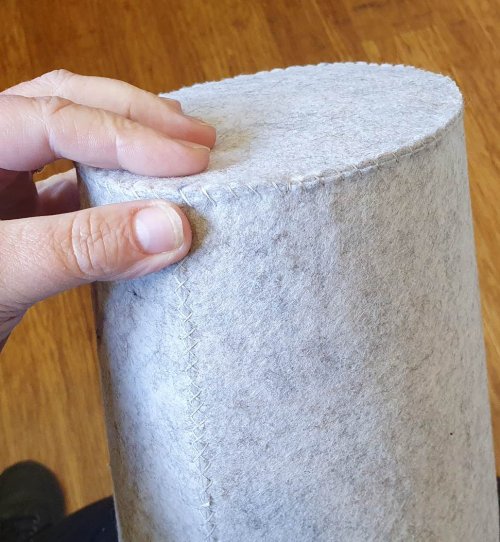
Before assembling the henin, I machine-sewed the small darts to ensure they would stay flat. I hand-sewed the back seam in heavy linen thread, and then sewed on the tip. The back seam was not flat enough, so I sewed in an extra strip of felt to stiffen the seam, which improved the shape. (Perhaps I should have steamed the curve more before I sewed it.)
Next, the cover in black silk velvet – always a tricky fabric.
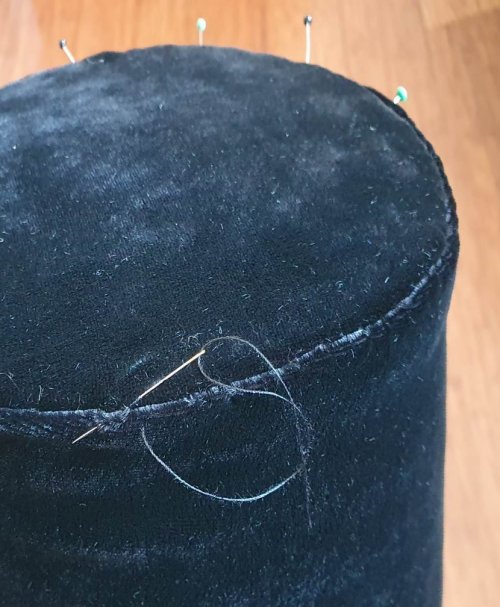
Because this goes around the felt, it needs to be larger, so I added a 2cm seam allowance all around. For the tip, I clipped the seam allowance, then pinned and basted this to the felt. Then I pinned, basted and machine-sewed the back seam. The felt is ‘sticky’ so I basted the seam allowances flat before easing it over the form, to avoid rumpling up the seams. Once in place, I clipped the top seam allowance, folded this under and slip-stitched it to the tip.
I trimmed, clipped and folded the brim allowance under and basted it in place, then removed the back seam basting. I tried it back on the headform – it’s a firm fit over the band, so it should stay put in use.
On to the decoration….
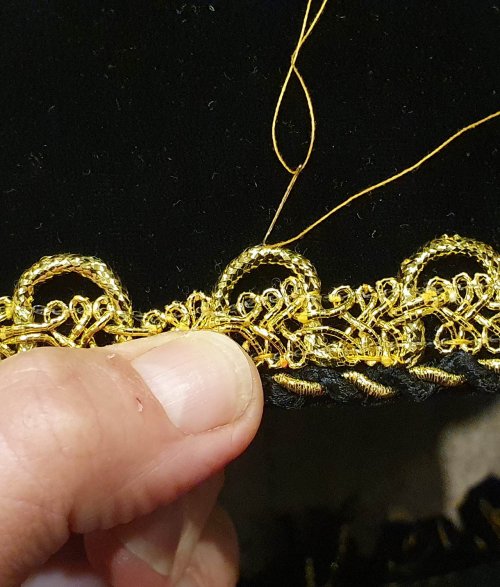
The Petrus Christus portrait has an edge decoration in gold and small pearls, with a black and gold twist around the base. I could not find matching twist, so I made my own by separating and re-twisting black and gold cords. I looked through my stash a gold braid in similar style and found a couple of options.
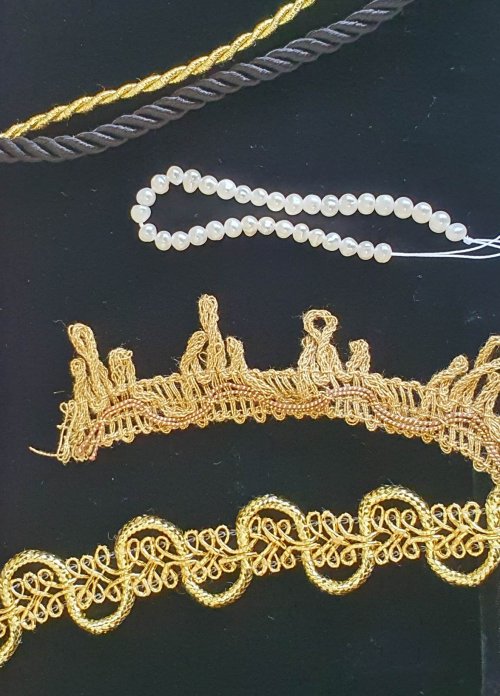
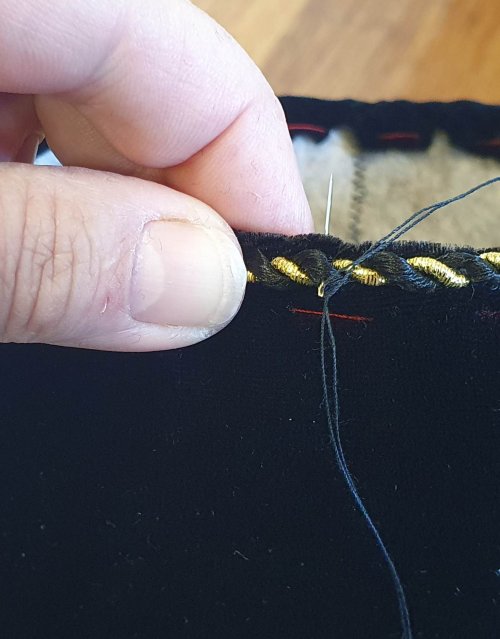
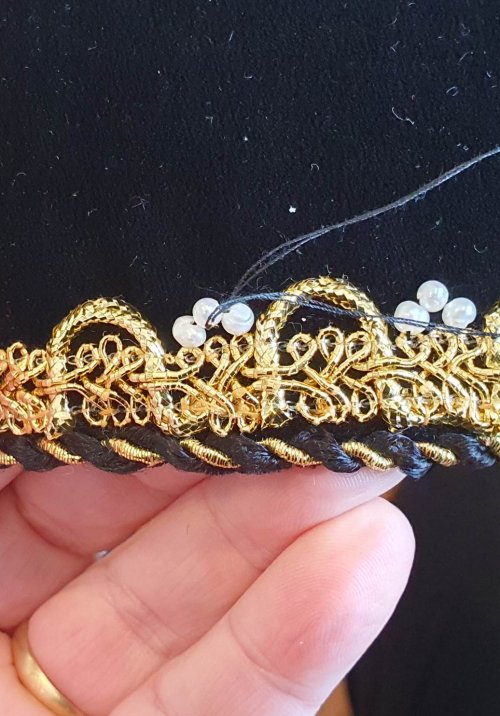
Imogen preferred the brighter one, so I basted this in place (to ensure I could match the pattern at the back) and then sewed it with gold silk thread. To complete the decoration, I sew on sets of small freshwater pearls between the loops of braid.
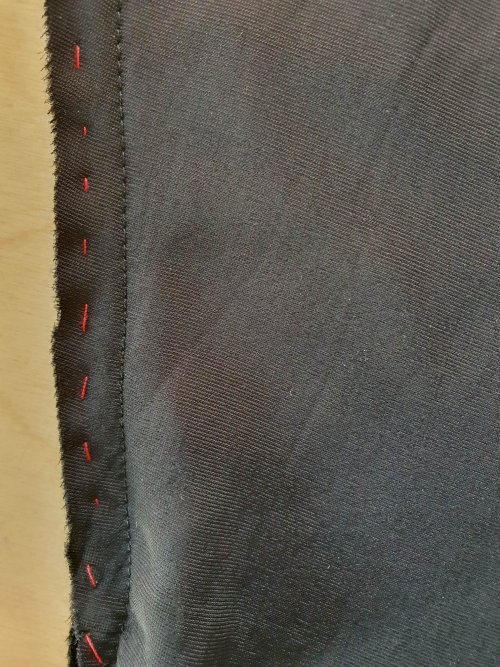
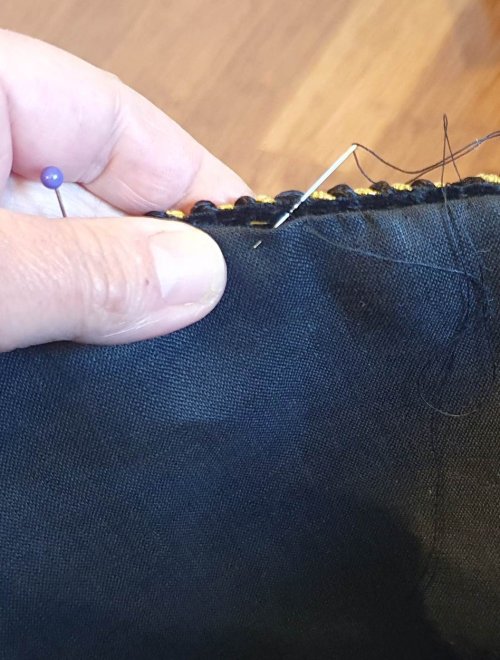
I’d originally planned a ilk lining, but decided that linen would have a better grip on the band. I made up a linen lining using the pattern as a guide, and then slip-stitched this in around the edge.
Finally, I made the band to wrap under the chin.
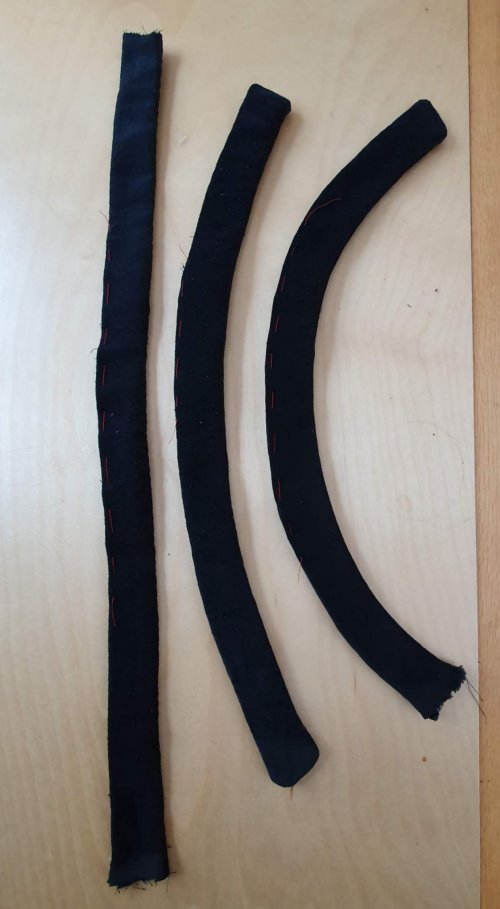
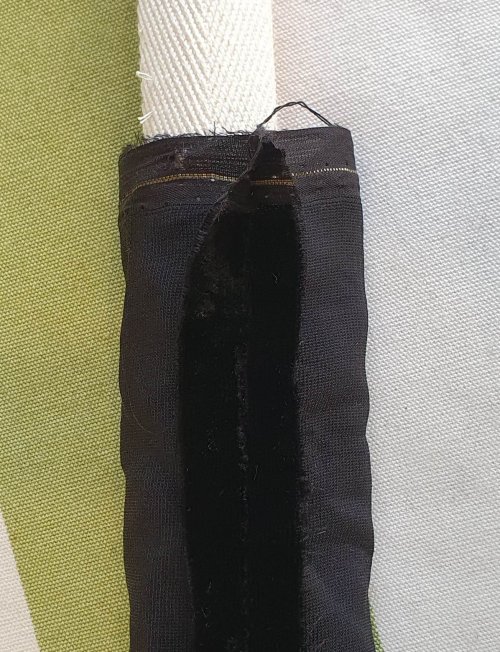
I considered many ways of attaching this to the hat, including building it into the tip seam, but at least one end needs to be free to get the henin on! In the end, I decided that simple is best, so I made up a long strip, basting and machine sewing the seam.
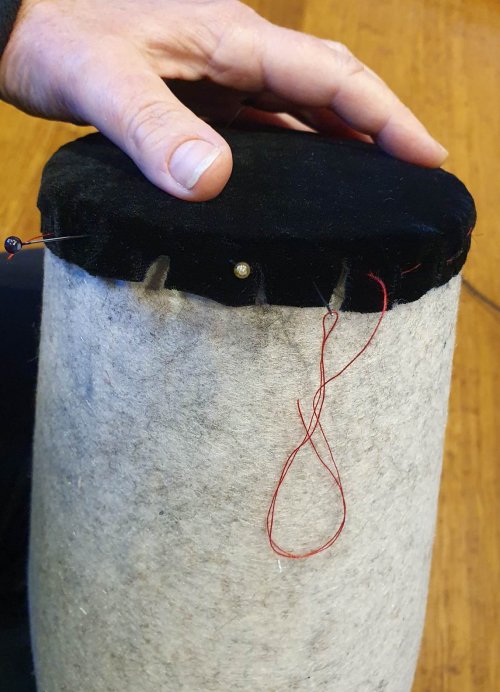
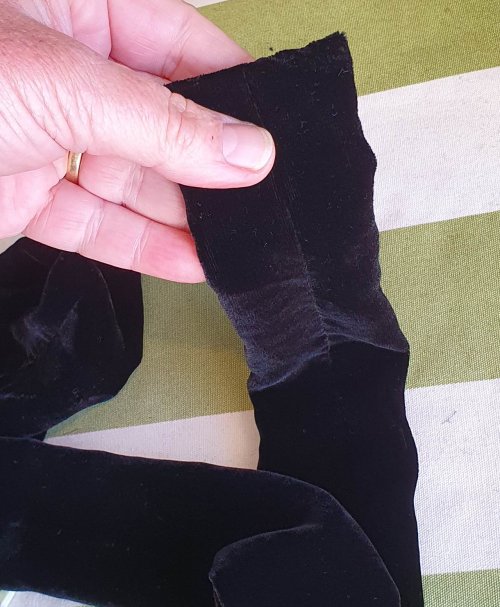
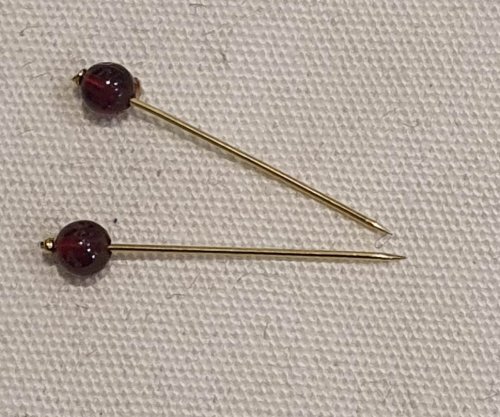
I turned the strip, pressed the seam (using an embroidery frame roller as an impromptu roll) and sewed the ends shut, with the seam in the middle. To attach it to the tip, I made up four garnet pins by glueing garnet beads onto brass lace pins.
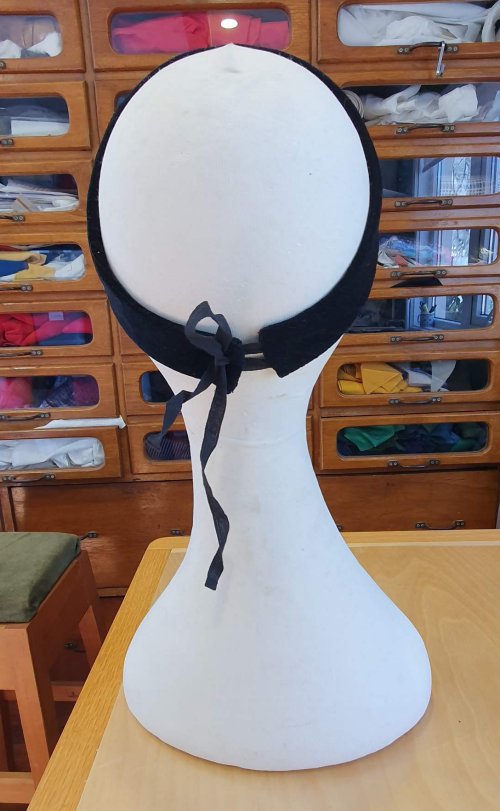
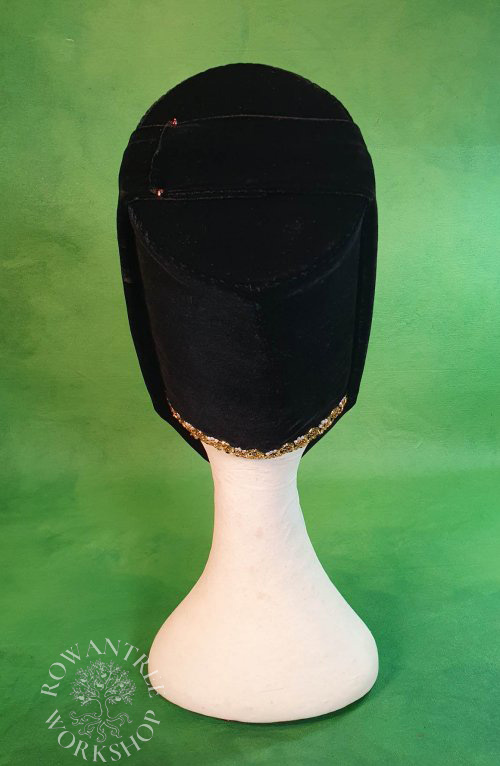
To wear it, the hair is pulled back (ideally) and the band goes on, holding back the fringe, then tied at the back. One side of the wrap is pinned across the tip, from side to side. The henin goes on from the back, easing the edge over the band, so it hugs the face. The wrap goes under the chin, over the top, and is pinned in place over the other end.
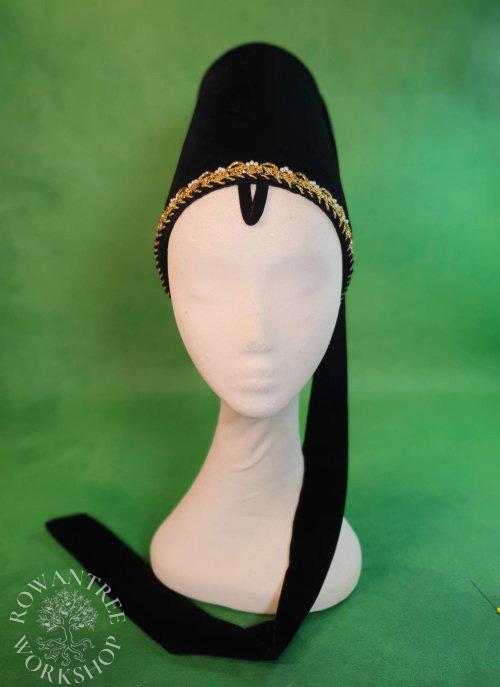
I was really pleased with the end result! It looks lush and should be stable to wear.