An upper class high-necked gown, based on a royal German portrait from 1519.
I had wanted to make a version of this dress for years – a ‘not-Cranach’ style gown with an interesting bodice. I stalled for ages, trying to decide how best to approach the spangled trim. I spent hours looking for suitable gold braid I could layer over velvet ribbon, and looking for tear-drop spangles.
With Midwinter approaching, I had the sudden urge to make myself something new – it had been a while, although I’d made heaps with/for others. This quickly turned into a plan to make something off my wish list. And morphed into ‘and make it all out of stash’.
I’d been hoarding some pink polycotton furnishing brocade which evoked the feel, even if not the exact brocade design of the portrait. I’d bought it at least a decade ago. Time to abandon the spangled trim debate and just make the thing!
Research and Design
This gown is inspired by several images of the same portrait of Queen Anne of Hungary and Bohemia – a painting by Hans Maler, and related woodcuts by Erhard Schoen and Hans Weiditz, presumably based on the painting (although Geisenberg (1974) puts the Weiditz woodcut 4 years before the painting!).

Source: Thyssen-Bornermisza
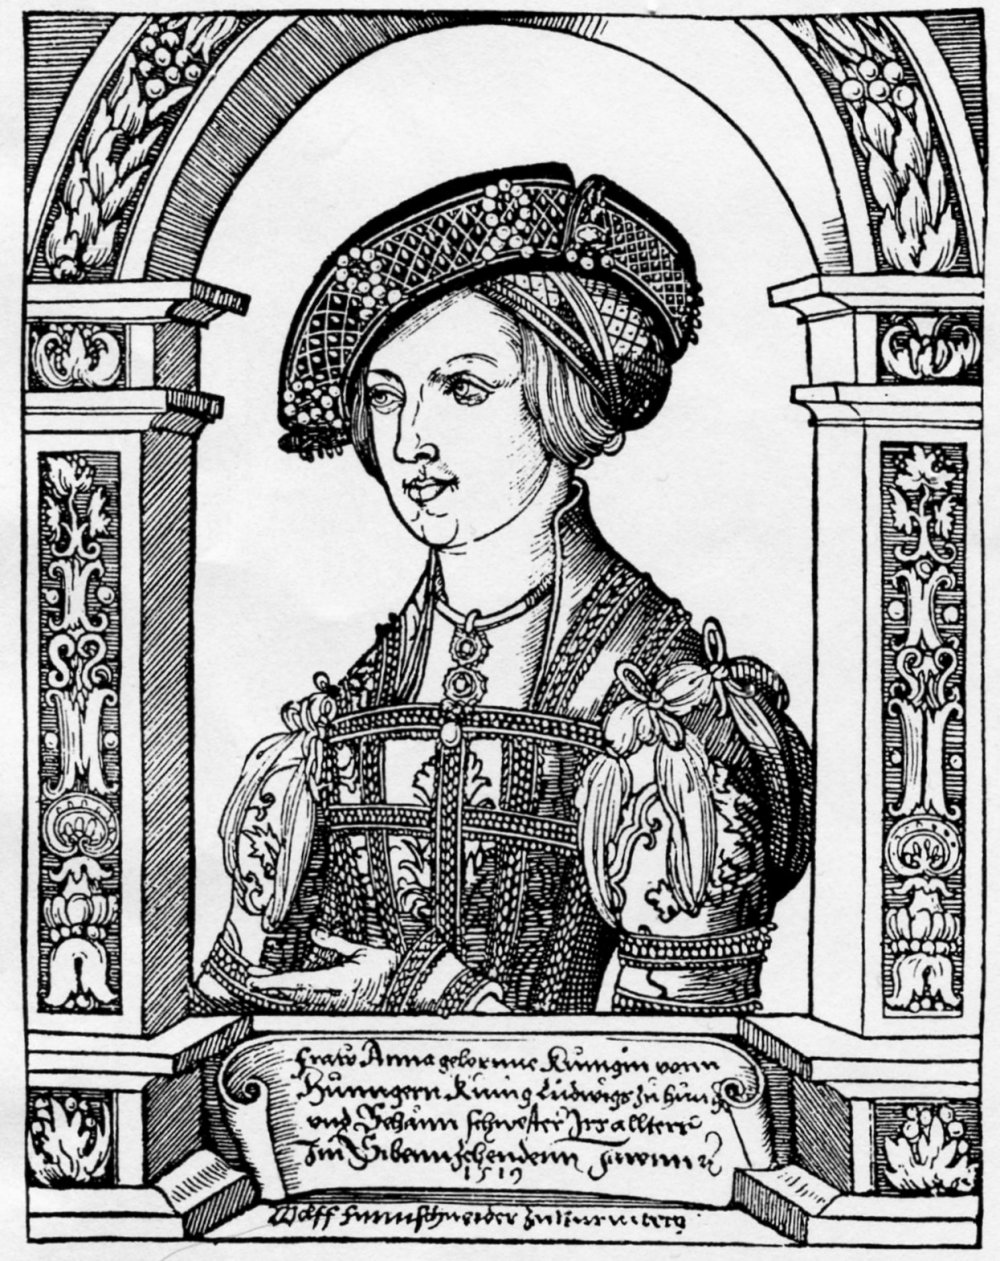
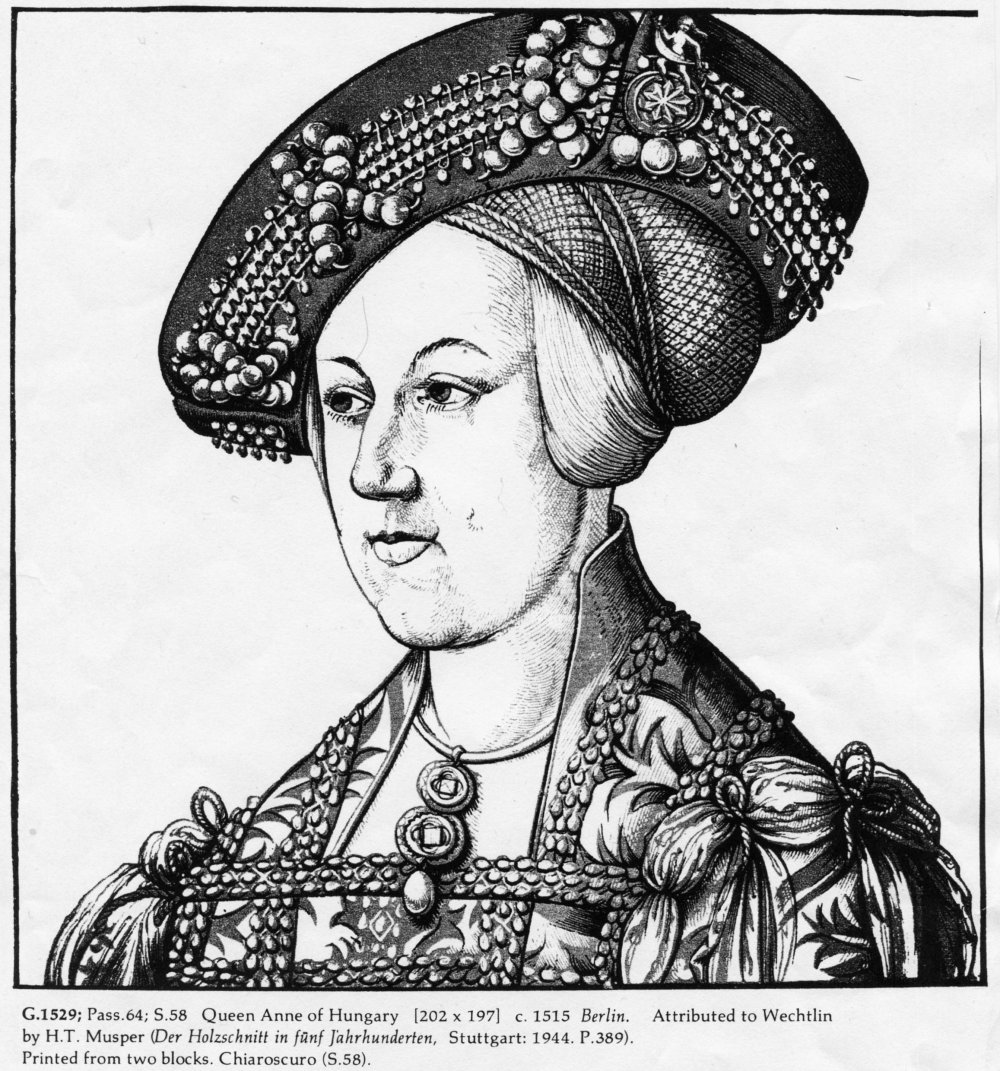
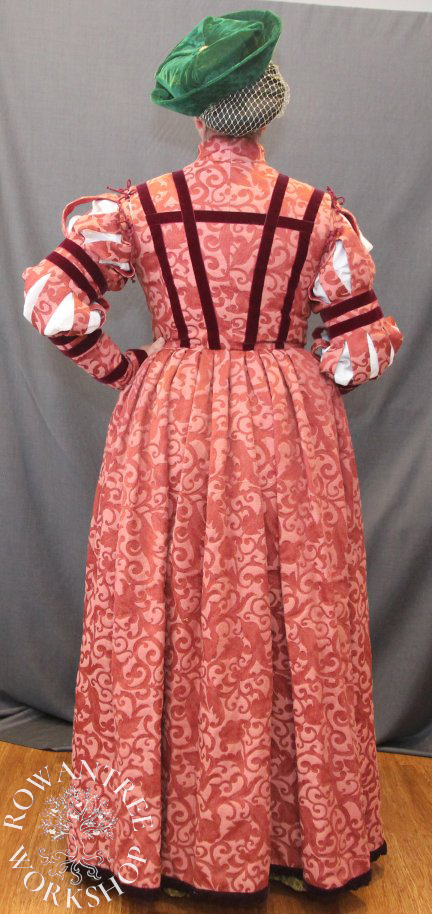
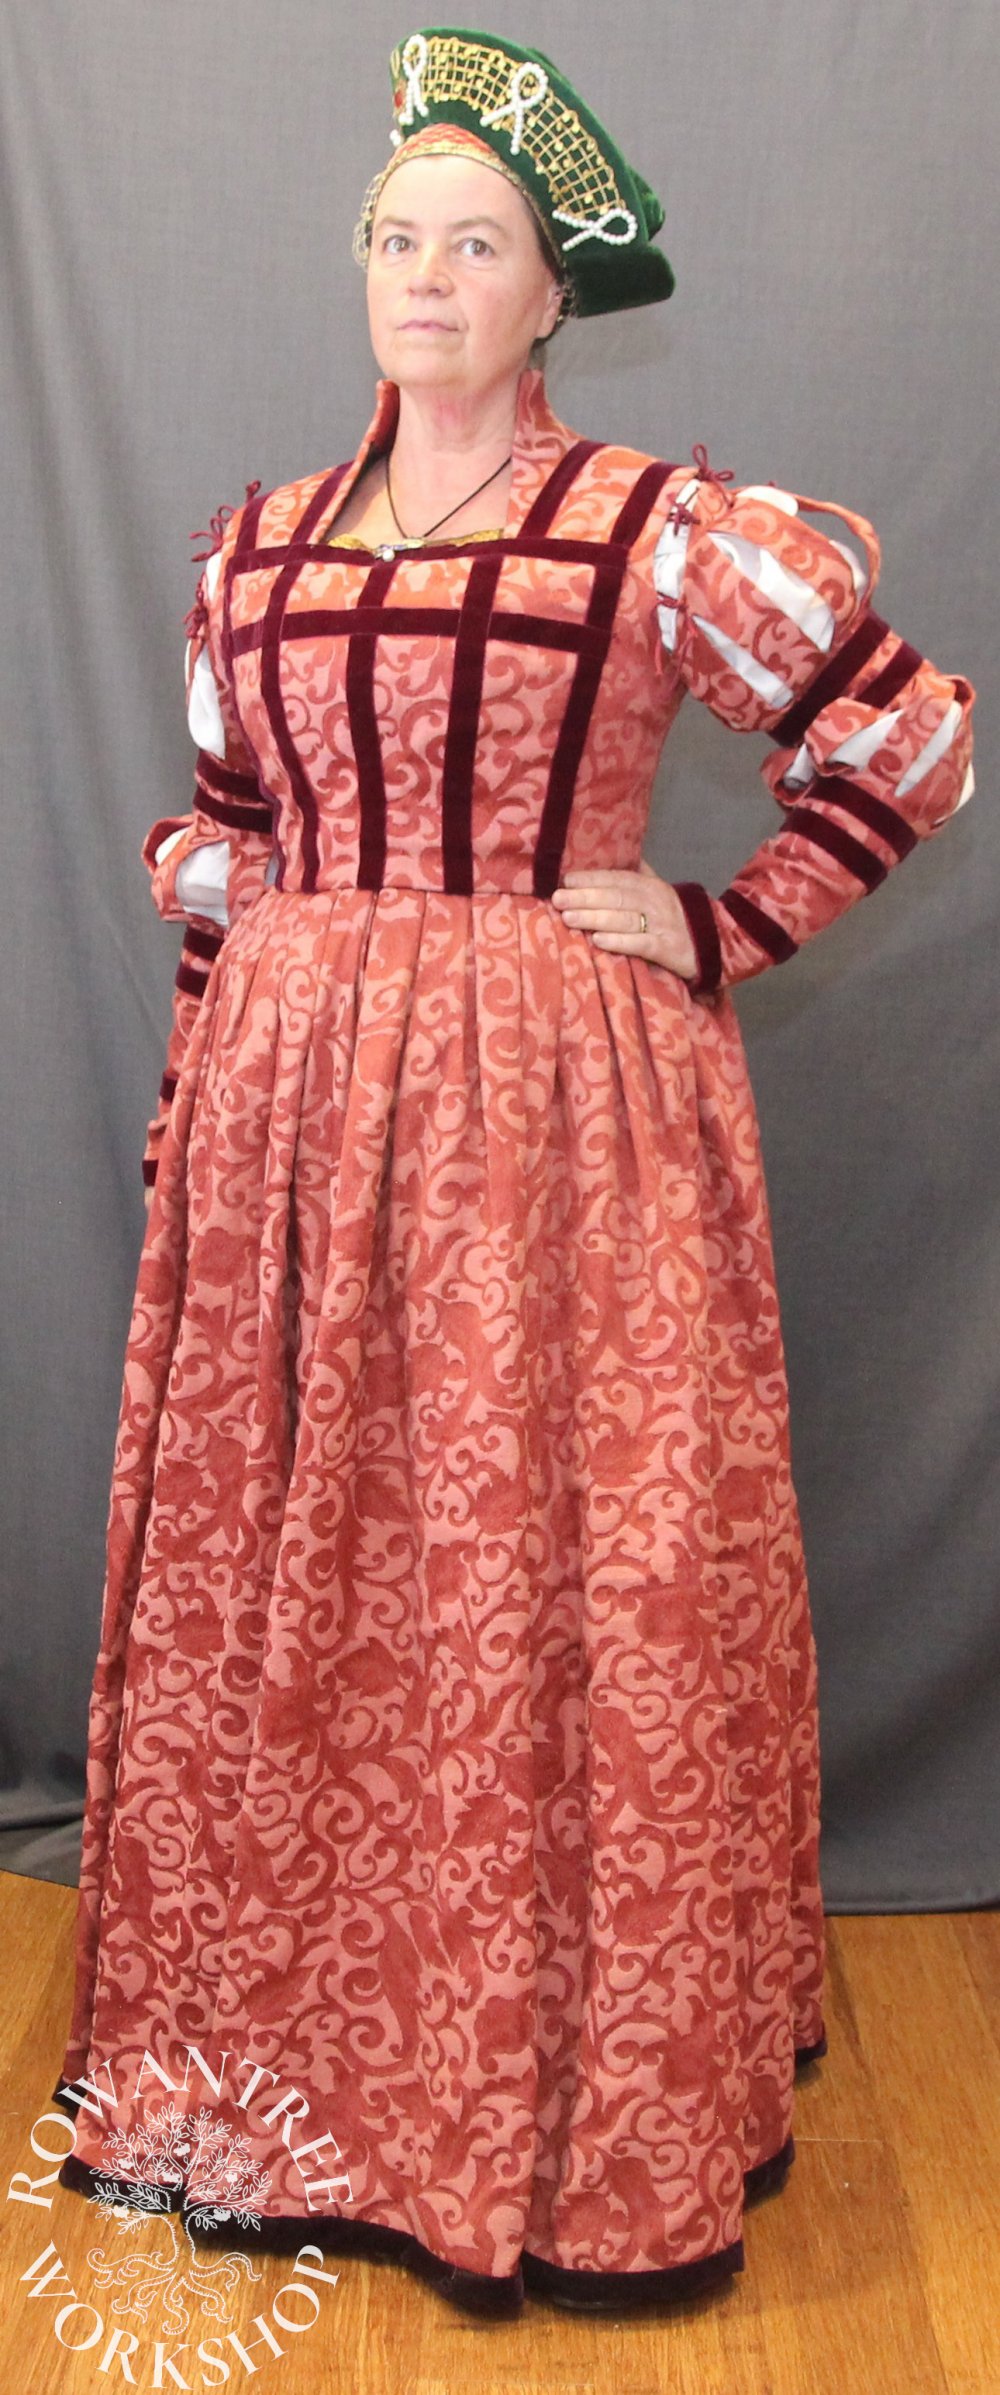
These artworks show a high-necked gown with an overlapped square front bodice, similar to that seen in contemporary male portraits. The sleeves are tied at the top of the shoulder, and slashed at the upper arm and over the elbow, with the classic lower sleeve and bell cuff.
The gown is worn over a Hemd with full sleeves and a high front, with it’s own goldwork panel visible above the front panel. The half length portrait does not show the shape of the skirt, or the decoration.
The original pink and red brocade would probably have been silk and the ornate trim shows a gold fretwork with suspended spangles, which are also seen on her Barett style hat.
Construction
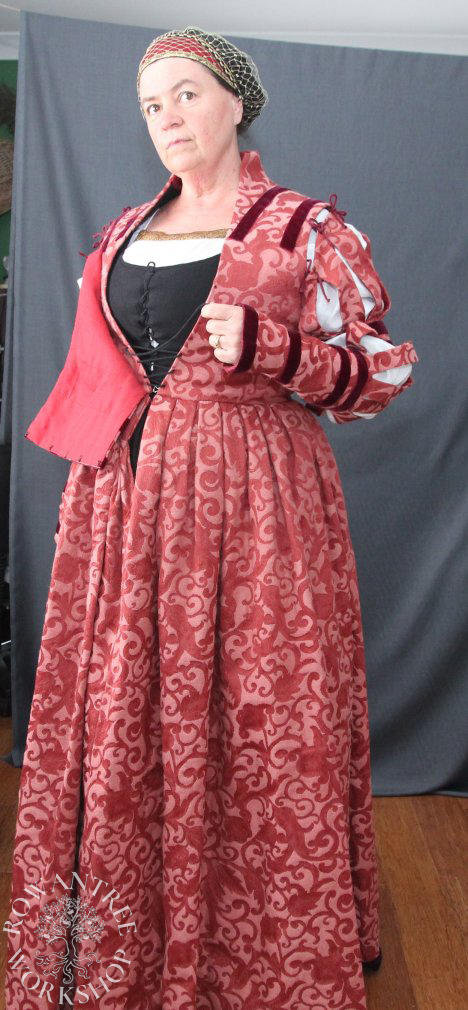
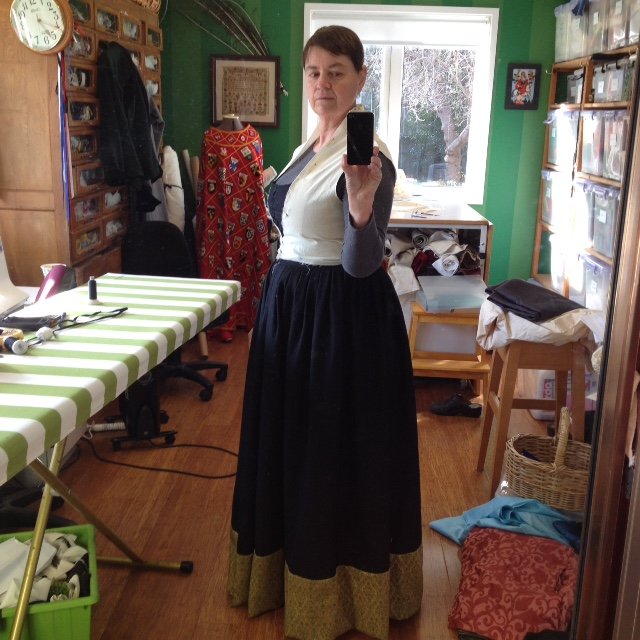
The first stage was to build the supporting Unterrock, since this would change my shape. Once this was finished, I could wear it to pattern the bodice. I started with the shapes from my previous high necked gowns, but changed the line to fit closely to the neck and form an open V front for lacing under the front panel.

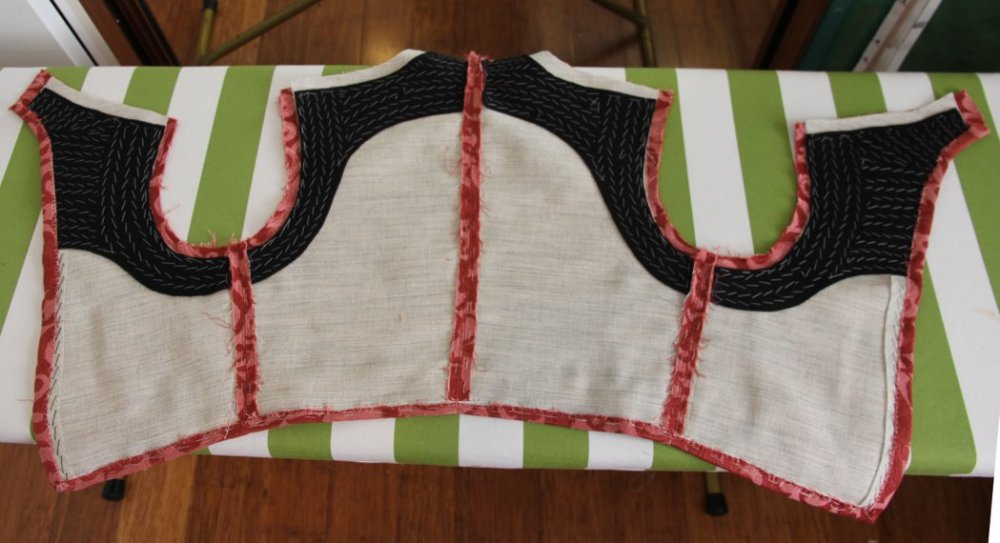
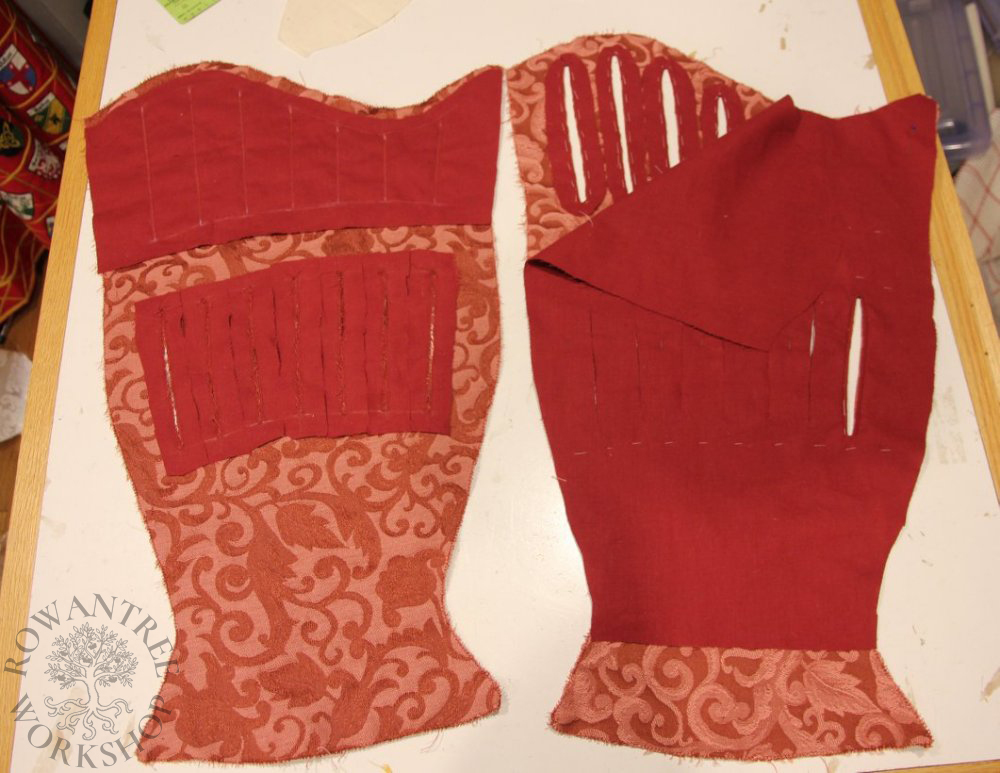
With the pattern working, I cut the bodice panels from canvas and brocade. I wanted the high neck to be well supported, so I pad-stitched melton to the top of the canvas pieces before basting them to the brocade, shaping the neck to flare out. I sewed the side and shoulder seams, and pick-stitched them from the outside, then catch-stitched the outer seam allowance back to the canvas, ready for lining.


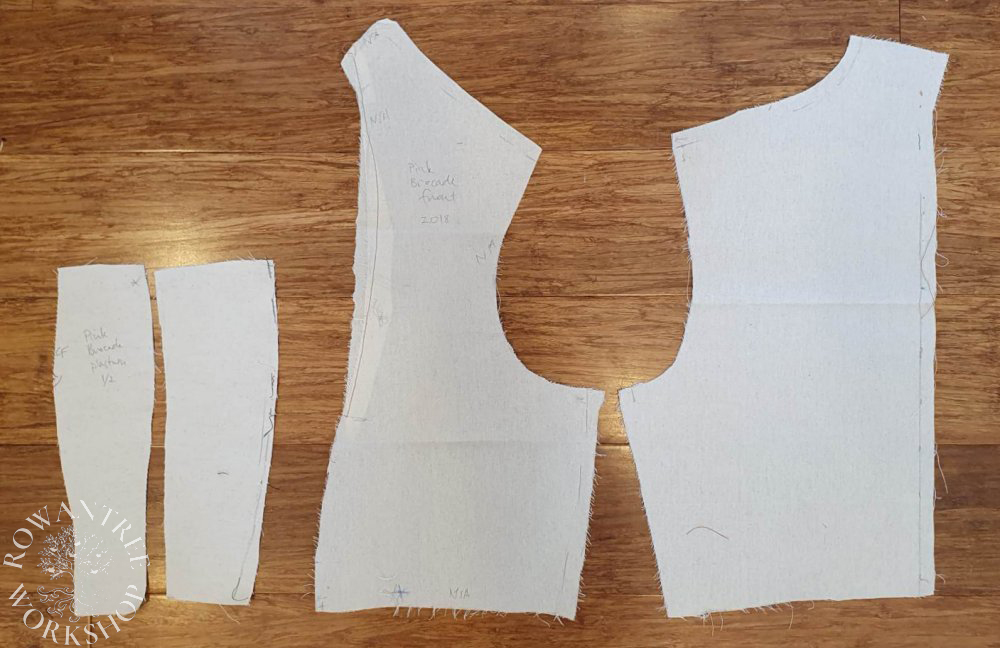
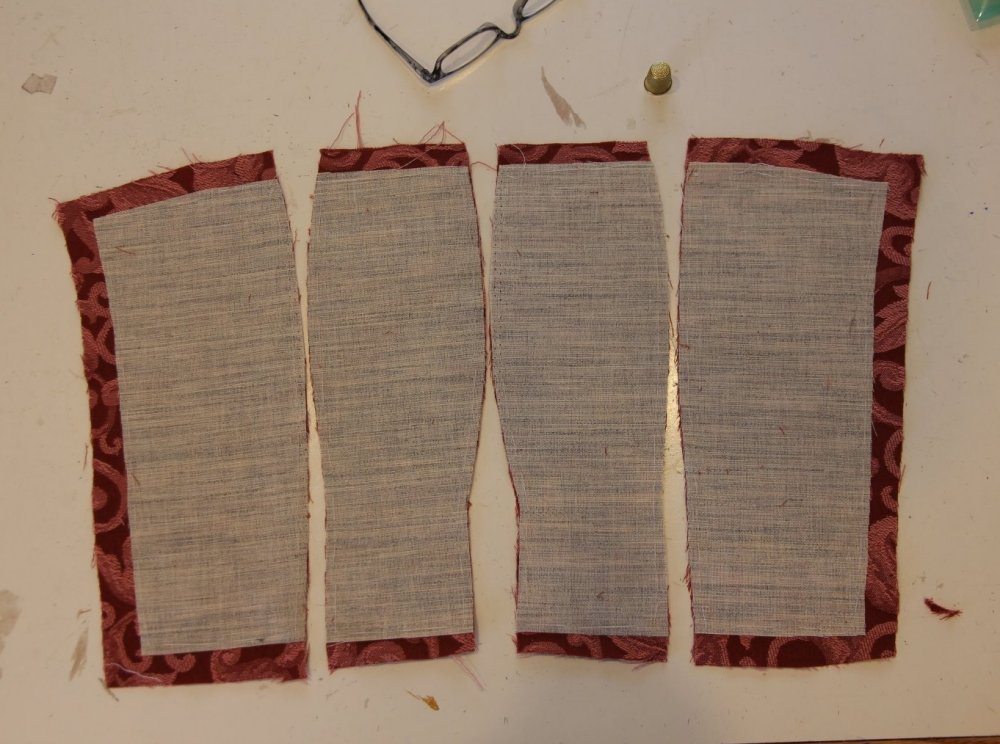
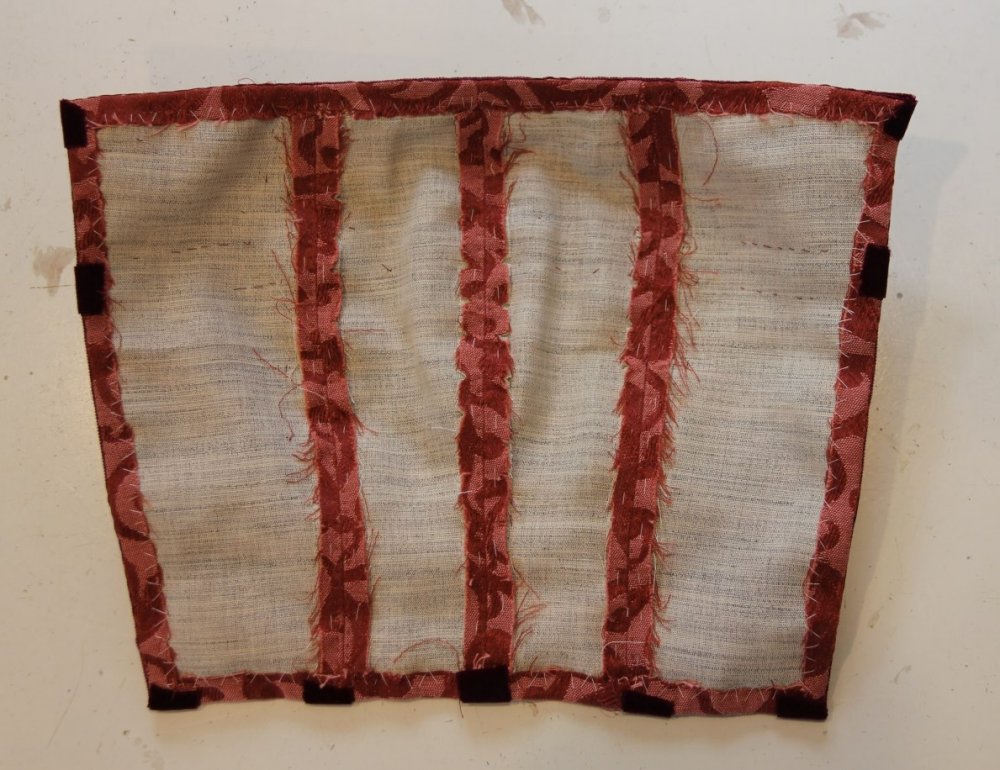
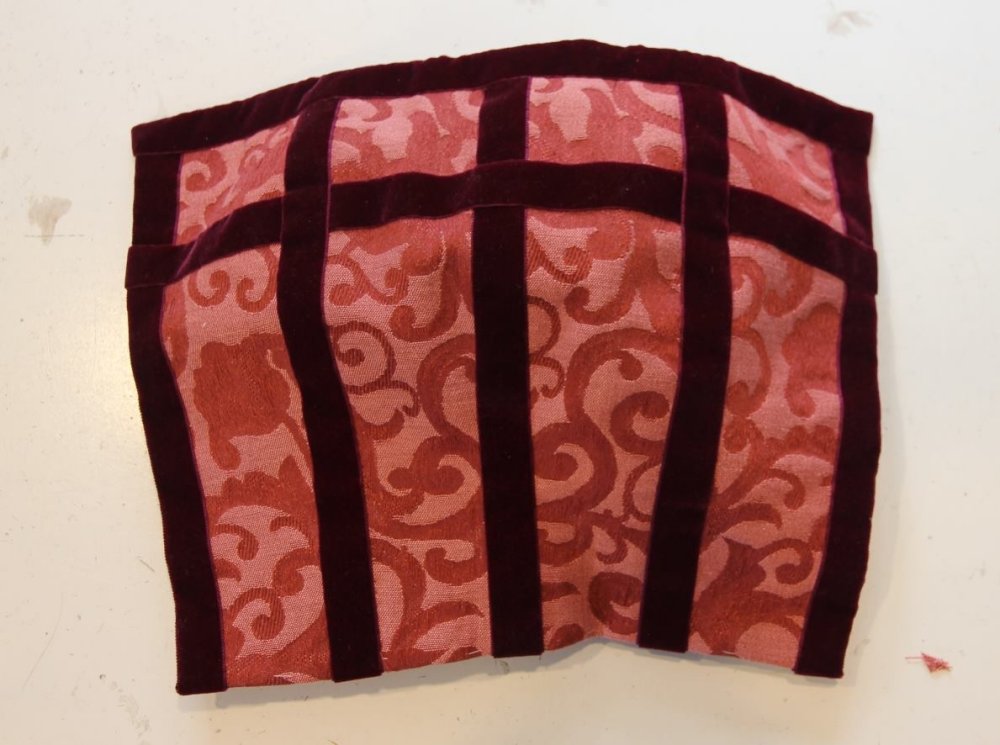
The front panel has a deceptive amount of shape – I used a 4-piece pattern to get the rounded form over the bust. I cut the pieces from canvas and brocade, basted them together, then sewed and pick-stitched the seams. I catch-stitched the hem to the canvas and couched velvet ribbon over the seams before lining the panel in red linen.
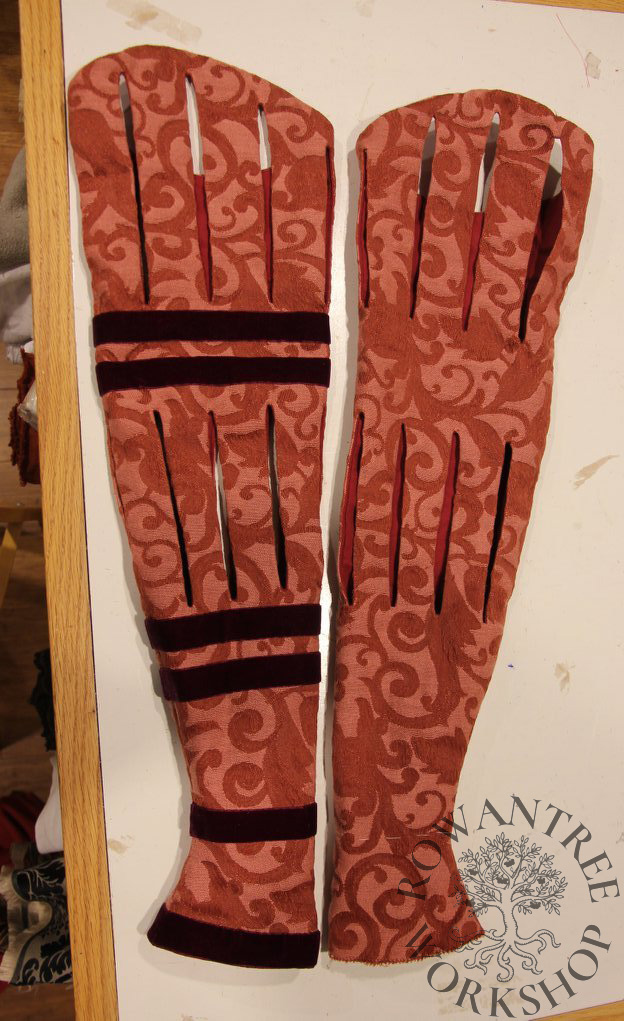
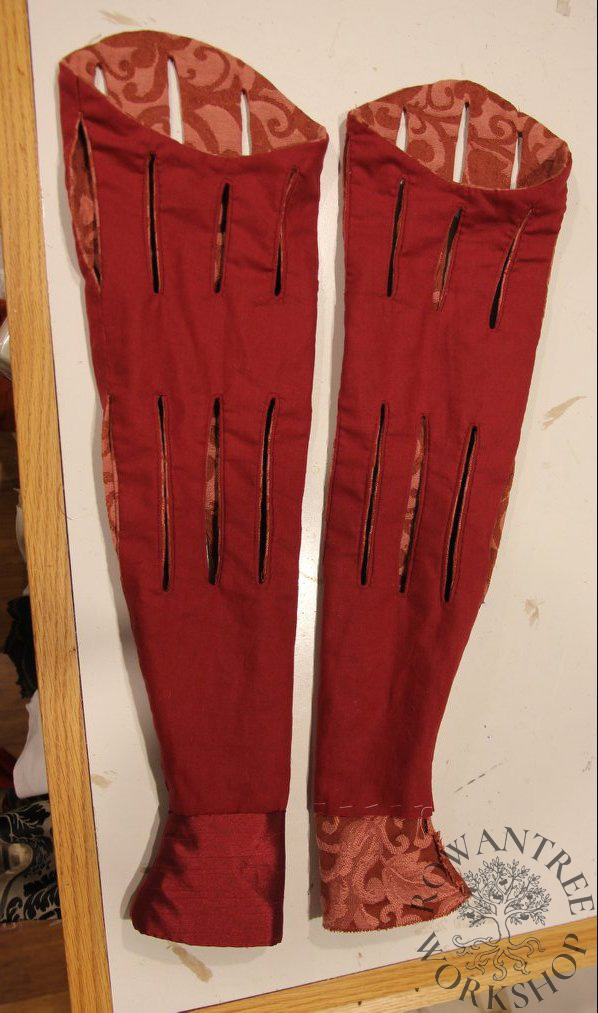
I patterned the sleeves with a rotated seam, then cut them in brocade. The painting clearly shows neat, well finished slashes within the fabric – not strips. I bound each slit in red linen by machine sewing around the area, slitting open, taking the linen to the back and basting in place. I slit the lining to match, turned the edges under and then slip-stitched in place.
Repeat for 27 more slits (the 4 on the seams were simply slip-stitched).
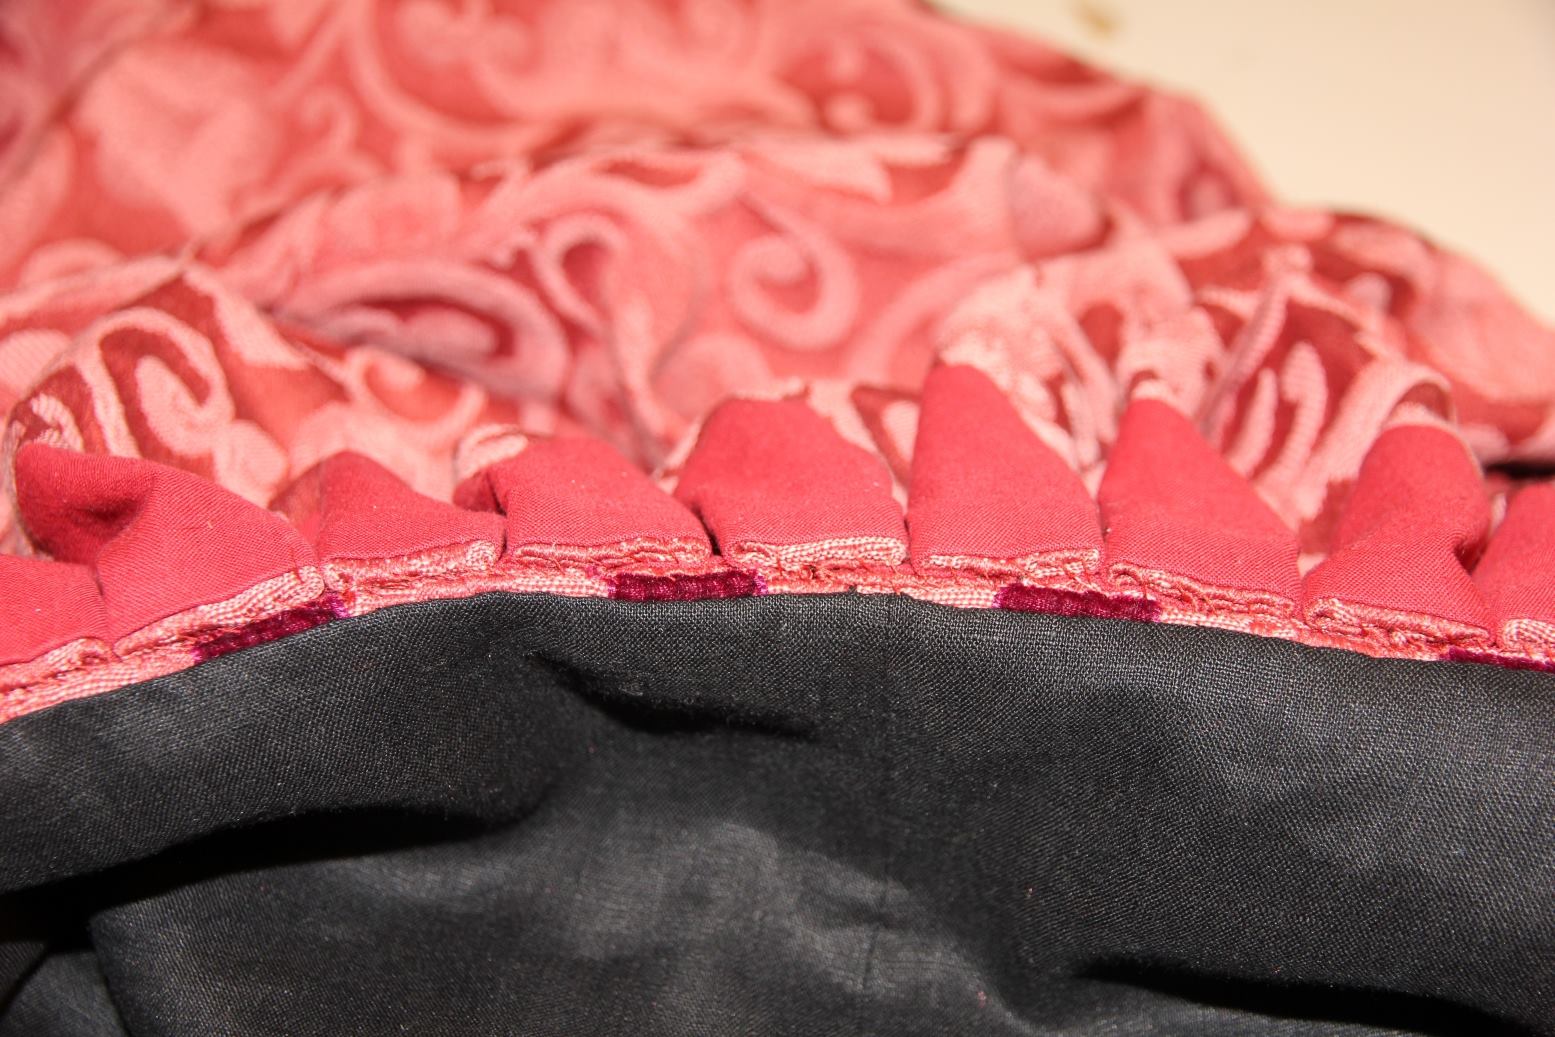
I hand-sewed the bands of ribbon to complete the look, then lined the cuffs in red silk. I slip-stitched the lining to the top of the sleeve, then worked 5 eyelets in red silk at the top of the 5 slits around the peak.
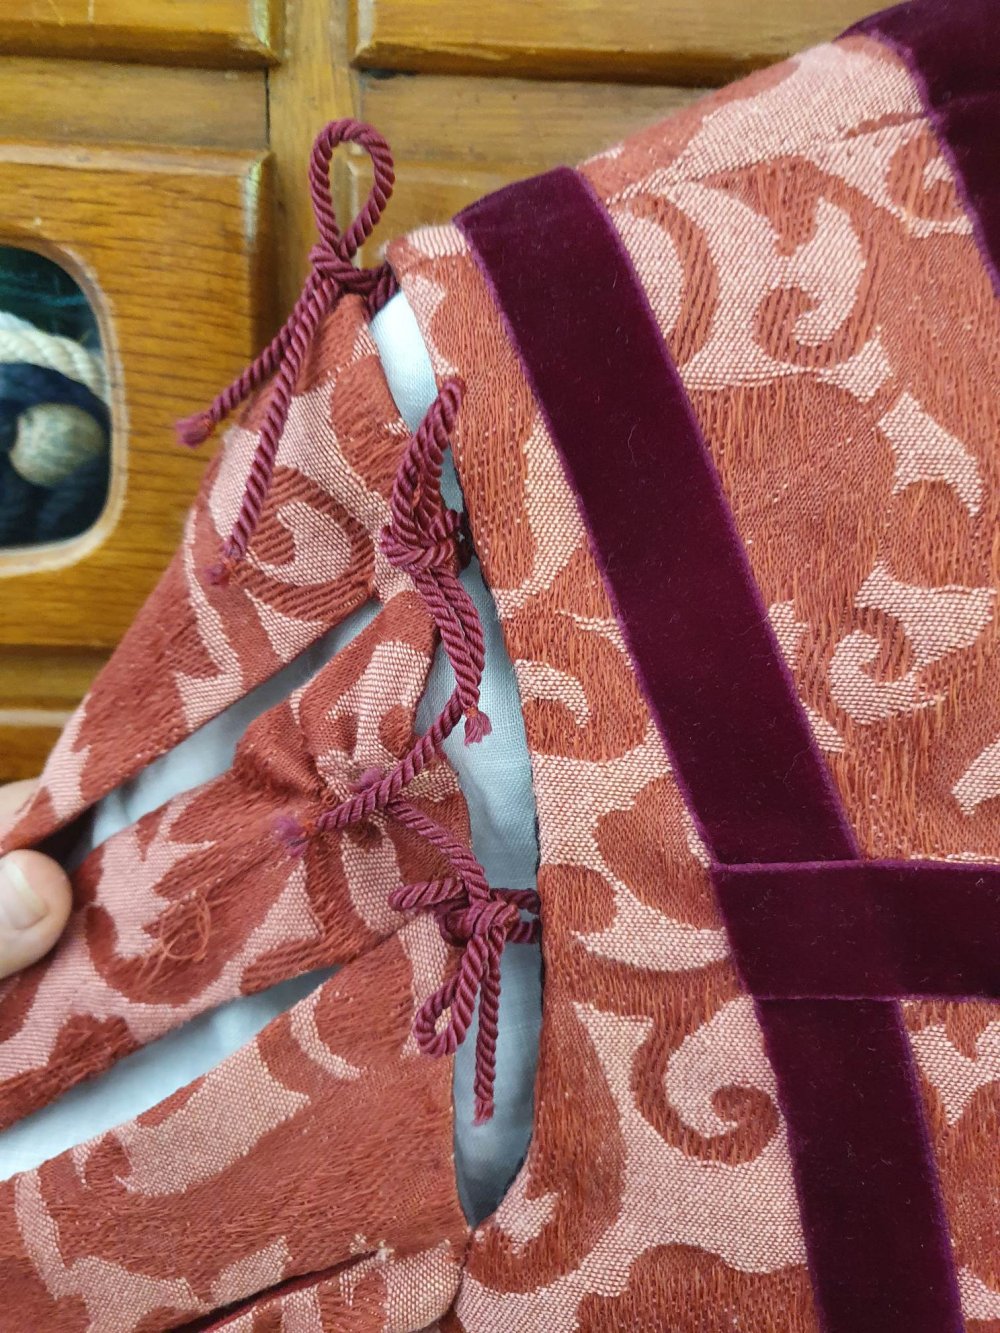
Back to the bodice…. I sewed on the ribbons, matching the spacing to the front panel and running over the shoulder, as seen in the portrait. The back design is conjecture, but is consistent with similar design on men’s garments from the time. I had planned to run them all the way down the front, but ran short on ribbon (naturally, I found the missing piece months later…).
I lined the bodice in red linen at the neck and black for the rest (I was short on red), hand-slipping it all around. I worked eyelets down the front of the bodice, where they would be hidden by the panel.
Since my fabric was wide (and I had enough), I cut the skirt as three broad wedges – each waist length at the top and full width at the base. I sewed these together by machine and hand-felled the seams, leaving a centre front opening. I didn’t want to line the whole skirt, so I just faced the top 6cm in linen.
I sewed the skirt to the bodice using box-pleats – over-sewing the outer layer, then sewing the inner pleats to the outer ones.

I sewed the front panel onto the bodice along down one side and across the front to the opening. The skirt is closed with a couple of hooks on the Brustfleck and buttonhole loops on the bodice – since the under-dress does all the work, there is no great strain on the outer gown (although sometimes it needs an extra pin or two).
To finish the sleeves, I sewed the underarm section to the base of the armscye, then sewed twisted cord ties to the upper half.
I tried on all the layers using a stunt Hemd, then cut the hem and finished with a narrow guard of plum velvet – a good match for the bodice ribbon trim.
With the gown finished, I could pattern and make the Hemd, ensuring the gold band would sit just above the top of the front panel. And to complete the look, I made matching headwear – Haube and Barett.
I am pleased with the end result – it evokes the look of the original, fits well and is comfortable to wear.