

An early 16th century German Frauenhemd (woman’s shirt), based on Portrait of a Lady by Martin Schaffner. It was worn by German women of the middle class, such as merchant’s wives.
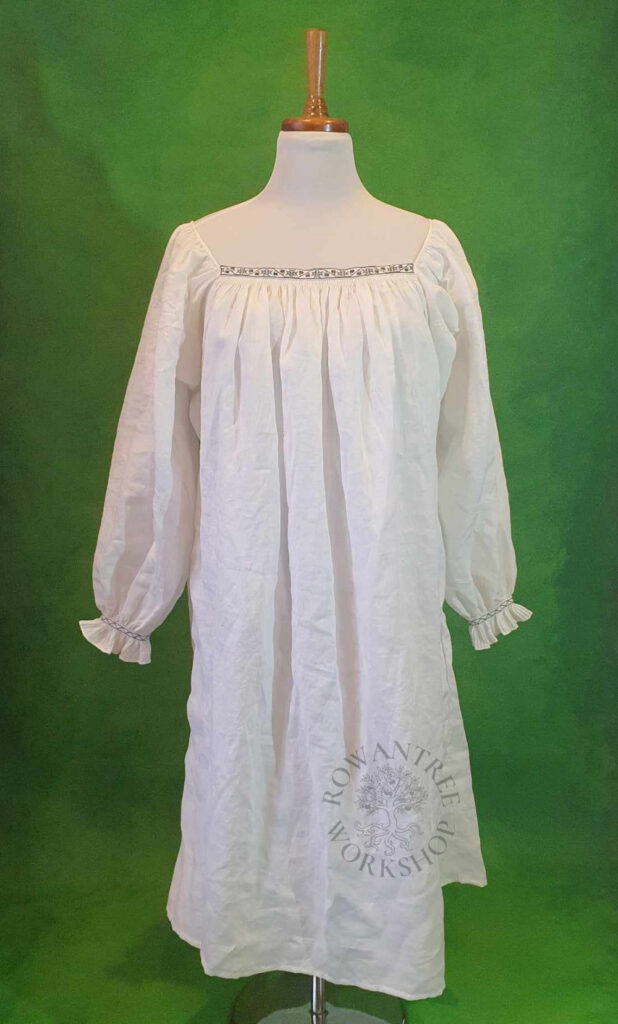
This Hemd has the same basic construction as the Simple Frauenhemd, but has fuller sleeves, pleated cuffs and embroidery at neckline and cuffs.
Research & Design
Zander Seidel (1990) states the Frauenhemd was in use by 1500, but was then replaced the high-necked Halshemd from the 1520s. However, there are still many examples of the Frauenhemd in art through to mid century and a reference to an ‘old-Franconian cut-out Frauenhemd’ from a probate inventory of 1577, so it was clearly still in use into the later 16th century, even if no longer fashionable.
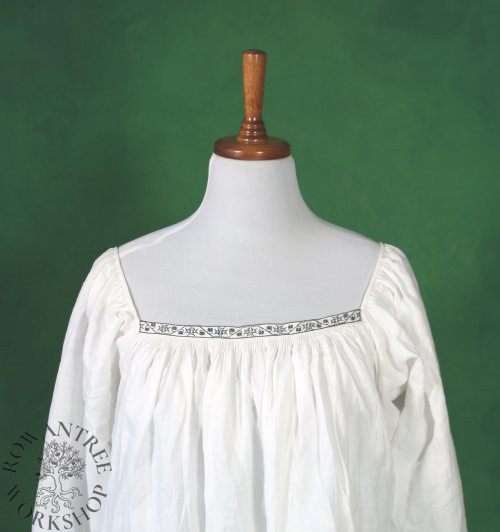
My inspiration for this Hemd comes from the Portrait of a Lady by Martin Schaffner. The small strip of embroidery adds interest above the neckline and the frilled cuffs work well under the open sleeves. (I also like the embroidered Steuchlein, but that’s a project for another day!)
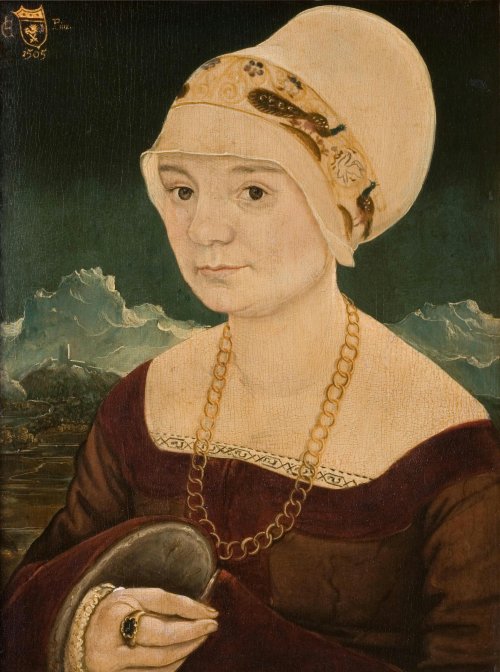
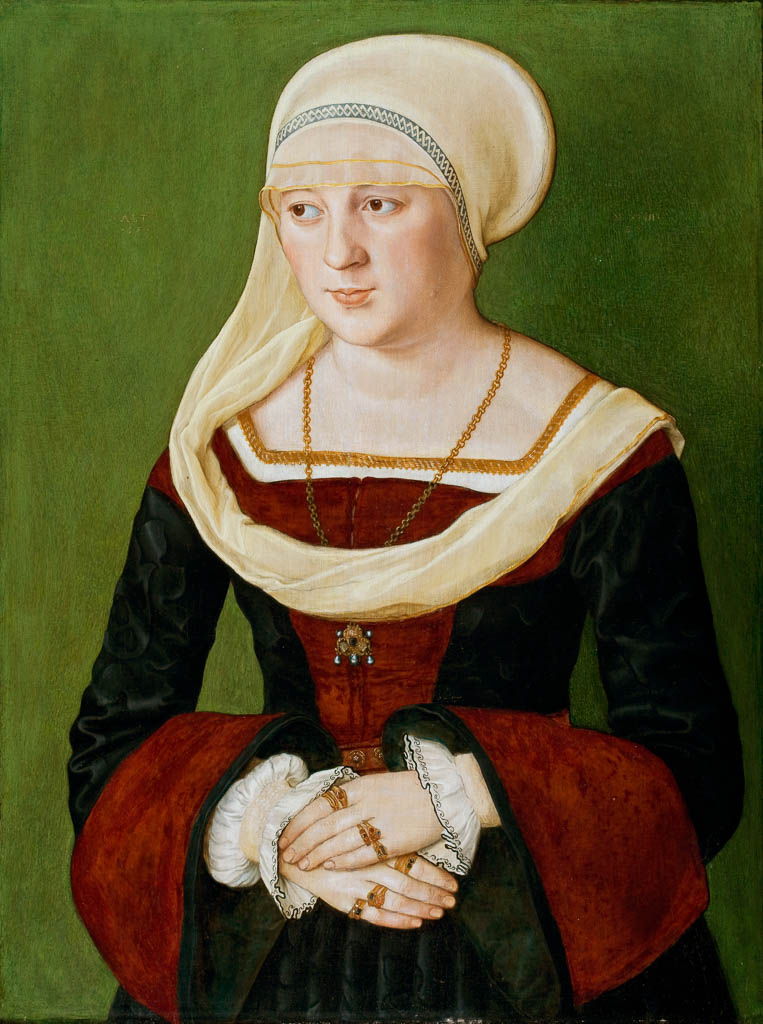
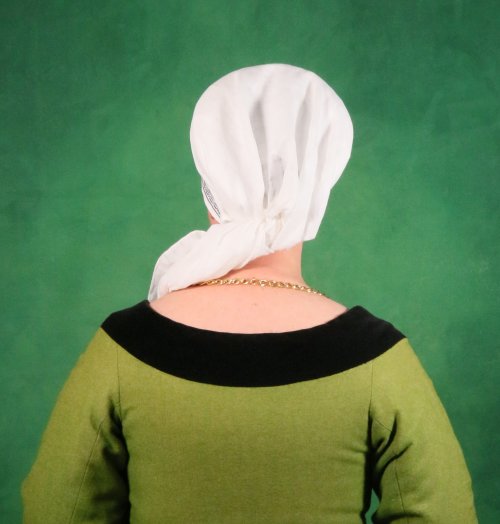
These middle class examples show a variety of finishes at the neckline. The Martin Schaffner portrait shows embroidery at the front, but the remaining neckline is hidden. The Jörg Breu painting has no linen visible at the neckline, but the cuffs show she is wearing a Hemd. The Barthel Beeham portrait has a gathered neckline visible all around, with a gold braid edge.

Other options for middle class neck finishes include a small frill or ruffle around the edge, and a fine bound edge using the same linen. The bound edge also works well when you don’t want the Hemd visible at the neckline – it can sit under the Rock neckline without adding bulk.
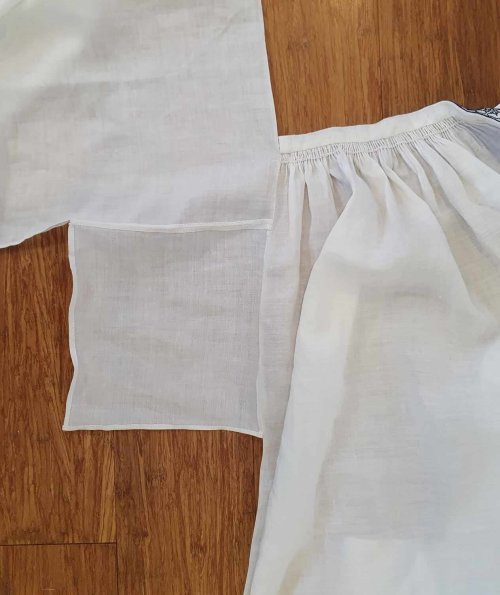
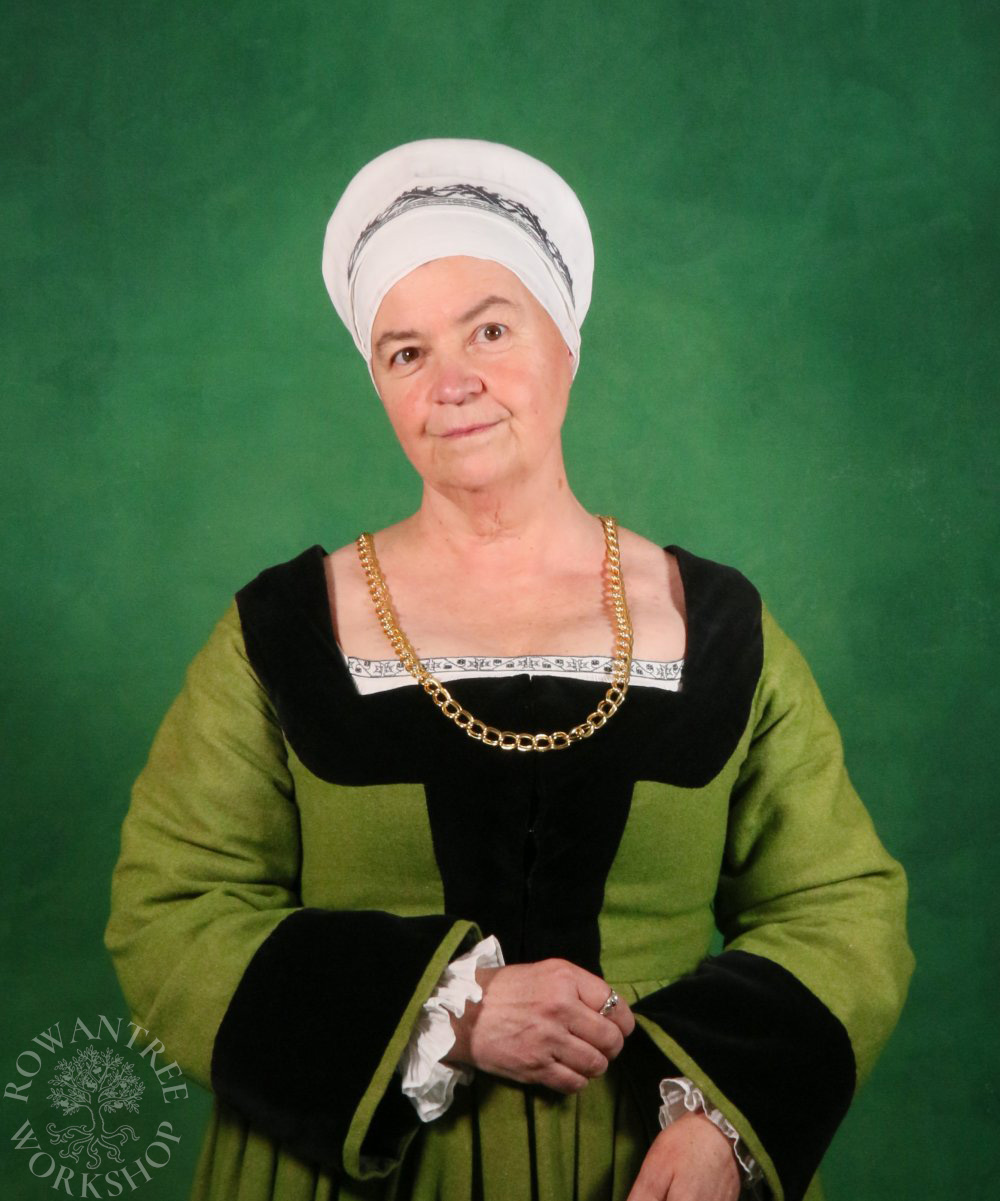
These middle class German gowns with slightly flared sleeves usually show a ruffled cuff, held in with a band, often decorated, as seen in the examples above. I have a green wool Rock in this style – this Hemd will be perfect for it.
There are very few extant body linens and those that remain tend to be elite examples, and not German, but they still tell us much about the fabric, cut and construction.
The elite examples in Patterns of Fashion 4 (Arnold, 2008) show several methods for finishing seams: run and fell, fine hemmed and whipped together, or held with decorative insertion stitches. The simple linen shirt of Svante Sture is made by whipping together the slevedges to each other, or to fine hemmed edges.
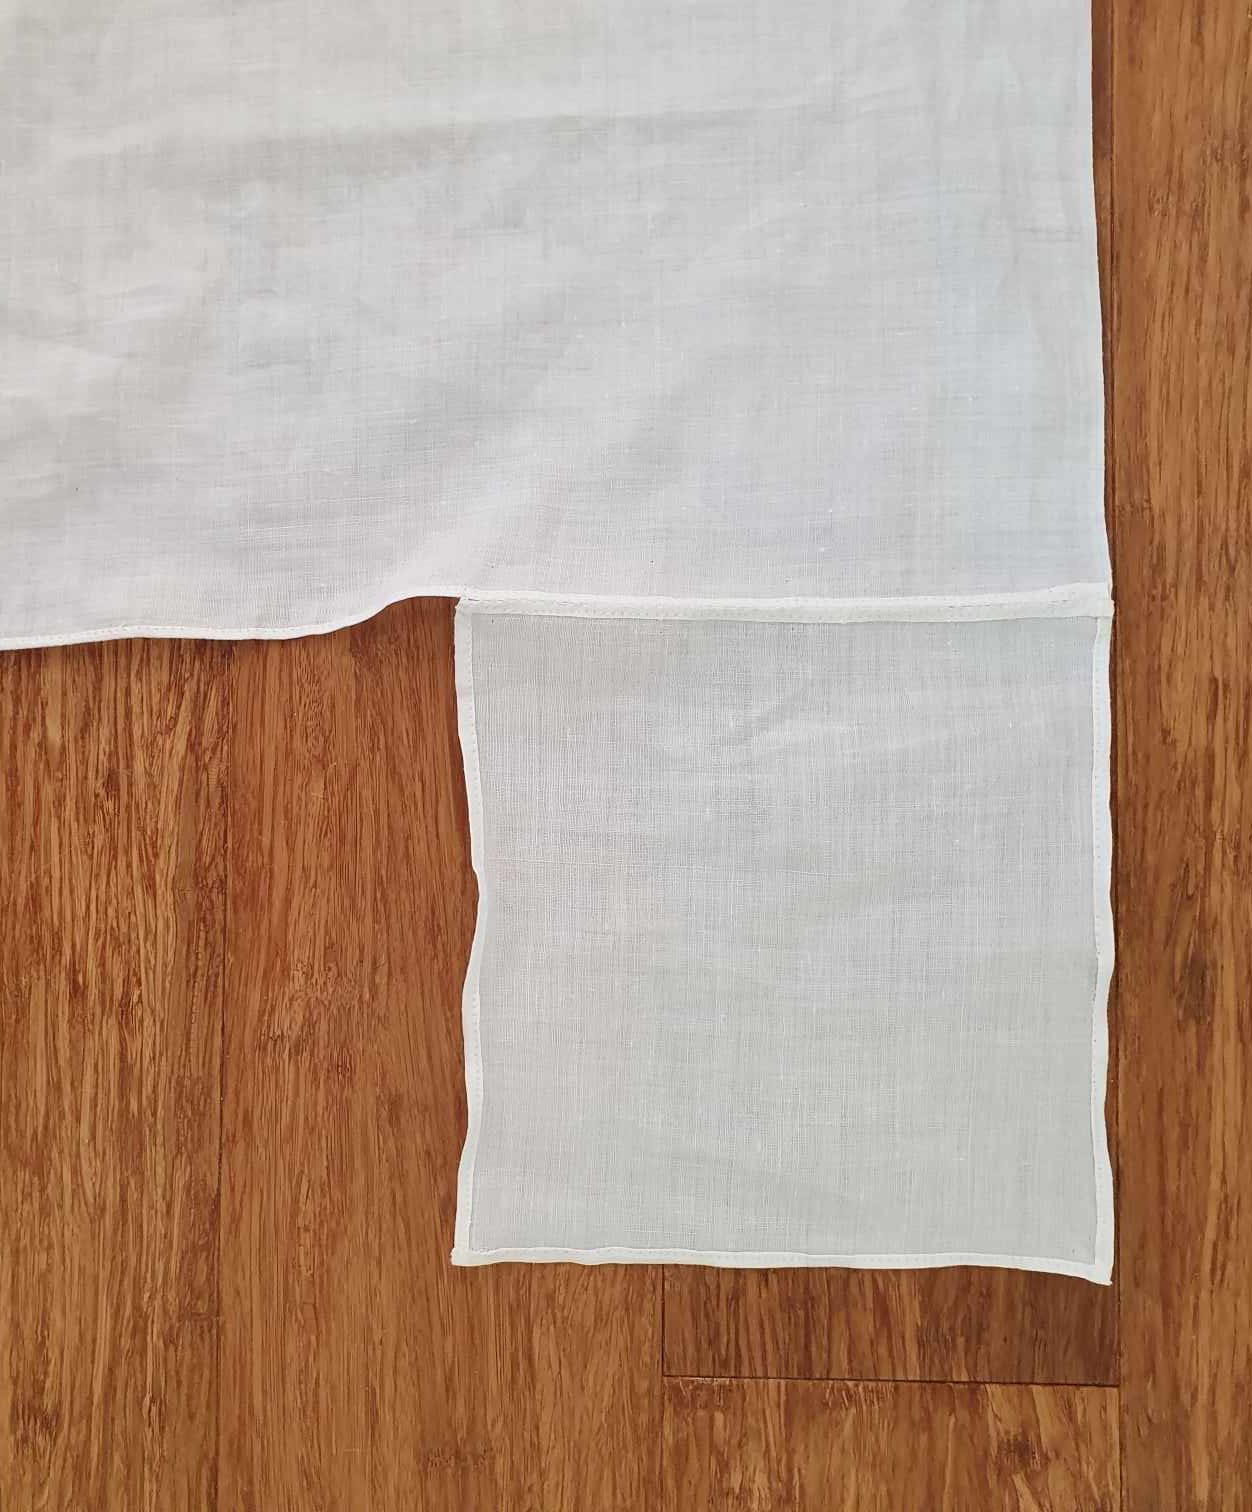
I have some fine 90cm wide linen with a true selvedge, so I plan to construct this Hemd using this technique – leaving the selvedges plain, turning fine hems on cut edges and sewing the finished pieces together. This is a good approach to use if you have problems with the run and fell construction, or want a good basket project.
It will have a narrow strip of embroidery at the front neckline, with the sides and back finished with a narrow self binding. The sleeves will be slightly full, with pleated cuffs.
Construction
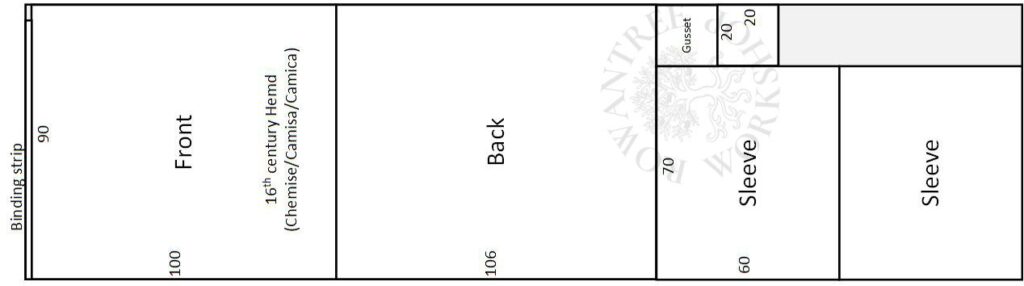
Like the Simple Frauenhemd, this style of Hemd is made of simple rectangles with square gussets under the arms. The dimensions will depend on your size, the status of the garment, and the width of your linen.
My pattern for this Hemd would be a good starting point for a range of women’s sizes, but if want to make a custom version, with the neckline sitting exactly where you want it, my Simple Frauenhemd has a detailed explanation.
To get the best from my 90cm fabric, I’m cutting the sleeves across the grain.
Embroidery
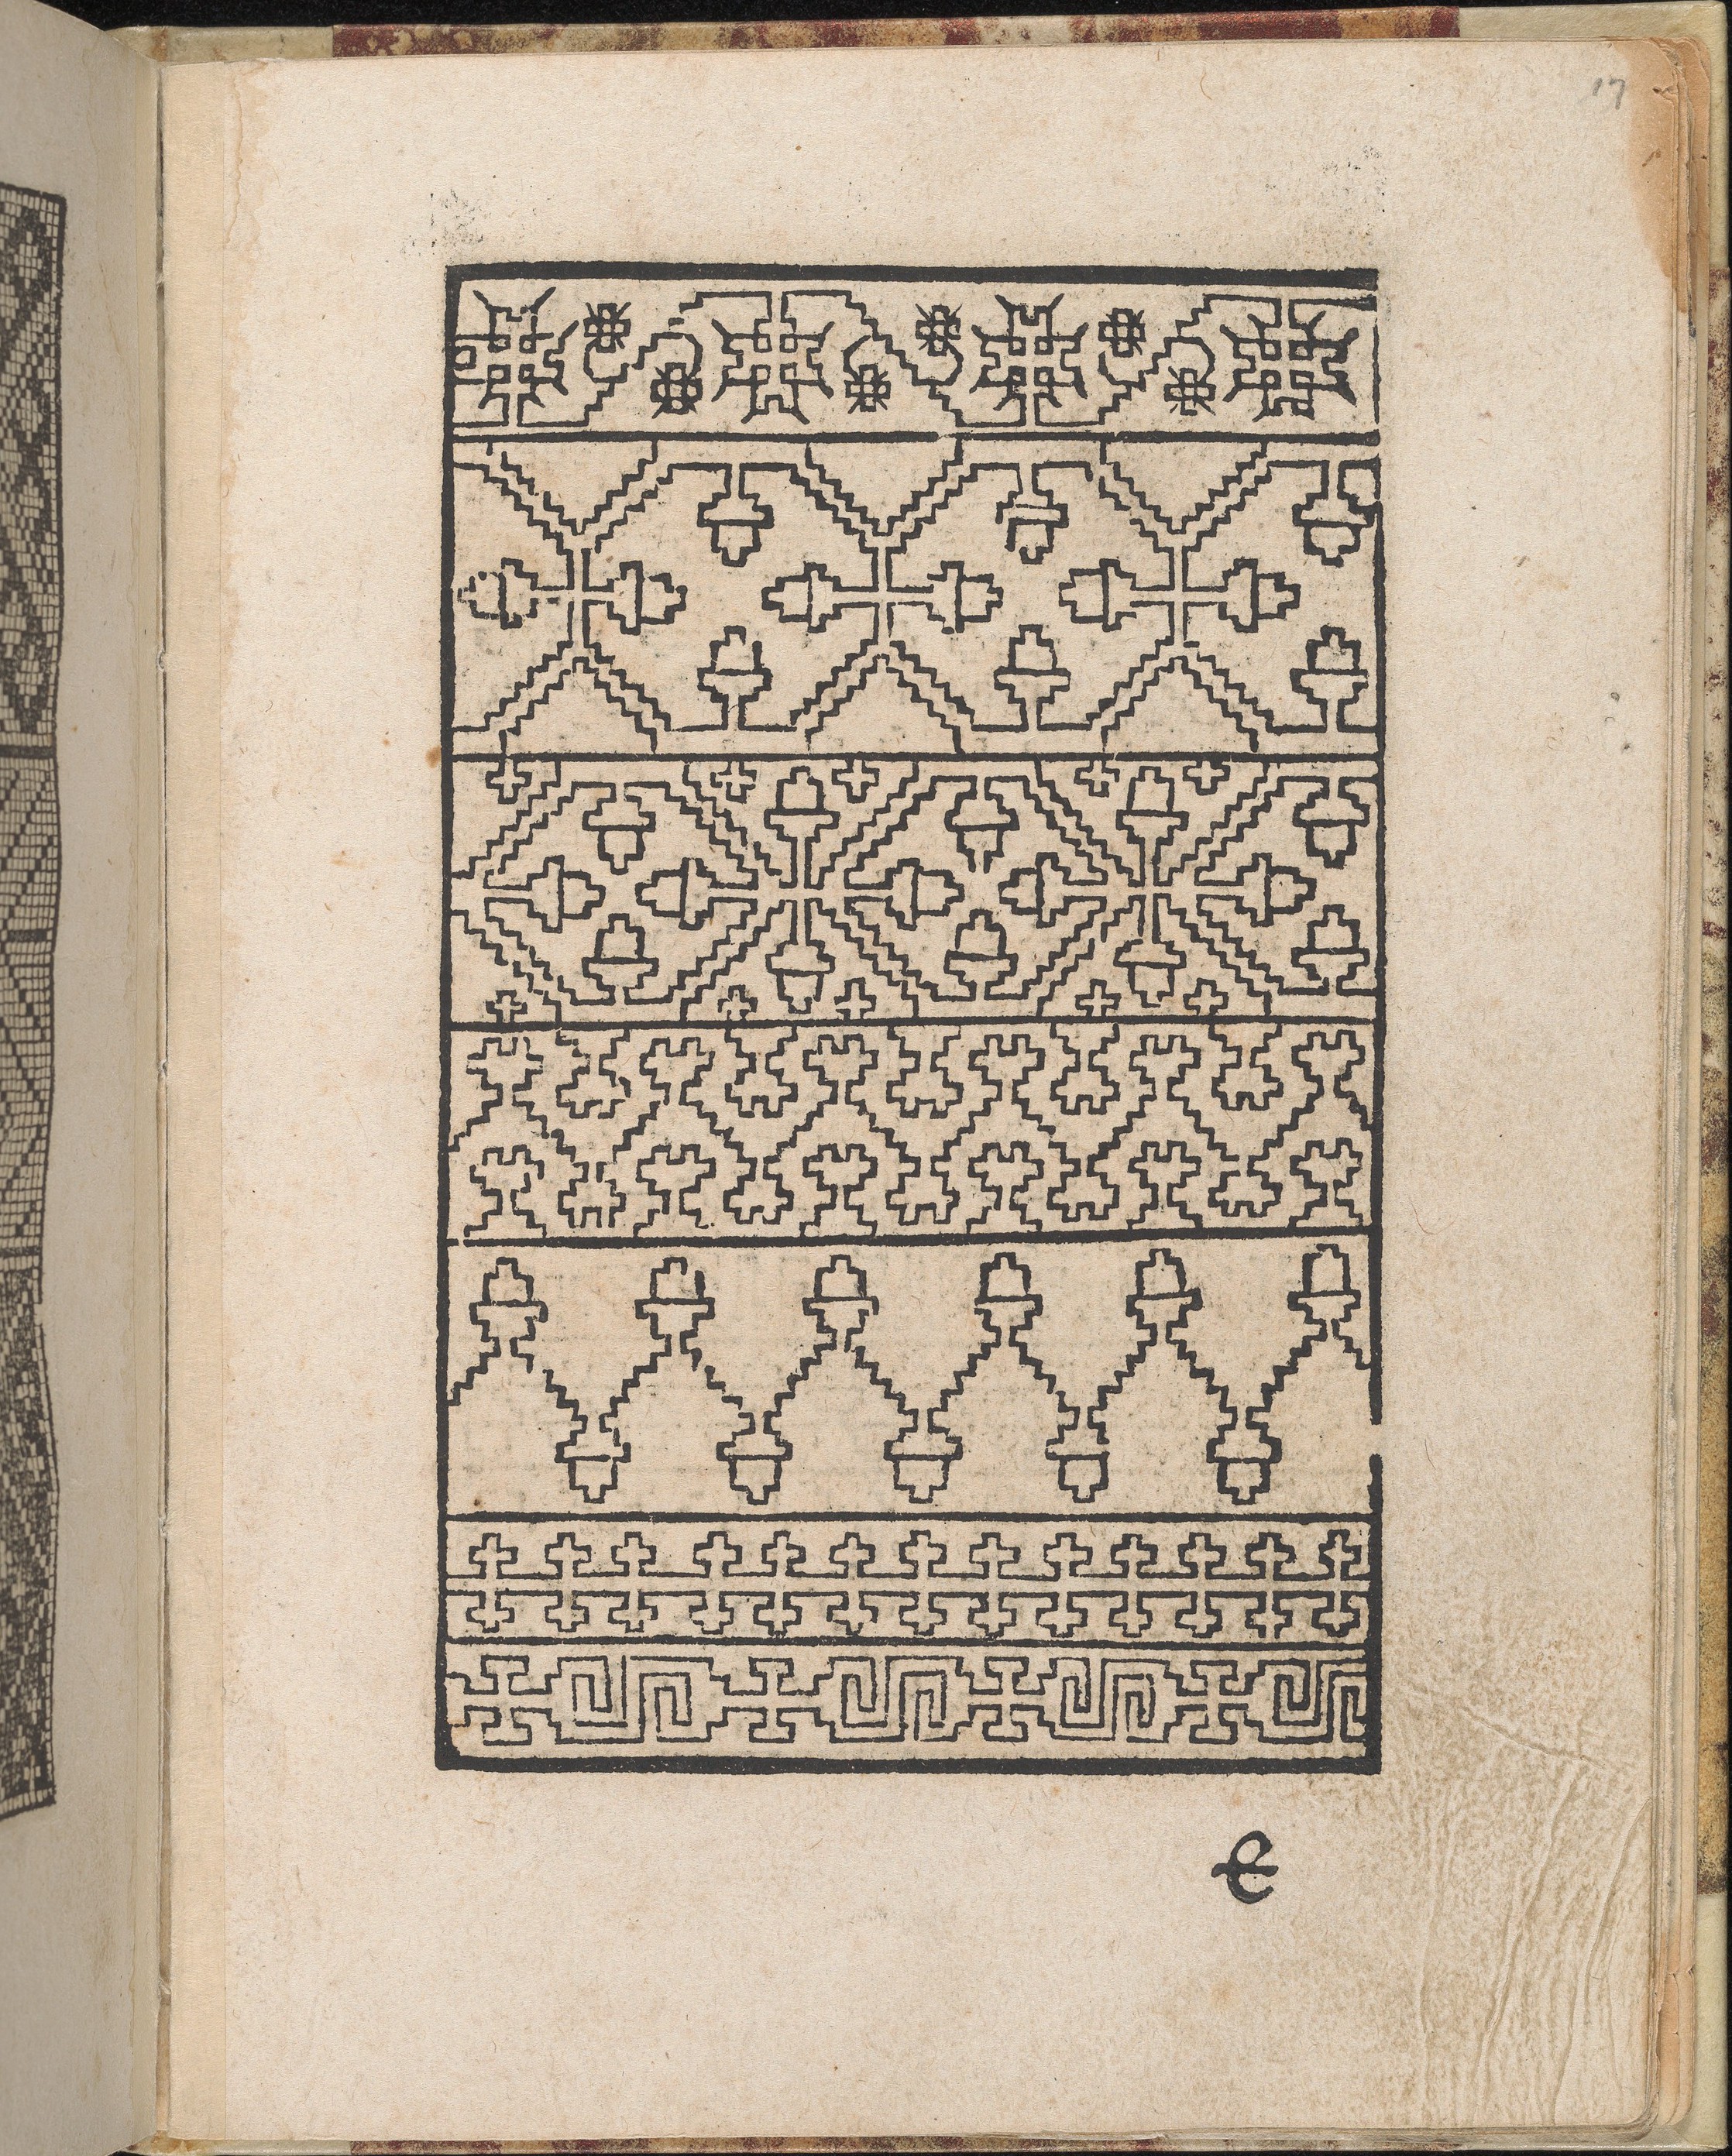
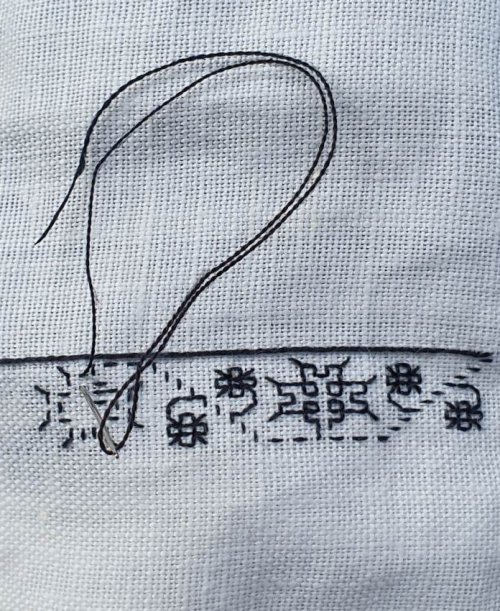
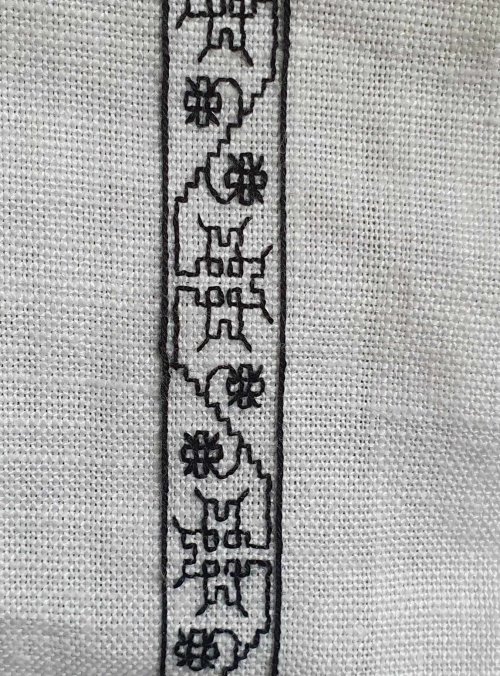
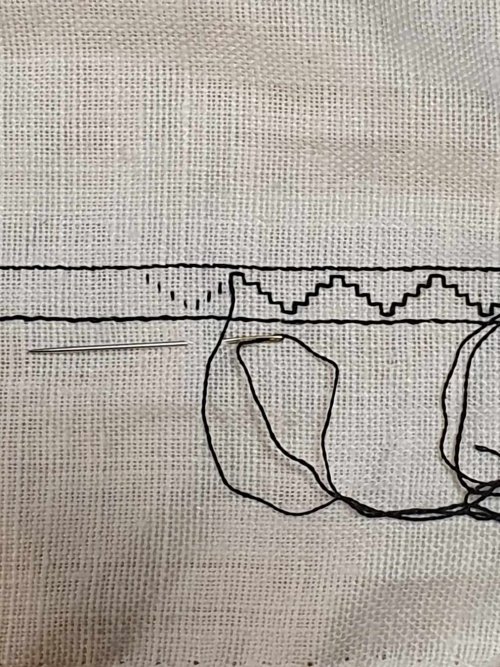
The neckline embroidery was inspired by the Martin Shaffner portrait, but the design is taken from Johann Schönsperger’s 1529 Modelbuch. I’ve worked this in Holbein stitch (double-running) using silk thread on 28 count linen. The design is worked in two steps and I needed to pay close attention to the sequence!
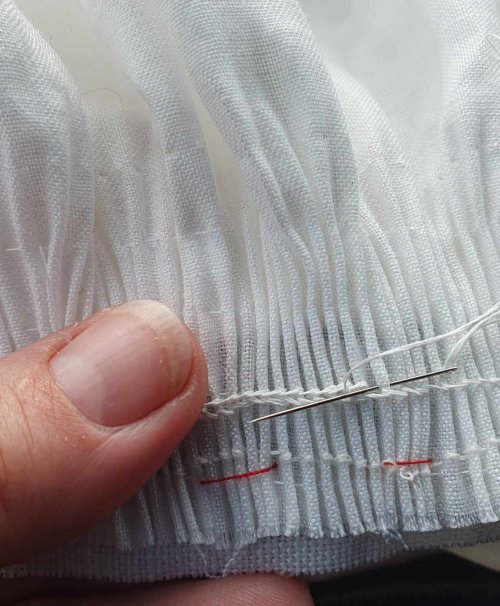
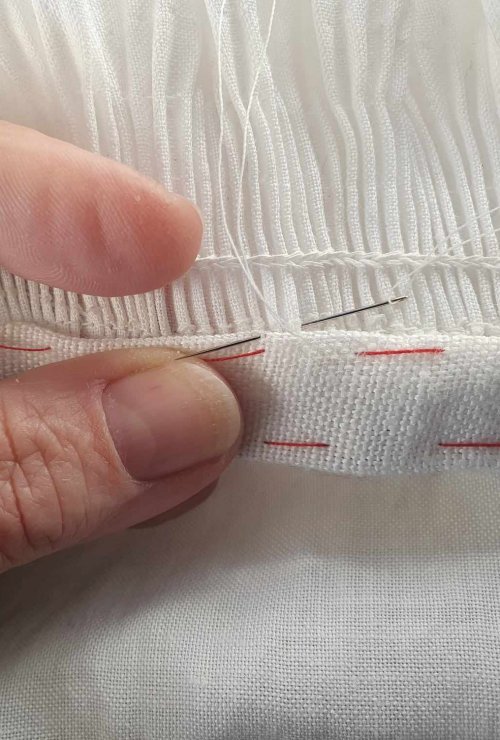
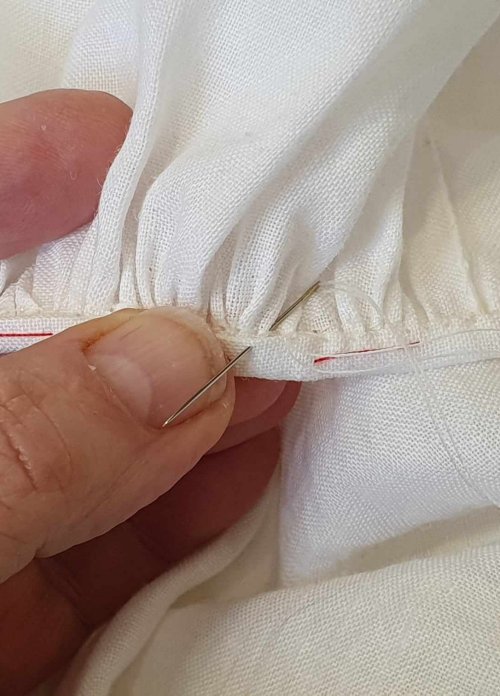
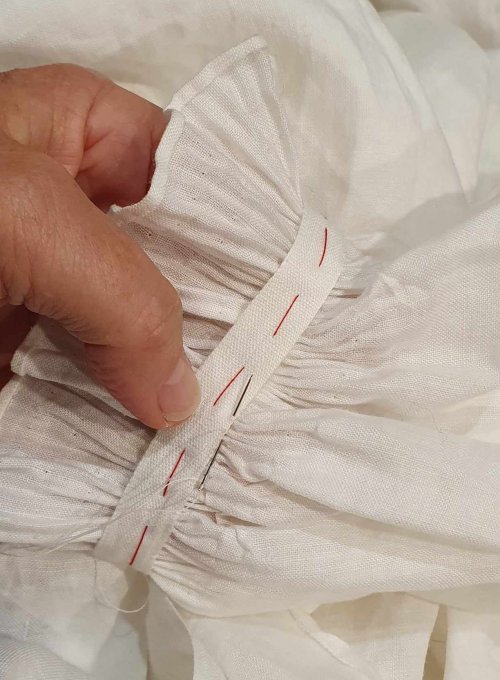
Because the front panel has embroidery, I am gathering and finishing it first. Although I could have gathered this with a pair of threds, I put the linen through my smocking pleater to ensure tiny, neat pleats. I also pleated the cuff ends of the sleeves.
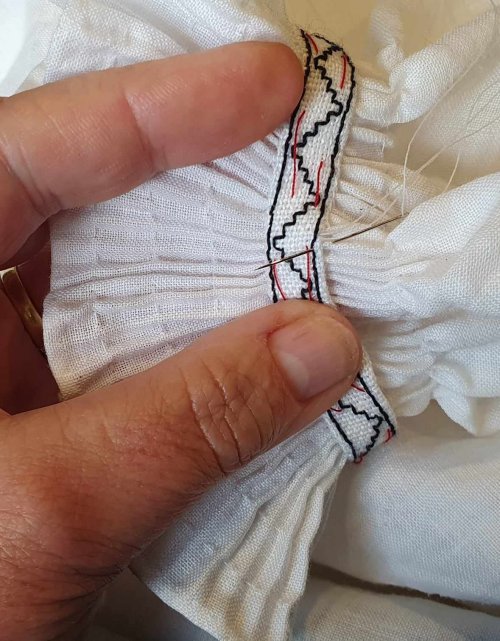
I marked the embroidery and pleats in 1/8ths, pinned them together and drew up the pleats evenly, then basted the embroidery to the front. I worked two rows of backstitch over them in waxed linen thread. This won’t be visible from the front, but will stabilise the pleats.
I sewed the embroidery on, then turned the strip to the back and sewed it down to finish the top edge and sides.
The next step is to finish all the raw edges to be joined – the arm seams and around the gussets. The sides have a true selvedge, so they don’t need finishing; the neckline and hem will be bound, and the cuffs and base hemmed last.
Since these seams won’t be seen, I could have machine hemmed of them, but hand-sewed the cuff end of the sleeve. Even id you machine sew, the corners need to be hand finished for a neat result. (If you prefer hand-sewing, this makes a great basket project, because you can work on one piece at a time.)
I’d planned to joined the sections together using a fine machine zig-zag, but hand-sew the cuff, since this will be visible, and the gussets for accuracy. But I got on a roll and ending up hand-sewing the whole garment using fine whipstitch, with an extra lock-stitch every few centimeters.
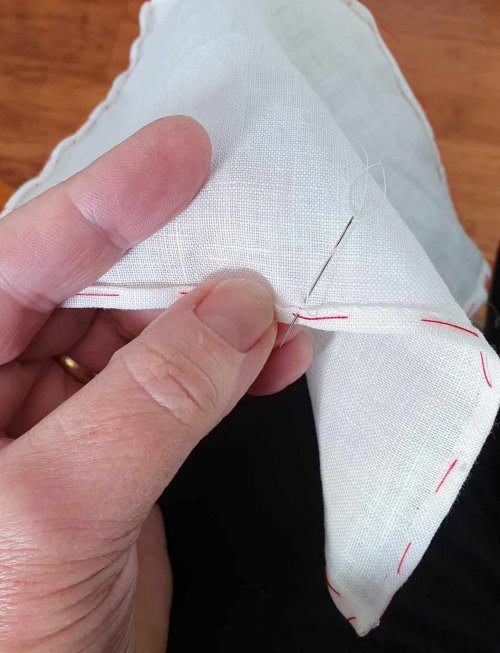
The underarm gusset is much easier to insert using this method. You still need to follow a logical sequence to ensure the neckline sits in the right place.
- Sew the gusset to the top/side of sleeve
- Sew the front to the sleeve+gusset, with the front offset – here, the top of the embroidery is 7cm above the gusset seam
- Take the free corner of the gusset and match it to the other top sleeve corner. Starting at the corner, sew the gusset to the sleeve and continue along the sleeve seam to the cuff
- Finally, match the back to the sleeve+gusset, back offset – here, the back is 13cm above the top of the gusset seam.
- Repeat for the other side.
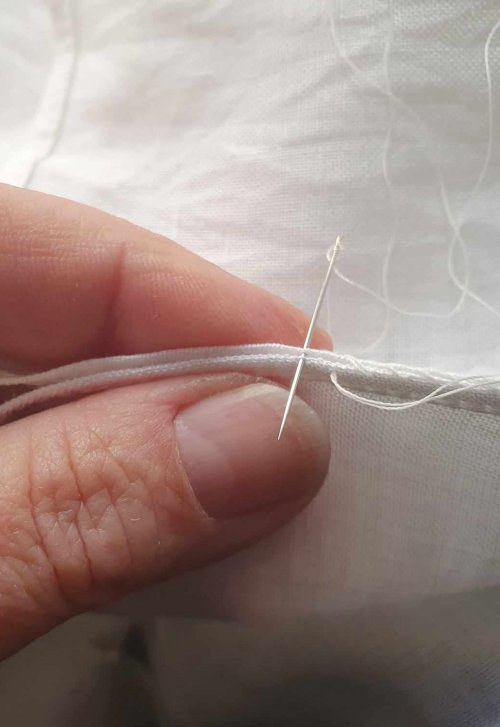
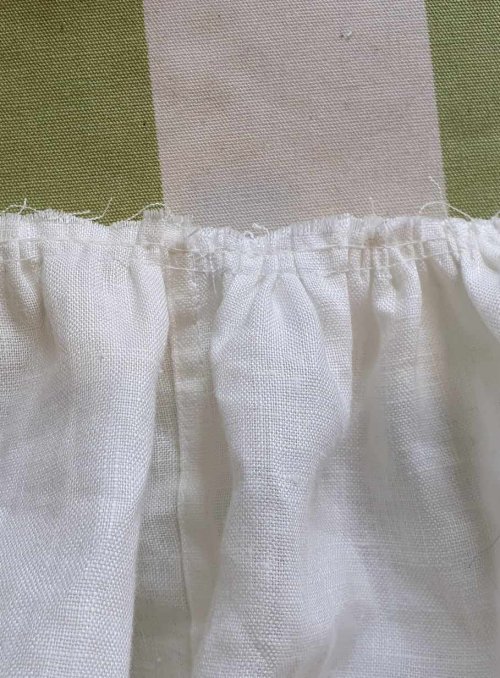
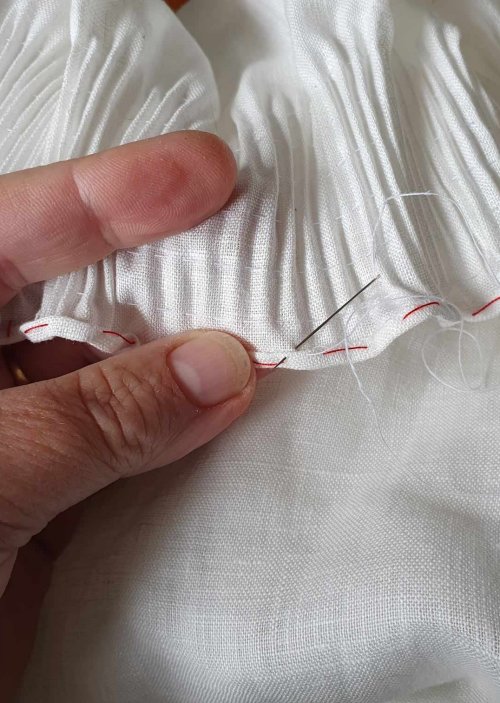
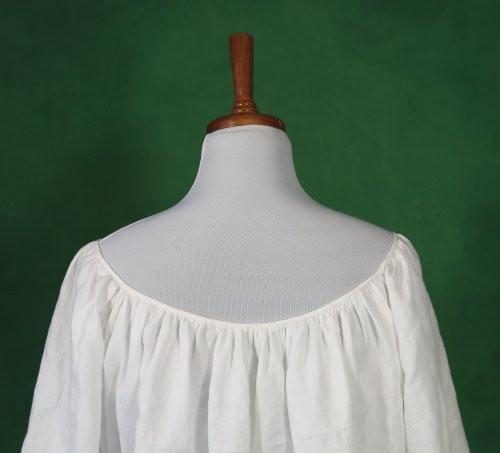
I finished the rest of the neckline by gathering it and binding it. I ran a pair of gathering threads around the neckline, then marked the neckline in sections – in quarters for the sleeves, and 1/8ths for the back, which has more fabric.
To bind the edge, I use a strip of the same linen, 20mm wide and 84cm long (neckline sides + back + end turnings). I turn the ends under, mark the back corners, then divide the sides into 4, and the back into 8 to match the gathered neckline.
With the ends pinned in place (on the outside), I match the marks and draw up the gathers to fit, distributing them evenly, then sew a 5mm seam. I turn the binding to the inside, fold, baste and sew it to the stitchline. Then I sew the ends of the embroidered band to the binding to finish the front corners.
To make the pleated cuffs, I turned a fine hem along the edge to finish them, then marked the depth of the frill. At this point I belatedly realised that I would need something to hold the pleats! Although it is not visible on the Martin Schaffner painting, other portraits of this style show a decorative trim at the cuff.
I wanted this to match the neckline embroidery, but less ornate, so I worked a narrow strip of embroidery in the same linen and silk using a simple step design. After I sketched it out, I found the same pattern in another modelbook (Quentel, 1544).
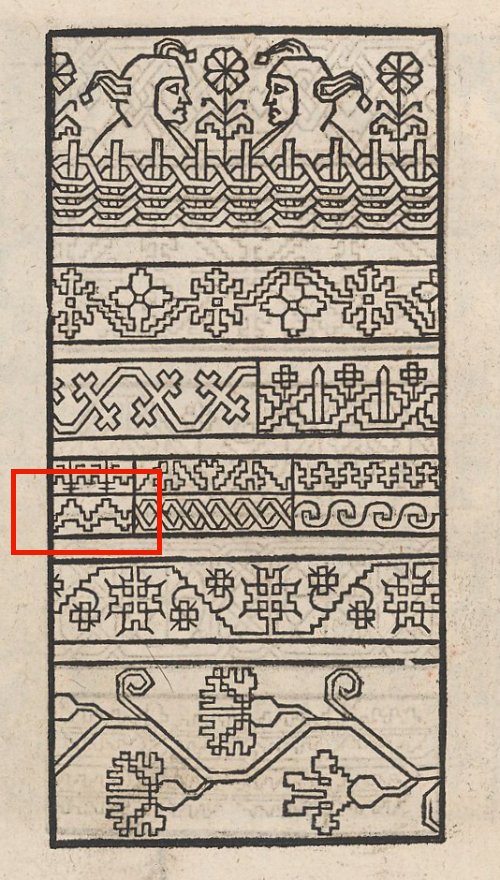
Ein neu kunstlich Modelbuch…
I sewed the finished strip together to make a ring, just large enough to get my hand through without a fastening, then turned and basted the edges.
I marked the sleeve and embroidery in 8 parts, pinned and drew up the gathers evenly, then basted. I sewed the embroidery along both sides, stitching at every pleat to hold them neatly. Because cuffs get dirty and wear, I ‘ve sewn woven tape to the inside of the cuff to protect the pleats, which I can replace if needed. They worked out really well.
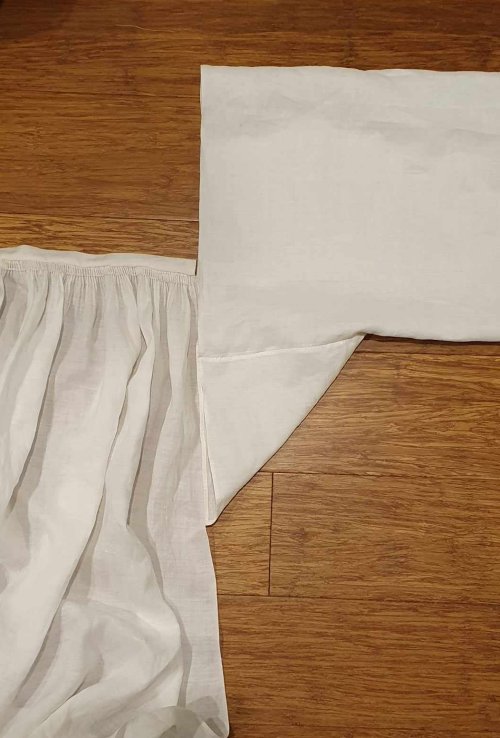
Finally, I turned a small hem on the Hemd and felled it down – the Hemd is complete and ready to wear!
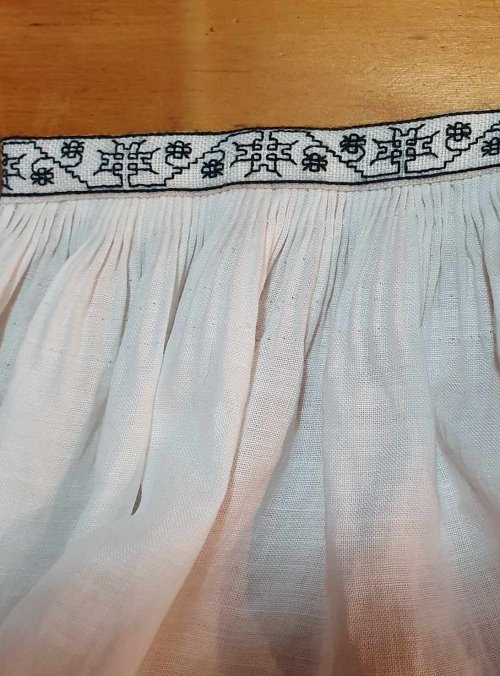
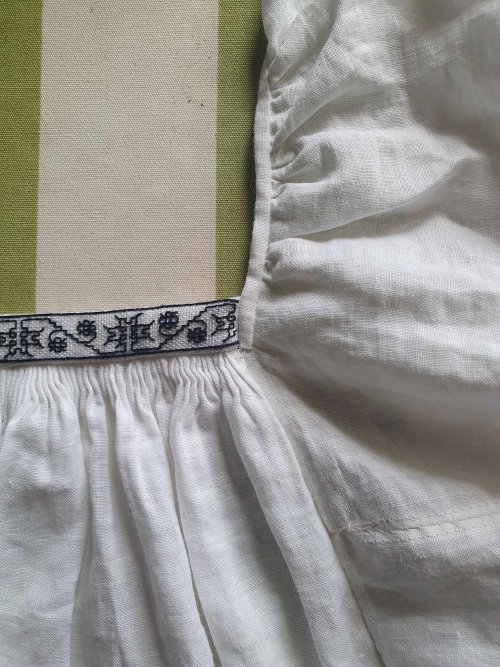
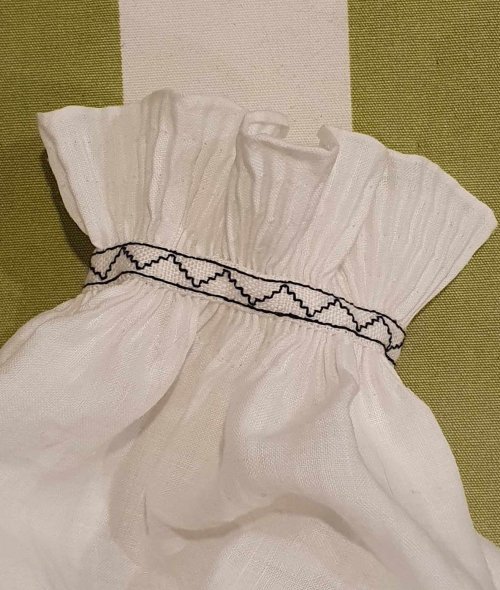
It sits well, with the front embroidery lying flat and the back bound edge out of sight.
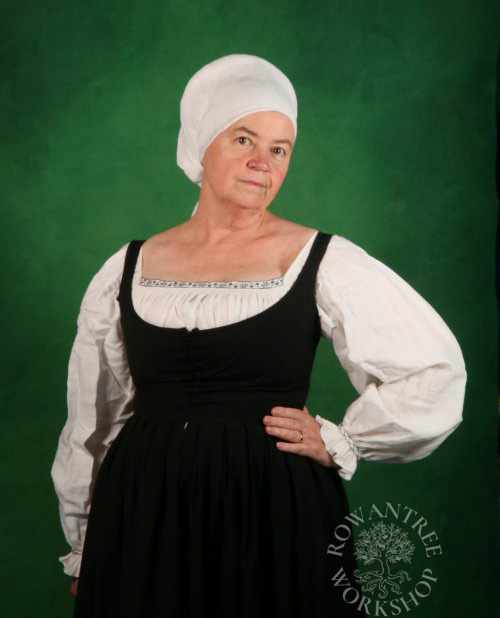
I was really pleased with how this looked with my green wool Rock. The narrow band of embroidery looks great above the neckline and the cuffs really add to the effect – just like in the Martin Schaffner painting.
Variations
The same basic construction method can be used to make other styles of middle class Hemden, such as the examples below – frill all around, bound, or braid edged; round or square.


Full frill
- With a pleater: Pleat the top of the front, back and sleeves, then construct the garment. Fine hem the neckline edge
Otherwise: Construct the garment, fine hem the edge, then run a pair of gather threads aroung the neckline - Sew your ribbon into a loop, mark at front and back seam points (put the seam at the side back)
- Divide and gather evenly as described in the project above, then sew on the ribbon, leaving the frill above.
For a square neckline as seen in the Holbein drawing, mitre the corners of the ribbon at the seam points.
Fully bound
- With a pleater: Pleat the top of the front, back and sleeves, then construct the garment
Otherwise: Construct the garment, then run a pair of gather threads aroung the neckline - Sew your binding into a loop, mark at front and back seam points (put the seam at the side back)
- Divide and gather evernly as described above, then sew the binding to the outside.
- Fold over, fold the edge under and sew, as described in the project above.
Braid edge
Remember to pre-shrink your braid!
The easiest approach is to bind the whole edge as above, then sew the braid around on top of the binding. This ensures a neat finish and also means that you can remove and replace the braid if it wears.
For a square neckline as seen in the Beeham painting, mitre the corners of the braid at the seam points.