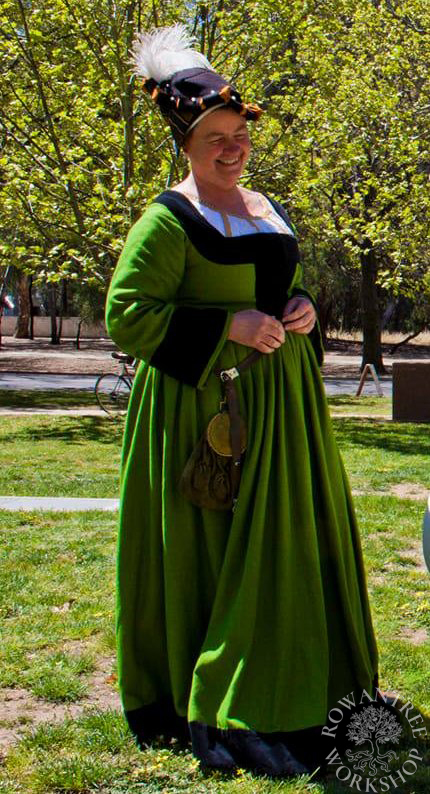
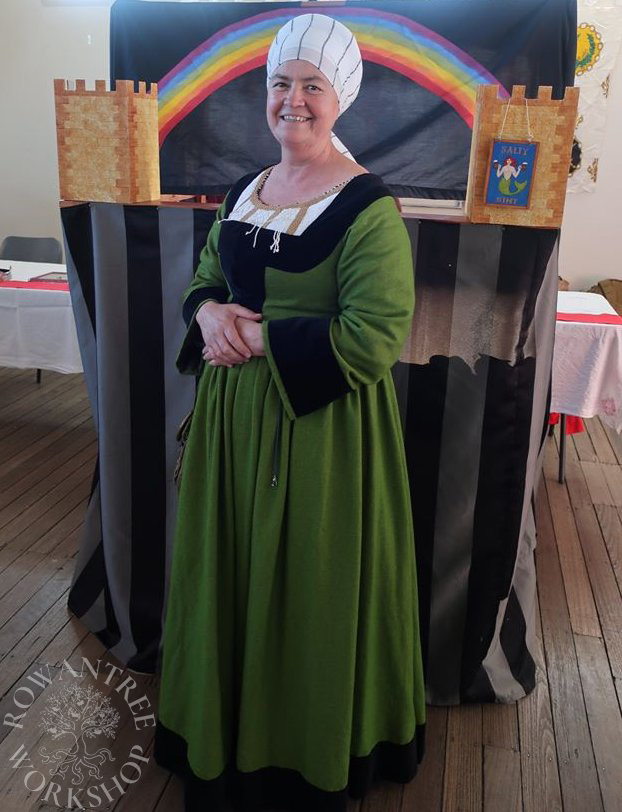
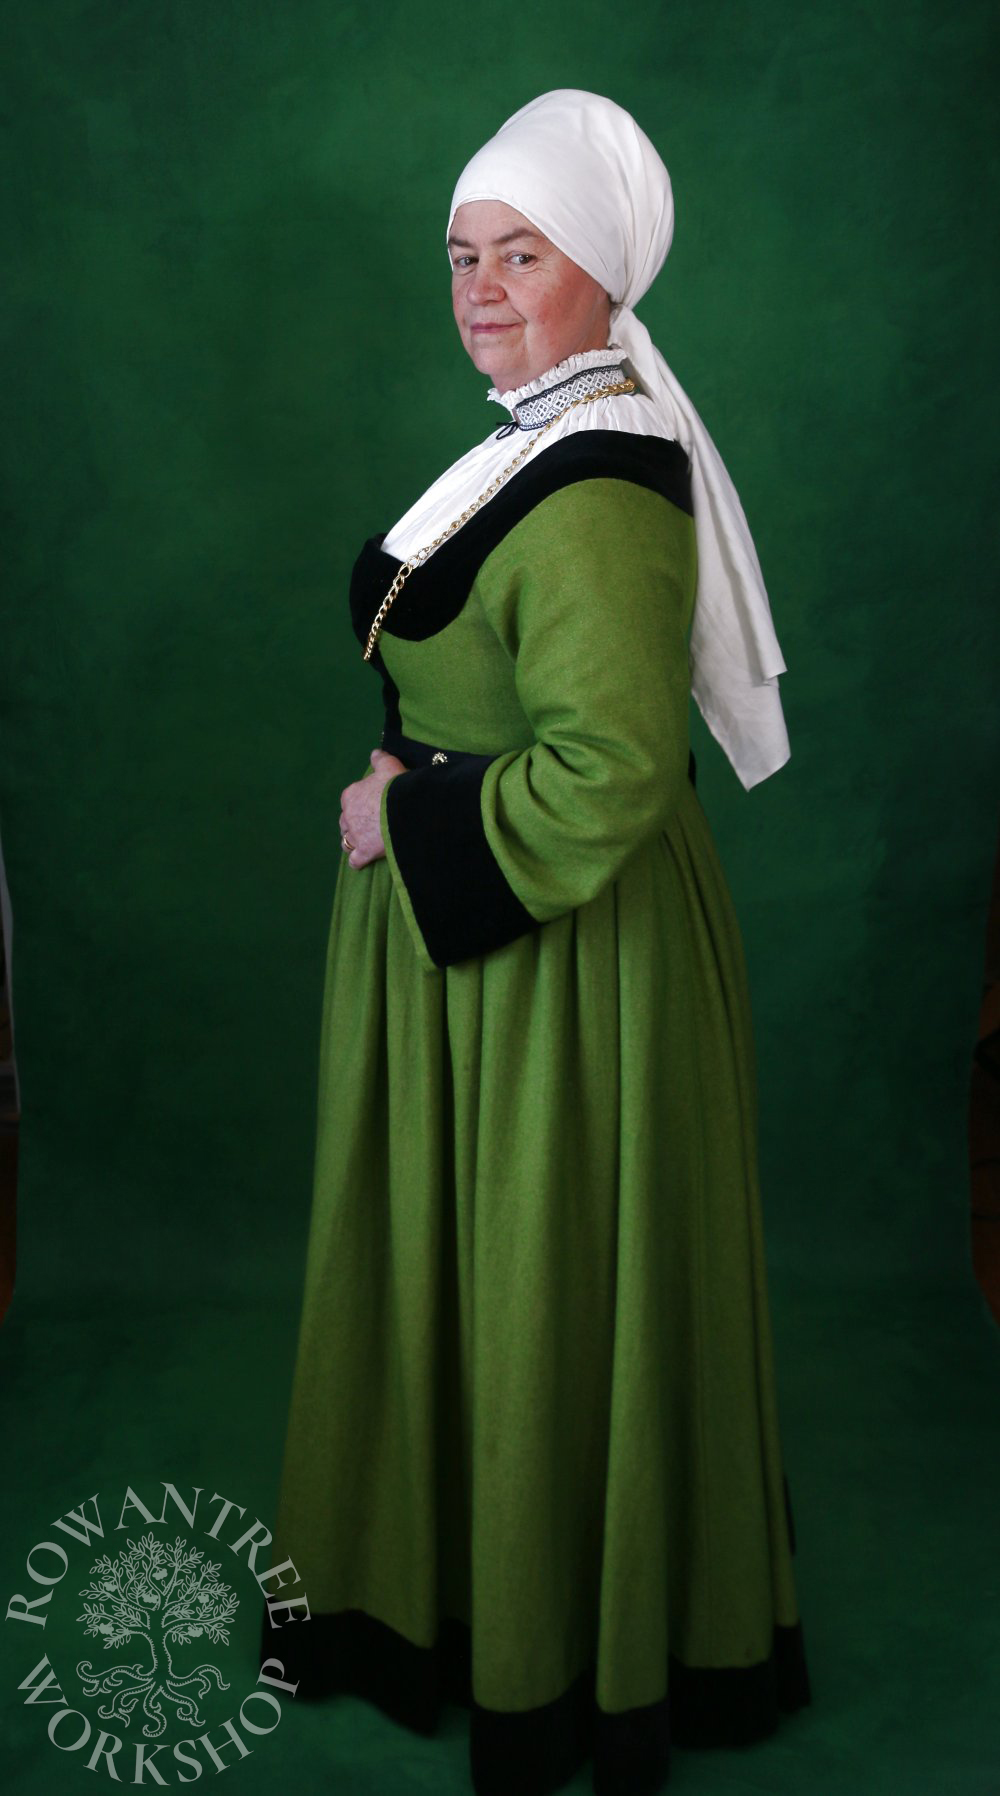
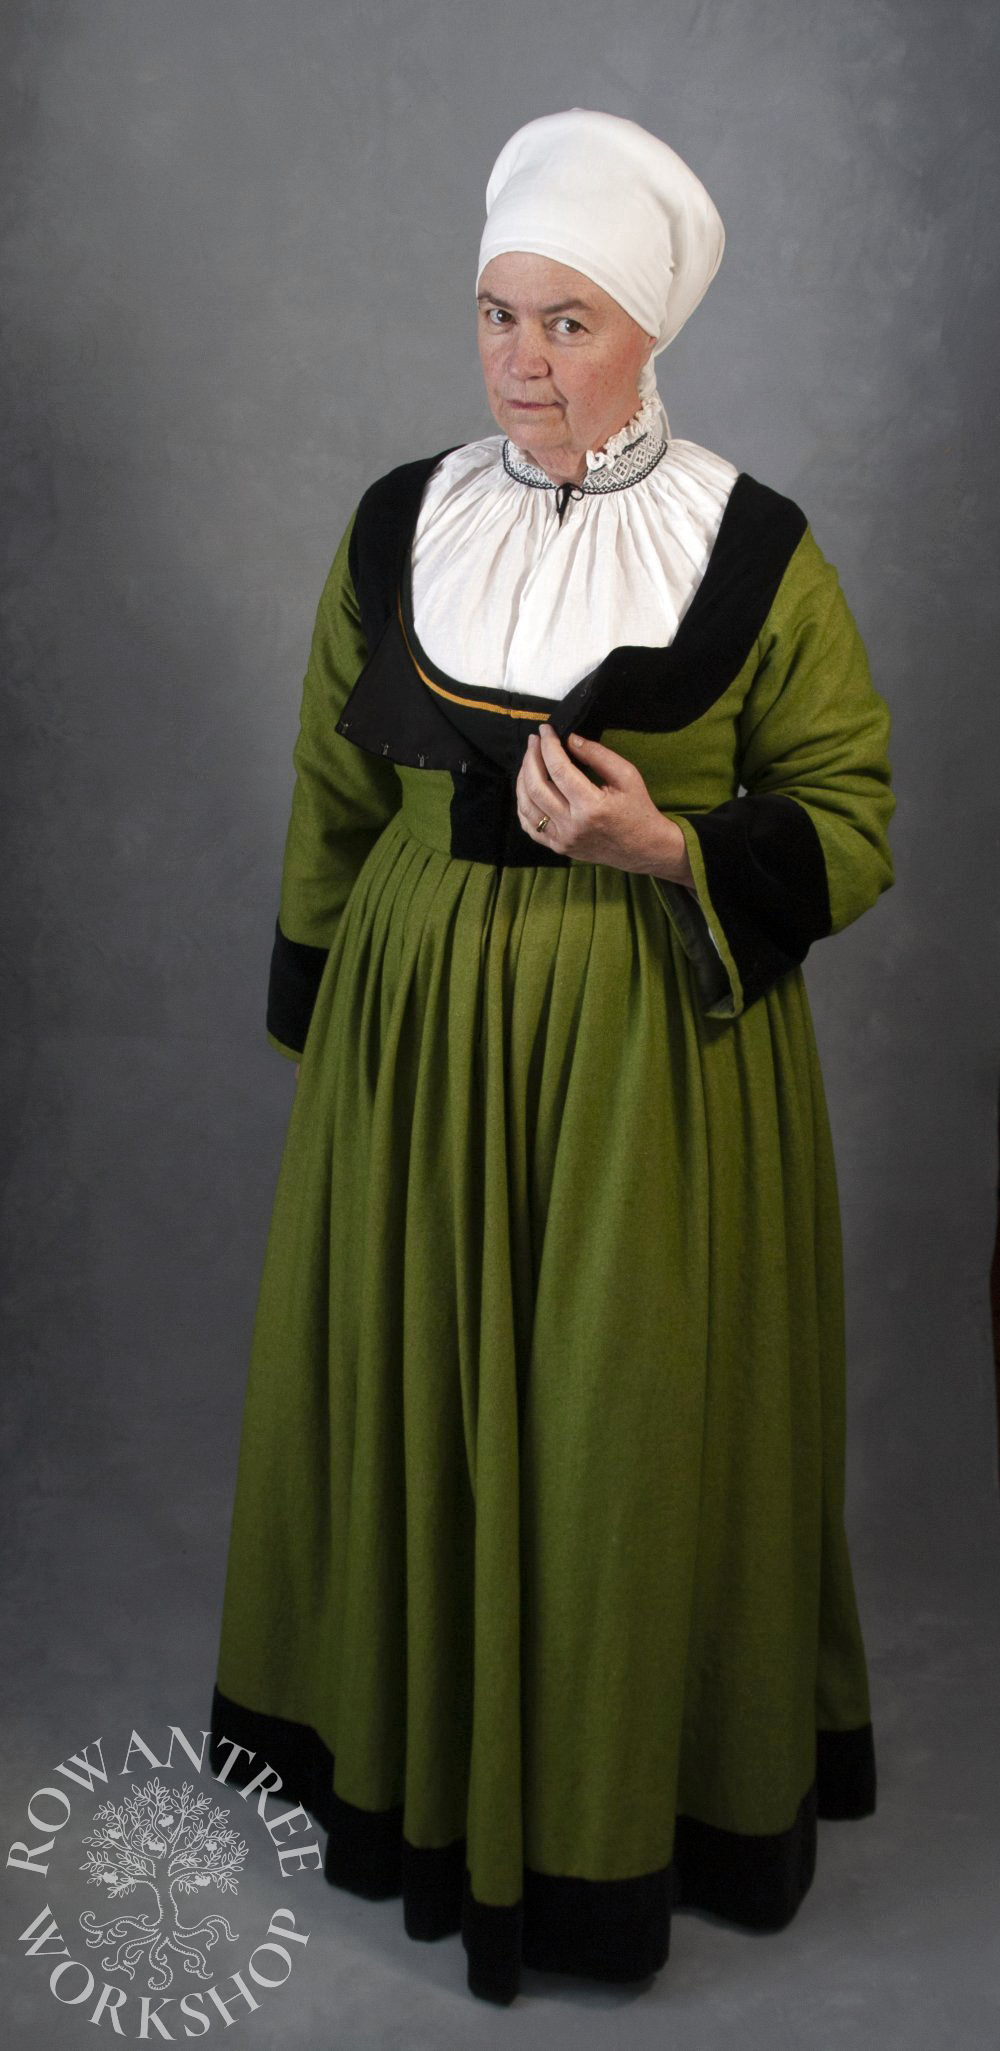
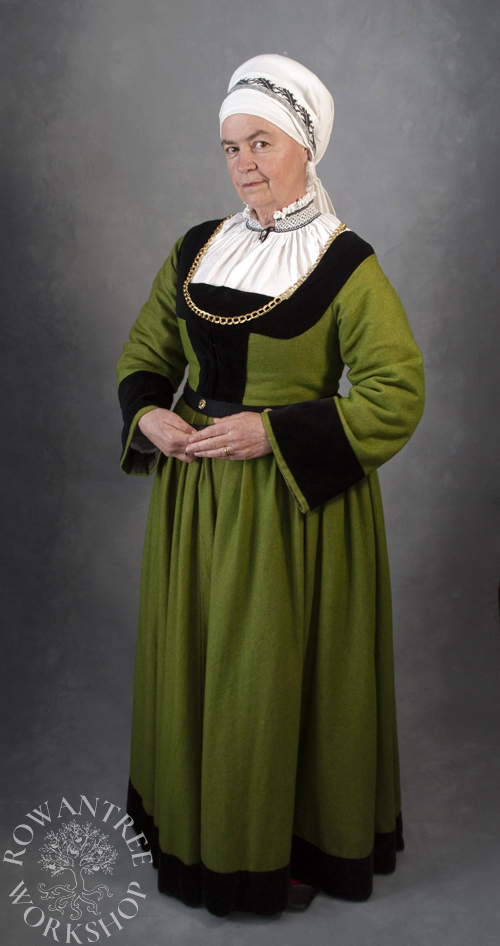
An early 16th century middle class German woman’s gown in leaf green wool, with wide sleeves, based on a portrait by Hans Krell.
I needed a new woollen gown for everyday wear – something with a typical Burgher look in a brighter colour than my current wardrobe options.
Research and Design
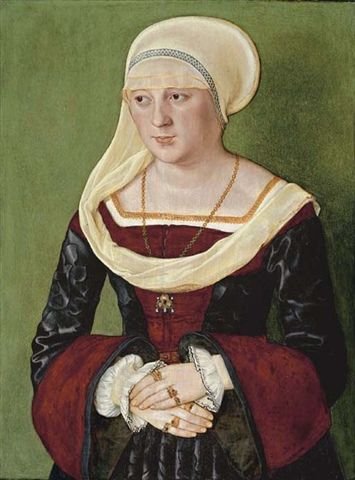
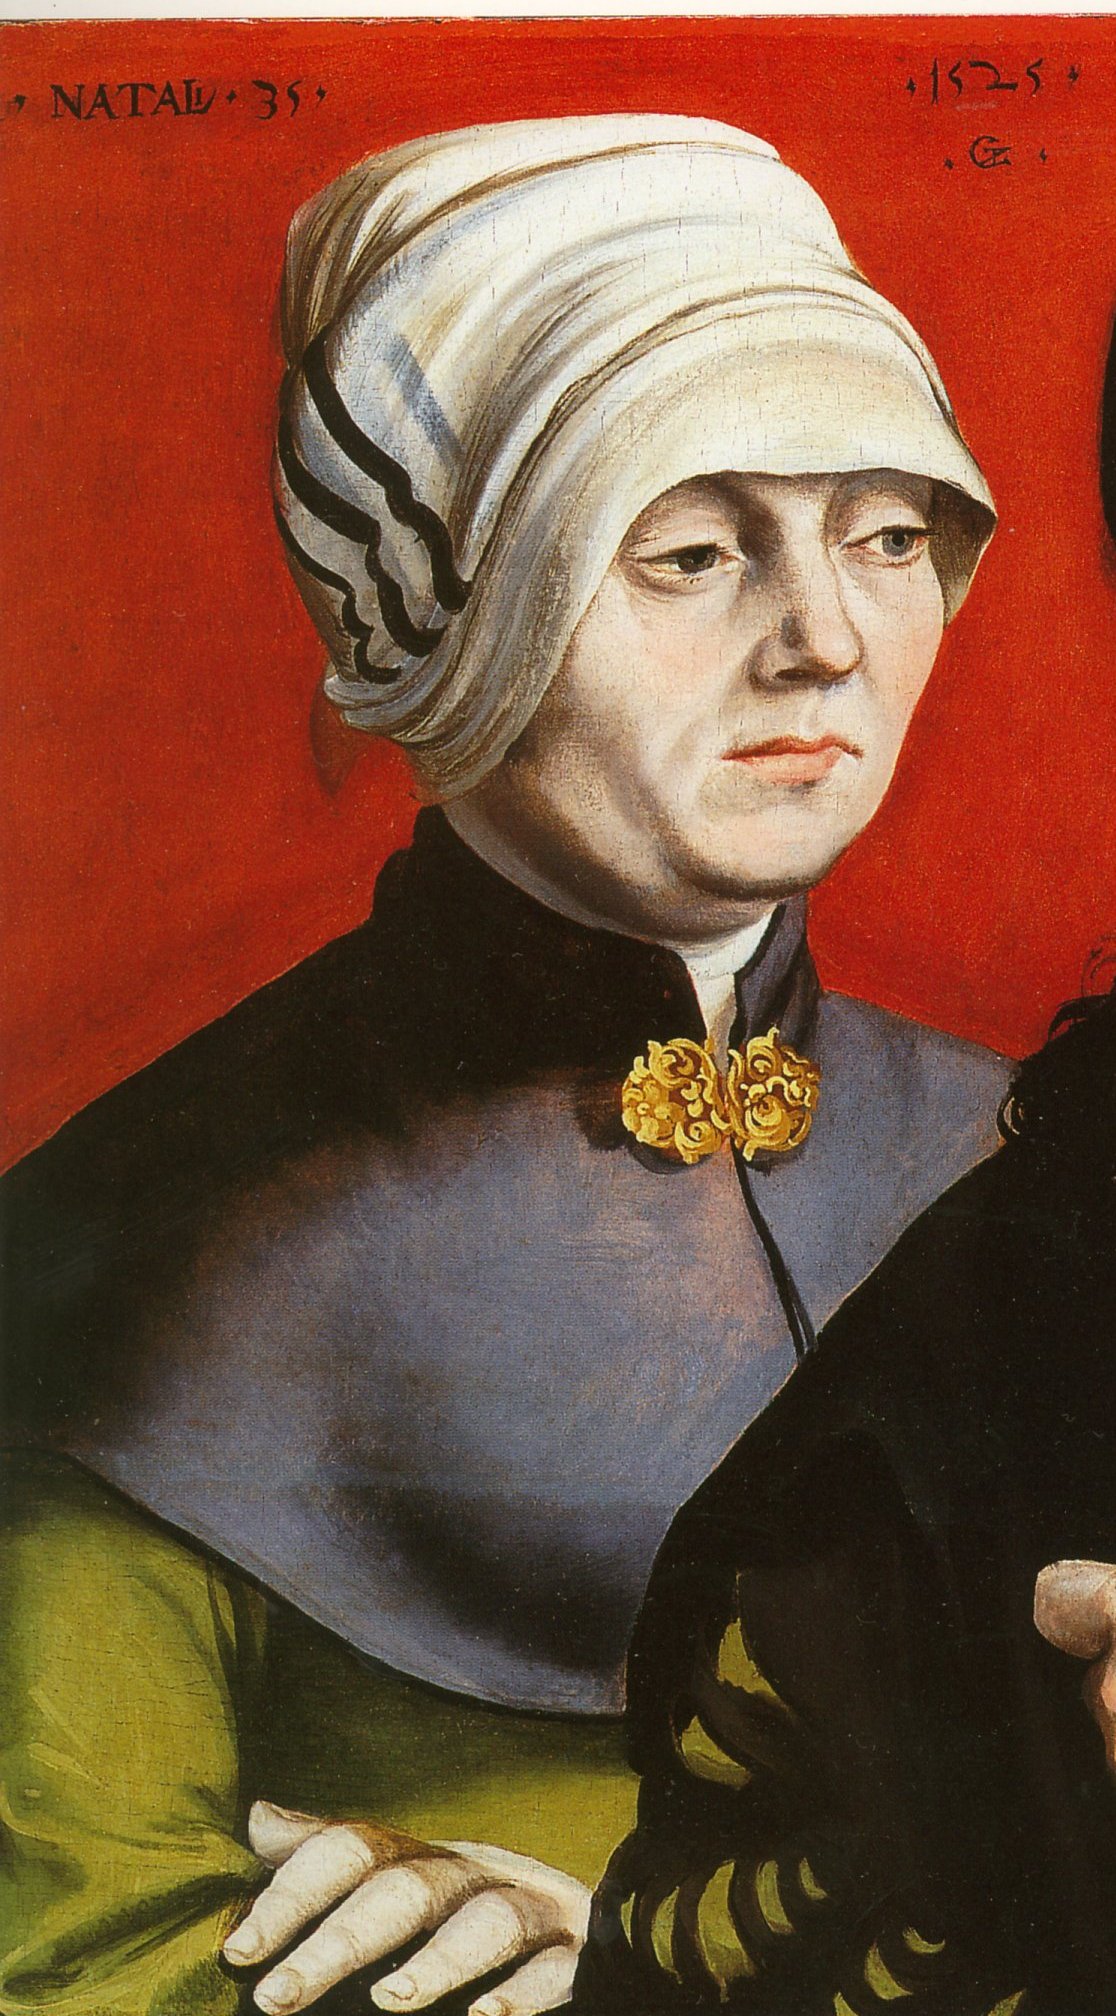
This gown is based on the Portrait of a Woman by Hans Krell, which shows a gown of pink wool with black velvet guards and wide sleeves. There are several other portraits showing similar style, including this one by Beeham, worn with a different style of Hemd and headdress.

Source: Kunst für Alle
Source: Wikipedia
Rather than copy the pink and black of the original, I decided to make this gown in leaf green – a colour seen in many German middle class images from this era, such as this example by Zegender.
Construction
The wide spaced shoulders meant I could not use my linen Unterrock – I needed one with narrower shoulder straps. So the first step was making a new worsted Unterrock!
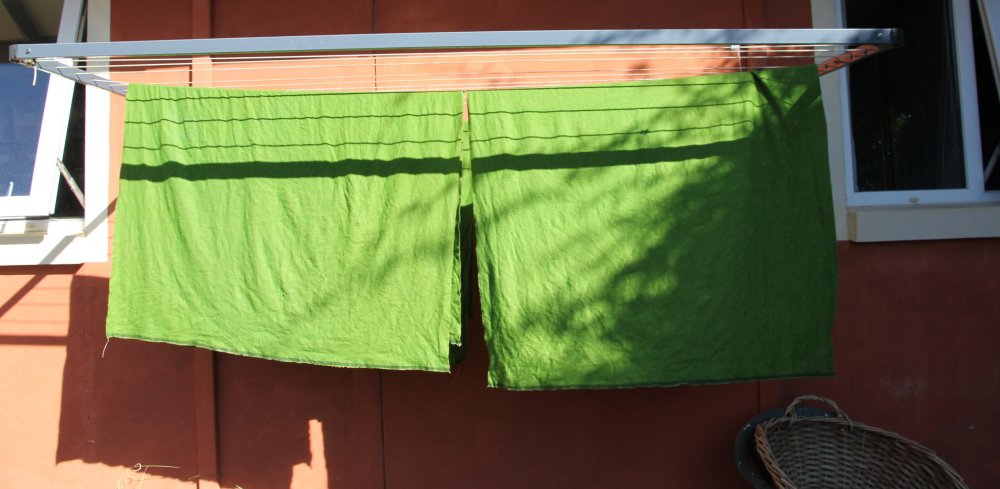
The next challenge was the green wool. Not an easy colour to come by, so I dyed some camel-coloured wool mix fabric with food dye to get the colour.
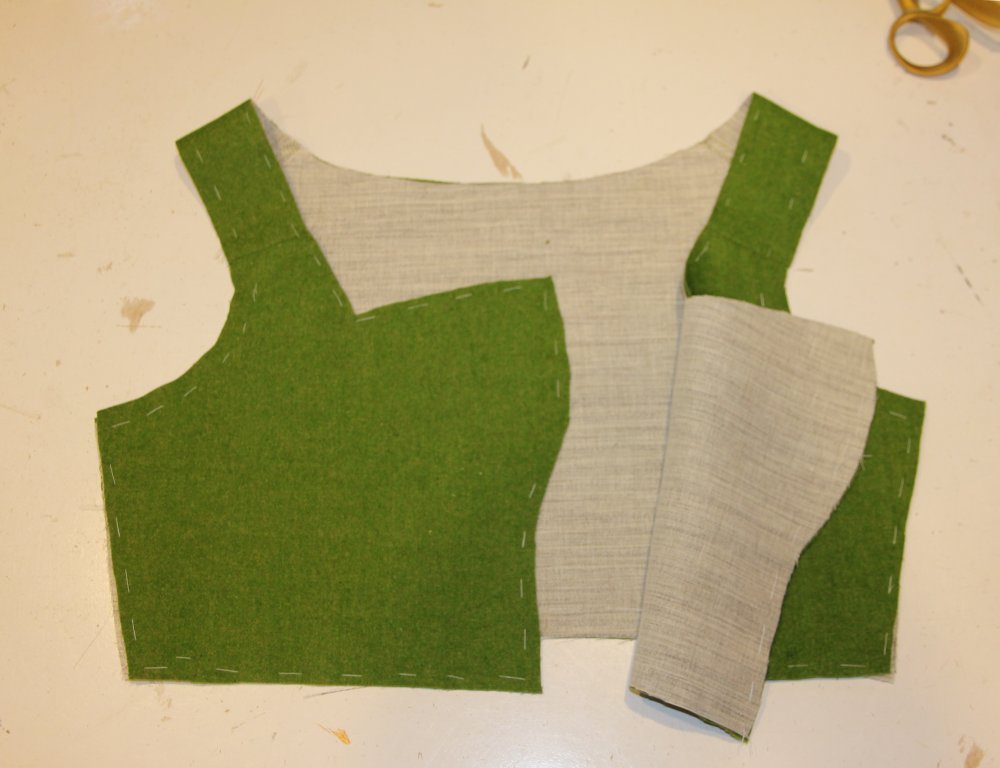
Once I had the supporting Unterrock, I could pattern the bodice. I wanted a nice curve over the bust, as seen in the portrait, so the front is heavily shaped. The shoulder section is cut on the straight, to reduce stretch, as seen in Alcega’s cutting diagrams in Tailor’s Pattern Book 1589 (Alcega 1979).
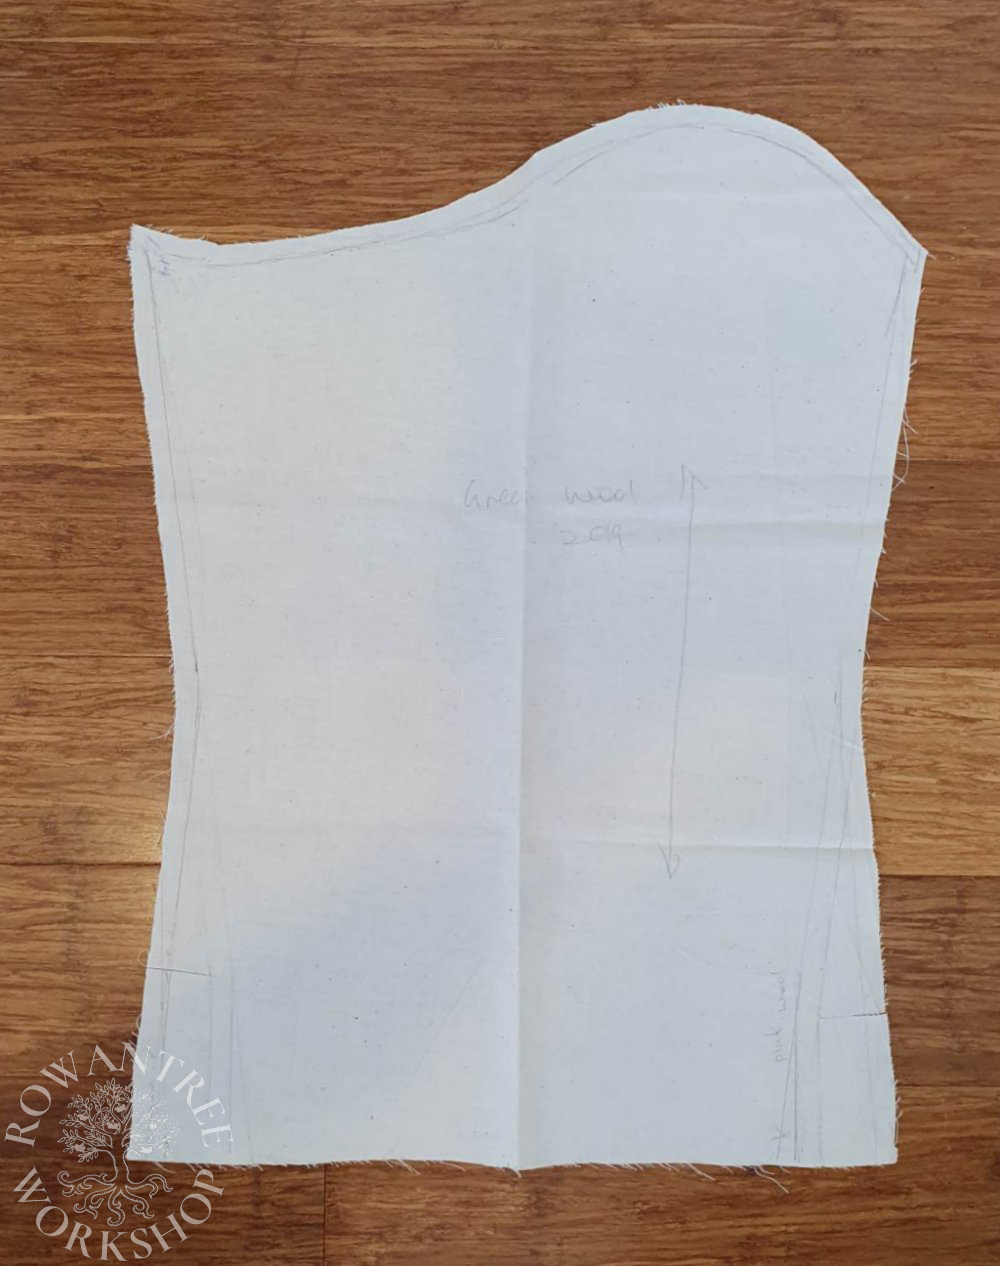
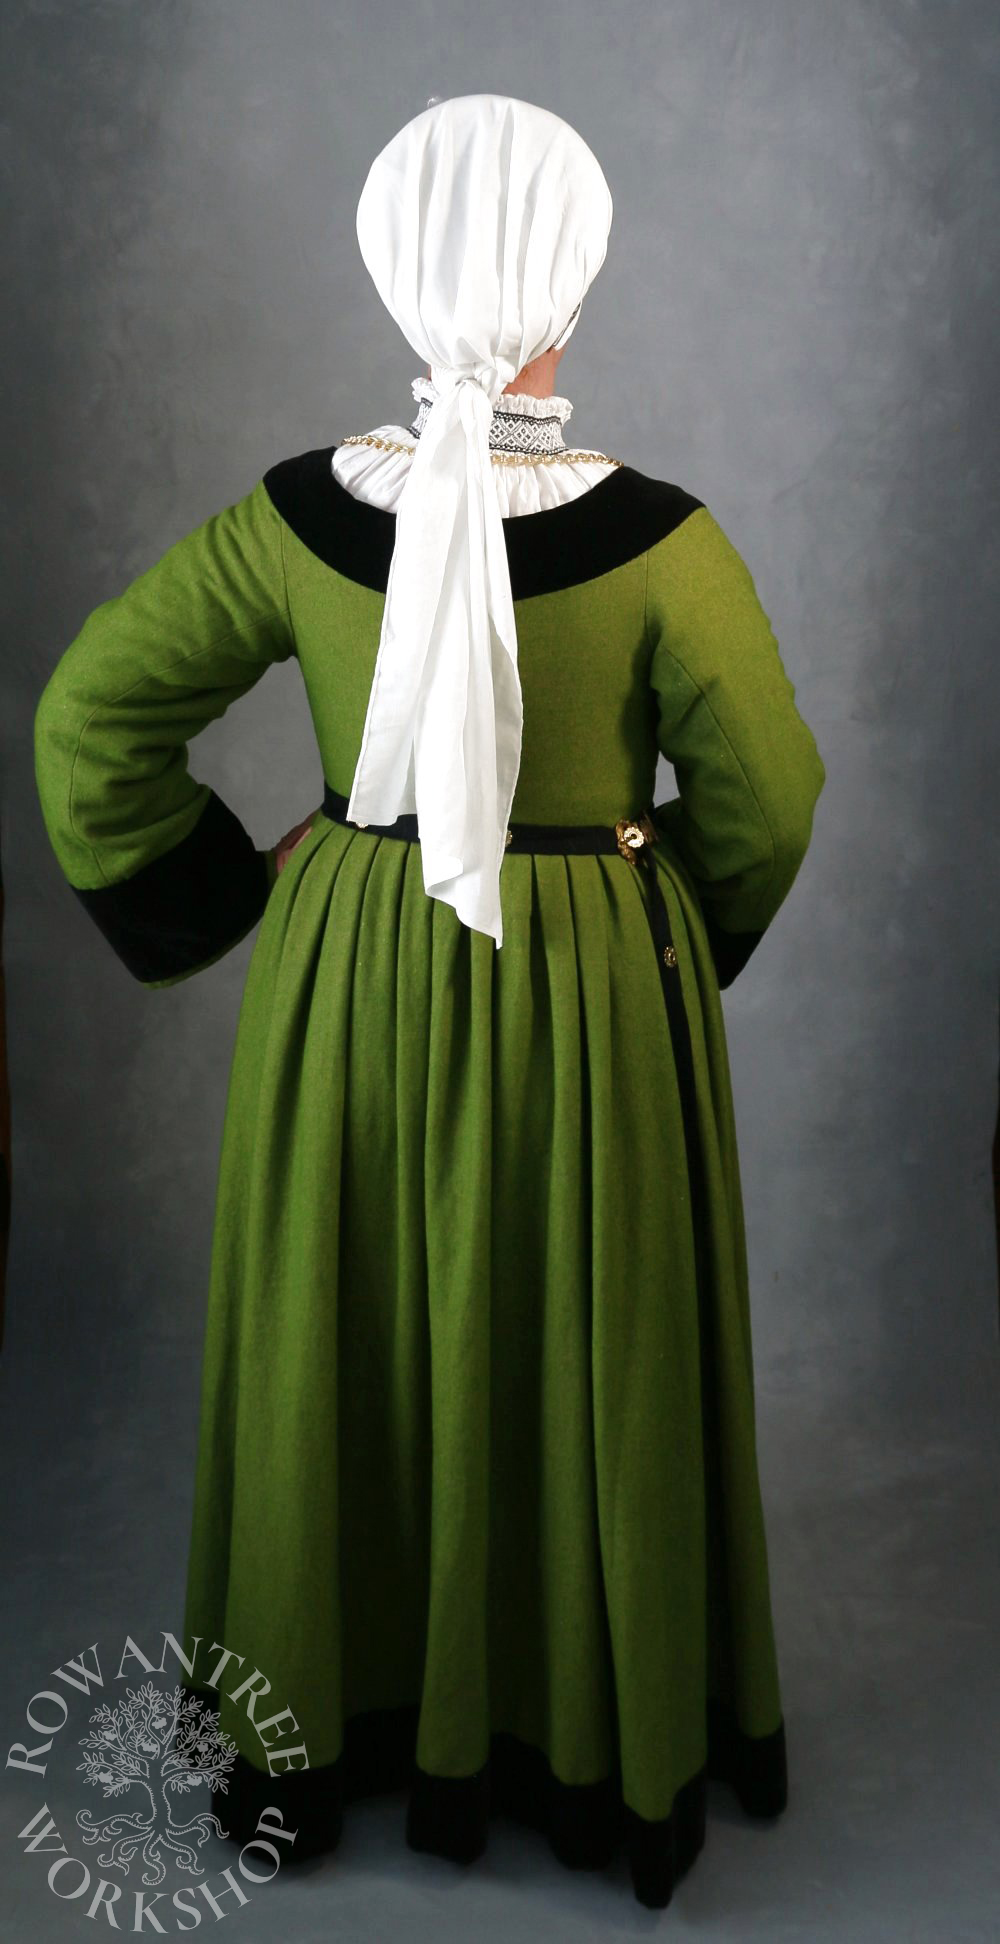
The sleeve pattern was interesting – it did not need much flare at all to make quite an open sleeve. The rotated seam ensures the sleeves sit well.
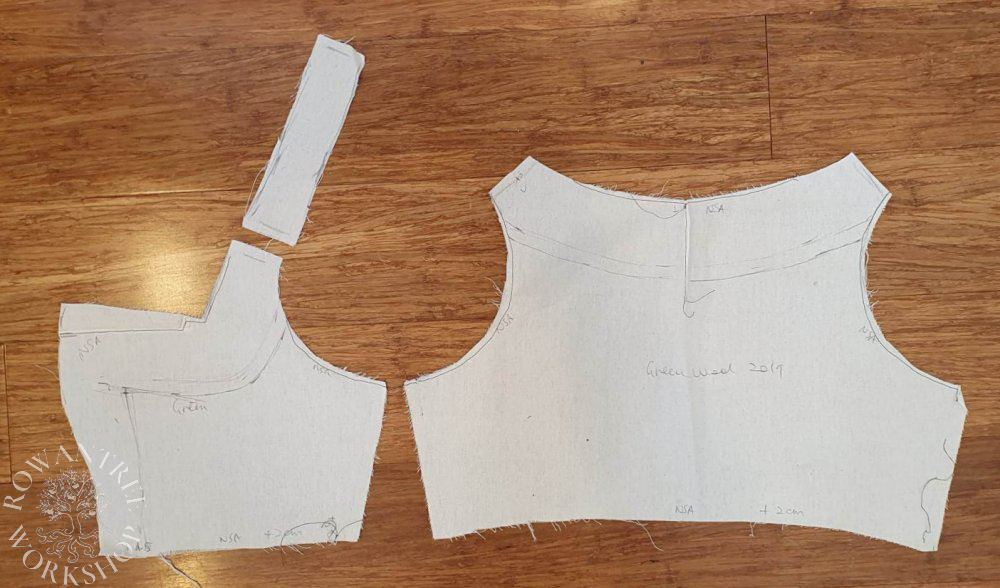
I cut the bodice in canvas, wool and linen. I sewed a piece of twill tape down the front of the canvas for extra strength and stiffness. I sewed the shoulder sections together, overlapping the canvas and seaming the wool, then basted the wool to the canvas. I stitched the side seams and pick-stitched the seam open, then I turned up the bottom hem and catch-stitched that to the canvas.
Since the velvet guards would overlap the top of the sleeves, I made the sleeves next. I cut them in wool and green linen for the lining, since this would show at the open cuffs. I sewed the back seam, pickstitched it open and catch-stitched the cuff hem. I cut the guards in black velveteen and hand-stitched them on.
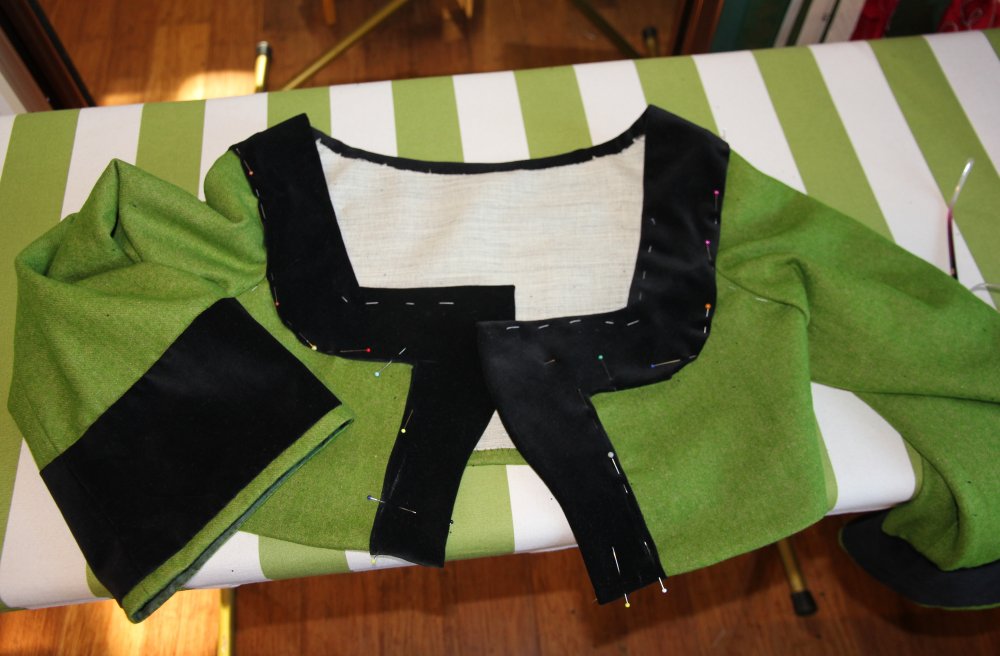
I sewed the lining and inserted it, basting at the top and slip-stitching in at the cuff. Then I sewed the lined sleeve into the armscye of the bodice. I used the bodice pattern to develop a pattern for the guards, then cut this in cheap fabric and checked it against the bodice before cutting in velveteen.
I machine sewed it around the neckline for my usual reverse binding approach. I did have a moment of doubt as I sewed it, but it has always worked before… As soon as I started to flip the guarding out I realised this was NOT going to work with the new tailored approach.
Nope.
So I had to unpick, cut new guards, then baste the outside and catch stitch to the canvas inside. Then I measured out from the finished edge, turned the velveteen under and slip-stitched the outer edge to the wool. Finally, I lined the bodice in linen, slip-stitching all around.
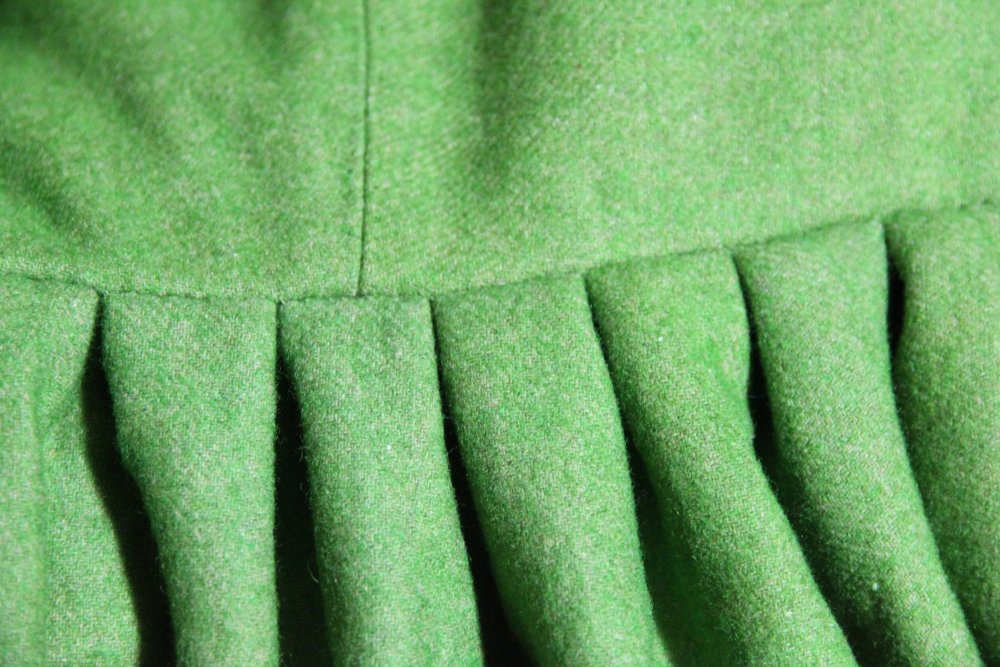
The wool was wide (150cm) so I cut three curved panels for the skirt, sewed them and flat-felled the seams, leaving a front opening. I lined the top of the skirt with a curved strip of linen, then box-pleated it onto the completed bodice, over-stitching in two passes.
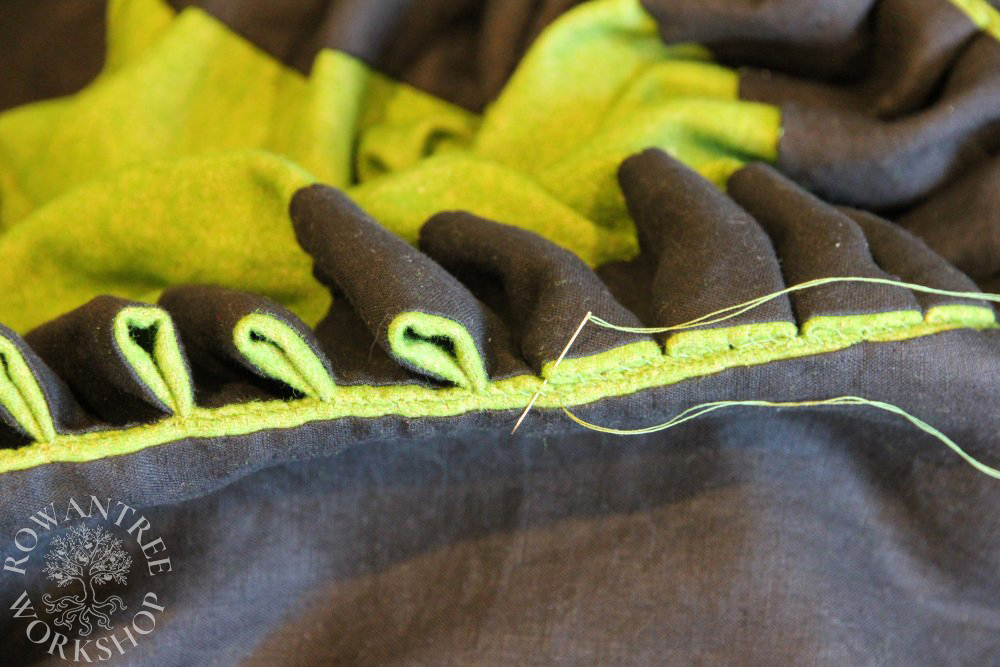
I sewed 7 sets of hooks and eyed down the front of the bodice, and another halfway down the skirt slit. Then I put on all the layers to adjust the hem length. Finally, I added a black velveteen guard to the base of the skirt.
I have worn this Rock often – it’s comfortable and surprisingly cool, with the open sleeves and worsted Unterrock. Not a good choice for the kitchen though – the sleeves are just not practical!