

This style of framed leather purse was worn by German women of most classes in the first half of the 16th century. When made of leather, it was worn by the middle class, farmer’s wives and soldier’s wives.
25 years ago I made a ‘temporary’ leather purse to go with my mid-class German clothes. I tried out a few ideas, was happy with some elements and not with others and meant to make a ‘real’ one. But there is nothing as permanent as a temporary solution that works!
A few months ago I made a noble German woman’s 16th purse for a friend, and thought I’d make myself one too. But then I realised that replacing my old middle class purse was a higher priority. There were several different contemporary styles to choose from and while I would like to try them all, I kept coming back to the pleated and embroidered leather examples.
So, 25 years later…
Research & Design
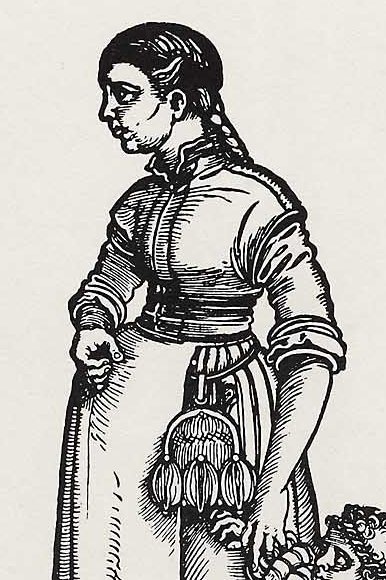
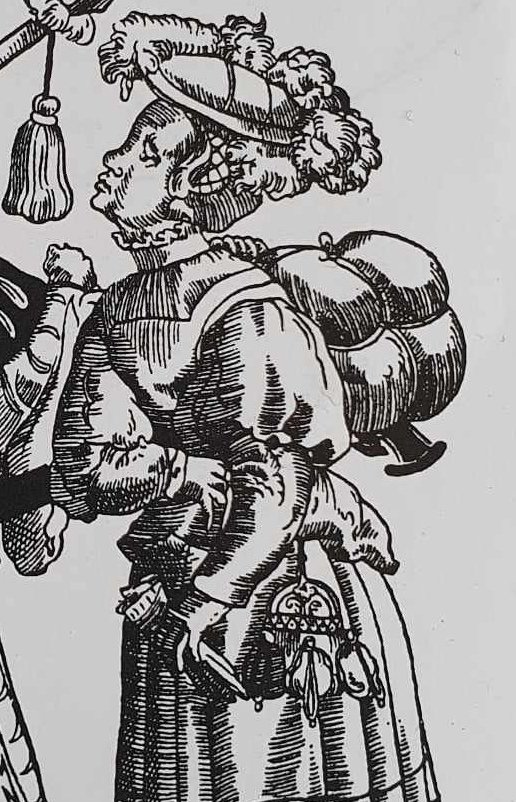
This style of Bügeltasche (hanger purse) is seen in images of middle class women from the 1520s to 1560s, hung from the belt on a short hanger, or on a longer belt. It was also worn by servants, peasants and soldier’s wives. They were sold from booths at markets, and set up as prizes for peasant girls at village fairs.
Source: Museen Dresden
In Purses in Pieces, Goubitz (2007) notes two forms of frame – square and curved – and states that the square version was worn by men and the curved by women. My analysis of 100s of artworks indicates that while men only wore square frames, women wore both sorts, with curved the most common.
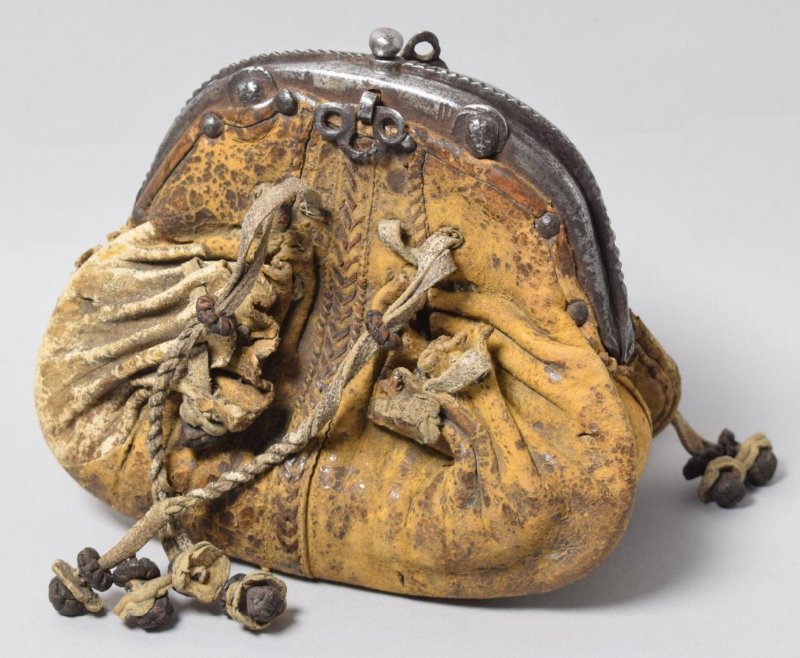
Goubitz describes this style of purse as a ‘Spring-catch framed purse’ because it closes with small internal catches set into the frame. The middle class examples were made of iron or steel, such as the examples below, although some show traces of gilding or plating.
Textiler Hausrat (Zander-Seidel, 1990) notes leather purses left in wills by ordinary women. The extant middle class examples are made of tan or brown leather. The information does not specify type, but they look like thin, oil-tanned calf, sometimes sueded, or possibly chamois. Likewise, paintings show this range of tan to brown – not coloured.
Source: Kunstmuseum Basel
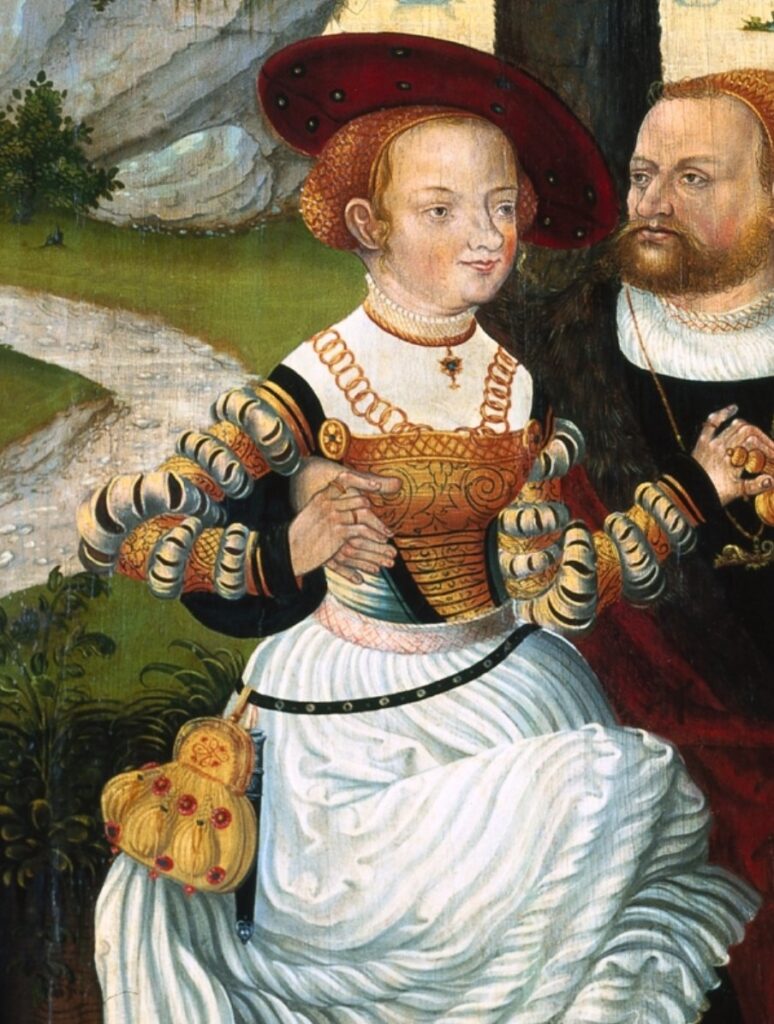
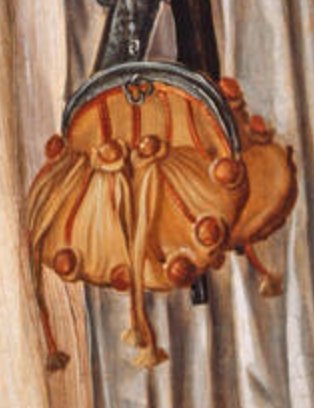
Many of the extant examples and frames are complex, with secondary frames supporting double purses, and/or internal compartements. The Hans der Maler Sixth Commandment painting and the Bildis der Elspeth both shows a double purse, but other examples sit flat againt the gown and may be a simpler form.
These purses are suspenced by a loop over the belt, which is set into a block or ring mounted on the frame. This loop may be fixed or a swivel, as found in earlier medieval purse frames.
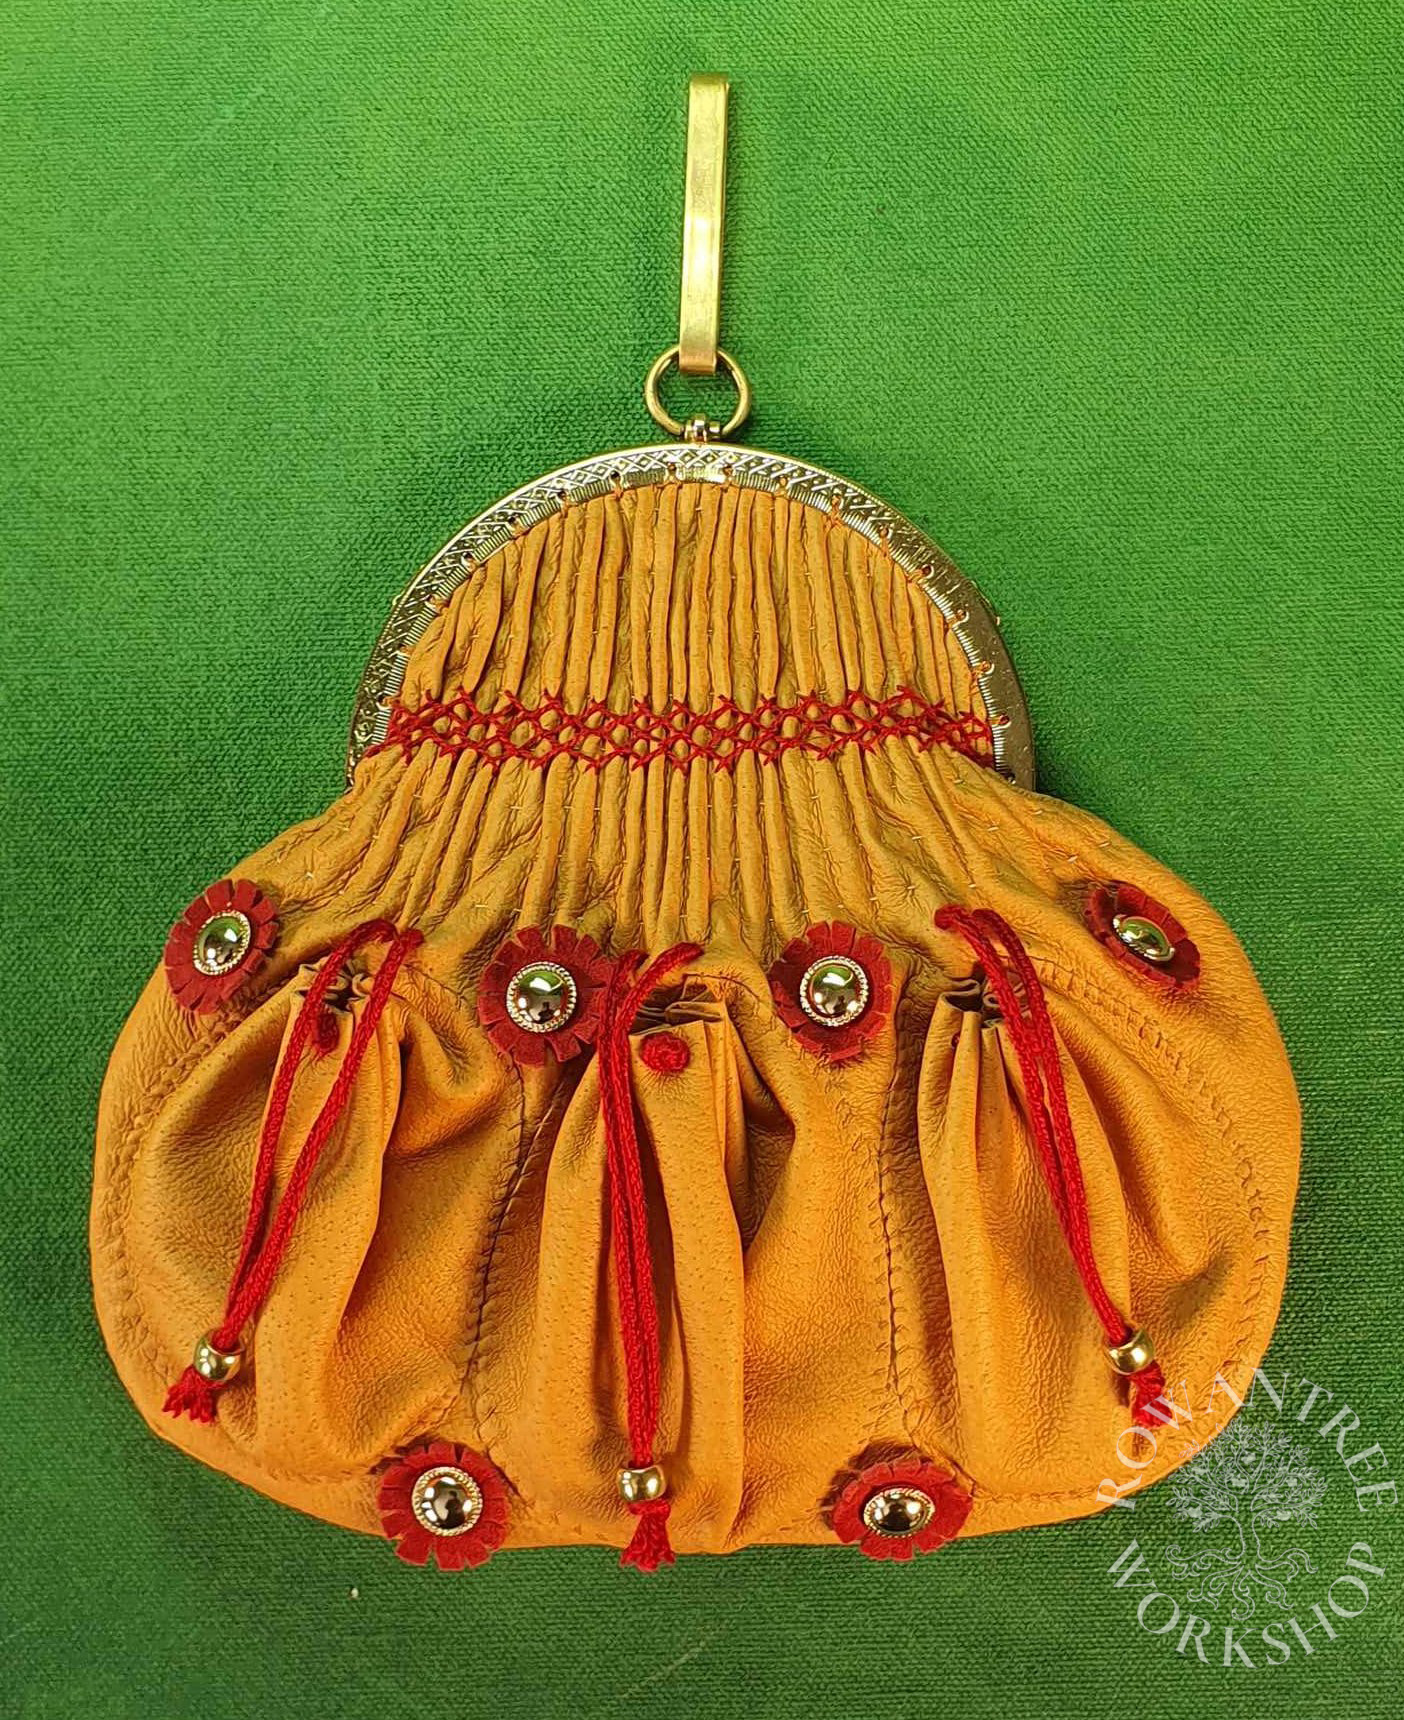
These purses usually have three (sometimes two) pouchlets on the outside – a typical feature of many styles of 16th century purses in Germany and the Netherlands, across all classes. Sometimes these pouchlets seams are decorated, but many are simply whipped over, as can be seen on the examples above.
Goubitz shows a drawing of a leather purse back which clearly indicates how the pouchlets are attached. It also shows the the 4 holes for the drawstrings which close the pouchlets, holes where extra mounts were attached, and stitched gathers at the top.

The pouchlets have a button on the outside, to make them easy to open. To close, you pull the drawstrings. The noble class drawstrings end in tassels, but the middle class ones usually end in metal beads, sometimes with leather washers.
Noble purses have large metal ‘Knopffen’ or buttons above and below the pouchlets. Some middle class examples do as well, made of leather, iron (sometimes plated) or passamentarie, some with leather washers, as seen on the examples above.
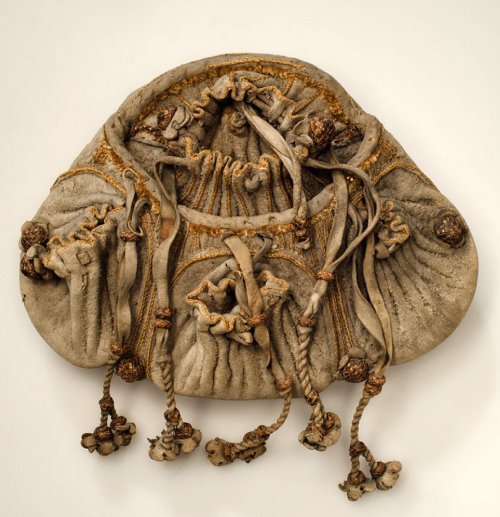
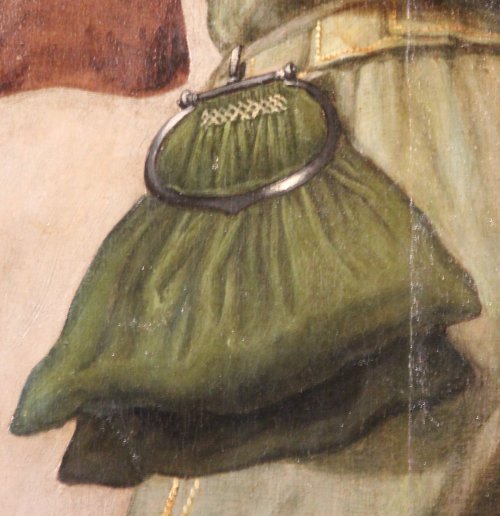
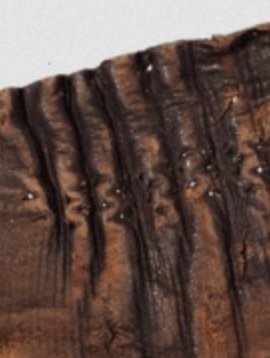
Some examples of this style, including the ones at the top of the page, show a fine pleated top section with embroidery over the pleats – a simple crosshatch, or more foliate design. This persists into the 17th century, as can be seen on the hunting purse below. I have not found any extant pleated clip-frame purses, but this find from Amsterdam (identified as a purse fragment) shows a pleated top with clear marks of sewing over the pleats.
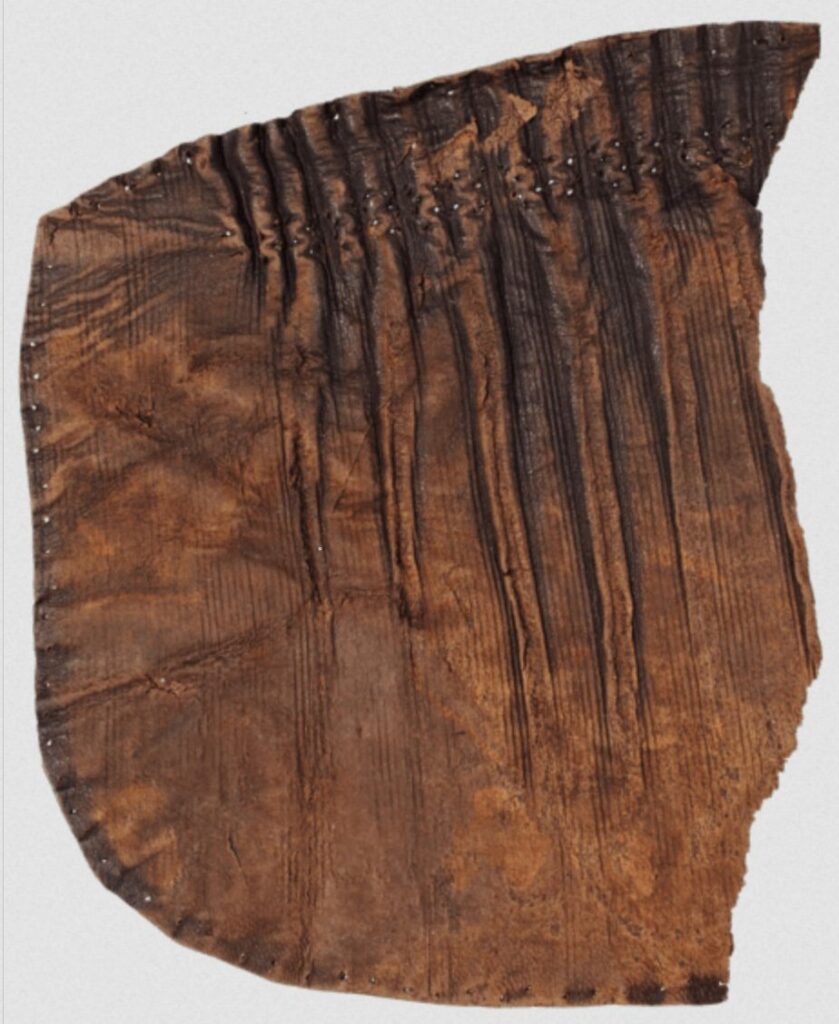
Source: Gemeente Amsterdam
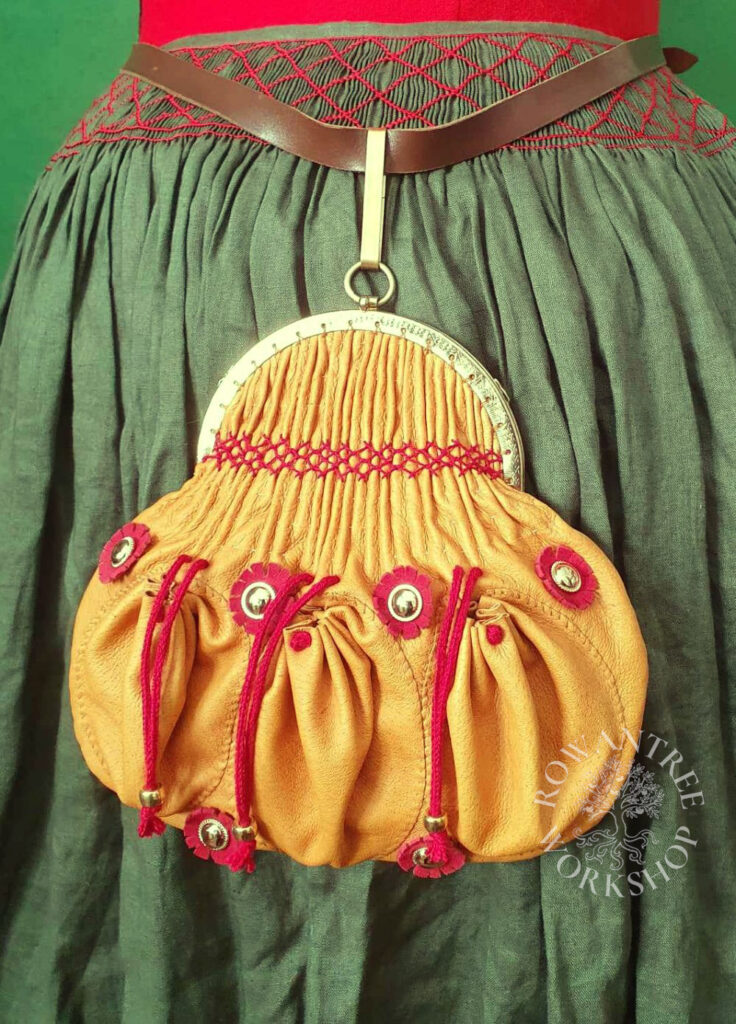
I thought about comissioning an iron frame from one of my metalwork friends, but decided it was more useful to show how to adapt a modern purse frame. This means it will be a simple one chamber purse (rather than a double one) with three pouchlets. It will have a pleated front with silk embroidery, decorated with gold buttons and red leather.
I have some fine gament leather in a mustard colour, which should work well. It’s pigskin, which is easier to sew than calf leather, and should make the pleating and embroidery easier.
Construction
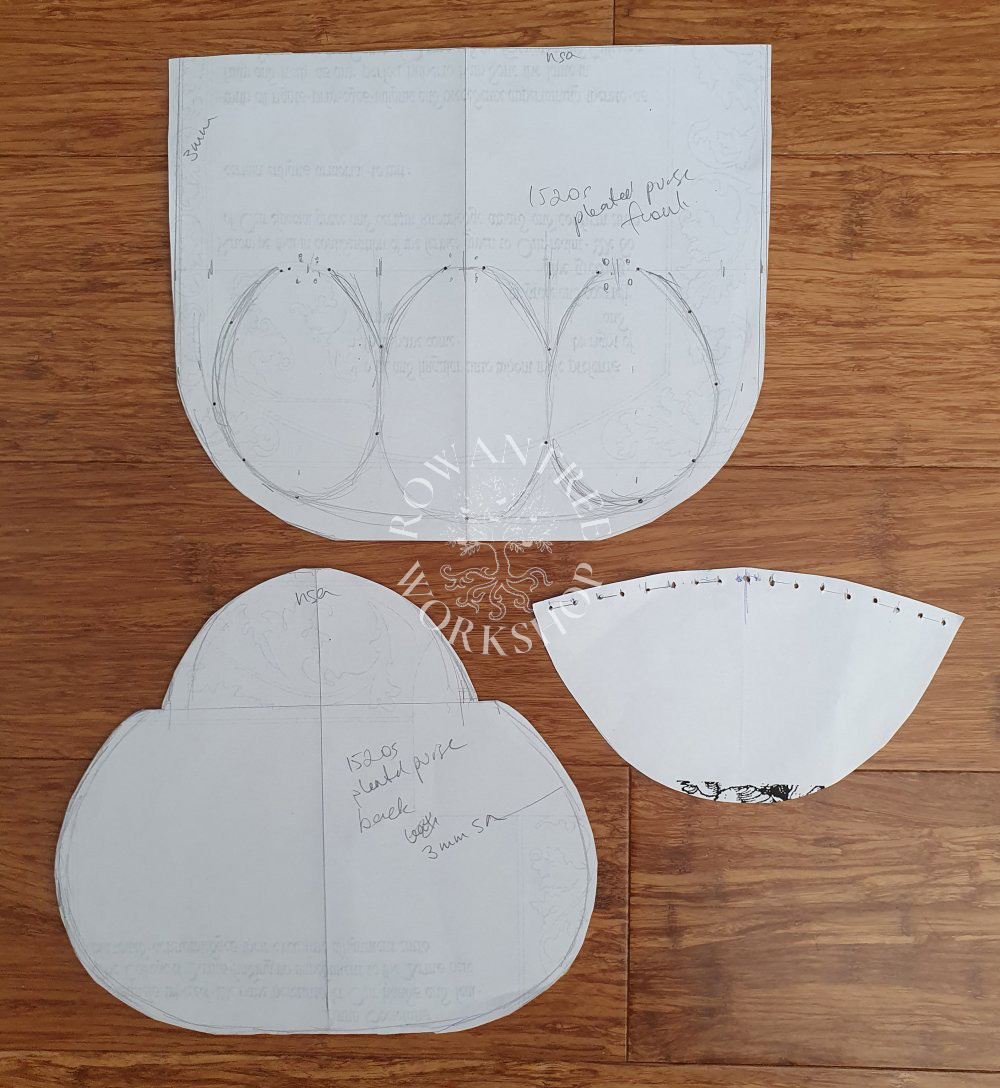
Mockups
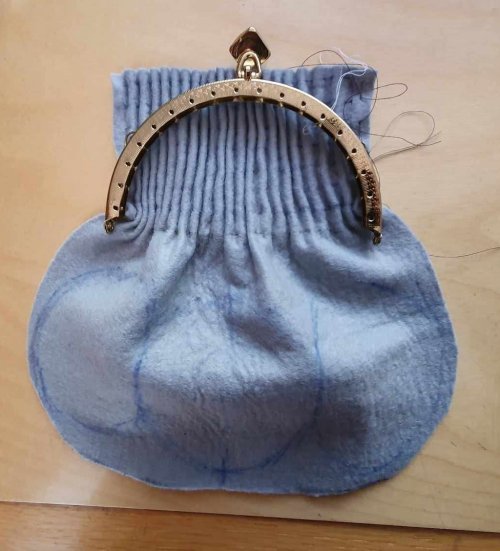
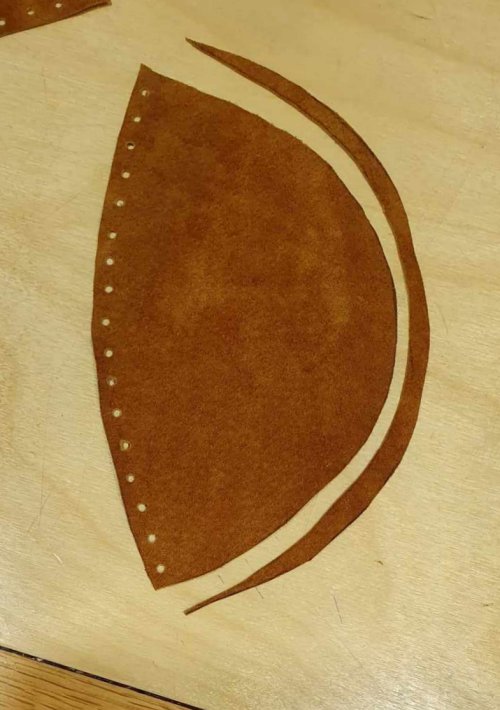
My first step was to make a basic pattern, first in paper to get the size, then in felt – a cheap, useful stand-in for leather. I pleated the top at 1cm spacing and traced the frame shape. It was an encouraging start, but a little small.
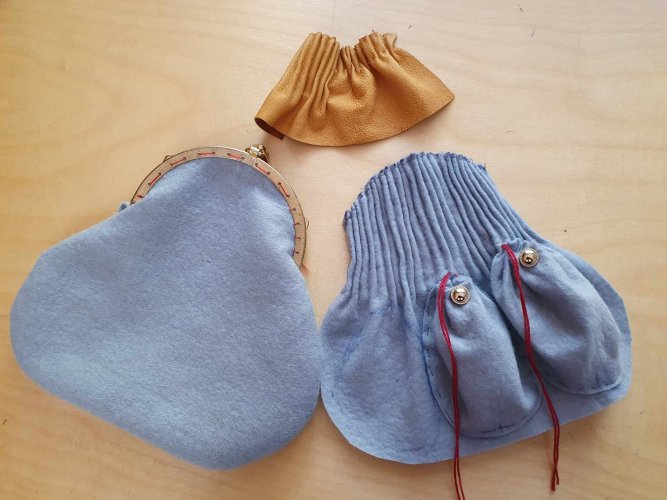
I made a second test in felt, without any pleating, to get the base shape right. Having learned my lesson from the velvet purse, I tacked this version onto the frame and checked I could get my hand in easily, and that I could fit my phone and other items in. My third test added pouchlets to the front – looks good.
My pattern ended up 22.5cm wide (24cm for the back) and 19.5cm high, with the pouchlets 18cm x 9.5
Finally, I did a test in the fine leather to see how well it pleated. 1cm spacing was a bit wide – not enough pleats and too thick for the frame. 5mm did not pleat well, 7.5mm worked best, but it is clear I will need to open up the frame housing a bit to hold the pleated leather.
Time spent on all these mock-ups is never wasted – it is the fastest way to a trouble-free build and a good result!
Adapting the frame
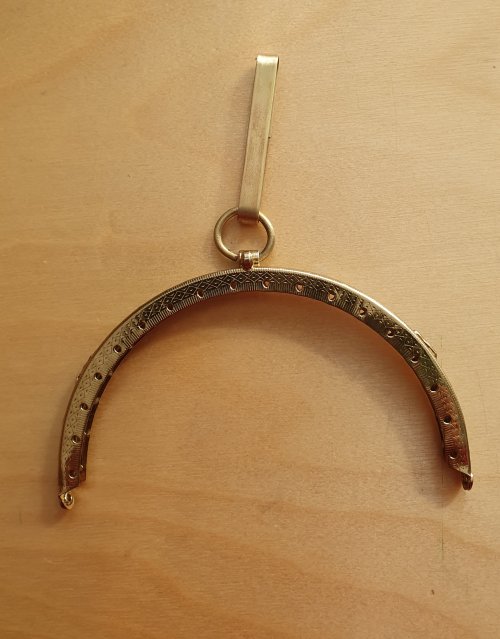
This frame was easier to adapt than on the velvet purse, because it had a central top closure rather than the kiss-lock top.
Removing the chain was easy, but the little lugs resisted my efforts with hammer and vice. In the end I used a flat screwdriver inside the frame as a dolly and flattened them against the bench. At the same time, I tried to spread the front frame a bit – the metal is thin but really hard!
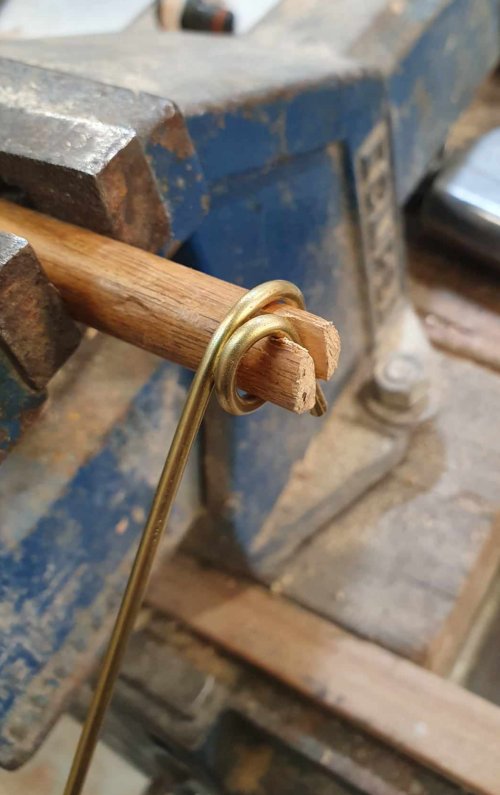
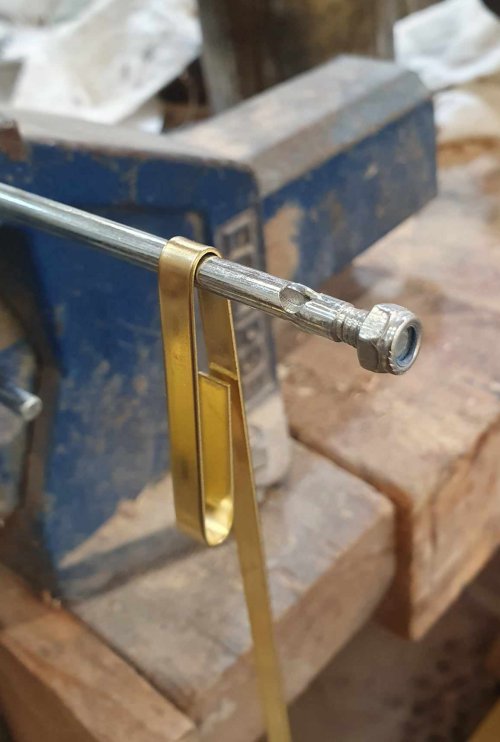
I cut off the loop and fake jewel, and checked the tube for size. I made up a ring from 2.5mm brass wire, formed over a dowel to make a loop. Using 8 x 1mm strip brass, I formed a longer loop over a smaller rod for the belt hanger. I cut and cleaned them, connected these to the frame, soldered them closed and cleaned them up. Frame done.
The bag
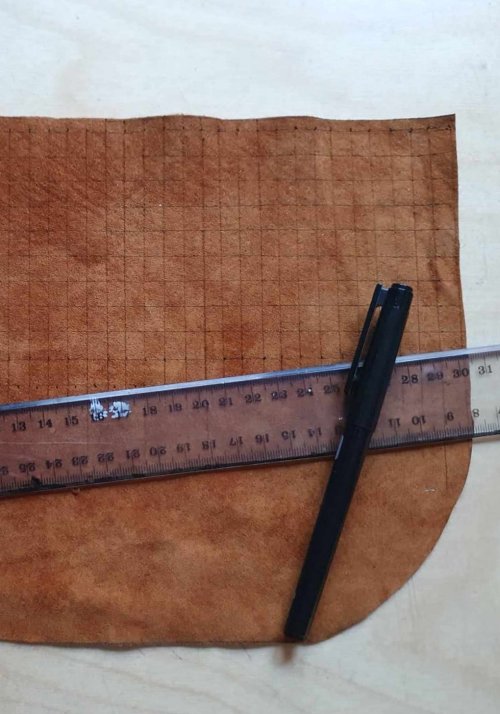
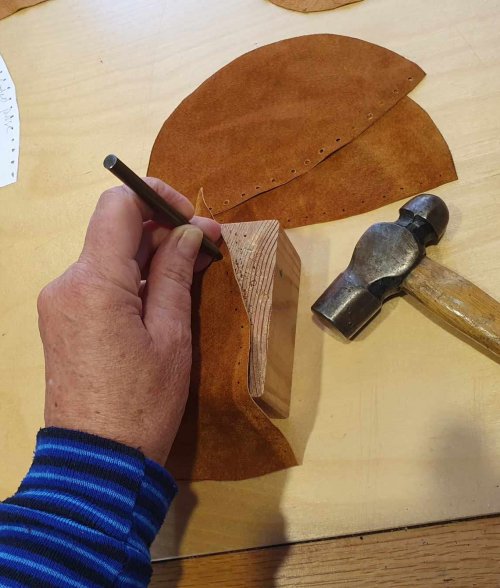
On to the leather – I’m using oil-tanned pigskin, which is on the thin side (1mm) but based on my samples, should pleat well. I drew the patterns for the front, back, pouchlets and linings on the leather (linings on the thinnest part), then cut them out with scissors.
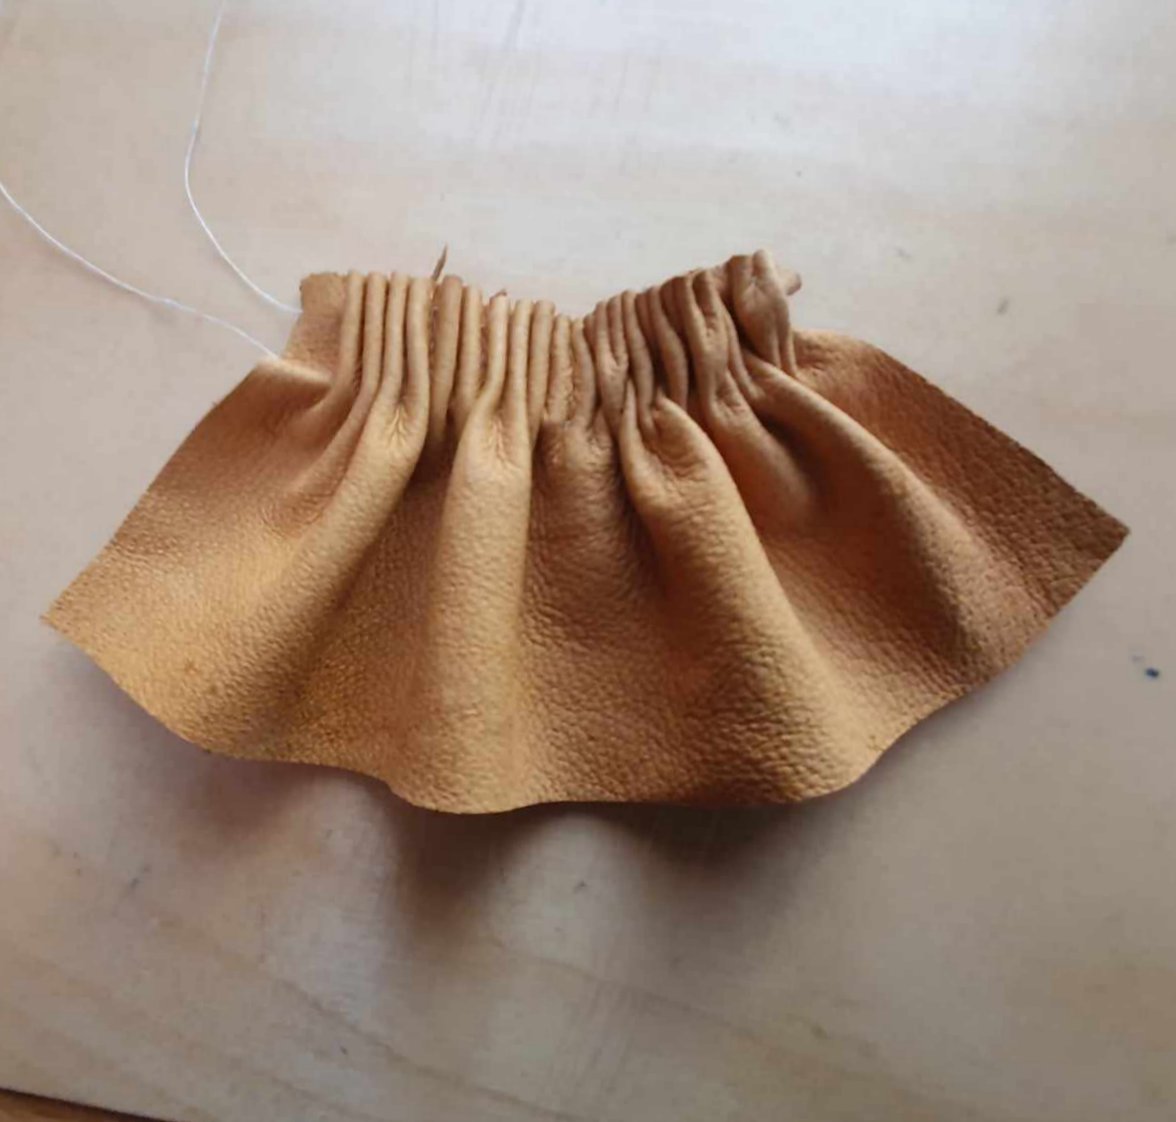
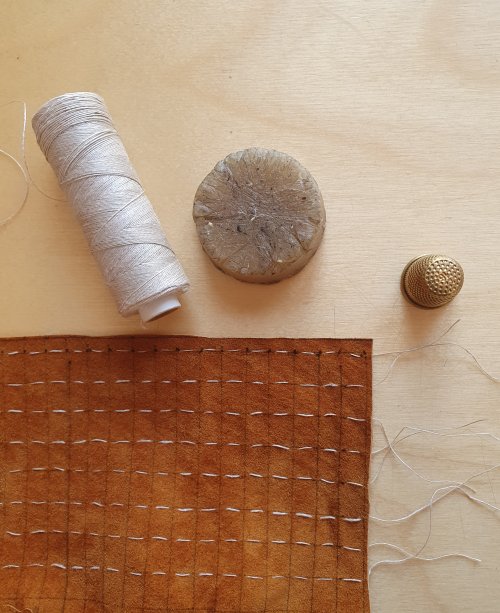
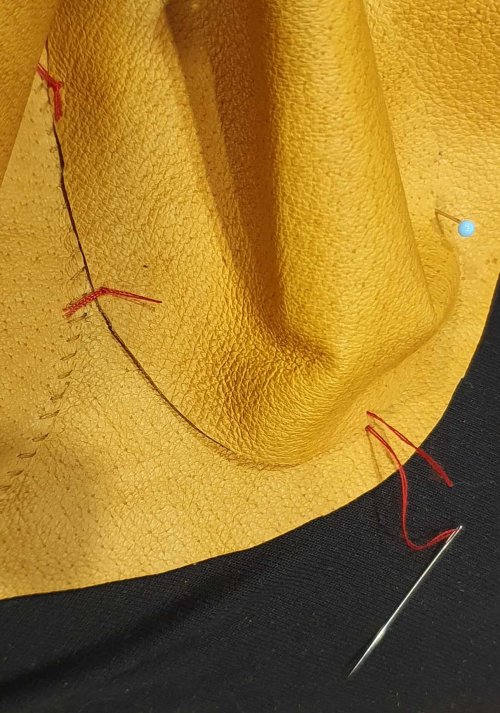
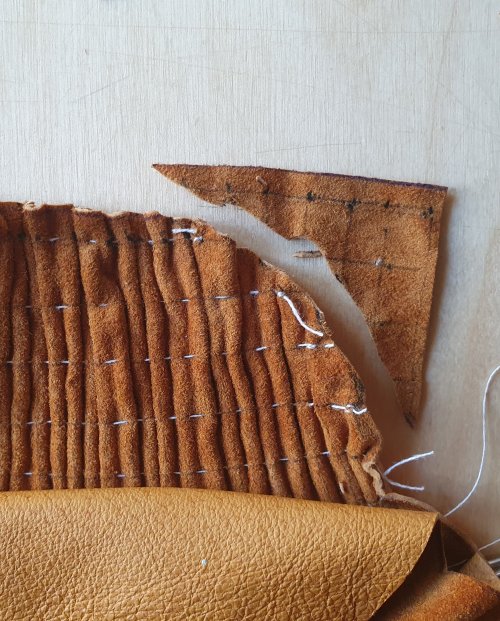
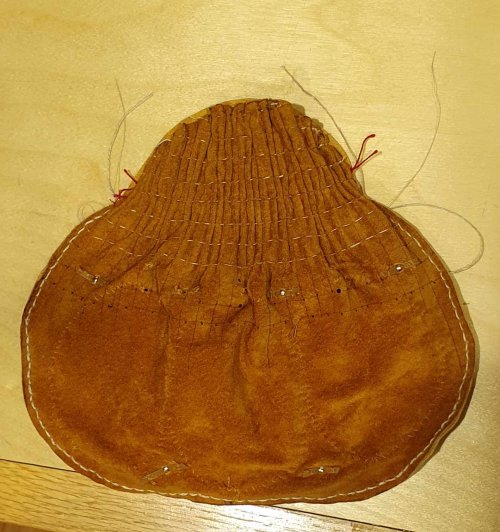
I marked out the pleating on the flesh side of the front section in pen – it will be hidden by the lining. Then I sewed rows gathering threads in waxed linen thread – easiest before I do anything else.
Next, the pouchlets.
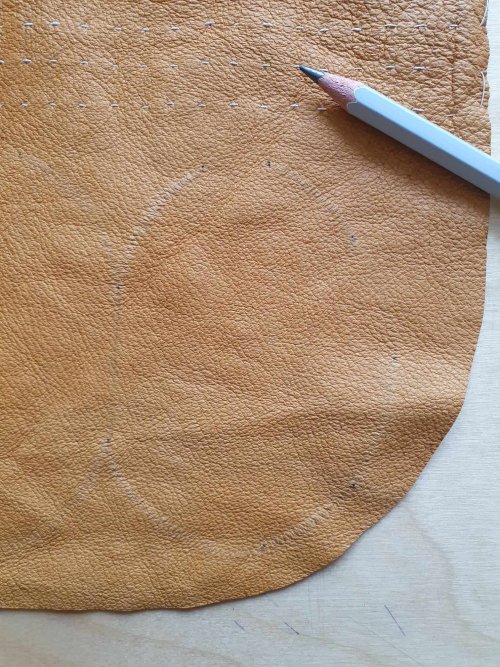
I used an awl to make holes in the pattern at a few key points, then marked through the holes onto the leather. I drew the shapes with a very soft pencil, which won’t show once the purse is finished.
After testing the hole size for my cords, I punched the tops of the pouchlets to take the drawstrings.
Before sewing I ‘dry fitted’ the pouchlets along the marks and found they were a bit large, so I trimmed the bases to fit. Then I tacked the centre pouchlet in place at a few points with thread ties – a practical approach on leather, since you can’t pin and baste.
Using a very sharp needle, I whipped over the seams with waxed silk thread (in thicker leather I would use a glover’s needle). Each stitch must be done in two steps – it’s not like sewing fabric. Then I repeated this for the other two pouchlets.
Now the pouchlets were on, I could see where to place the mounts above and below. I checked my hole size and punched holes for mounts. I also punched the holes at the mouth of the pouchlets where the cords go through the body of the purse.
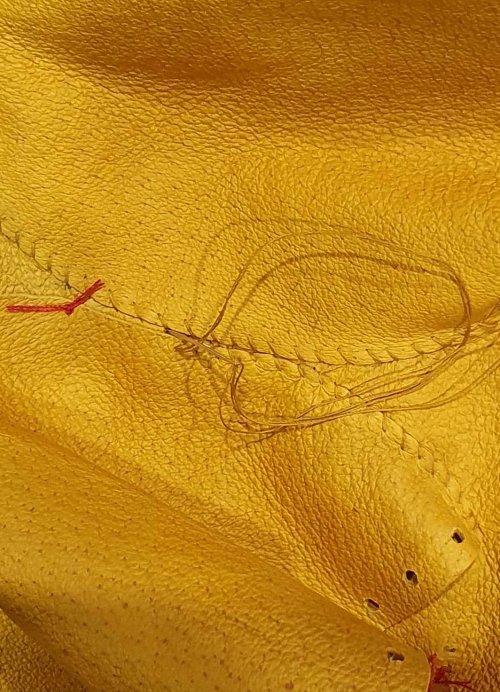
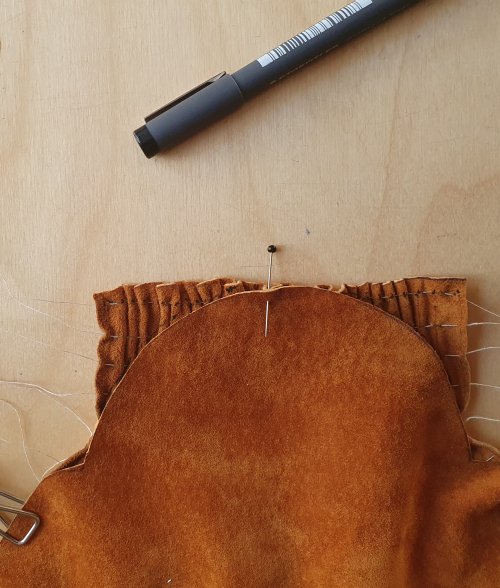
I drew up the rows of gathering threads to match the frame width. I used the back as a pattern and marked out the frame curve on the front, then unpicked the threads back to this point, sewed them to the pleats, then trimmed the top.
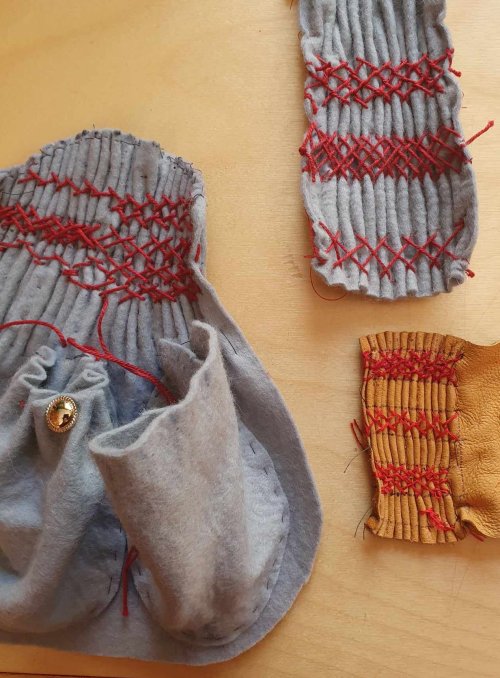
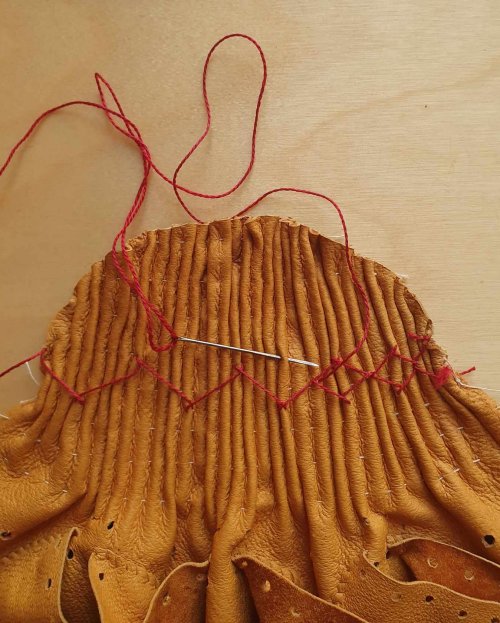
For the herringbone pattern embroidery, I wanted something that looked right, would hold the pleats and not have long threads which migh catch on things. I worked several samples on the felt with crochet cotton to find a pattern that worked. Lots of samples. This was not as simple as it looked….
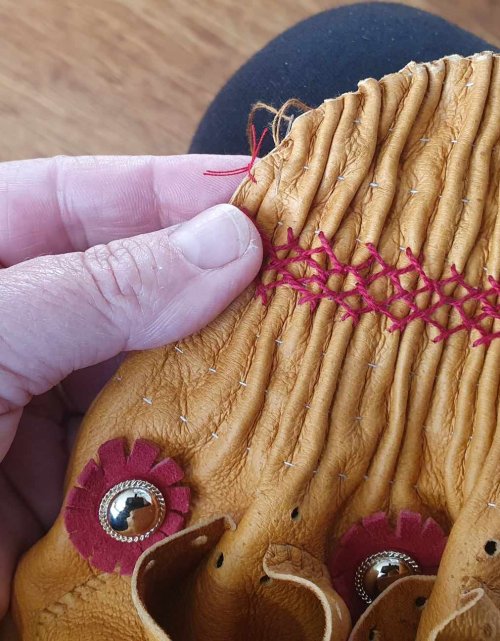
In the end, I decided on a 4-pass herringbone, with backstitches on the intersections to hold the pleats. Then I worked some samples on the leather to see how this would translate, and which silk and needle to use. Once I was happy, I sewed over the leather pleats with the 20/2 silk thread and a glover’s needle. Finally!

Now for the other decorations. I’m going for a high end middle class look, with more decoration that would be seen lower down the social scale.
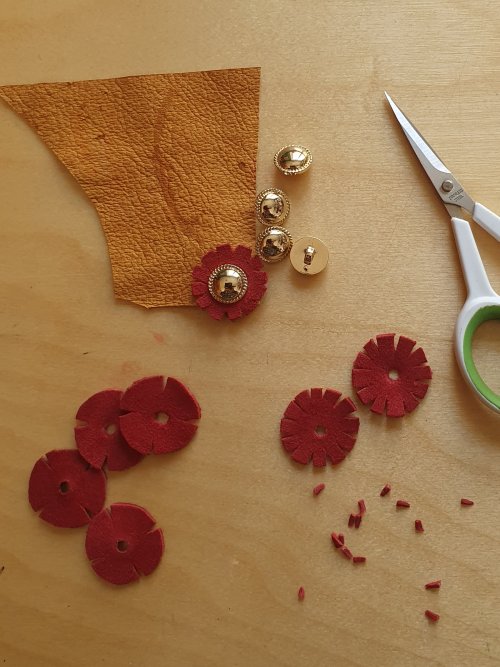
I loved the look of the red backed mounts on the purse in the Hans der Maler painting, and I have seen other examples using leather ‘washers’ behind the mounts and on the cords above the end beads. I didn’t have any bright red leather, so I dyed some scrap chamois and then cut circles, notching the edges.
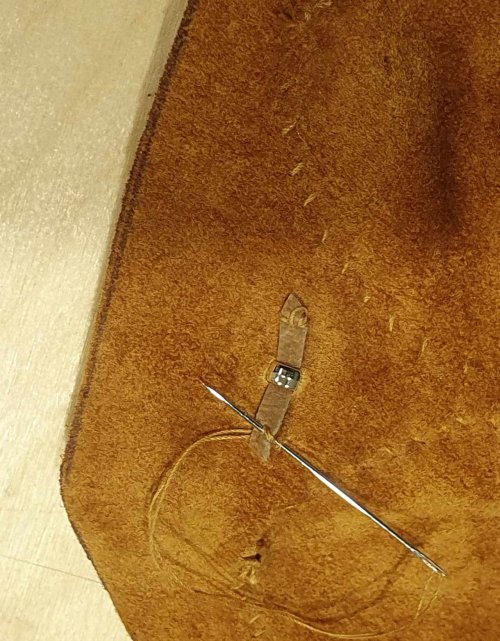
Because I am using buttons in place of mounts, I cannot peen them over on the inside. Instead, I inserted the mounts into holes punched in the leather, securing with a thong on the back (a technique I learned when making the leather jerkin) and sewed down the ends into the back of the leather.
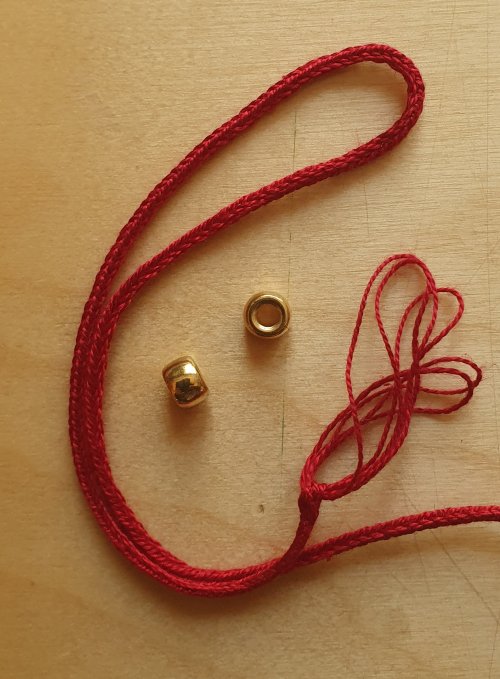
To close the pouchlets, I made three red silk cords in fingerloop of 5 bowes, which I will finish off with small brass beads.
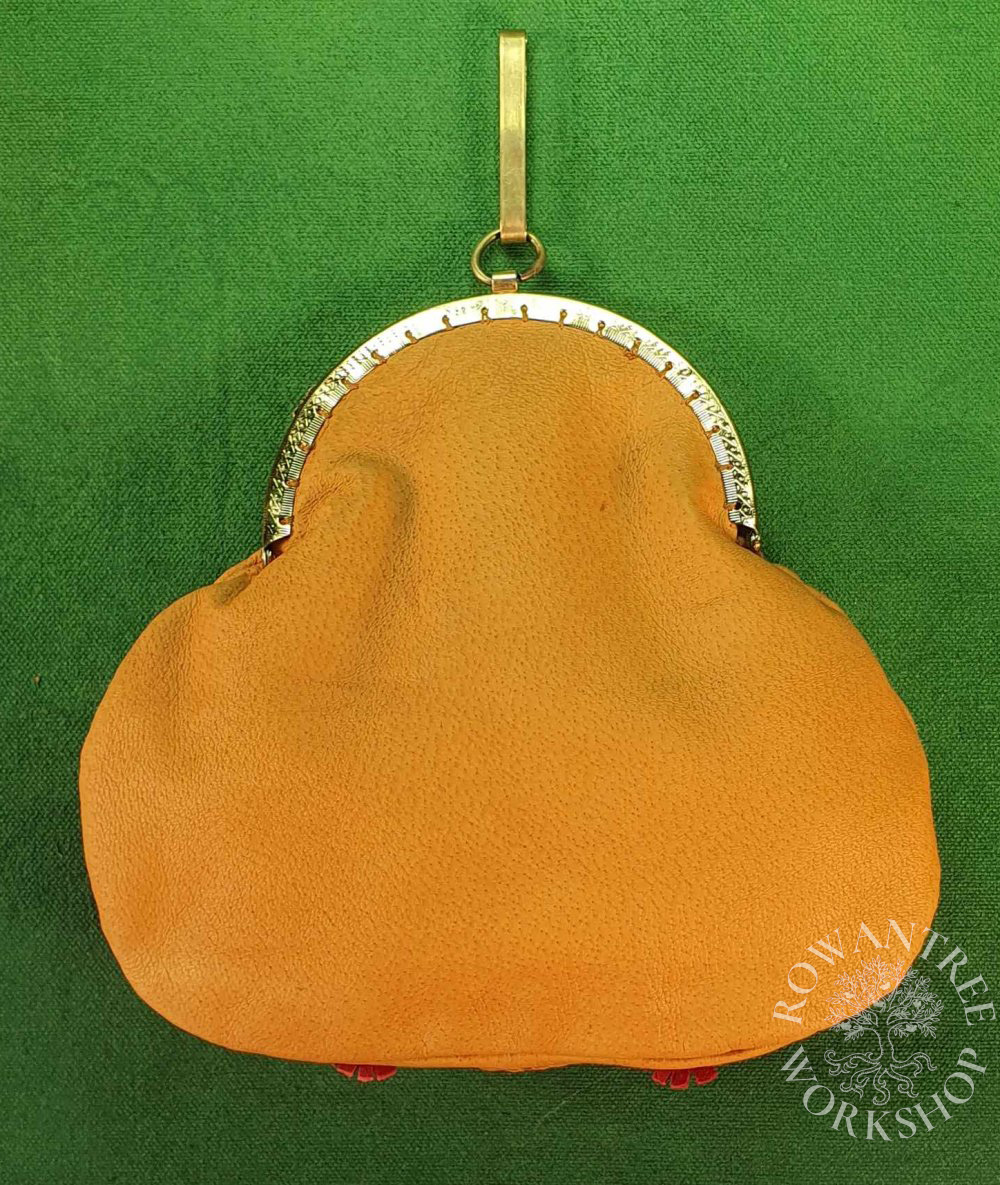
With the front complete, I sewed the main purse together with 16/2 linen thread treated with coad, mounted on boar bristles – it needs to be strong, although the lining will take much of the strain. The stitches are about 5mm long, based on archeological finds (I just eyeballed them). I sewed up the lining the same way.
I made sure the pleats were sitting smoothly compared with the back, and then sewed off the ends of the drawthreads to secure them.
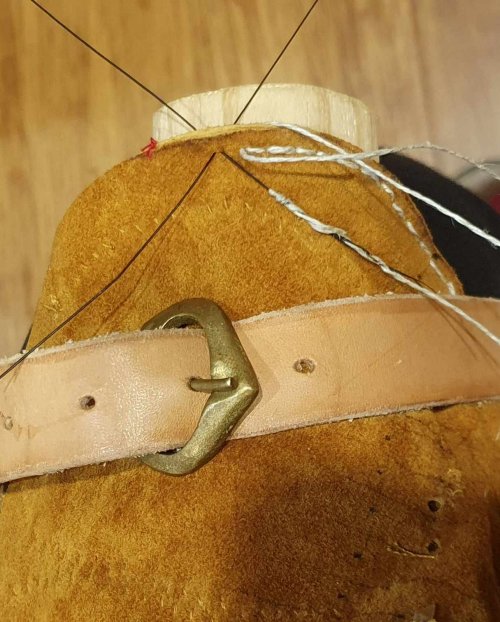
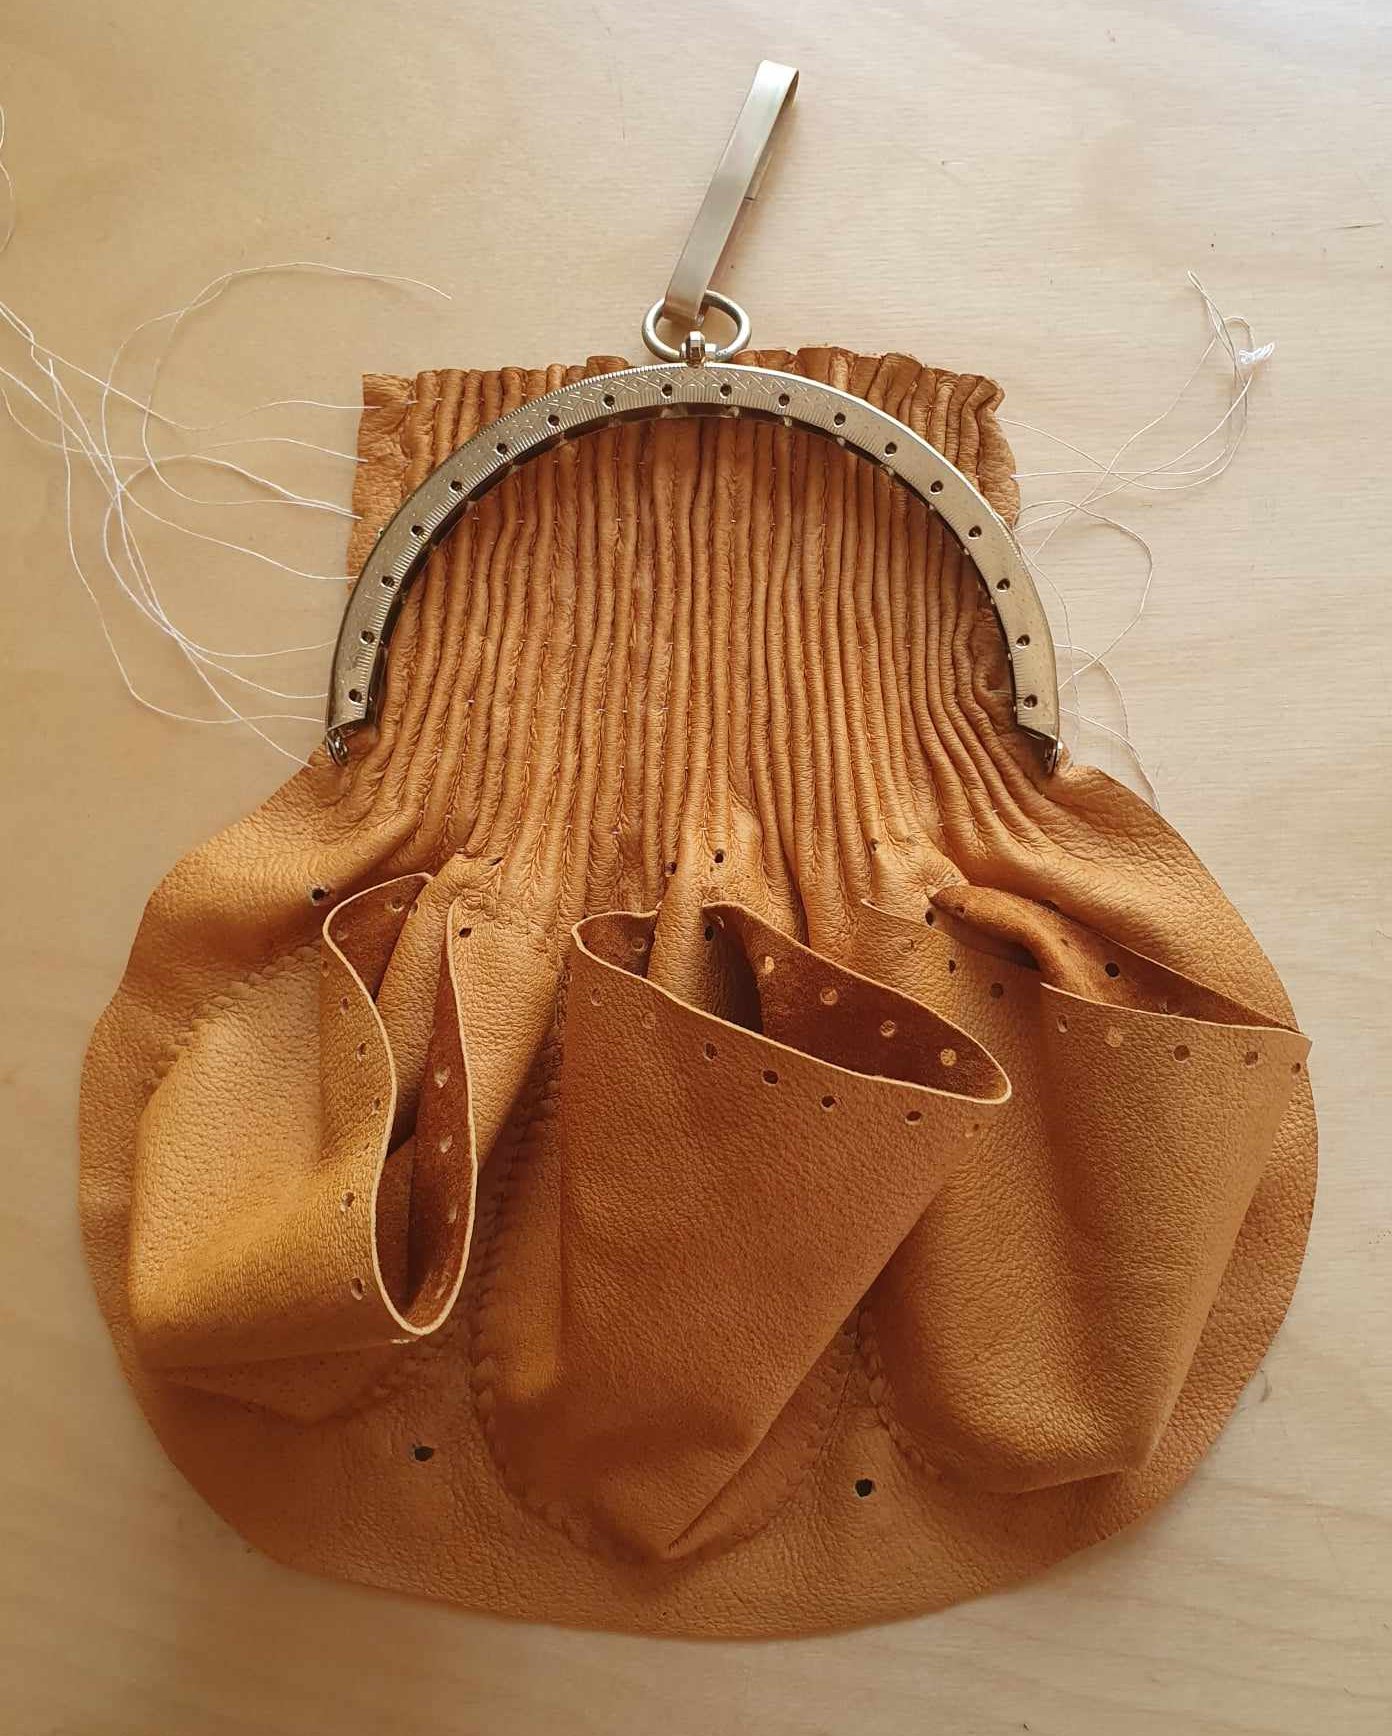
I put the lining into the purse, then joined them around the top curve with whipstitch. The pleats were too thick to go into the frame, so I hammered the edge and then trimmed any excess, which worked well.
I pursuaded the top into the frame, secured it with thread tacks and then sewed it securely in with waxed silk threads. The extant examples have holes on the back of the frame, so I want to minimise the stitches.
To finish off the purse, I threaded up the pouchlets with a button at the front to open the purse, and fininished the cords with brass beads.

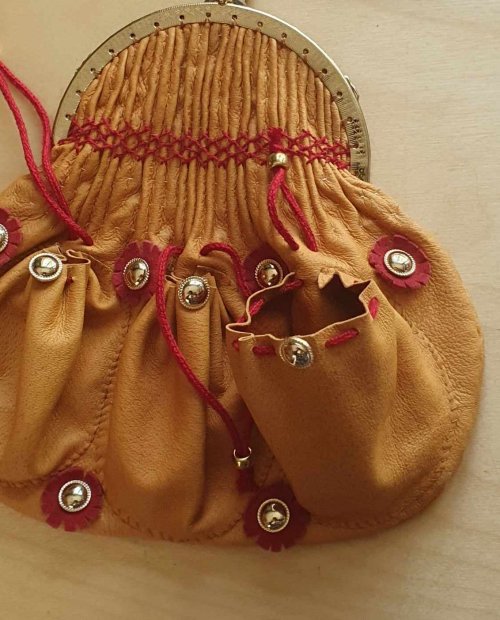
At which point, I decided there was too much ‘bling’. Sigh. I wish I’d changed my mind before cutting off the cords. I carefully unpicked the end knots, wrapped the ends to prevent unravelling, then unthreaded and removed the shiny buttons, replacing them with simple knots. Better.
And it’s done!

Afterthoughts
I really like the end result. It’s a nice scale, fits useful things and looks great.
But as always, when exploring something new, I learned things along the way….
- The leather was very fine, although pigskin is strong. It does need to be very pliable, but 2mm would look better (although it would not work with pleats in my narrow frame). Chamois would work well for this, or a garment weight calf.
- The pleats added a whole new layer of complexity to the design – the patterning, the construction, the decoration and fitting into the narrow frame. If you are inspired to make one but haven’t done much leatherwork before, I recommend a plain front (with the pouchlets of course).
- If you plan to use pleats, you really need a frame wide enough to hold them!