

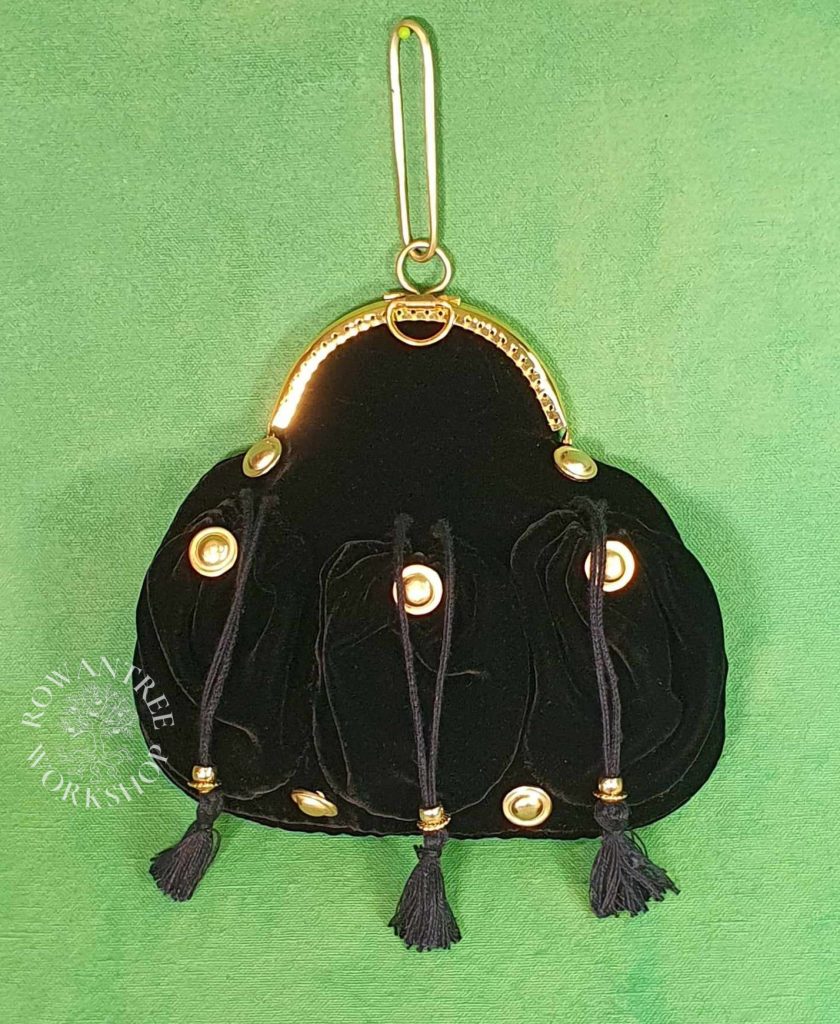
A black velvet purse for an early 16th century German noble woman, in the style of Cranach paintings.

This style of purse has been on my To Do list for many years, so I was glad to have a reason to push it to the top! My friend Anne von Weise was being elevated to the SCA Order of the Laurel and a purse to go with her new gown seemed a suitable gift. A great reason and a deadline – excellent.
Research and Design
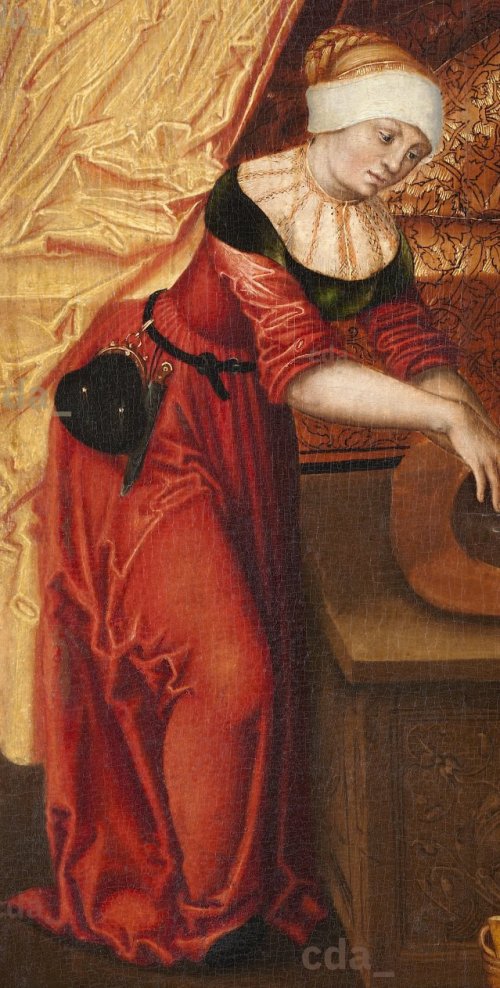
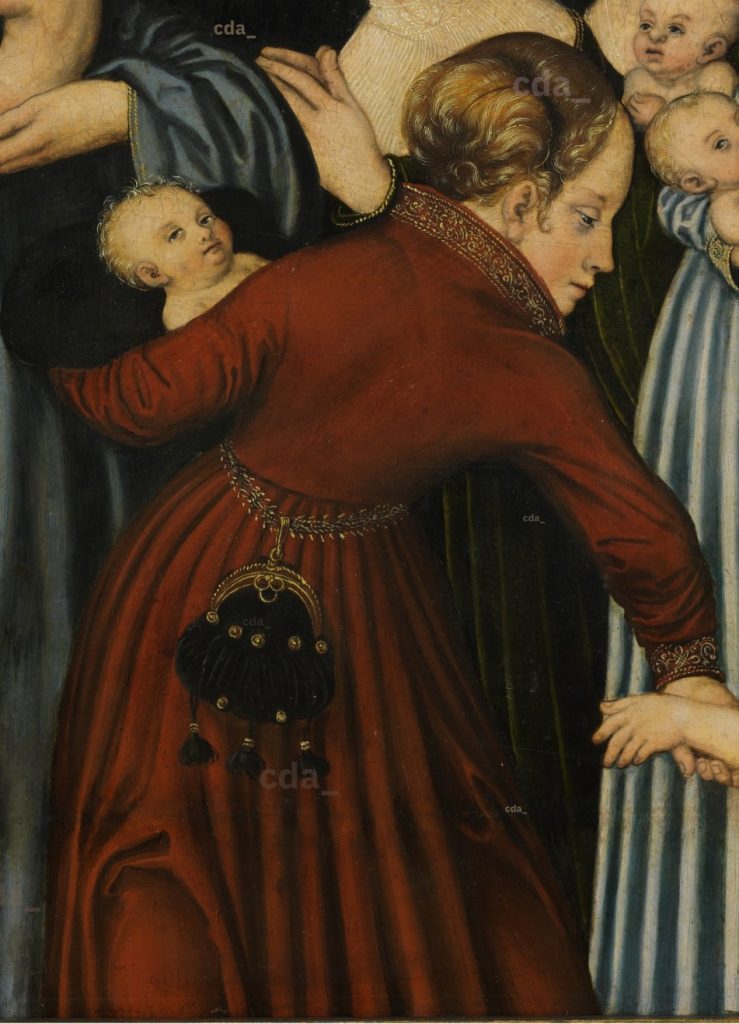
There are many paintings by Lucas Cranach the Elder depicting noble women with rich frame purses hung from their belts.
These women’s frame purses were popular with noble women from about 1520-1540. They were made of rich velvet, decorated with bright mounts and hung directly from an ornate belt, hanging at hip level at the back or side of the skirts. Middle class women wore similar framed purses, but made of leather.

In Purses in Pieces, Goubitz (2007) notes two forms of frame – square and curved – and states that the square version was worn by men and the curved by women. Although round frames are more common, the Cranach paintings above show examples of both types, as do middle class images.
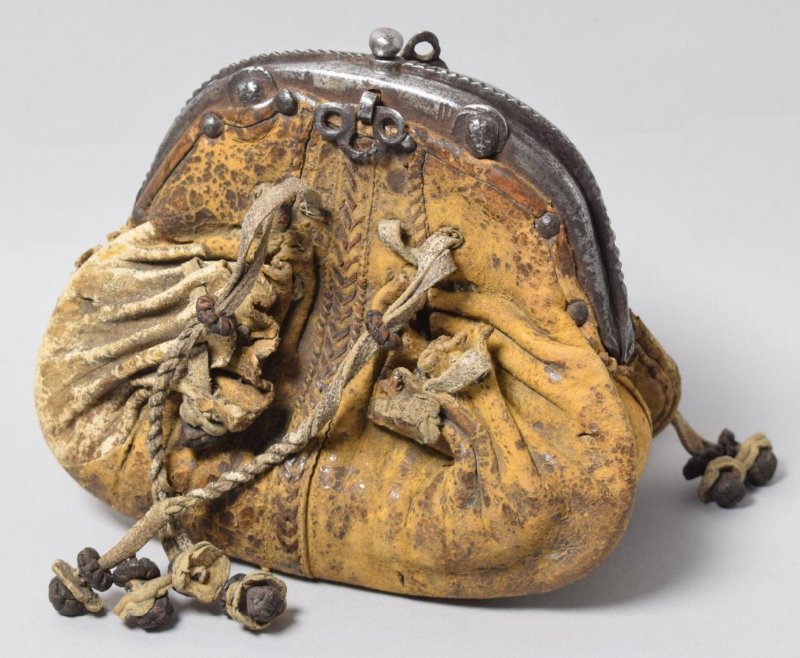
Goubitz describes this style of purse as a ‘Spring-catch framed purse’ because it closes with small interal catches set into the frame. The middle class exmaples were made of iron or steel, such as the examples below, while the up-market purses were made of silver or silver-gilt (or perhaps plated base metal).
These purses are suspenced by a loop over the belt, which is set into a block or ring mounted on the frame. This loop may be fixed or a swivel, as found in earlier medieval purse frames.
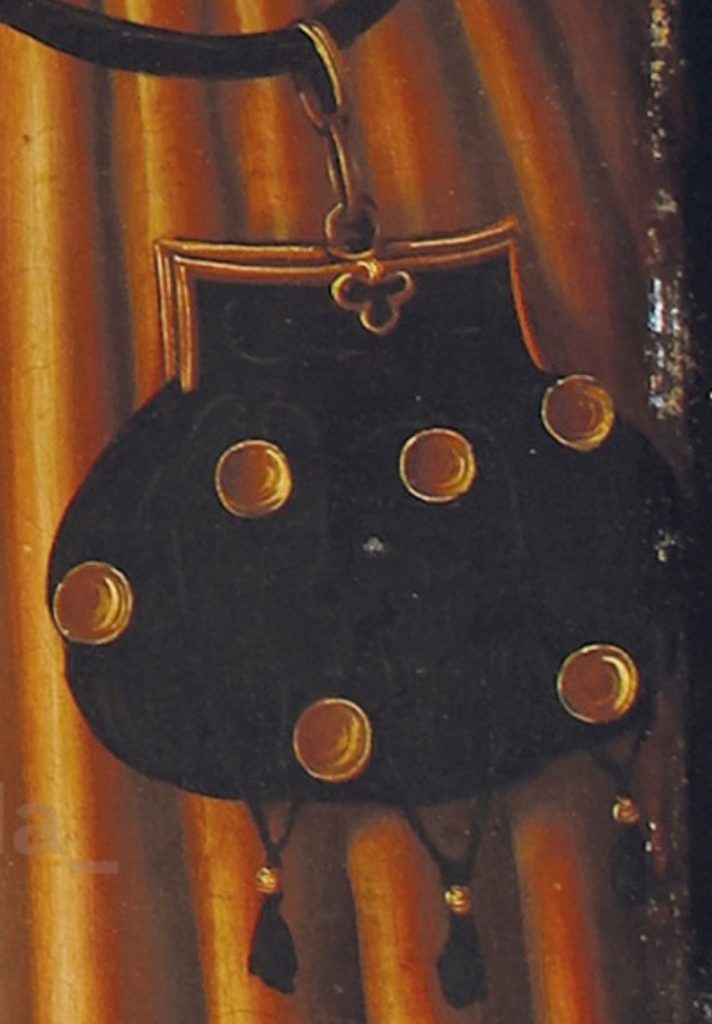
Some of the extant examples and frames are complex, with secondary frames supporting double purses, and internal compartements. These are generally larger frames and I believe are probably men’s purses. By contrast, these noble women’s purses appear to be simple structures which sit quite flat againt the gown.
These purses usually have three pouchlets on the outside – a typical feature of 16th century purses in Germany and the Netherlands, across all classes. Goubitz has a drawing of a leather purse back which clearly indicates how the pouchlets are attached. It also shows the the 4 holes for the drawstrings which close the pouchlets, places where extra mounts were attached, and stitched gathers at the top,

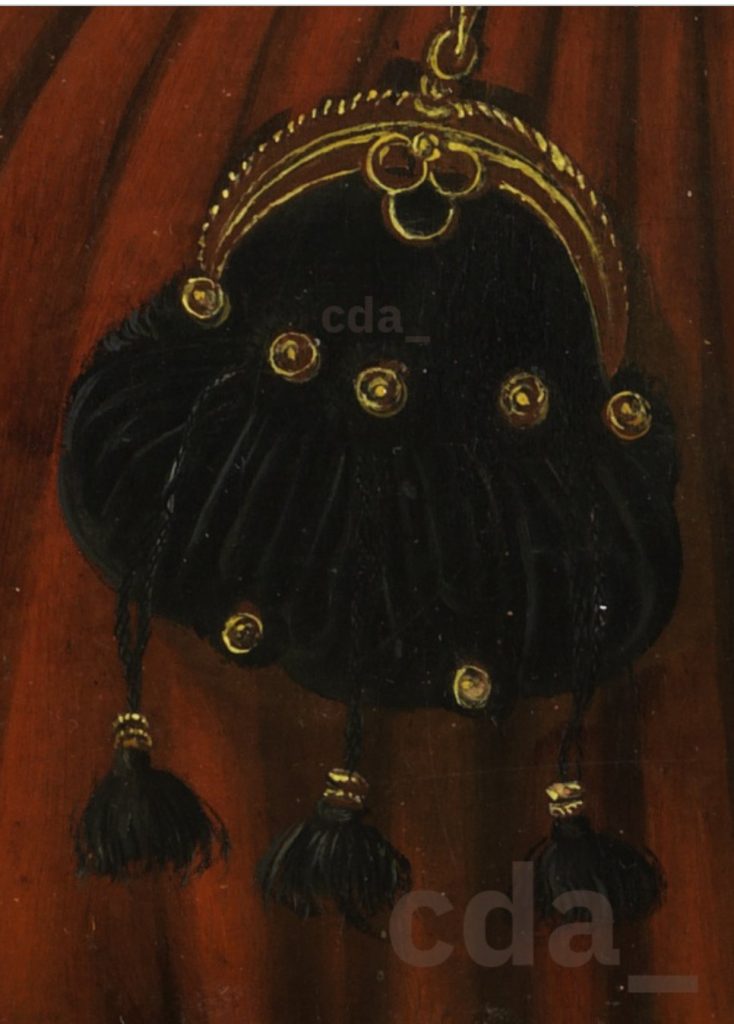
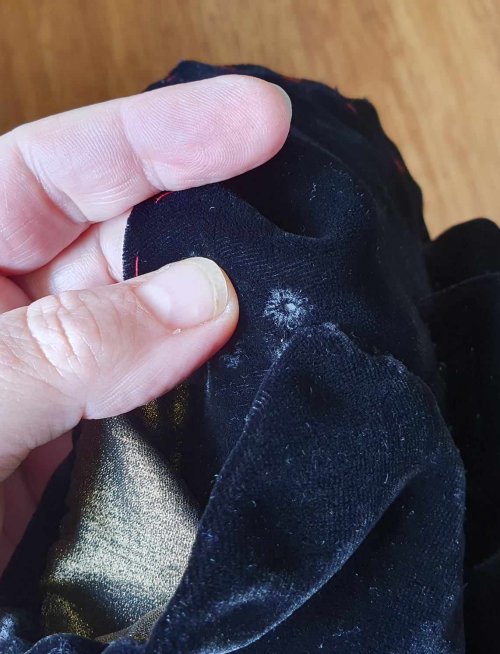
The fabric of these purses is a rich velvet, usually black. Textiler Hausrat (Zander-Seidel, 1990) notes many such purses left in wills – usually black velvet, with silver-gilt or silver buttons. The cords which close the pouchlets often end in tassels, and sometimes additional mounts. The fabric is not sewn to the frame on the outside, so they may be sewn to the back of the frame, glued in or held by the crimped metal.
The pouchlets have a button on the outside, to make them easy to open. To close, you pull the drawstrings. Many purses also have decorative ‘Knopffen’ or buttons between the pouchlets and beside the frame. The Cranach examples above show several styles of circular mounts – dished or raised, some with roped edges. Egan & Pritchard (1991) details examples of circular mounts in all these forms, many in a copper alloy. Zander-Seidel notes silver and gold plated versions on velvet purses.
Based on all this, my plan was for a black velvet purse, with a gold-coloured curved frame and mounts, finished with black silk cords.
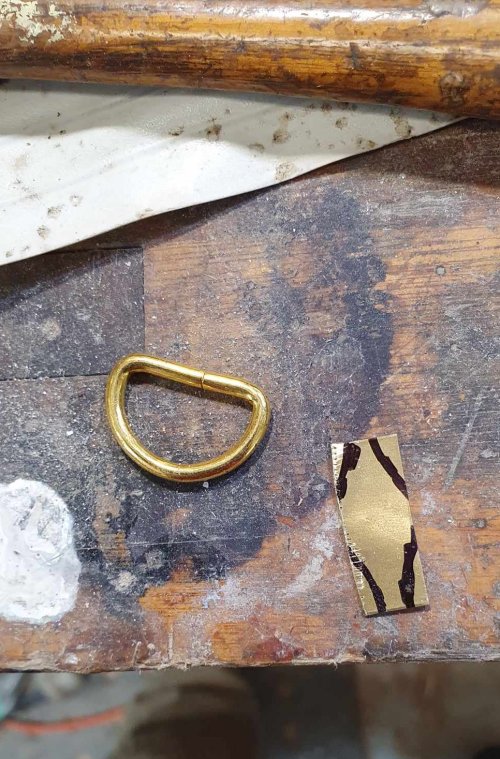
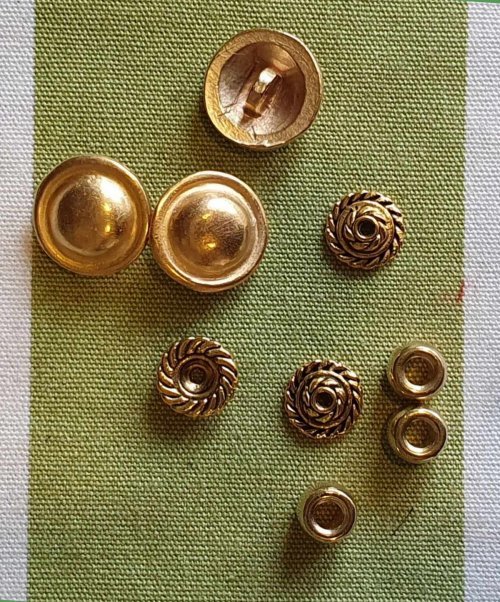
I don’t have the skills to make a proper frame, so I planned to adapt a suitable brass purse frame from my local craft store. After much searching, I found some brass buttons online in the right style for the mounts. I had the black silk velvet and heavy silk thread for making cords in stash – ready to go.
Construction
Mock-ups
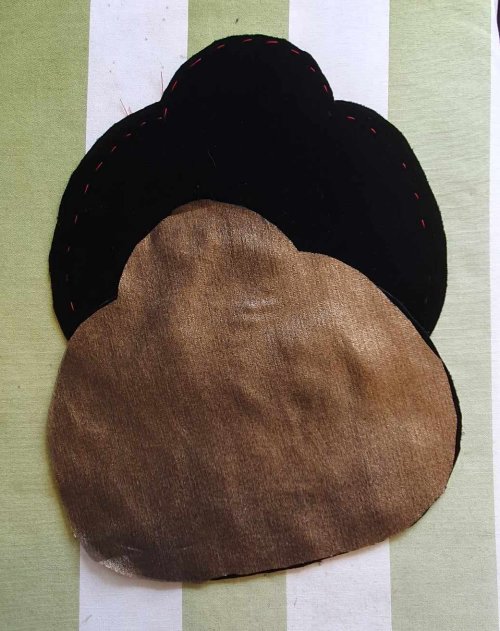
First, a mockup of the purse to get the shape and proportion. I drew out the shape on paper using the frame as a guide, then made a mockup in felt to check proportions – an essential step. I also used this to test out options for the pouchlet shape, using buttons from stash.
At this point it occurred to me that Anne might want to actually use this purse for something – like her phone… So I contacted her to ask how large her phone was. And then made another (larger) test version!

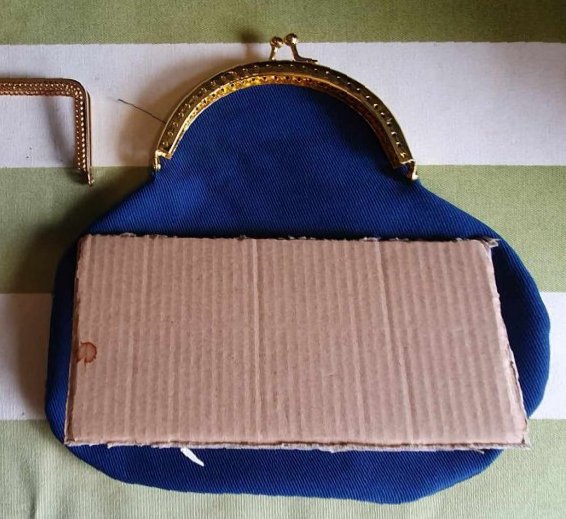
Next, some test samples using the velvet. Silk velvet is too soft to support the pouchlets, so I plan to mount the main purse pieces on linen for stability. I wanted to test how the pouchlets would work too, and whether the eyelets would need to be sewn (most textile drawstring purses do not have sewn eyelets, but velvet is tricky).
Conclusions: Linen interlining is fine for the main bag, but too stiff for the pouchlets. So is silk taffeta. The fine gold silk worked well, but is sooo slippery. No need for eyelets on the pouchlets, but a good idea where the cords run through the main bag.
The Frame
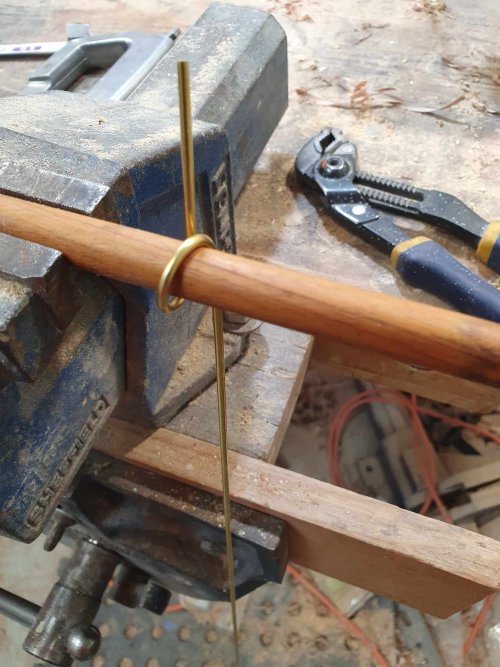
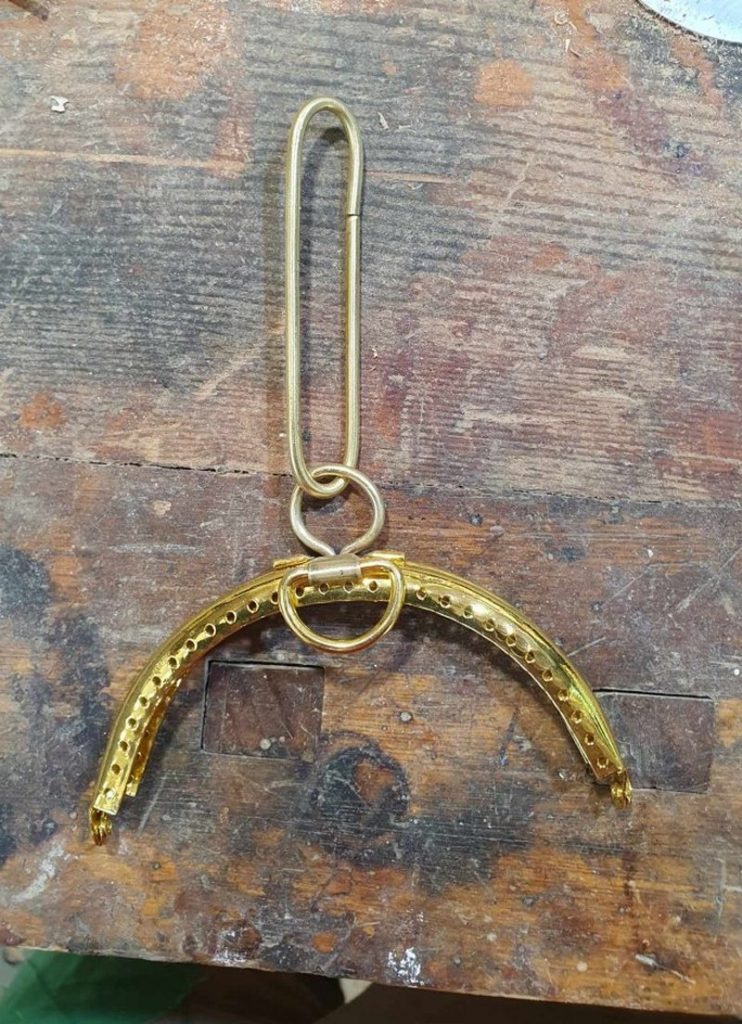
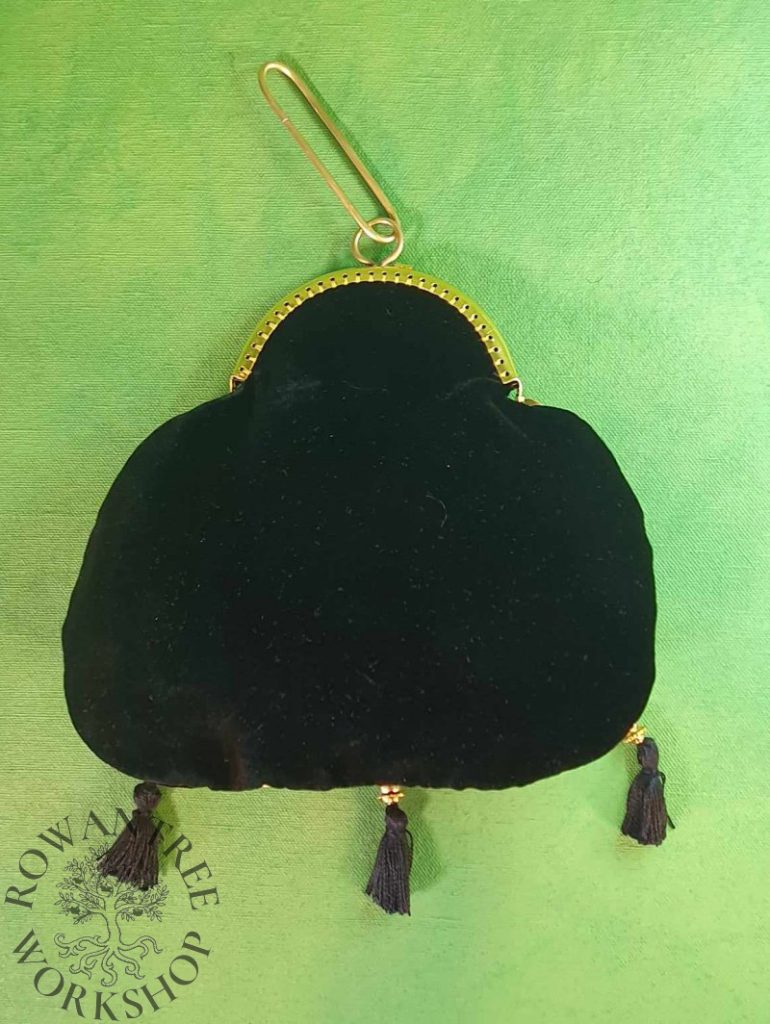
The modern purse frame has a pair of balls which clip together to close the purse. I need to replace this clip with a loop hanger. The painted examples gave several options, so I went for the simplest – a ring at the frame, and a long loop to go over the belt.
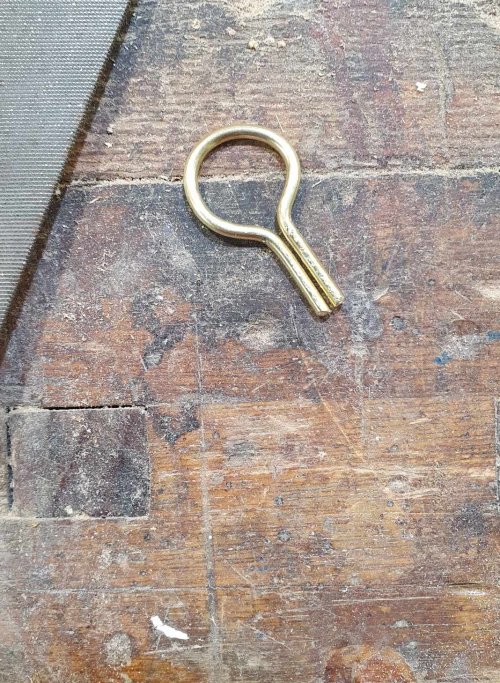
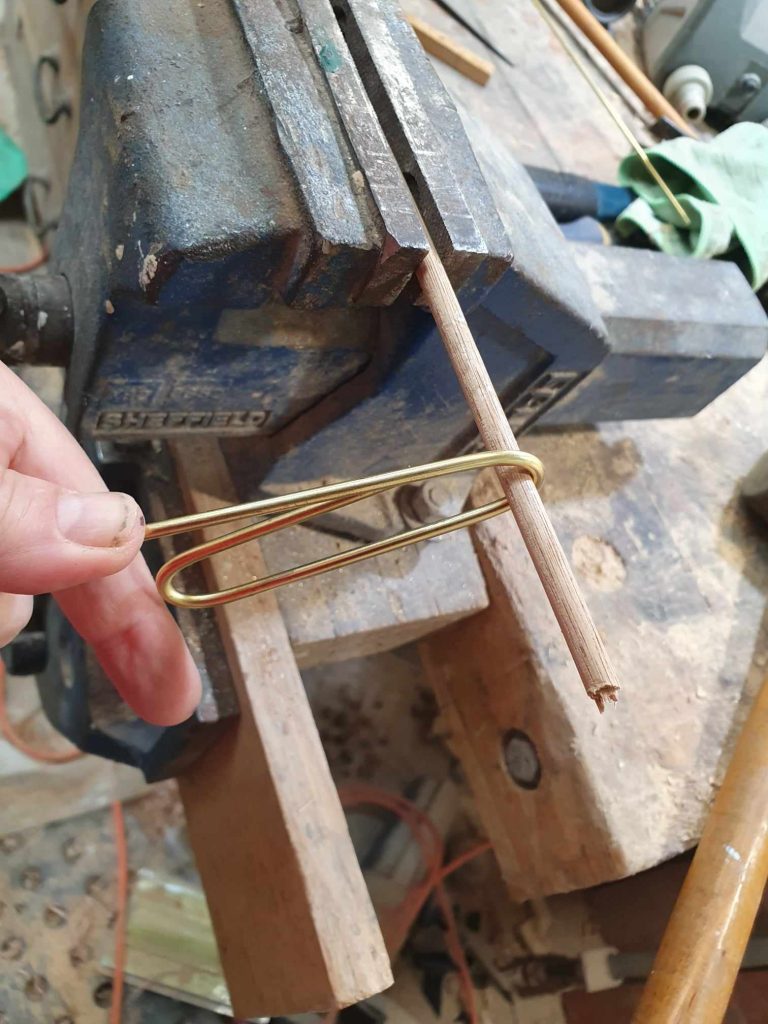
For the ring hanger, I formed a piece of 2.5mm brass rod over a dowel to make a loop, then shaped the legs in the vice. I anealed the legs with a blowtorch, so they would be soft enough to bend over inside the frame. Then I formed the long loop the same way, bending at both ends.
I’d planned to remove the balls clips with their bases, but that would damage the frame too much, so I just used a hacksaw to cut them off close. And discovered the frame was not brass but gold-plated steel! Ah well… A little Rub’n’Buff should hide the cut ends 🙂
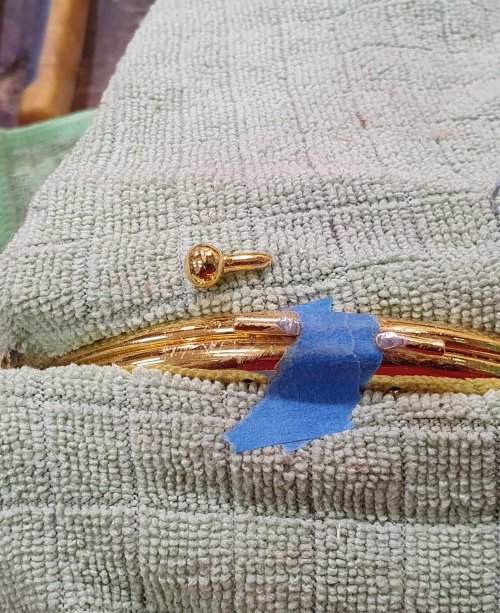
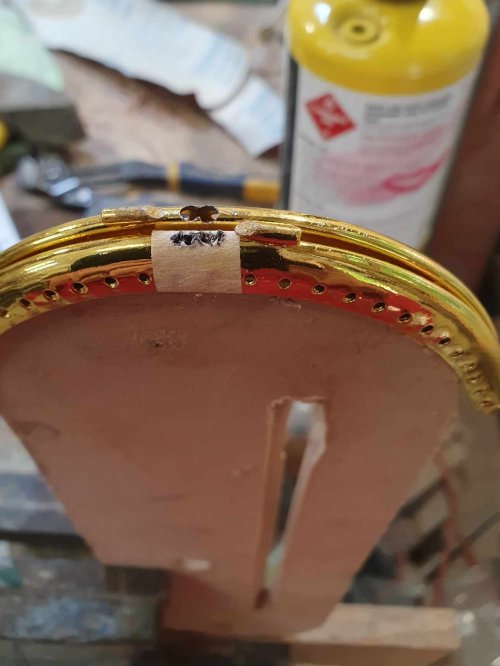
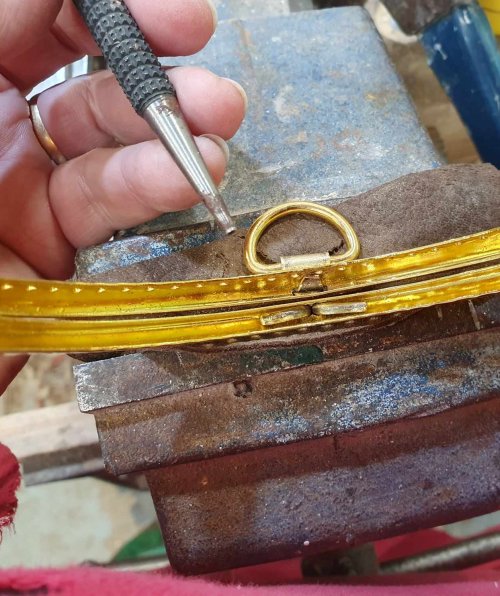
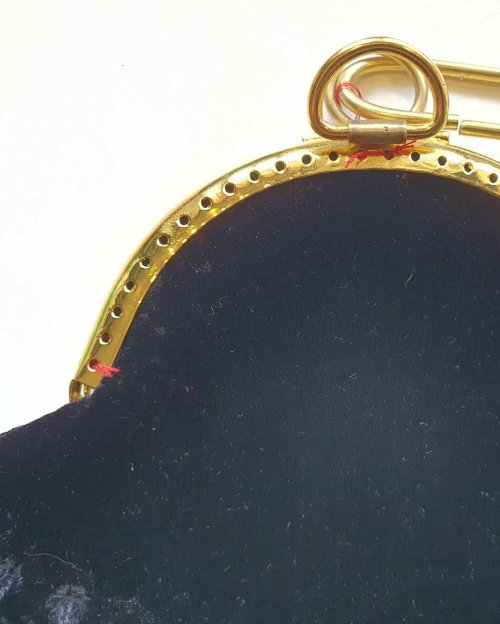
With the frame supported on a rounded wooden form, I taped, marked, centre-punched and then drilled two holes to take the legs of the hanger. Then I drilled a series of smaller holes to make a slot for the tag holder. A lot of fiddly work with small files later, it was ready for the new bits.
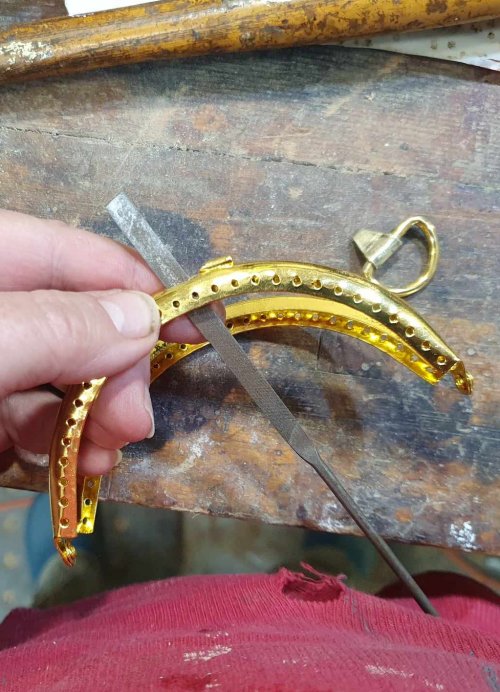
I can’t make sprung catches, but the frame is quite stiff, so it should stay closed. However, I do need a way to open the purse, like the button or trefoil tags on the paintings. A trefoil was too hard, so I used a D ring and cut a small brass strip to hold it. I annealed this and bent it over the D ring, crimped it closed and bend the legs over, ready to insert into the frame.
I put the free end of the tag holder through the slot, turned the frame over and spread the two ends. Then I put the legs of the hanger loop through the holes, turned the frame over and spread them out – easy, because I had annealed them earlier.
The Bag
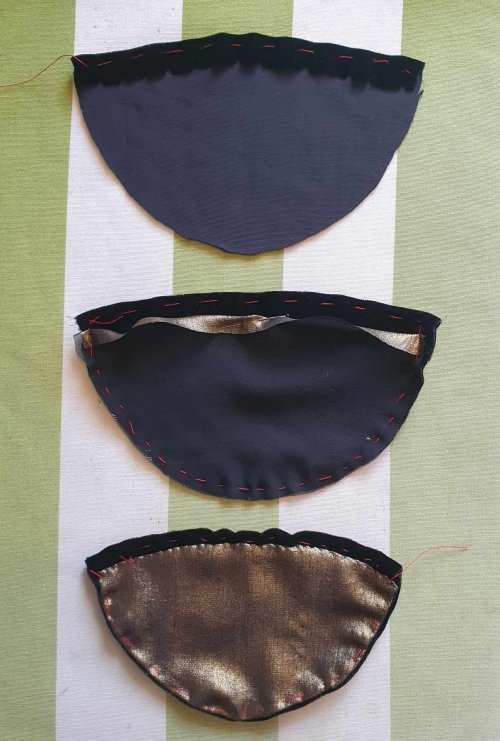
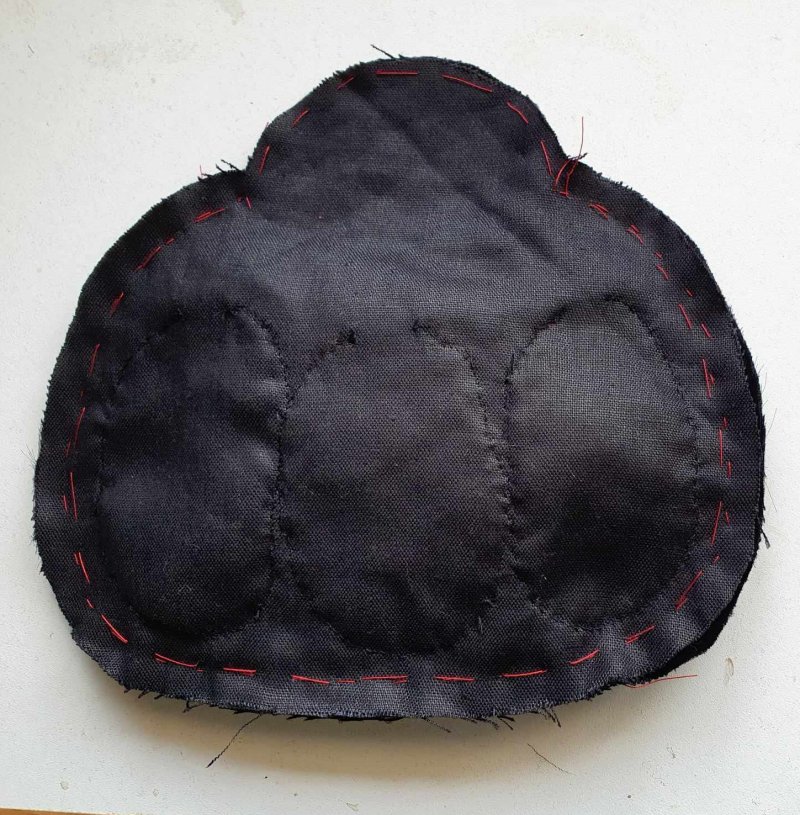
Back in the sewing room, I marked out the main pieces on black linen, basted this to the velvet and then cut them out, together with the pouchlets. I folded over the top of the pouchlet and basted in place, then lined the pouchlets with silk.
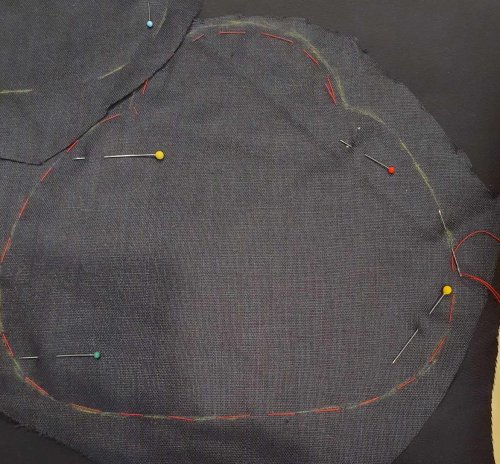
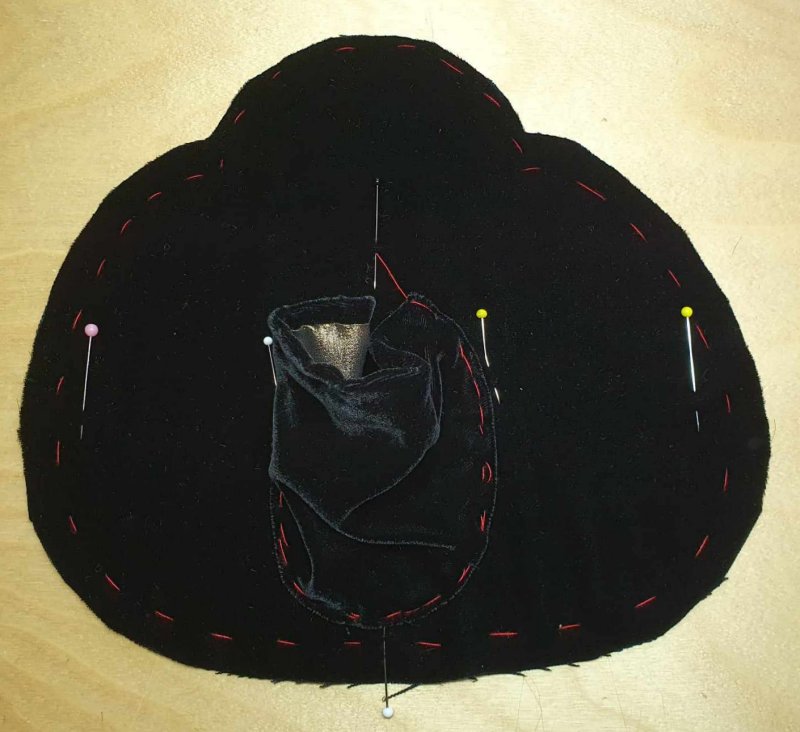
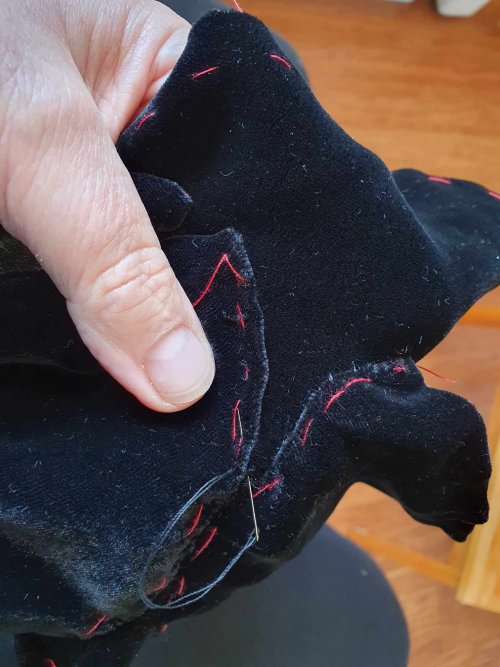
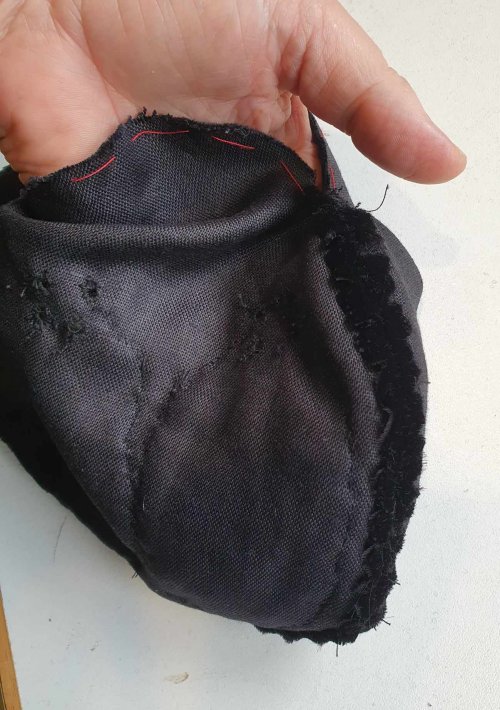
I used pins to space the pouchlets, then basted them on, with a small opening at the top. Then I whipped them on, with very small close stitches. Now I could see where the holes should go, I worked 4 eyelets at the mouth of each pouchlet, above and below the opening, as in the Goubitz example.
With the pouchlets sorted, I basted the front and back of the purse together, and then sewed the seam with backstitch (much easier than machine sewing silk velvet!). I trimmed and clipped the seam allowance, then catch-stitched it to the linen lining – this will ensure the purse shape stays looking full.
And I waited for the mounts to arrive….. So frustrating seeing them lurking at the local depot for 5 days.
I made three black silk cords in fingerloop braiding. Once the buttons arrived (yay!) I threaded one onto each cord, and then laced it though the pouchlet and then the eyelets. I sewed extra buttons on the base and sides, as seen in the paintings.
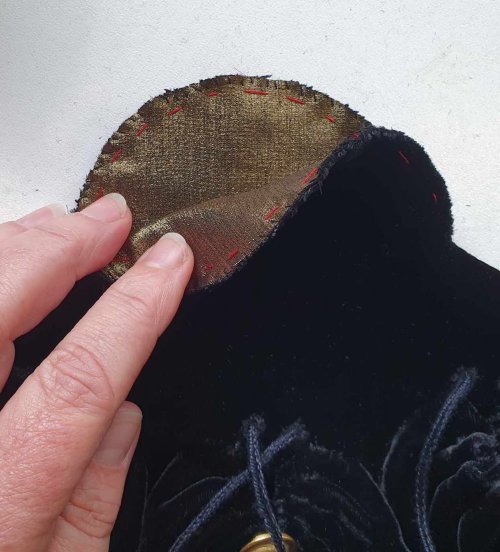
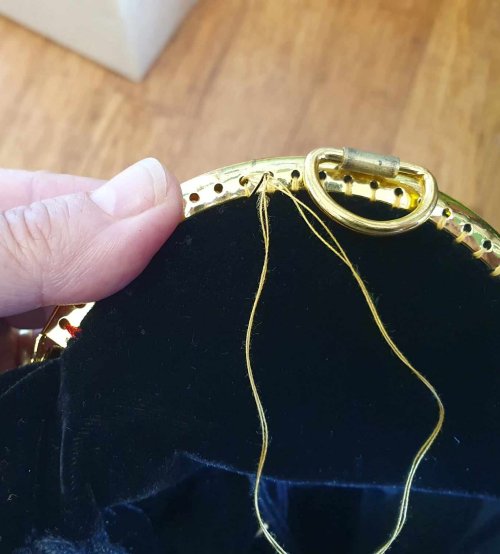
I made up the silk lining, inserted it and basted it to the velvet along the top edge. I checked it against the frame and edited a bit, then whipped over the edge. I eased this seam into the purse frame and basted it in place. Then I sewed the purse securely into the frame with waxed gold silk.
At this point, I decided that the long brass loop was not strong enough to stay closed by itself, so I soldered the joint (long time since I soldered anything), being really careful not to damage the purse. Of course I should have done this while I was working on the frame! But it is stronger now.
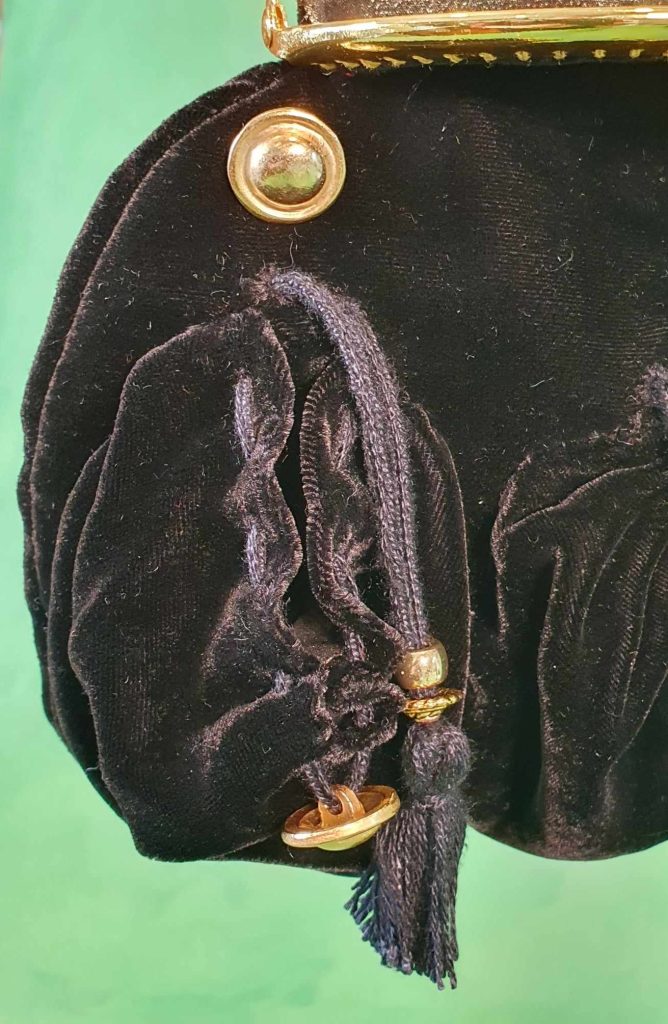
Finally, I decorated the ends of the cords with brass beads and black silk tassels. Excellent – just like the pictures!
And the purse was finished, ready to send to Anne on the other side of the world.

Afterthoughts
If I was doing this again I would make a few minor changes:
- Finish making the frame completely before adding the bag. Obviously.
- Add a seam allowance to the rounded top where it fits into the frame, turn and line it before sewing into the frame. This would fill the frame better than the single layers of fabric.
- Add a bit more ease to the top section, to make it easier to put things in the purse.
Now I have the process sorted (and plenty of brass bits), I want to make myself one too. I do have some elaborate German belt fittings on order…
But first, I need to make a middle class purse to replace my old, worn one.