

I had wanted an embroidered high-necked Hemd (smock/chemise) for years, but with a chest already full of Hemden, it never quite made it to the top of the list…
The simple materials make this one is suitable for the middle-class German clothes I usually wear.
Research and Design
Textiler Hausrat (Zander-Seidel, 1990) notes that this high-necked style of Hemd was popular at all levels of society, for both men and women, from the 1520s, as can be seen in these images by Beham, Holbein and Fueszal. They are decorated in everything from simple embroidery to elaborate gold threads and velvet bands. Mine is a simple, middle class version.
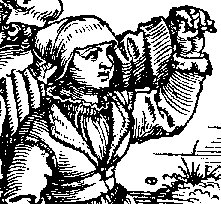
Source: Geisberg M 1974
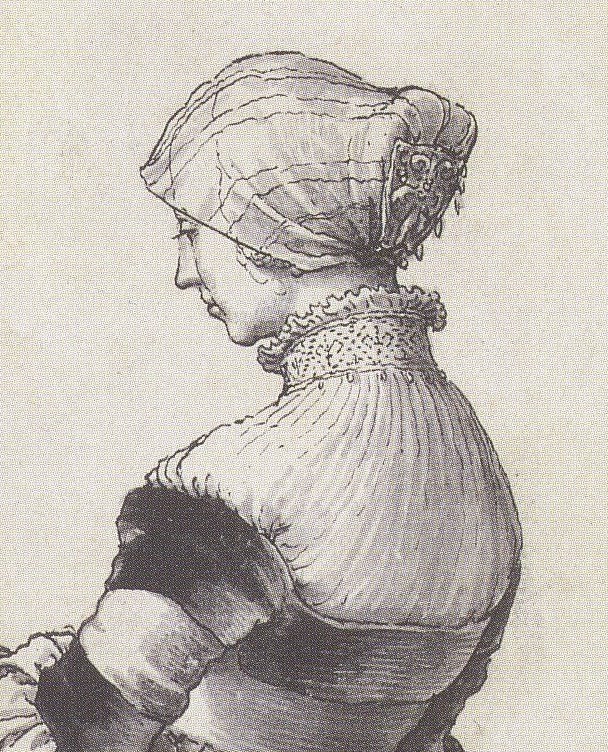
Source: Wikimedia
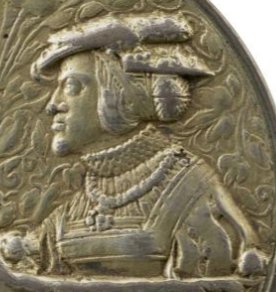
Source: The Frick Collection
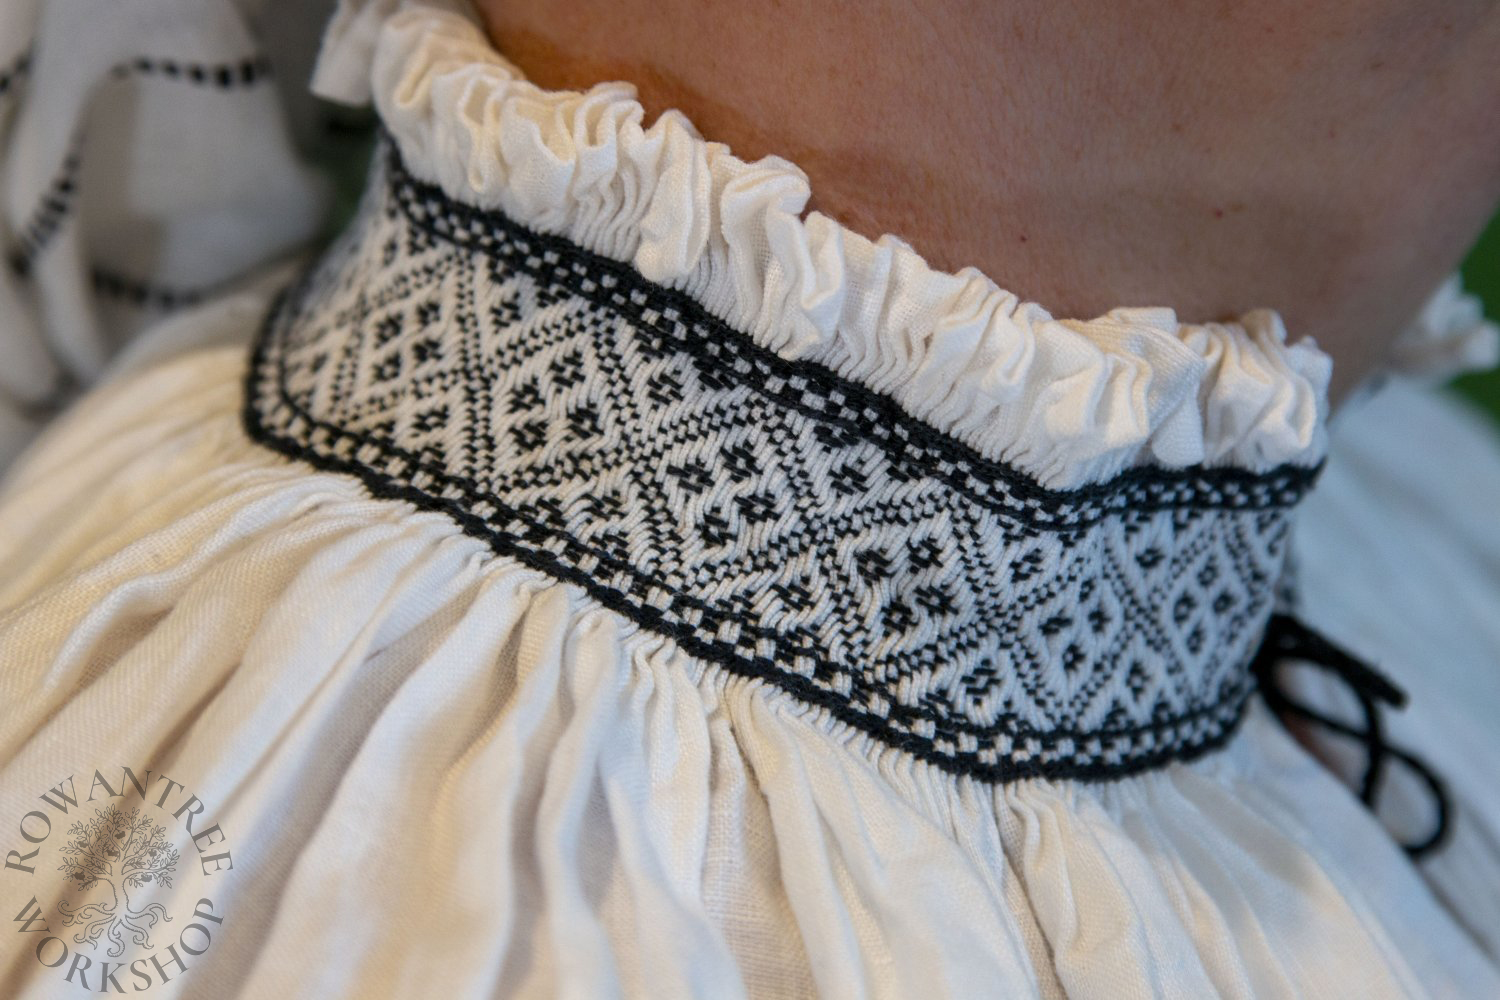
I have seen many reproductions of this style made with smocking, but this did not match what I thought I saw in the contemporary artworks. Smocking (especially honeycomb smocking) tends to stretch in use unless heavily back-smocked or lined, but the collars in the artworks looked very firm and stiff.
The more I looked, the more convinced I was that I was seeing embroidery directly worked over the pleats themselves – pattern darning using the pleats. Shortly after this, German Modelbücher (McNealy 2018) was published, which confirmed that this was one of the techniques used.
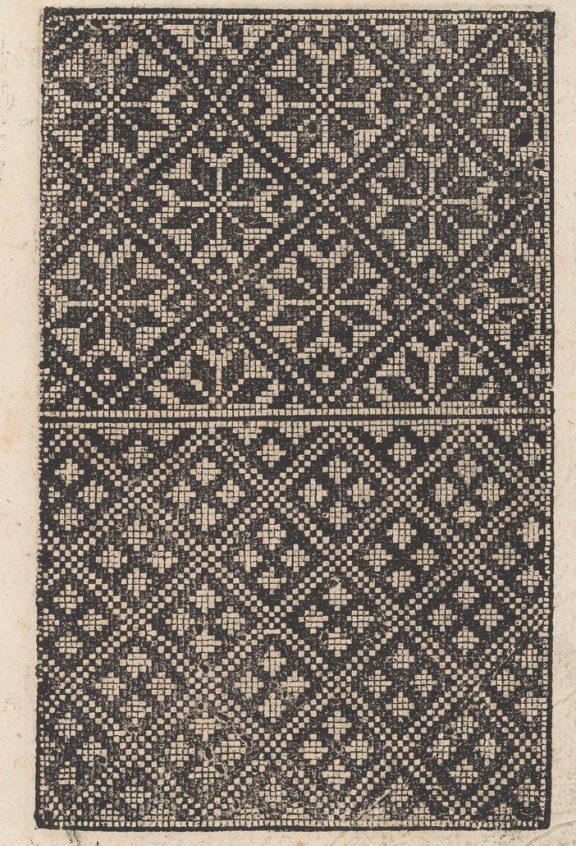
I wanted a design with a regular diamond pattern, as can be seen in the Holbein example above. The 16th century German modelbooks are full of such patterns and I found a suitable one in Ein new getruckt model Büchli by Schösperger 1529 f.10v (reproduced by McNealy and other sources).
However, I was concerned about the length of the ‘floats’ – I wanted to avoid long threads on the surface, which might catch in use. So I adapted the pattern by reversing the colours, and adding an extra stitch in the middle of each solid diamond. I also added a checked border above and below – a feature seen in other patterns in contemporary mmodelbooks, and in art.
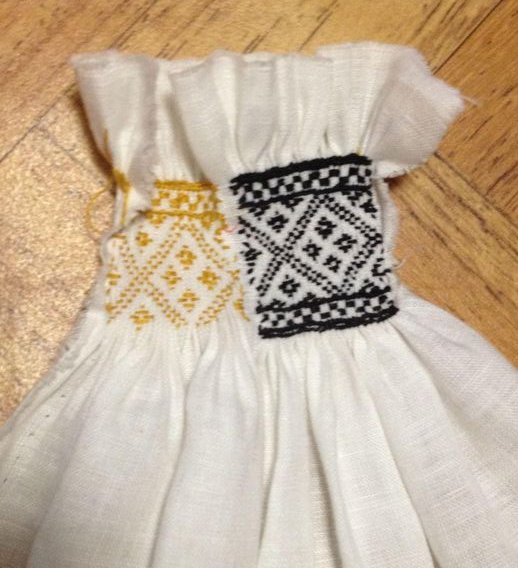
The first step was to do a sample piece – to try out the technique, look at colour options, and check how closely I could pack the pleats. I liked both the gold and black silk embroidery, but decided the black would be more useful.
Source: The Met

The sample showed me that I would need to be careful to keep my darning lines straight and evenly spaced – since I could not use the fabric weave, as for regular pattern darning.
It also enabled me to estimate how much fabric I needed to complete the collar – which in turn determined the widths I needed for the body and sleeve panels. I would have liked more fullness in the body, but I didn’t want the neck to be too large, so I added triangular side gores to the body.
Construction
The Hemd is made of 4 rectangular panels (body and sleeves), with underarm gussets and side gores. I ran the top of the body and sleeve panels through my smocking pleater, using red draw threads (to make them easy to see). Then I hand-seamed the top 30cm of the long edges together, basting from the outside to line up the draw-threads. I sewed a mock French seam in the gathered area, to minimise bulk.


Before gathering, I cut the front slit and hand-sew a fine rolled hem along the edges, using fine waxed linen thread, buttonholing around the base of the slit and adding a buttonhole bar for strength. Then I turned a fine rolled hem around the whole top edge.
On to the gathering… This had to be done in 4 sections, trying to match the density to endure even pleats. I tied the draw-threads across each seam to keep the pleats tight, ready for the embroidery.
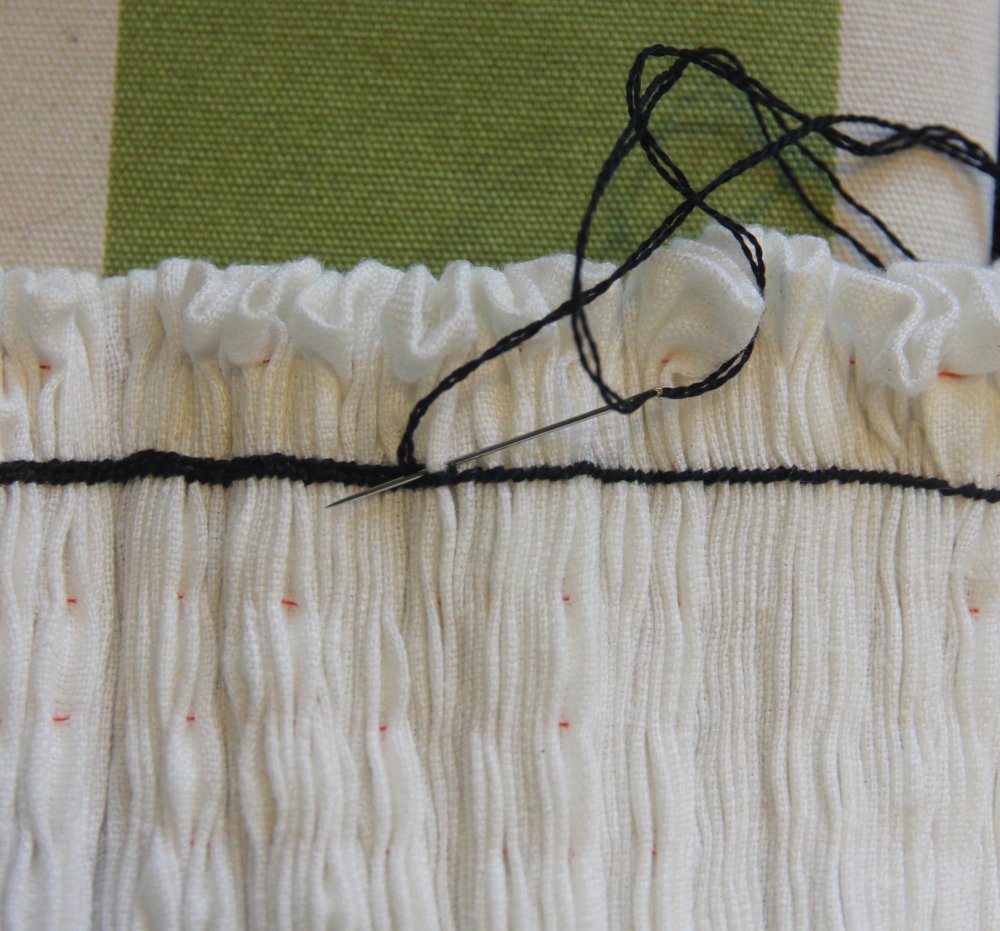
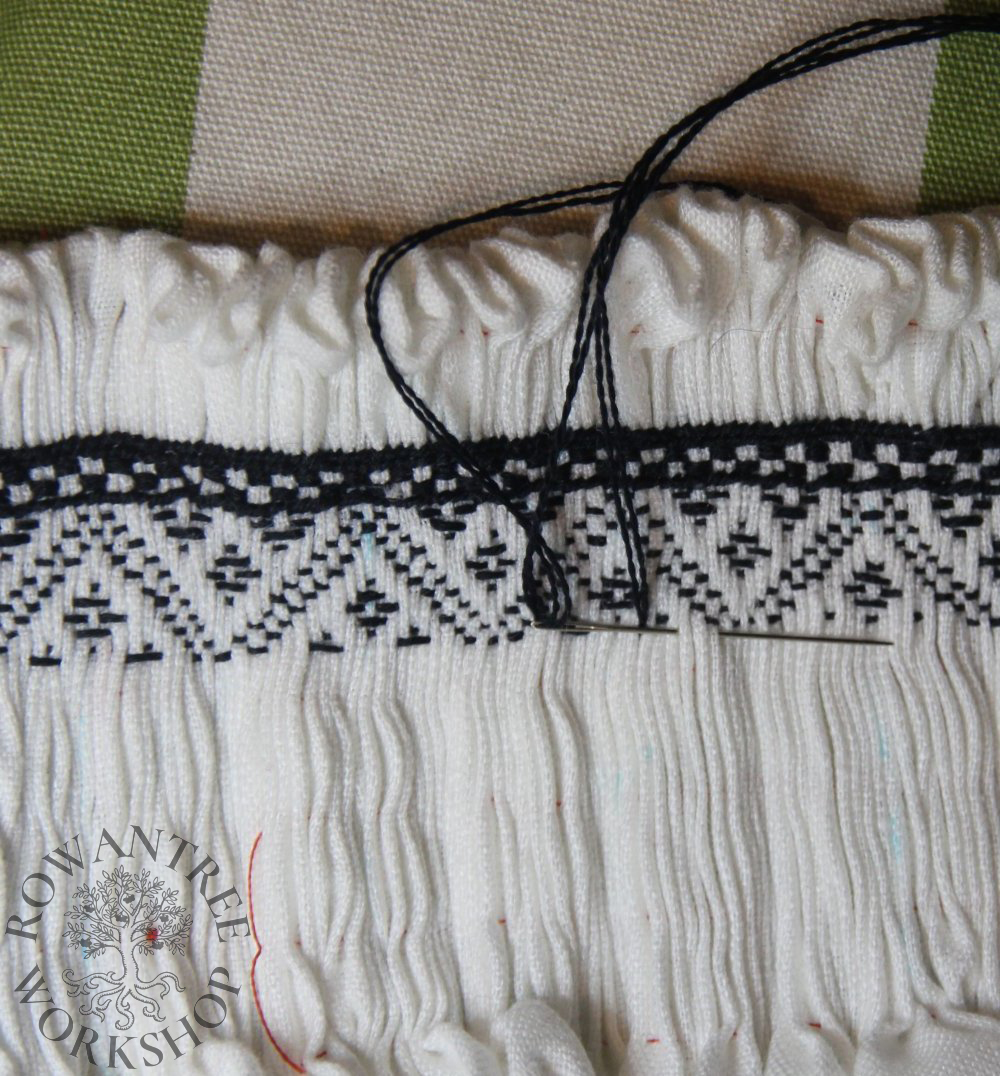
To begin, I worked a first pair of rows in stem stitch, to secure the pleats and provide a solid foundation line. The next four rows were worked as simple pattern darning over and under 2 pleats, then another set offset, to make checks. Another 2 rows of stem stitch finished the border.
I started working the pattern from the chart, with the needle just under the top if each pleat to avoid distortion. I spaced the rows by eye, trying to keep them even and parallel. It was slow, detailed work and hard on the fingers because the pleats are packed so hard – I could only manage an hour a day. Embroidered dot-matrix!
About half-way through I made a stupid mistake – I realised I had some slack in the black silk and thought I should pull up the rows. Once I had done it, I realised I had pulled the neck in by about 2cm – and there was no way to fix this. I tried damping and stretching, but the pattern-darned pleats were rock solid.
Ah well – onwards… Once the pattern was complete, I repeated the border rows to secure the base of the collar section and the embroidery was done. It took some effort to remove all the draw-threads – they were held tightly by the worked pleats.
I tried it on – yes, the neck was too tight, and would not fully close at the front. Sigh. But otherwise it was fine. I contemplated working a matching godet and inserting into the centre back, but decided I would just accept it. Although it was not what I had planned, there are images of slightly open collars. I lined the collar in fine linen, to combat wear and soiling (the lining is easy to replace if needed).
With the collar complete, I added gores to the sides to increase the hem width, inserted gussets under the arms, completed the side and sleeve seams with run and fell seams, and hemmed the cuff and hem edges.


Afterthoughts
I would have liked a bit more fullness in the body – and more ease in the neck. I was concerned about making the neck too big, but the pleats packed tighter than on my sample, so I could have been more generous.
And I do wish I had not committed the folly of over-tightening. Next time…