

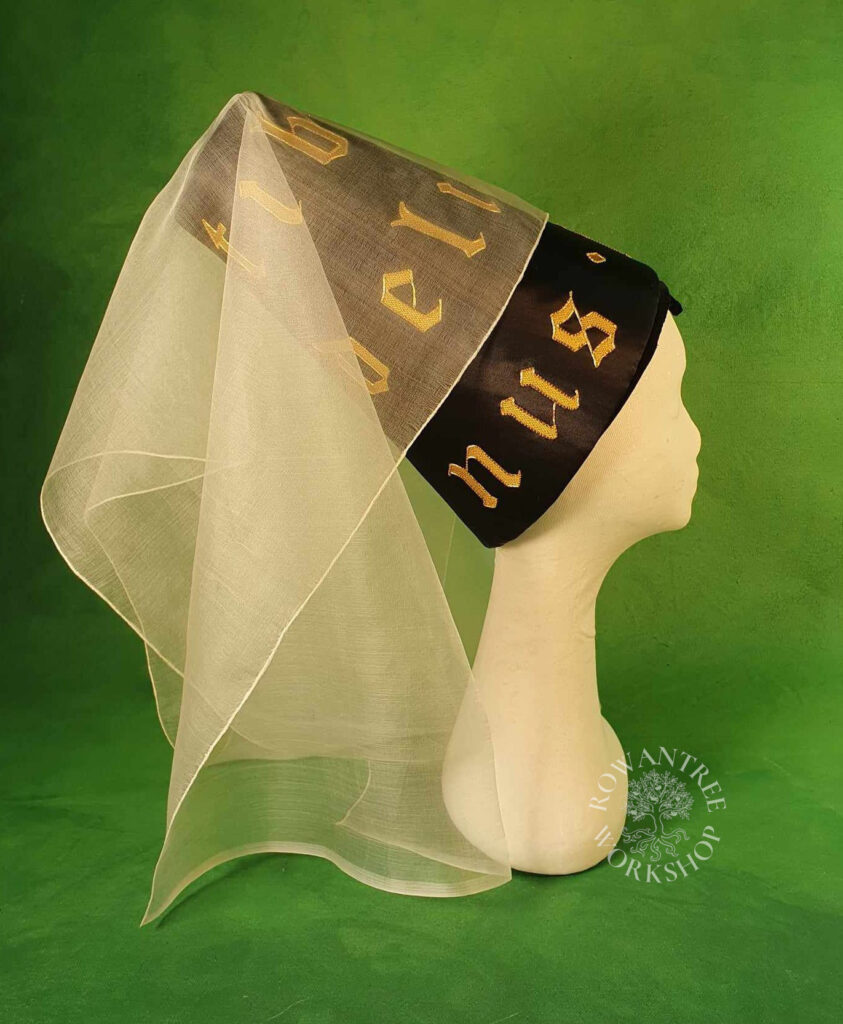
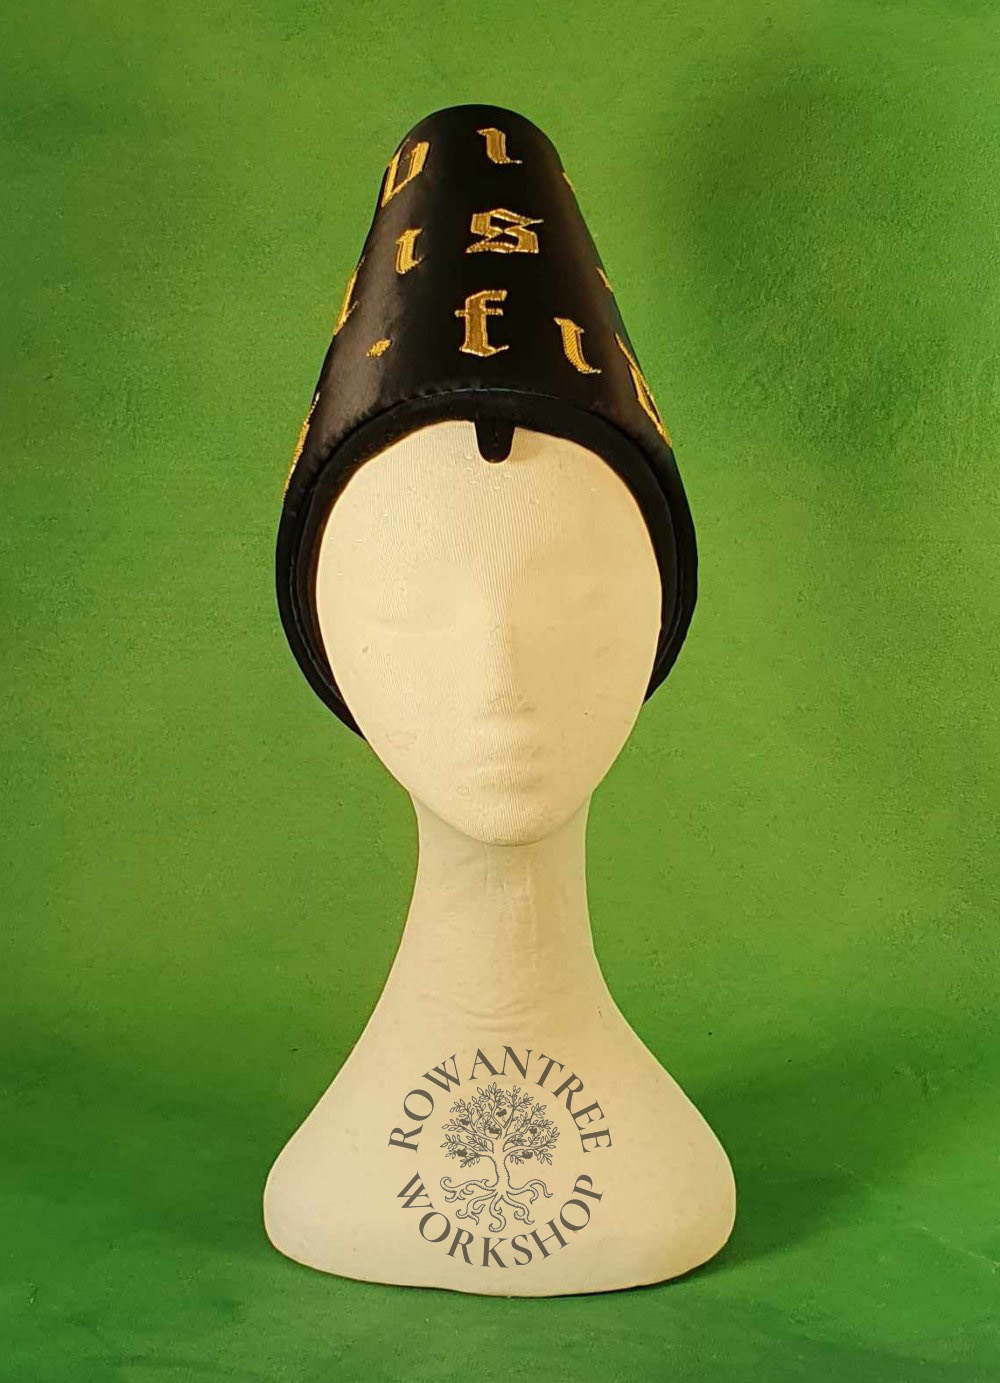
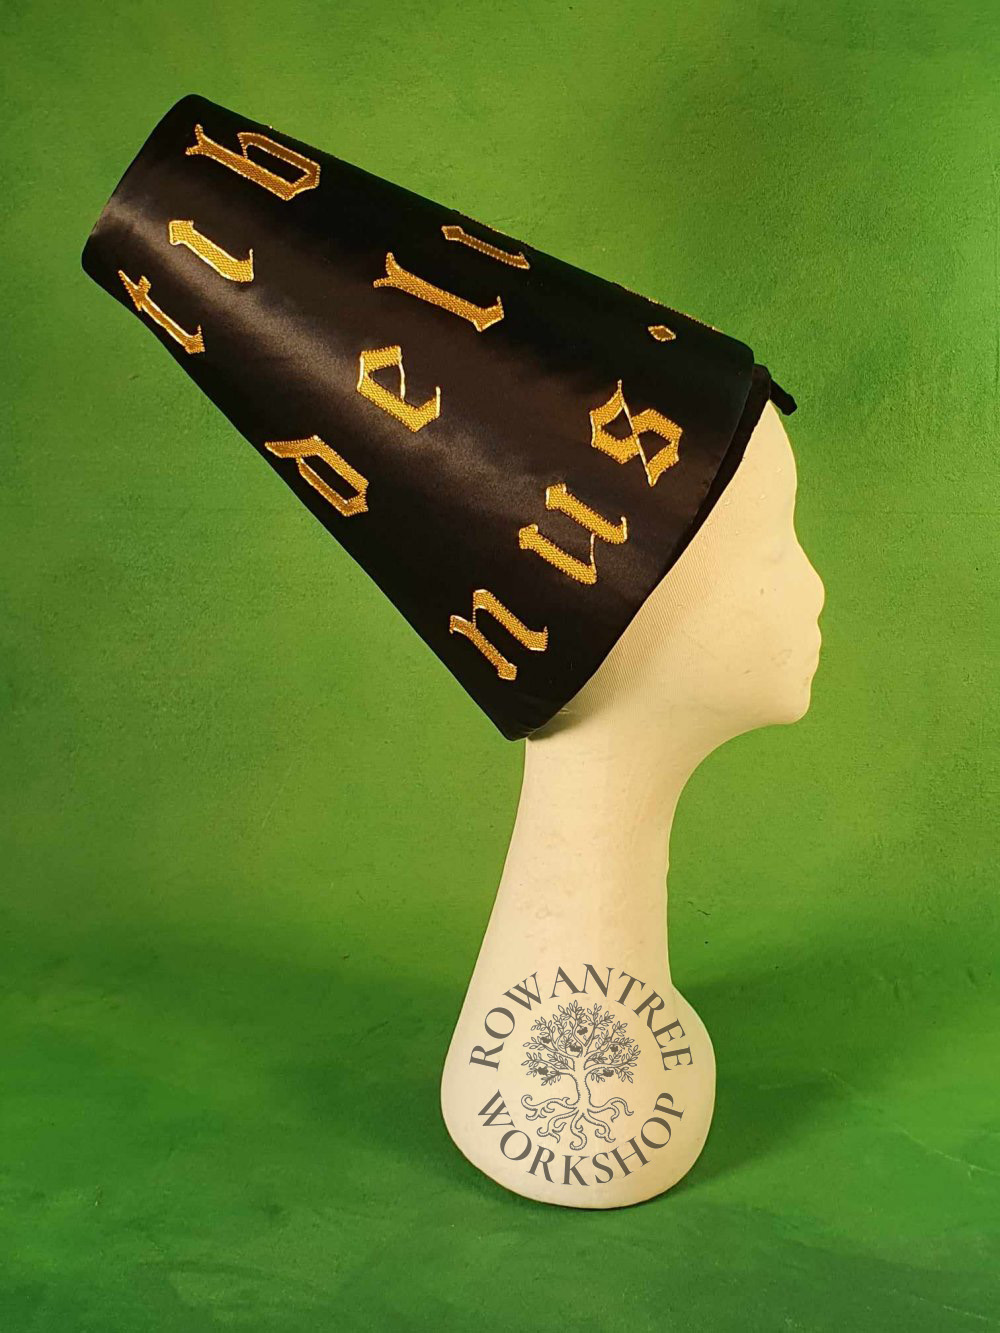
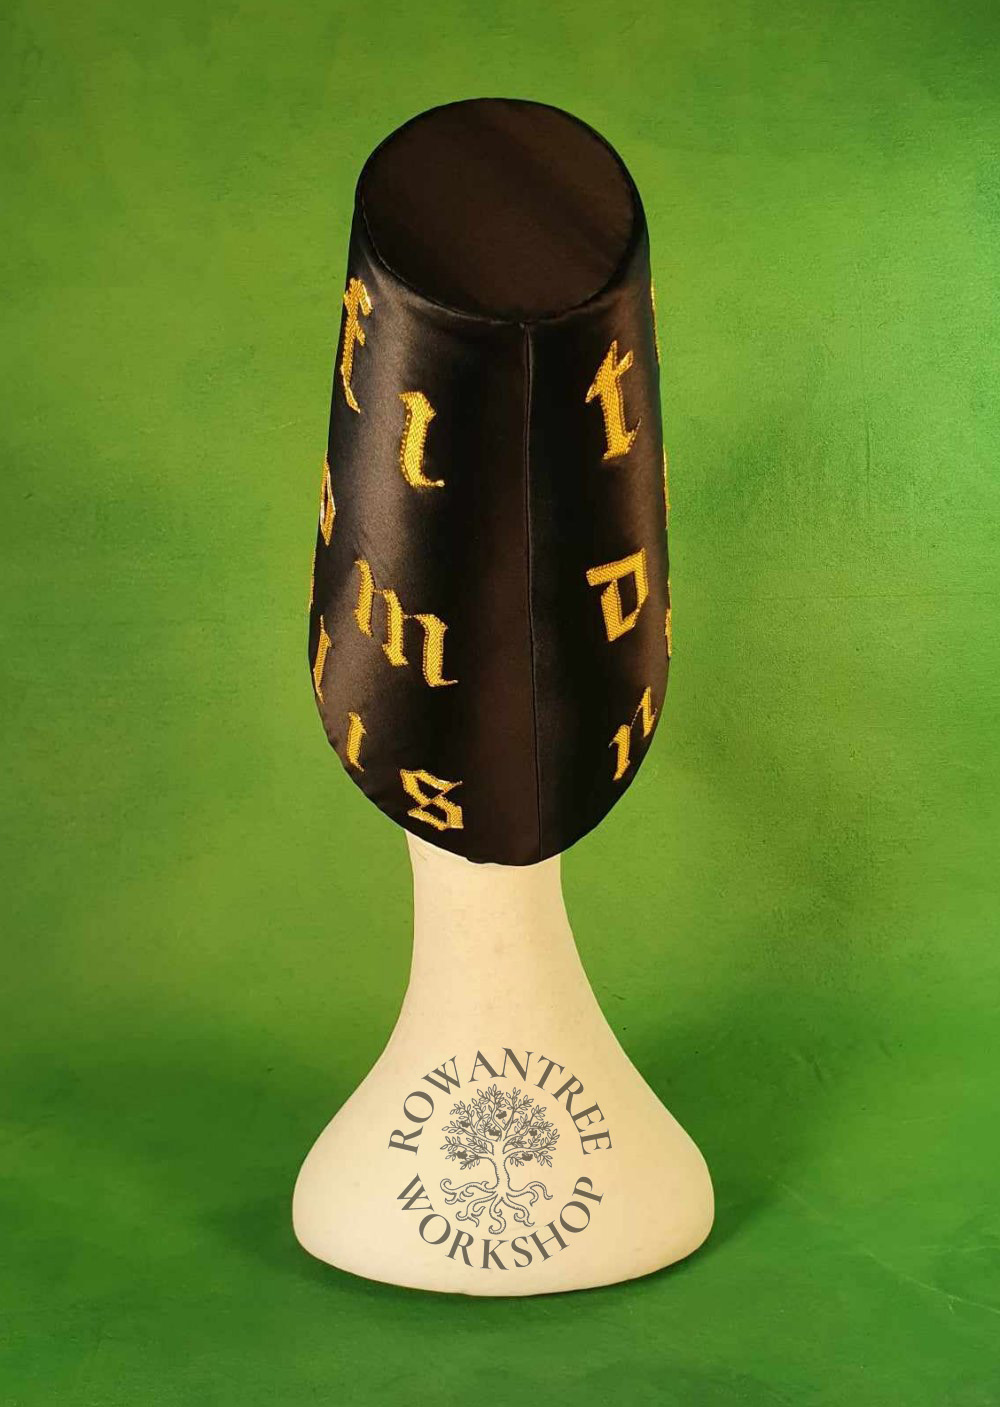
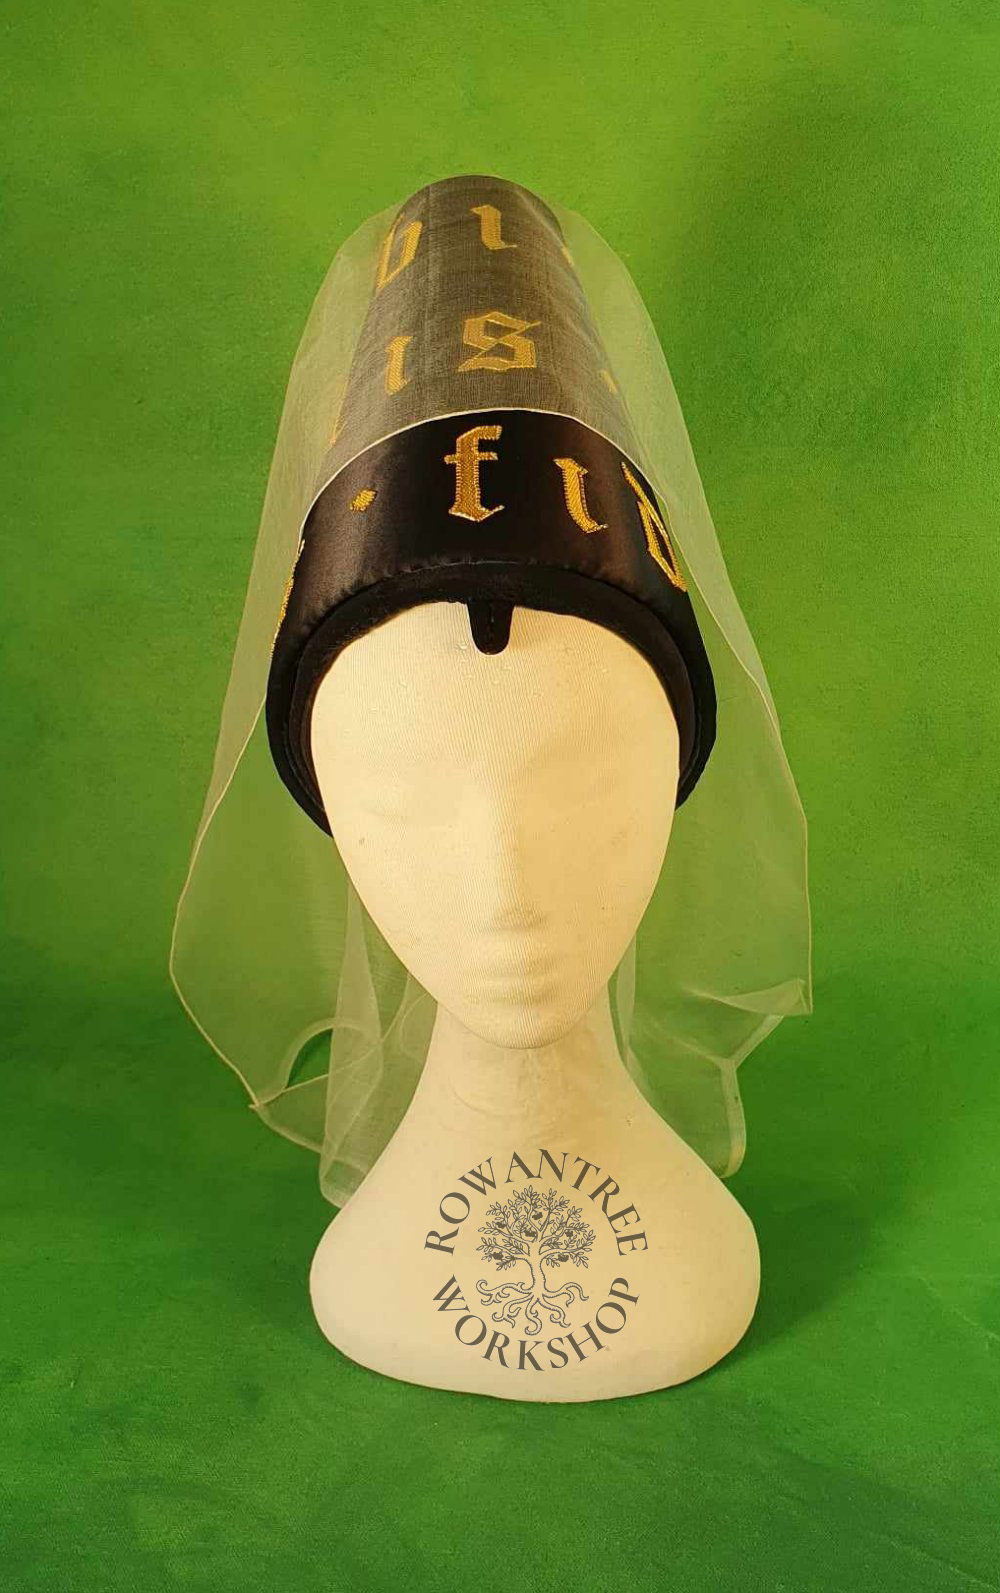
A mid 15th century henin, richly embroidered in gold, for a noble lady.
I had not planned to make another henin so soon after the last one.
The original plan for this gift was an embroidererd purse, but my research on 15th century women’s noble purses came up blank for embroidery. So the discussion turned ito embroidered henins, and I remembered the portrait of Isabelle which I saw on our trip to Ghent. Perfect!
Research & Design
Henins start to appear in mainland Europe in the 1450s, replacing the horned headress for noble women. The truncated version remained high fashion until 1500, when they gave way to velvet hoods. In England, the full henin did not appear at all; but a very truncated version was in fashion from from 1470-1490s, alongside a version of the horned headdress (Scott 1986).
The main inspiration for this piece was the portrait of Isabella van Bourbon by an unknown master, in the Ghent City Museum (STAM). Similar images of truncated henins from the mid 15th century can be seen in manuscripts and portraits of the time, such as the examples below.

Photo: Robyn Spencer
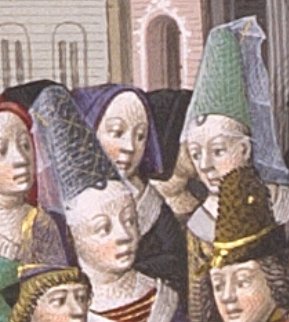

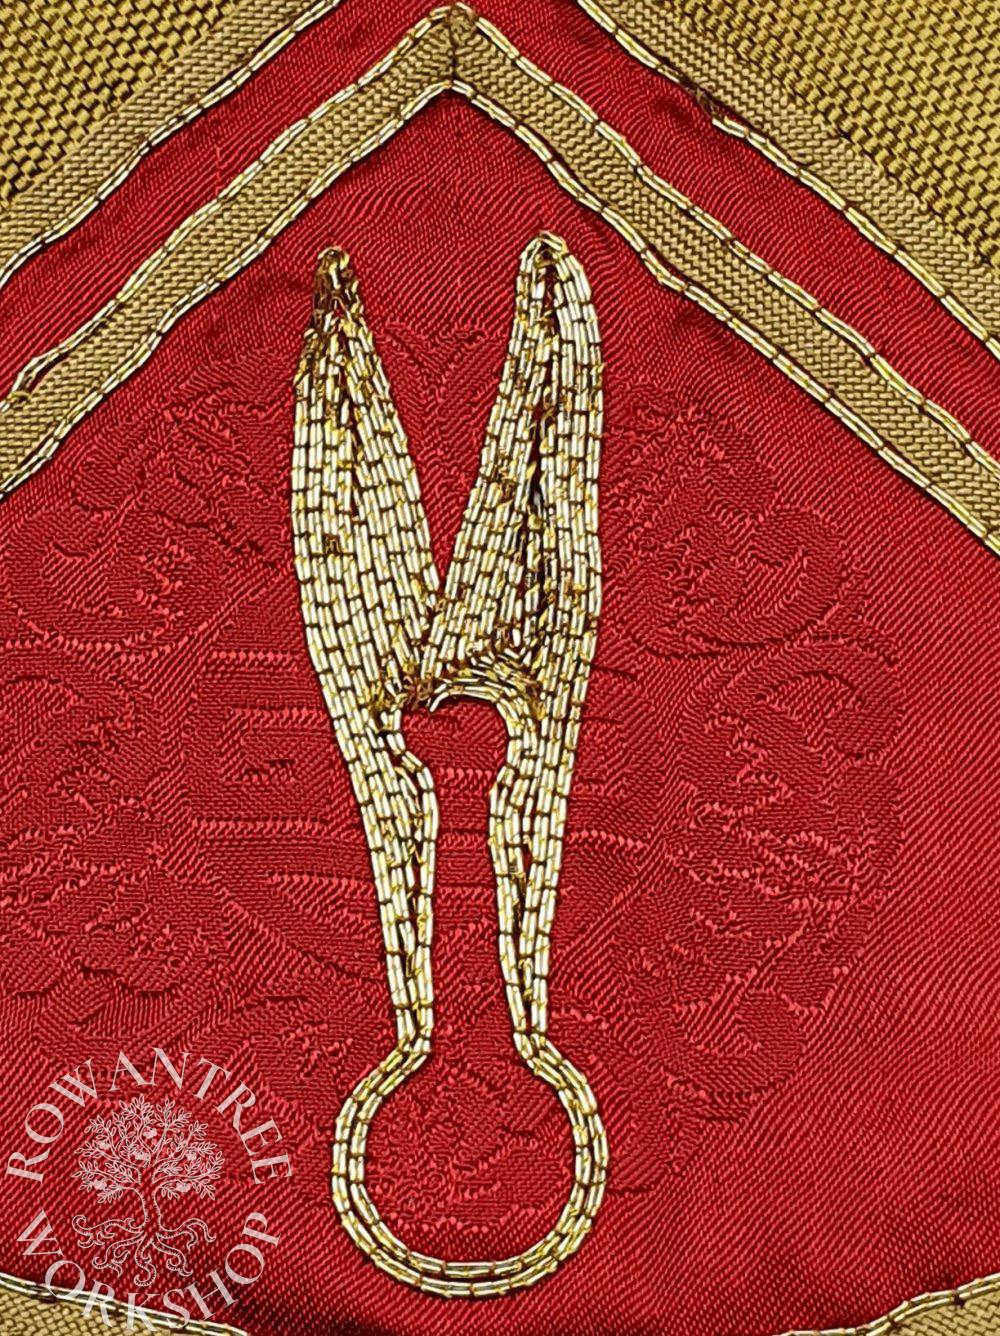
Many of these henins are decorated with embroidery, usually geometric. The Ghent example hs the letters YC, which I believe are her initials – Isabella of Bourbon, Countess of Charolais.
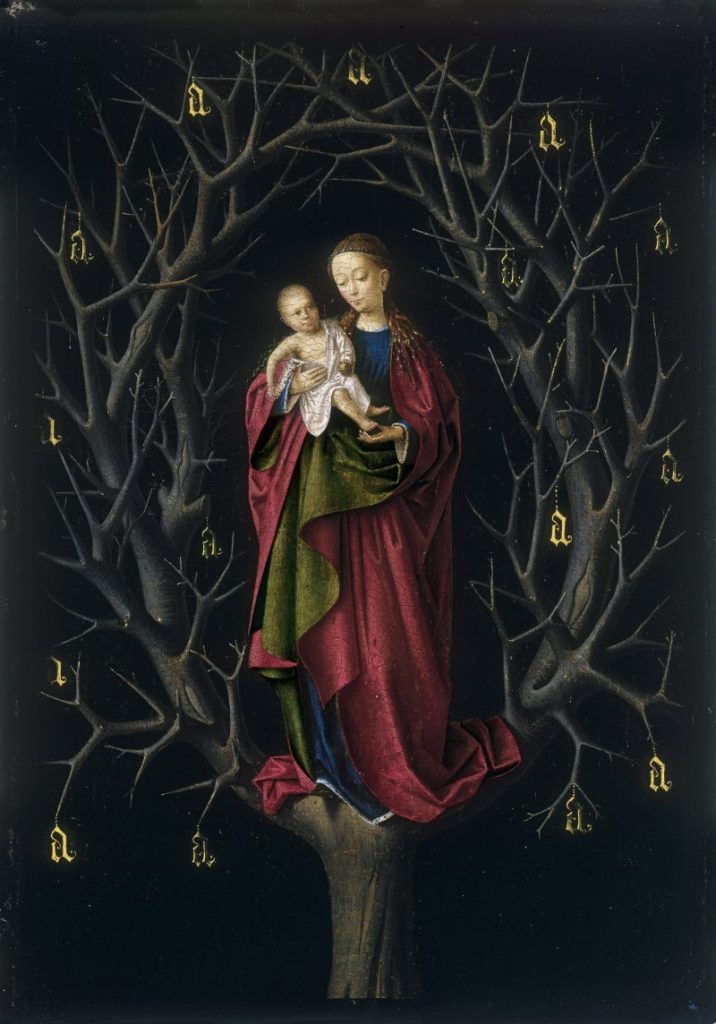
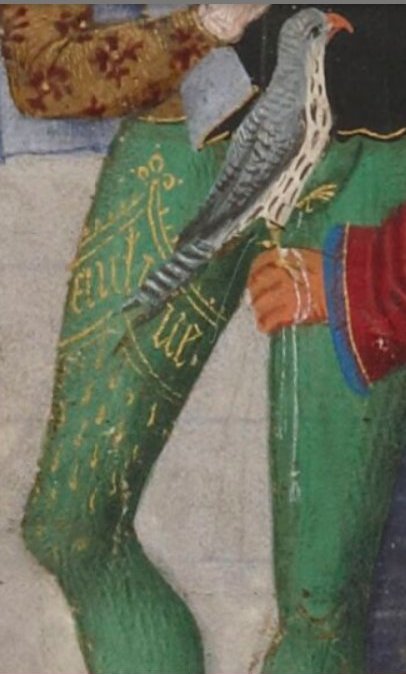
Although the Ghent example is unusual, the use of text as ornamentation for clothing and accessories appeared in the 14th century and was wide-spread in the 15th century, found on everything from from paintings to clothing, as you can see in the examples below.

Source: Wikipedia
Source: Museo Thyssen-Bornemisza
When I started to look at the letters in detail, I noticed that extant belt mounts and other 14th century ornaments (such as those in Wilemsen & Ernst 2012) were in the form of Lombardic capitals. But in the 15th century, the style of letter ornaments changes to Textura Quadrata (scribal nerdiness…)!
The decoration required thought. I think the original would have been laid goldwork, but I know from previous projects such as the WCoB banner that this is very time consuming.
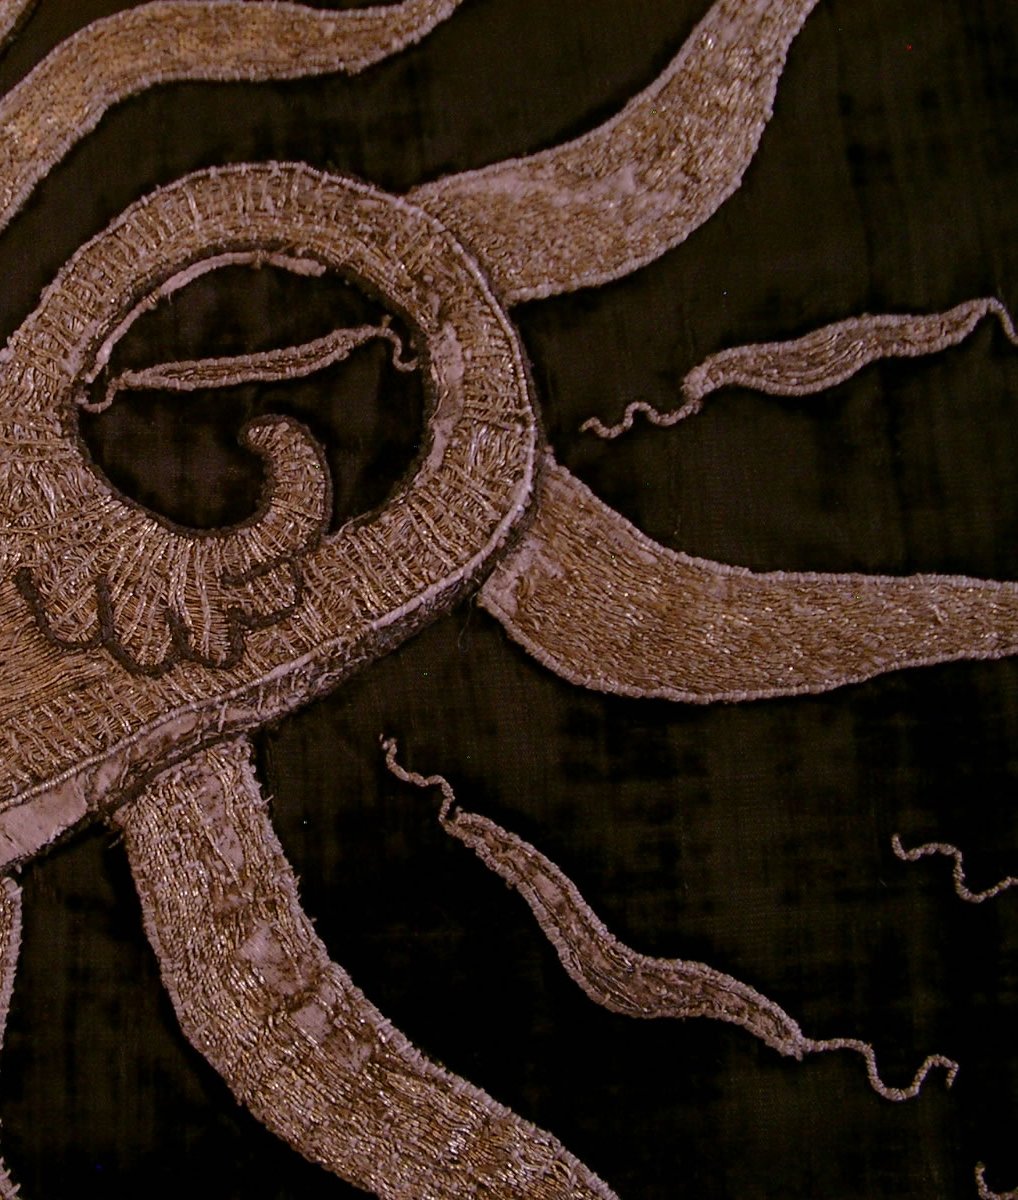
Staniland (1991) notes that applique worked on silk and velvets might use beeswax to treat raw edges, and that the edges were often covered with couched threads or cords. I recalled a 15th century cope with applied embroidery of the arms of the Duke of Burgundy, and a friend sent me a detailed image from her visit to Bern (thanks Kiriel!)
The cope decoration is actually goldwork on linen, appliqued with a couched gold edge, but it looks very similar to some woven gold silk I had in stash. I tested the decoration options using a scrap of velveteen: laid gold vs appliqued silk with couched gold edges. The qpplique looks brighter and is faster to work, so that’s a win!
Another look at the Ghent painting made me realise the original henin is shiny, indicating silk satin rather than velvet. I had something suitable in stash, although it would need backing. Materials sorted.
Construction
The Band
The first step is the head band, which provides support for the henin – and keeps the hair back frm the forehead.
I tested the pattern I made for the previous henin to see how well it fit this larger head – the shape was good, it just needed more length. With that adjustment, I made up the velvet band following the same process as before. In addition, because the headband is visible along the edge, I sewed an extra strip under the tie, to cover any gap.
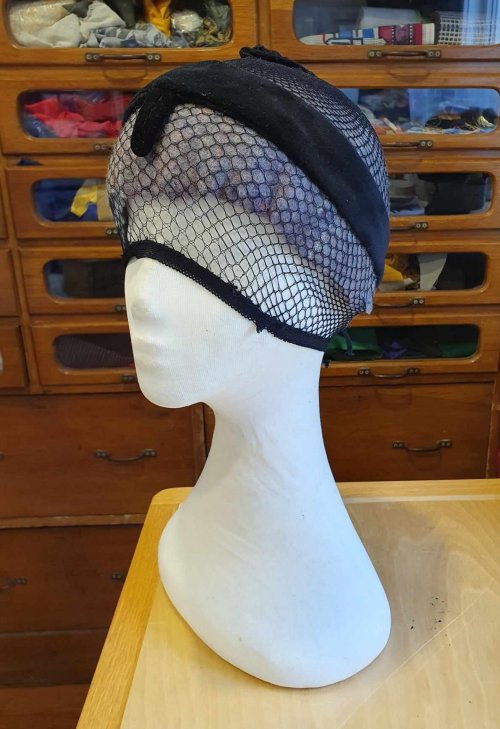
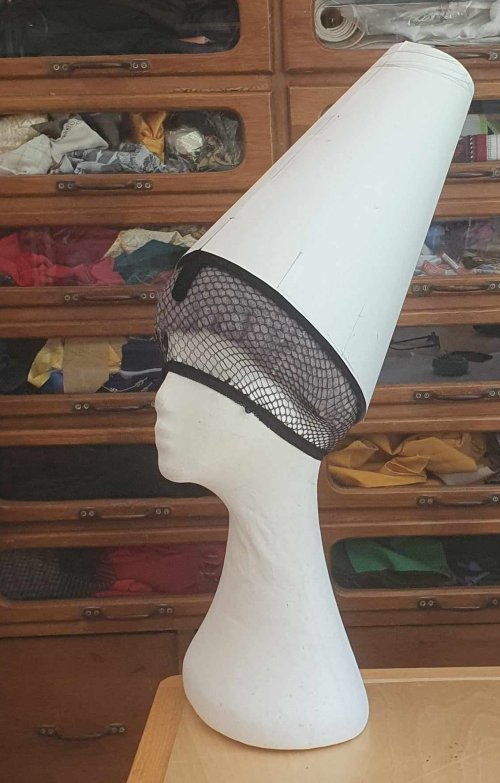
After looking at pictures of the mockup (below) Elizabeth asked my to make the loop smaller, so I unpicked the front of the headband, made a replacement wire, covered it (using the same ribbon) and sewed it all back together.
The Henin
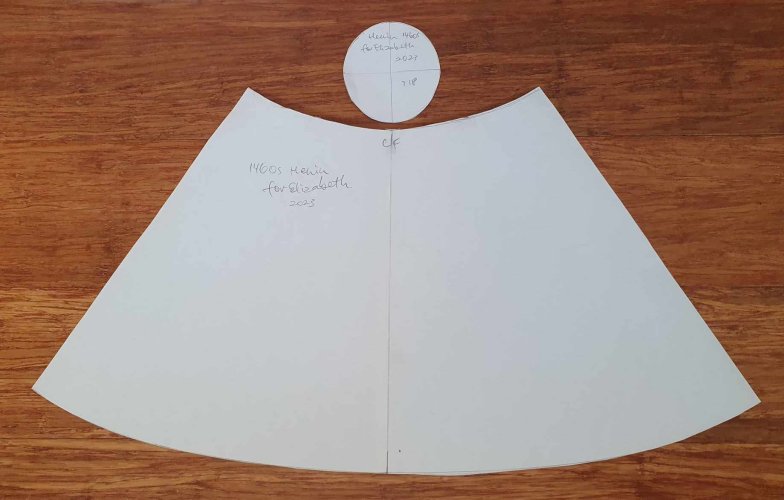
Now, on to the henin pattern. This one needs more taper than the Petrus Christi henin and the back is more sharply angled than the front. With the band on the headform, I measured up and then made a cardboard mockup. It needed changes – taller, more slope – but I was happy with version 2.
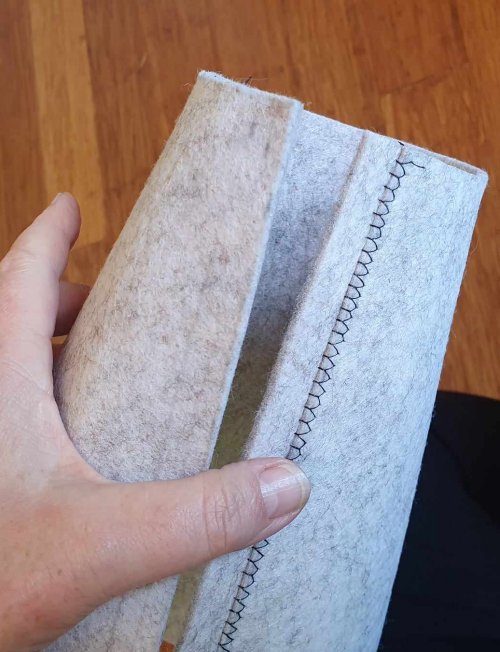
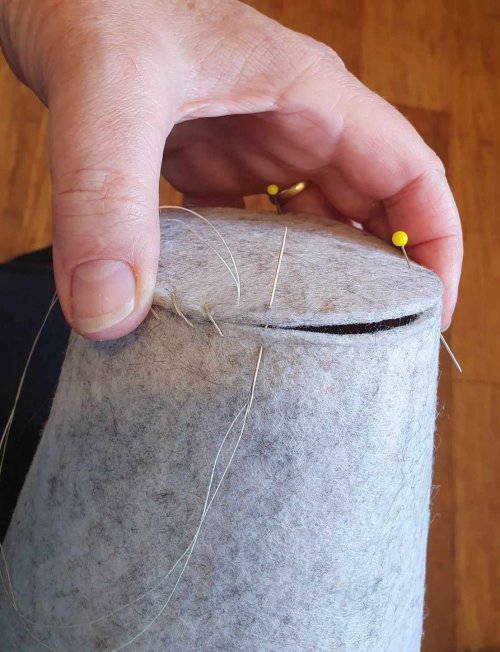
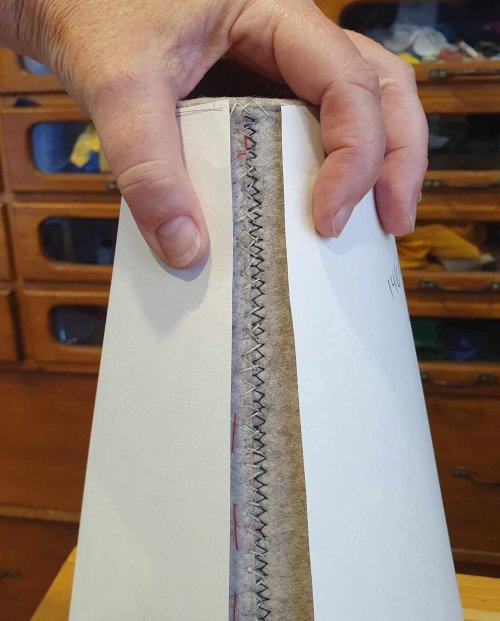
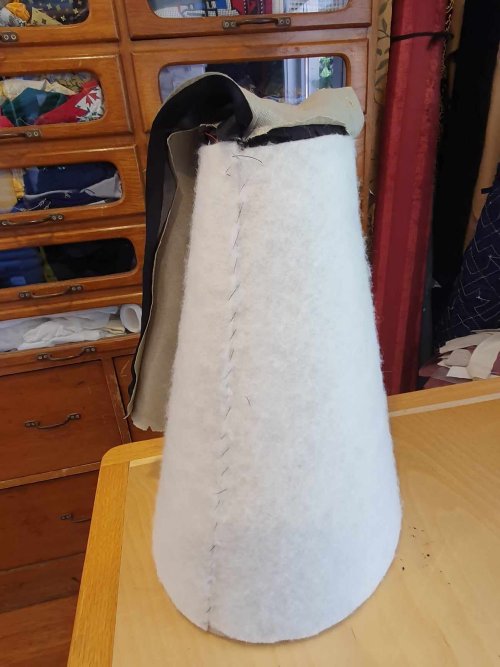
I made up the base in 3mm furnishing felt, supporting the back seam with an extra strip (having learned from the previous henin). I could sew the first side by machine, but the other side was hand-sewn with waxed linen thread for strenght.
Even with this added support, I had to steam the seam and let it set in position to get a smooth shape. Once I was happy, I sewed on the tip.
The thickness of the felt means the outside is larger, so the pattern needs to be adjusted for this. I tested the pattern on the completed base – I need to add 1cm to each side to make the cover the right size, with a snug fit around the band. The process of covering the base will make the inside smaller, but with silk this will be minimal.
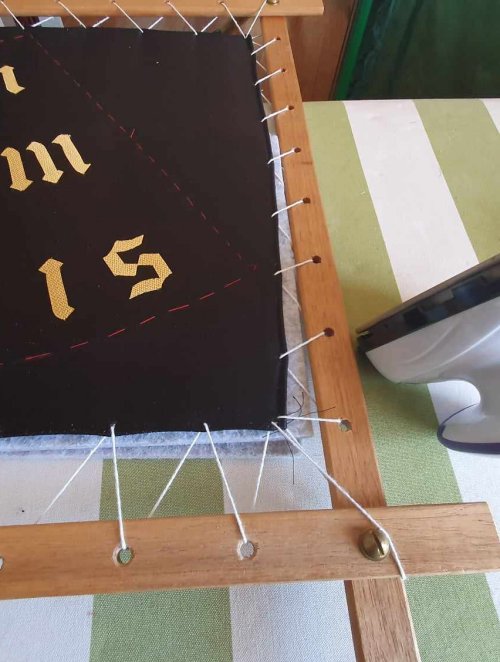
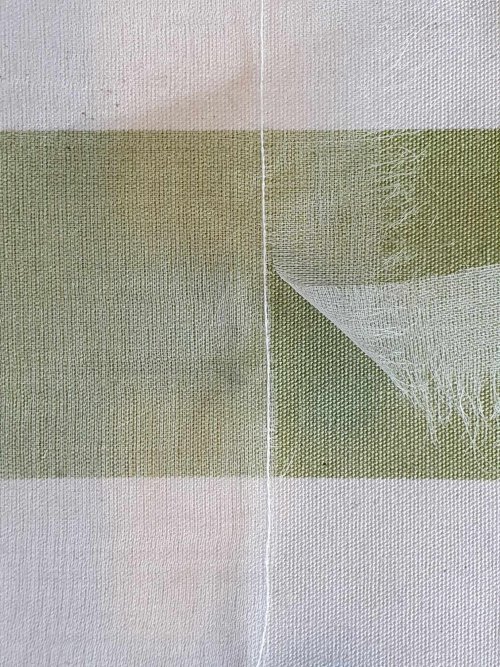
Silk is tricky to cut without distortion, so I pulled threads and cut a true rectangle from the black silk satin, basted this to a light linen base and then sewed it firmly using machine zig-zag (the edge will be cut off).
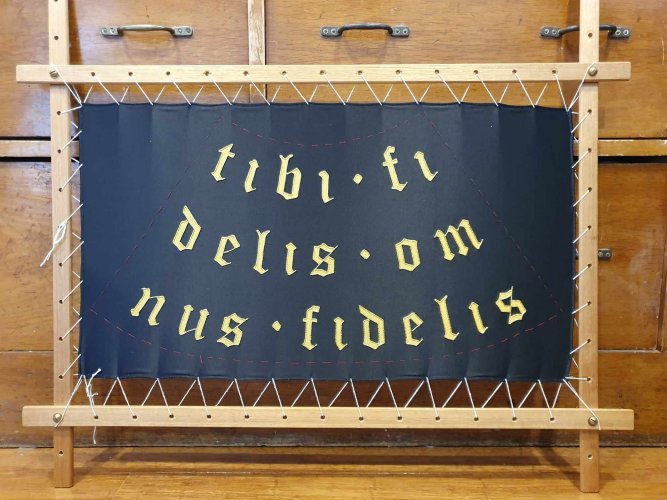
I checked to make sure I had made my slate frame the right size – it just fit. Then I sewed string around the edge of the silk (machine zig-zag again), trimmed the linen and sewed the silk over the string again. All this prep makes a strong edge and spreads the load, reducing distortion. Finally, I laced the prepareed silk into the frame.
To transfer the shape, I supported the stretched silk and traced around the pattern with tailors chalk, then basted along the lines to show the outline.
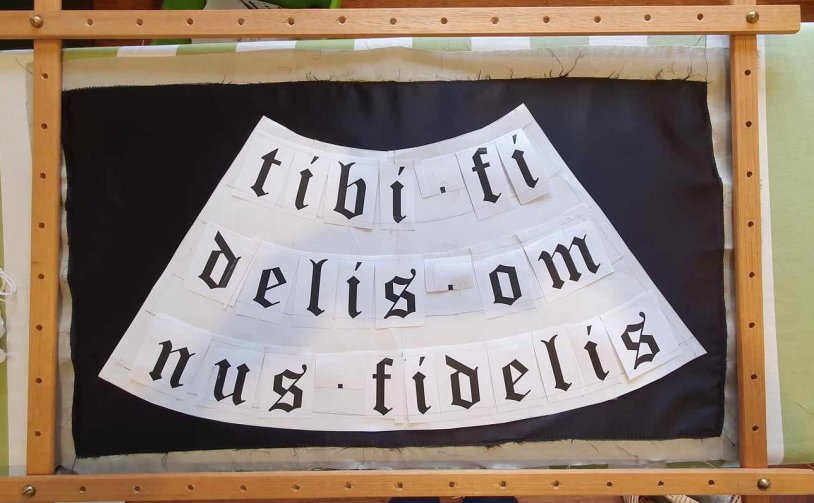
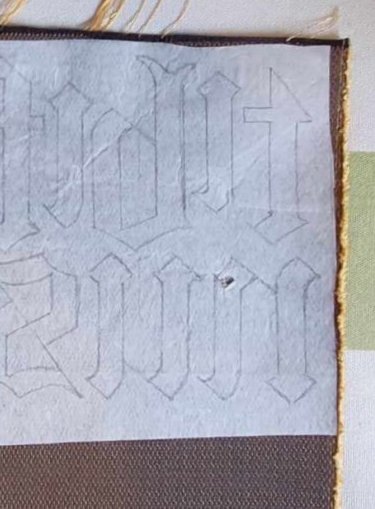
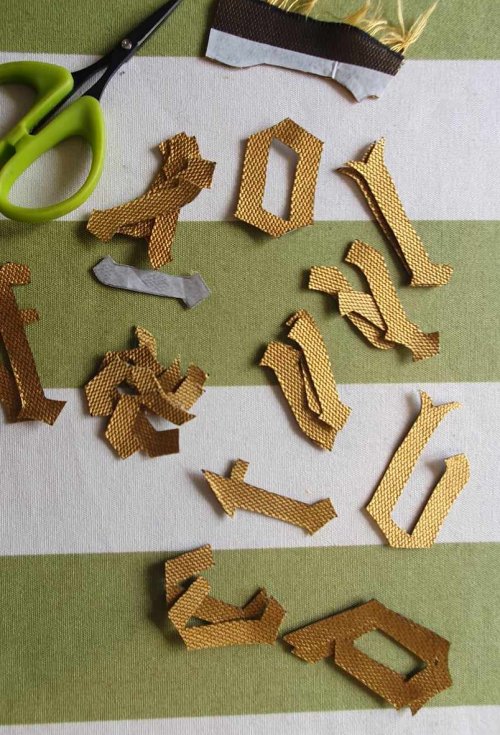
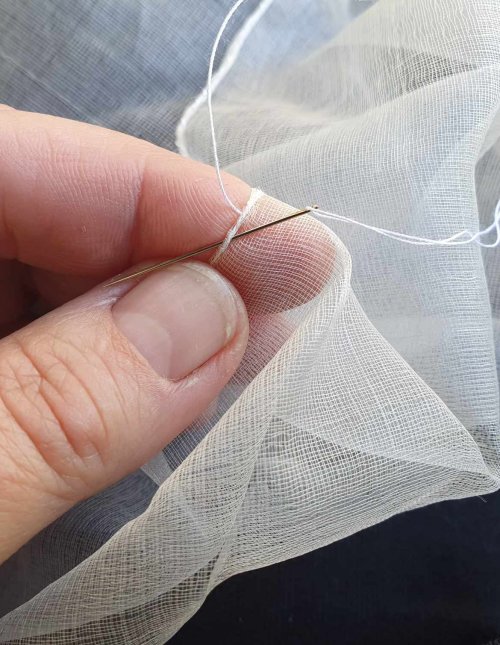
The decoration is Elizabeth’s motto: ‘Tib fidelis omnus fidelis’ which translates as ‘True to myself, true to others’. For the letters, I used my light table to trace the outlines onto Bondweb paper. Twice actually – I forgot they needed to be mirror image the first time….
I ironed this to the back of the textured gold silk fabric, then cut them out with a small pair of very sharp sissors.
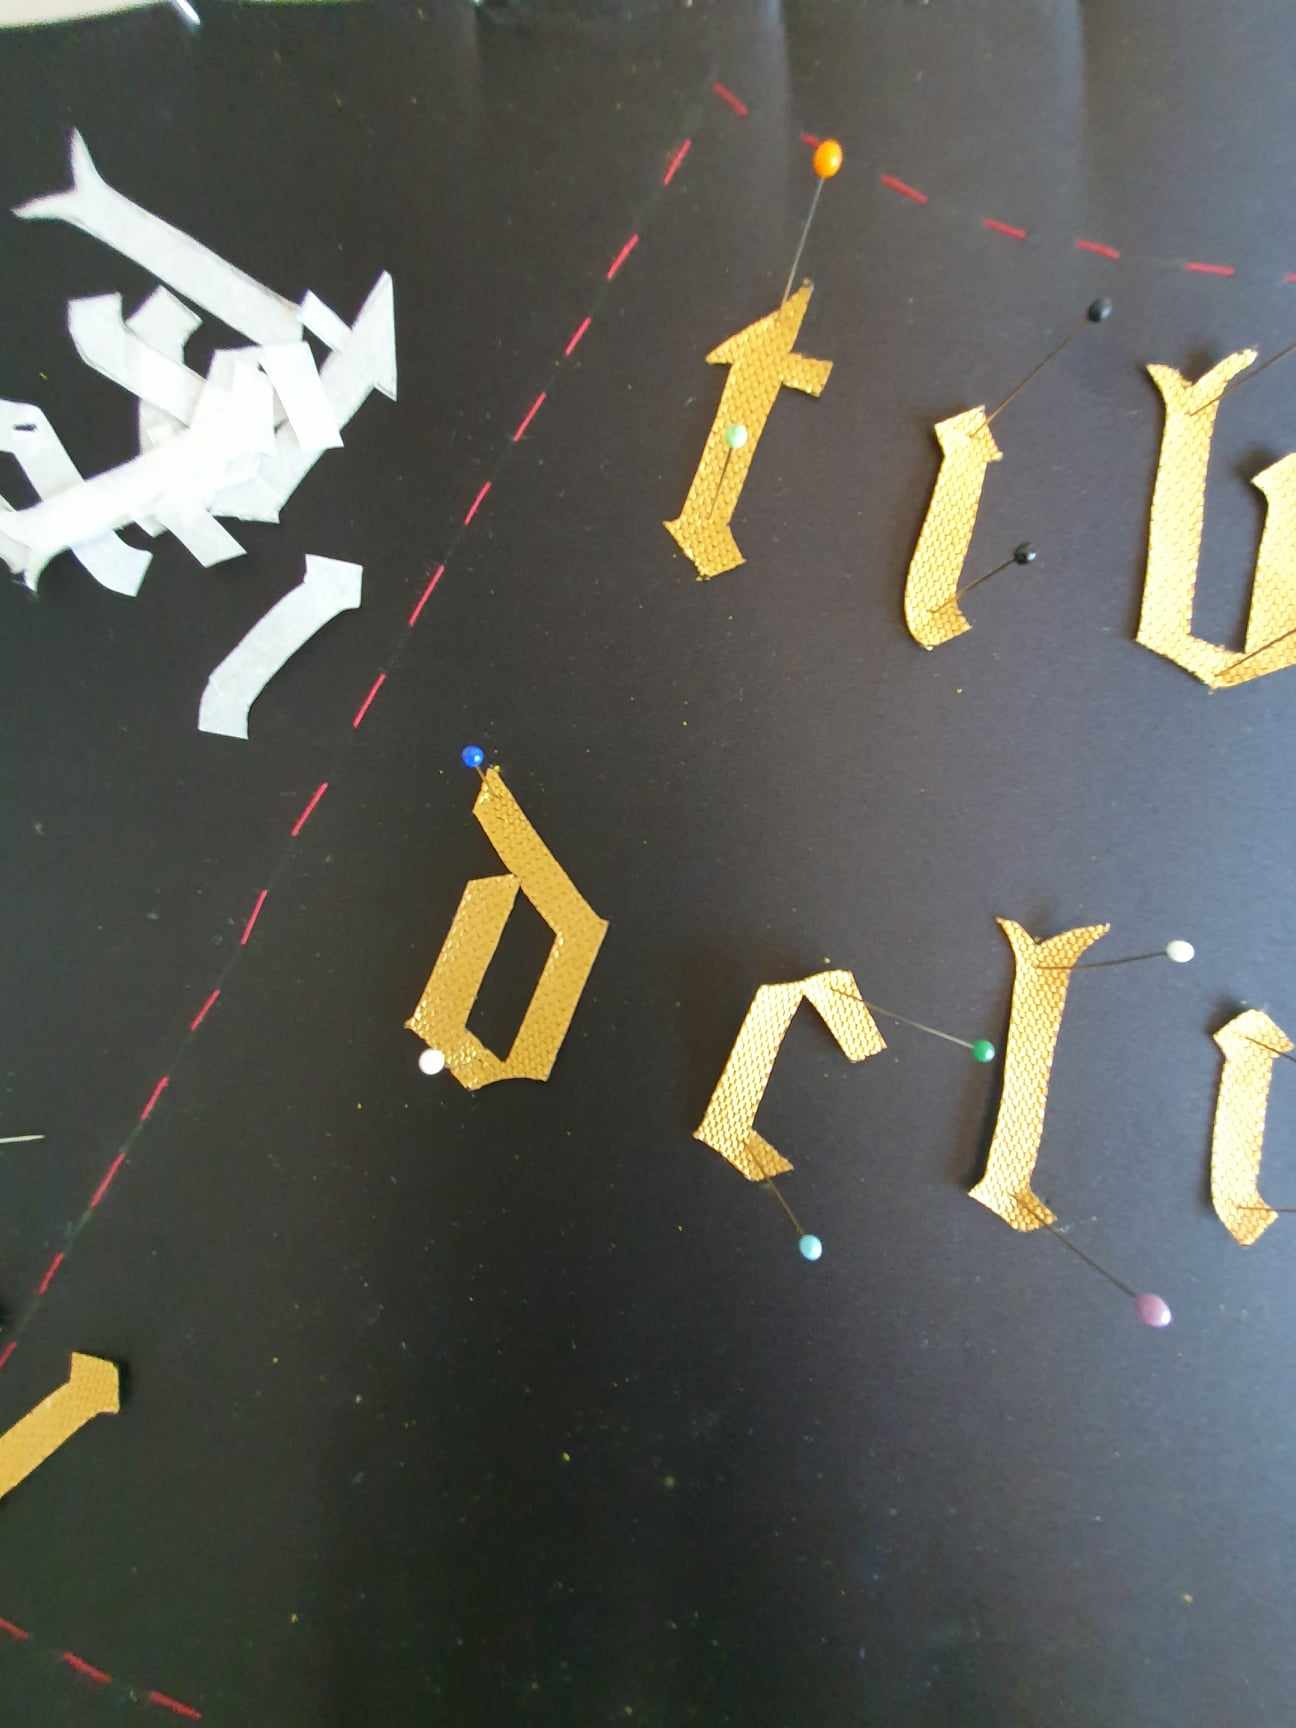
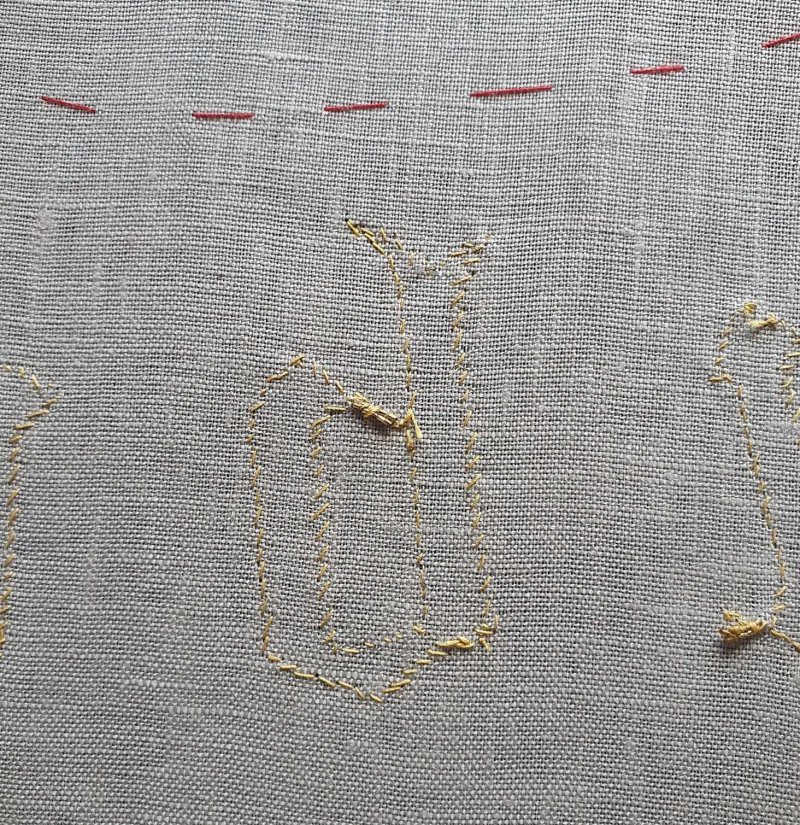
I tested a few options for transferring the locations of the letters to the silk, but the multi-layered pattern was too thick. In the end, I supported the stretched silk on a solid base and used transfer paper to mark top and base of each letter.
I positioned the letters on these registration marks, holding them in place with pins, so I could adjust them. Once I was happy, I carefully ironed them on with a mini iron, and then steam-pressed from the back to ensure a good hold.
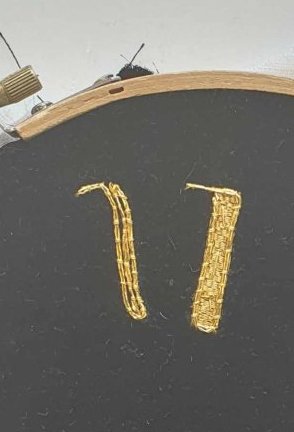
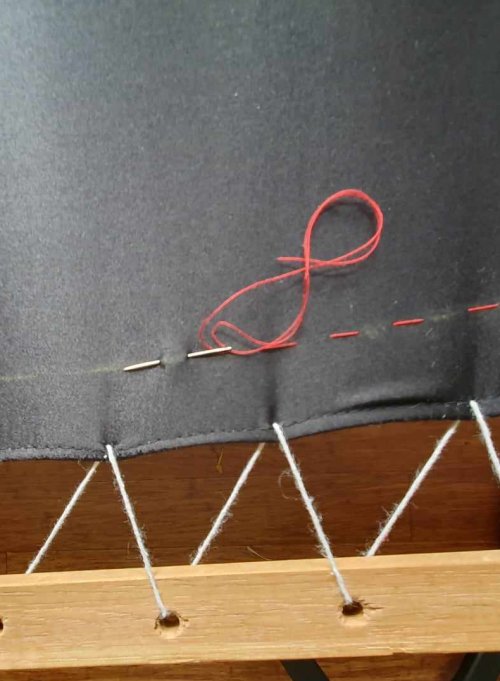
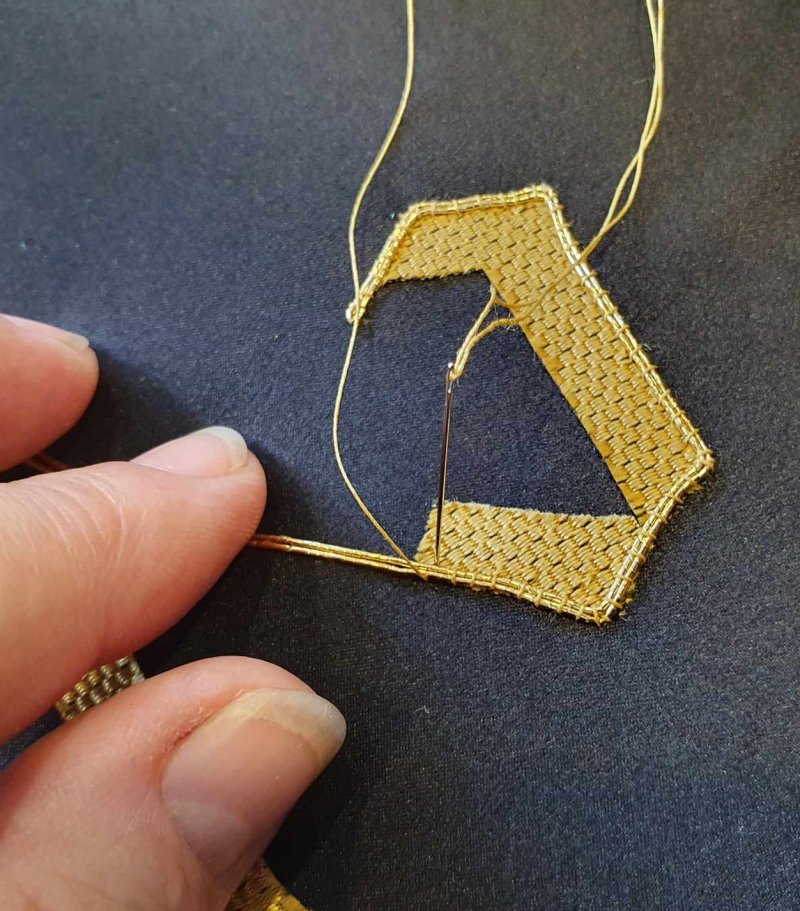
On to the embroidery. I considered a single gold twist, but the pair of passing threads gives better coverage over the edge. I sewed pairs of gold passing with a single thread of silk around the edge, plunging the ends to the back and securing them to the linen (another advantage of the linen backing).
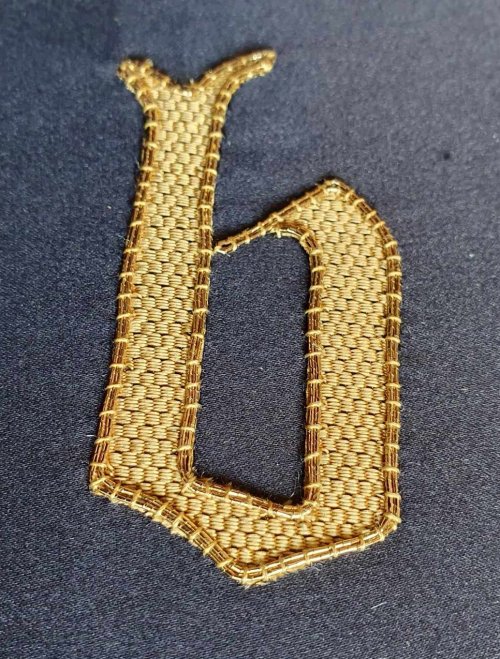
Once the letters were complete, I removed the silk from the frame. I was concerned the letters might pucker once the tension was removed, but it stayed perfectly flat. Yay!
The cover is applied in stages.
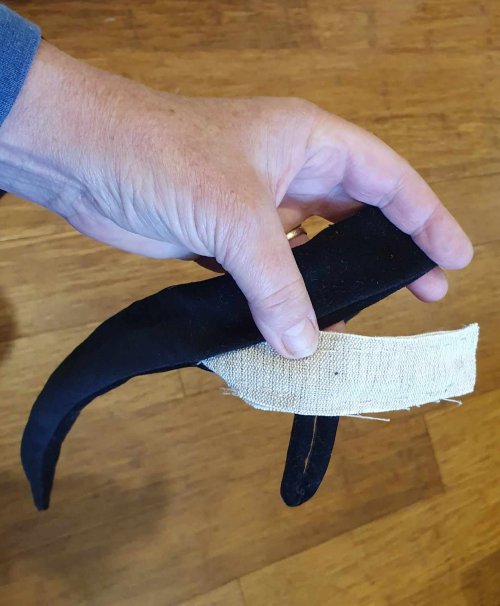
I cut the embroidered section out, adding a seam allowance all around. Then I used one leftover corner of the silk and linen to cover the tip, basting around the edge and clipping to reduce bulk. It looked lovely and smooth, so I decided not to cover the main form with mull (a thin wool batting).
I pin-fit the embroidered silk to check where the seam should go and then sewed this up. I pressed the seam, then trimmed and basted so it would stay flat while I covered the felt. Then I turned it the right way out, being very careful of the embroidered letters.

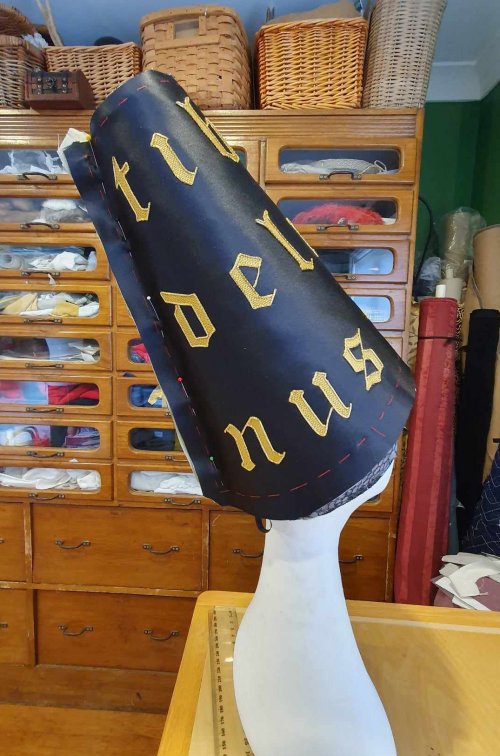
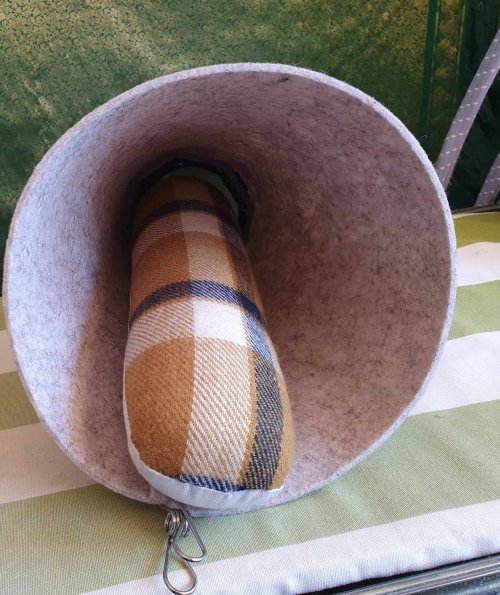
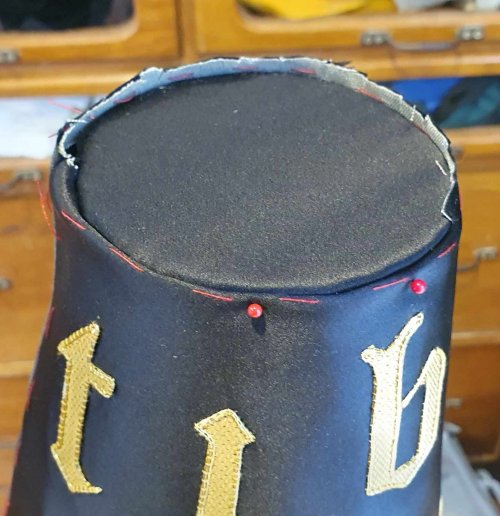
I carefully eased the silk over the felt base, pinning at the base to stop it shifting while I finished the tip. I trimmed the top of the cover, clipped and turned it under and sewed around the tip.
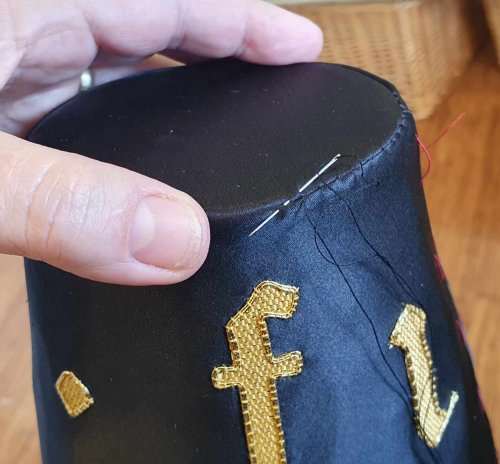
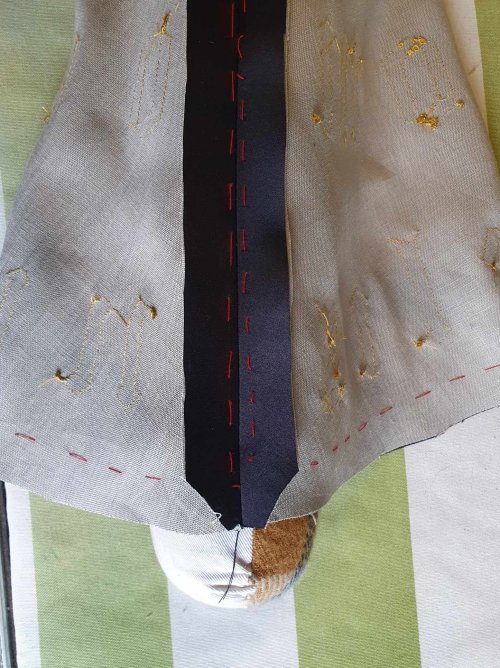
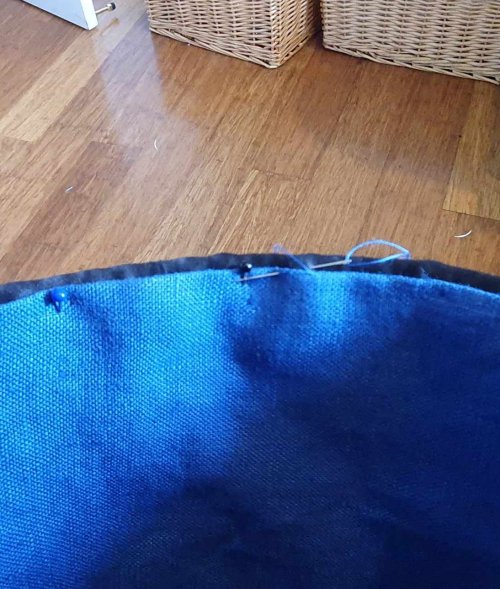
There is no edge decoration around the base of the henin, so I can’t simply sew the silk to the felt from the outside. Instead, I trimmed, clipped and basted the edge, then sewed it to the inside.
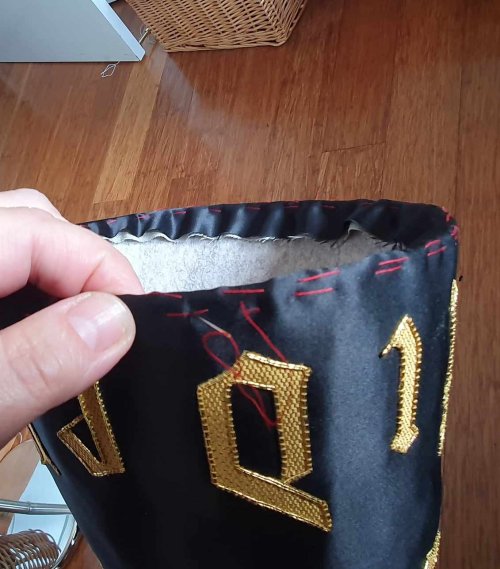
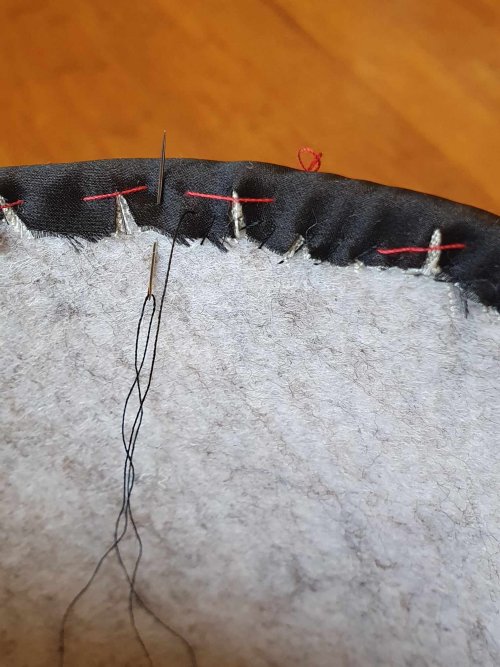
At this point, I looked at the silk and found it was not completely flat – it looked a bit fractured. I tried steaming it, but that only accentuated the problem. Ir realised the problem was the felt – it was curved so tightly it had micro-creases, which were visible through the silk.
It really needed the mull padding to get the smooth finish. Sigh…
So I unpicked the basting and stitches at the base. Since it was firmly attached at the top, I carefully peeled back the silk, trying not to damage the letters. I cut and sewed on a layer of mull, then carefully reversed the silk back over the top. Of course, due the to extra bulk, the silk was now a little short. So I trimmed 5mm off the felt base, then basted and sewed the cover again.
Much better.
Finally, I checked the pattern inside the henin, and adjusted it to cut a blue lining (at Elizabeth’s request). I usually use silk linings, but linen will grip the headband better than silk. I sewed up the lining and then slip-stitched it in place to the silk around the base.
The Henin is finally finished, and looks great! There is a blank space at the back, but this will not usually be seen.
On to the veil…
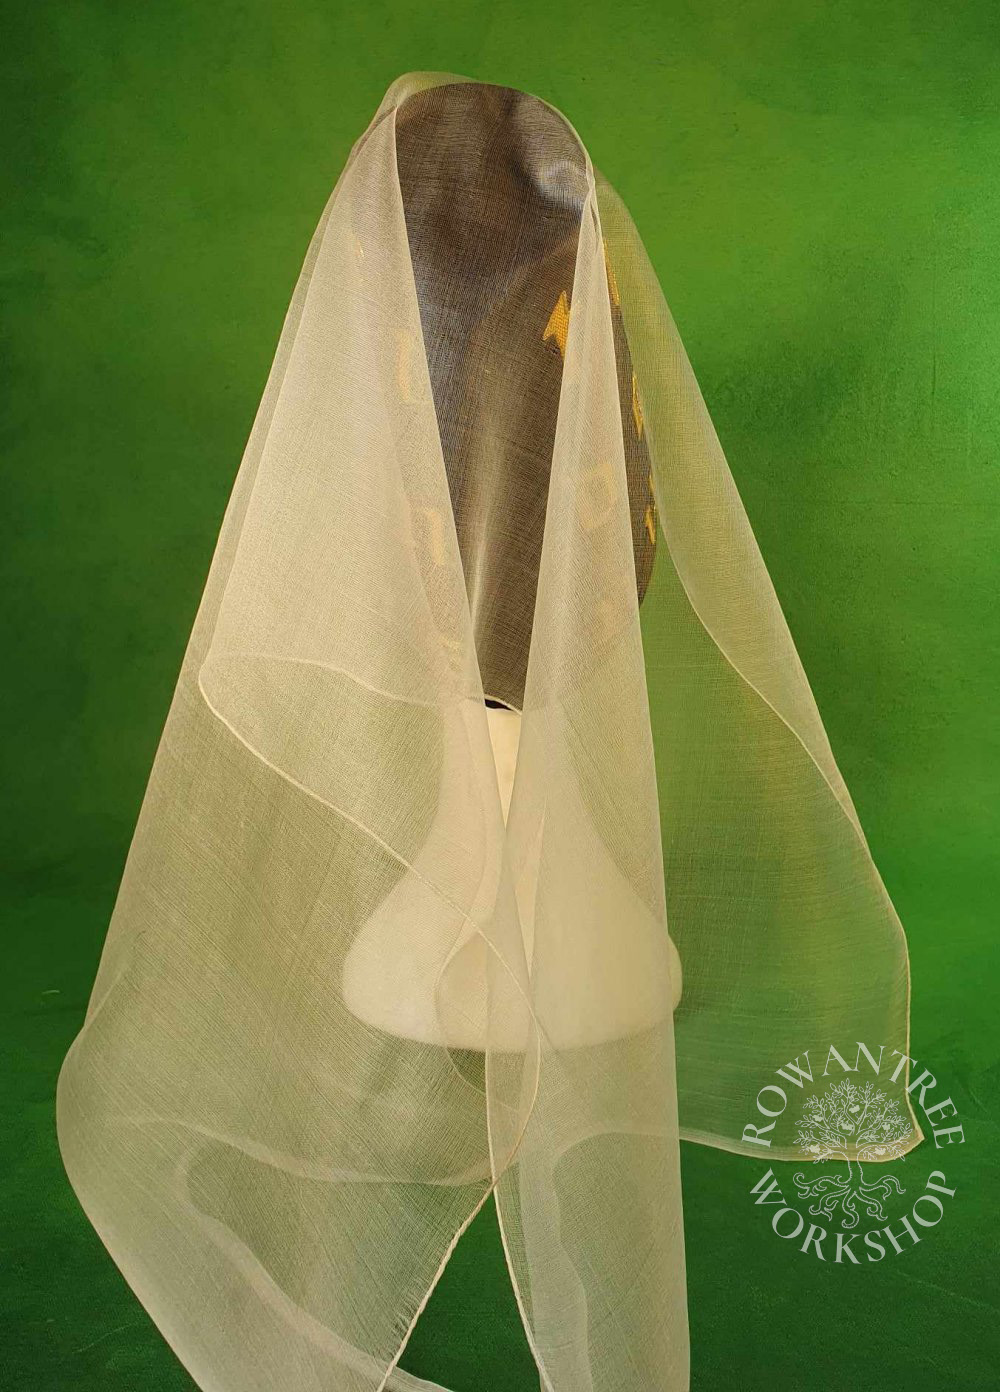
The Veil
The Ghent portrait shows a fine veil, draped over the top half of the henin and falling in stiff folds to the side and back. Looking at other contemporary examples, I can see that this veil style is wide but not very deep.
Into the stash for some off-white superfine slk organza (15 gsm!), which is perfect for the job. I played around with this on the henin and decided on a veil 50cm by 112cm (the fabric width). It has a proper selvedge, so I only need to hem the two long sides.
Trying to hem this fine, stiff, sheer stuff is very tricky. I tried a few different methods on on offcut, but the silk thread was too visible in most options – a fine ‘spit-rolled’ hem gave the best result.
The fine open weave frayed so easily, so I used a trick of my own. I pulled a warp thread to give me a straight line, then machine sewed along this, then trimmed very close to the sewing line. This gives me a stable edge which I can tension against, to make hemming easier.
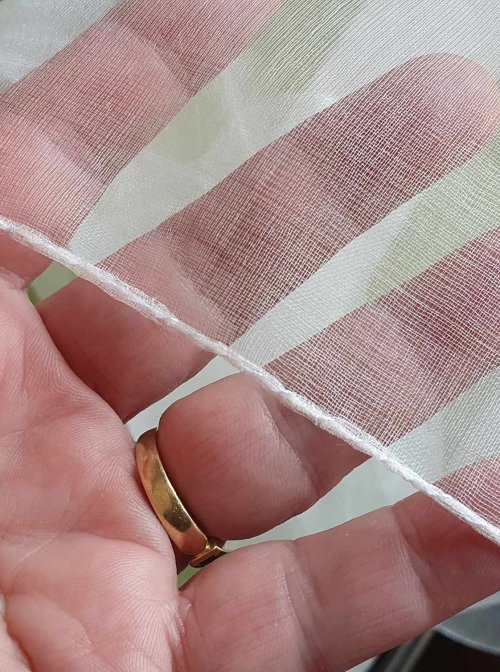
The fine rolled hem completes the veil.
I am really pleased with the way this looks – the gold letters are striking on the black silk!

Afterthoughts
Most of my decisions and processes worked well, but I made life much harder by skipping the mull. It is not needed when I cover in velvet, but the shiny silk satin shows every little flaw! I’ll remember this next time I am using satin….