

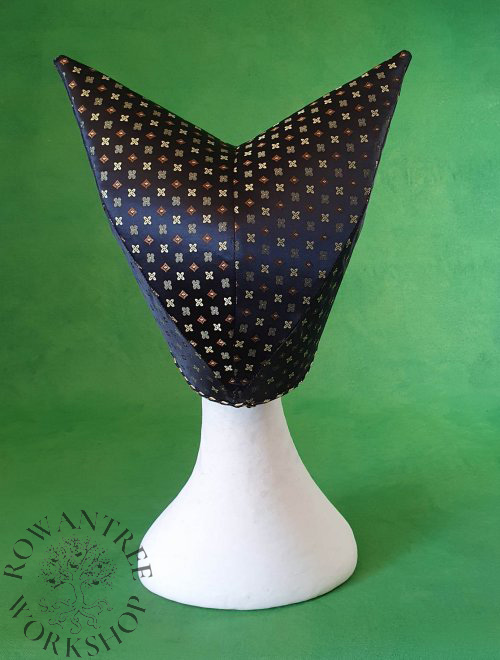
A wonderfully distinctive headdress for a noble 15th century Burgundian lady.
I’d been wanting to make a hat in this style for some time for my friend Anne, but it needed to wait until she was no longer wearing a coronet.
This piece was so much fun to pattern and make!
Research & Design
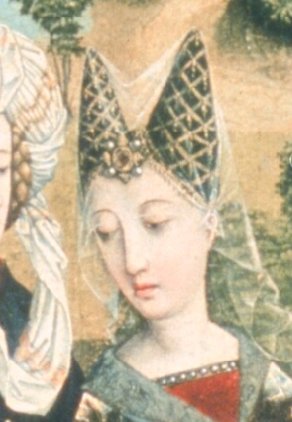
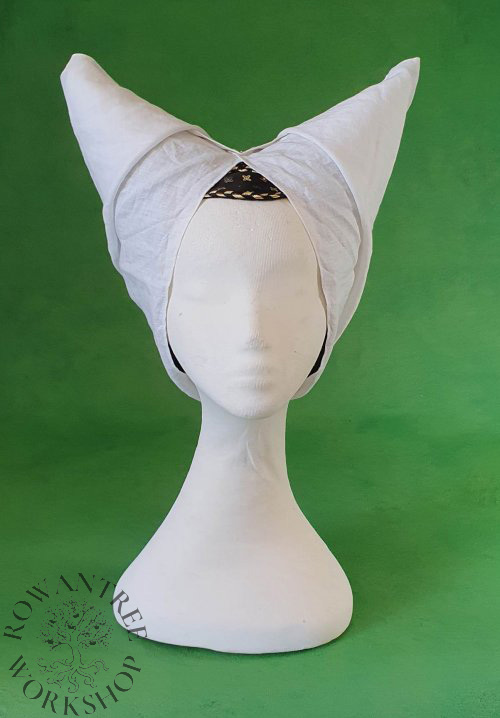
Variations on the Escoffion style stayed in fashion for generations across western Europe from 1410s to as late as 1500. Some had padded rolls on top (like this one), whilst others were plain horns. In England, the horns had rounded tops, but in France and the Netherlands they were distinctly pointed.
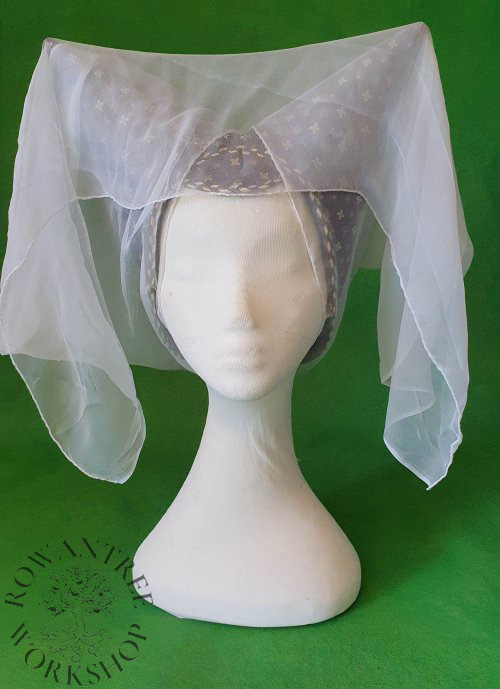
As can be seen in artworks from the 15th century, the escoffion might be worn alone, with a fine veil, or completely wrapped in linen. The examples below show some of this variety.

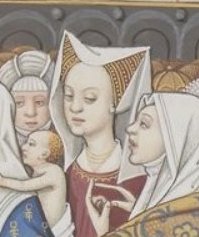
Other examples show headdresses made of rich fabrics, with small regular designs. I had the remains of a lovely rich brocade with small quatrefoil decoration which I had previous used as part of another 15th century headdress – it would be perfect for this project too.
Construction
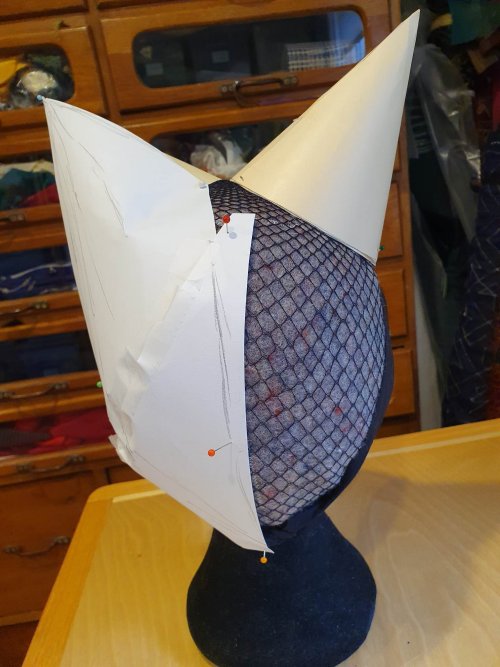
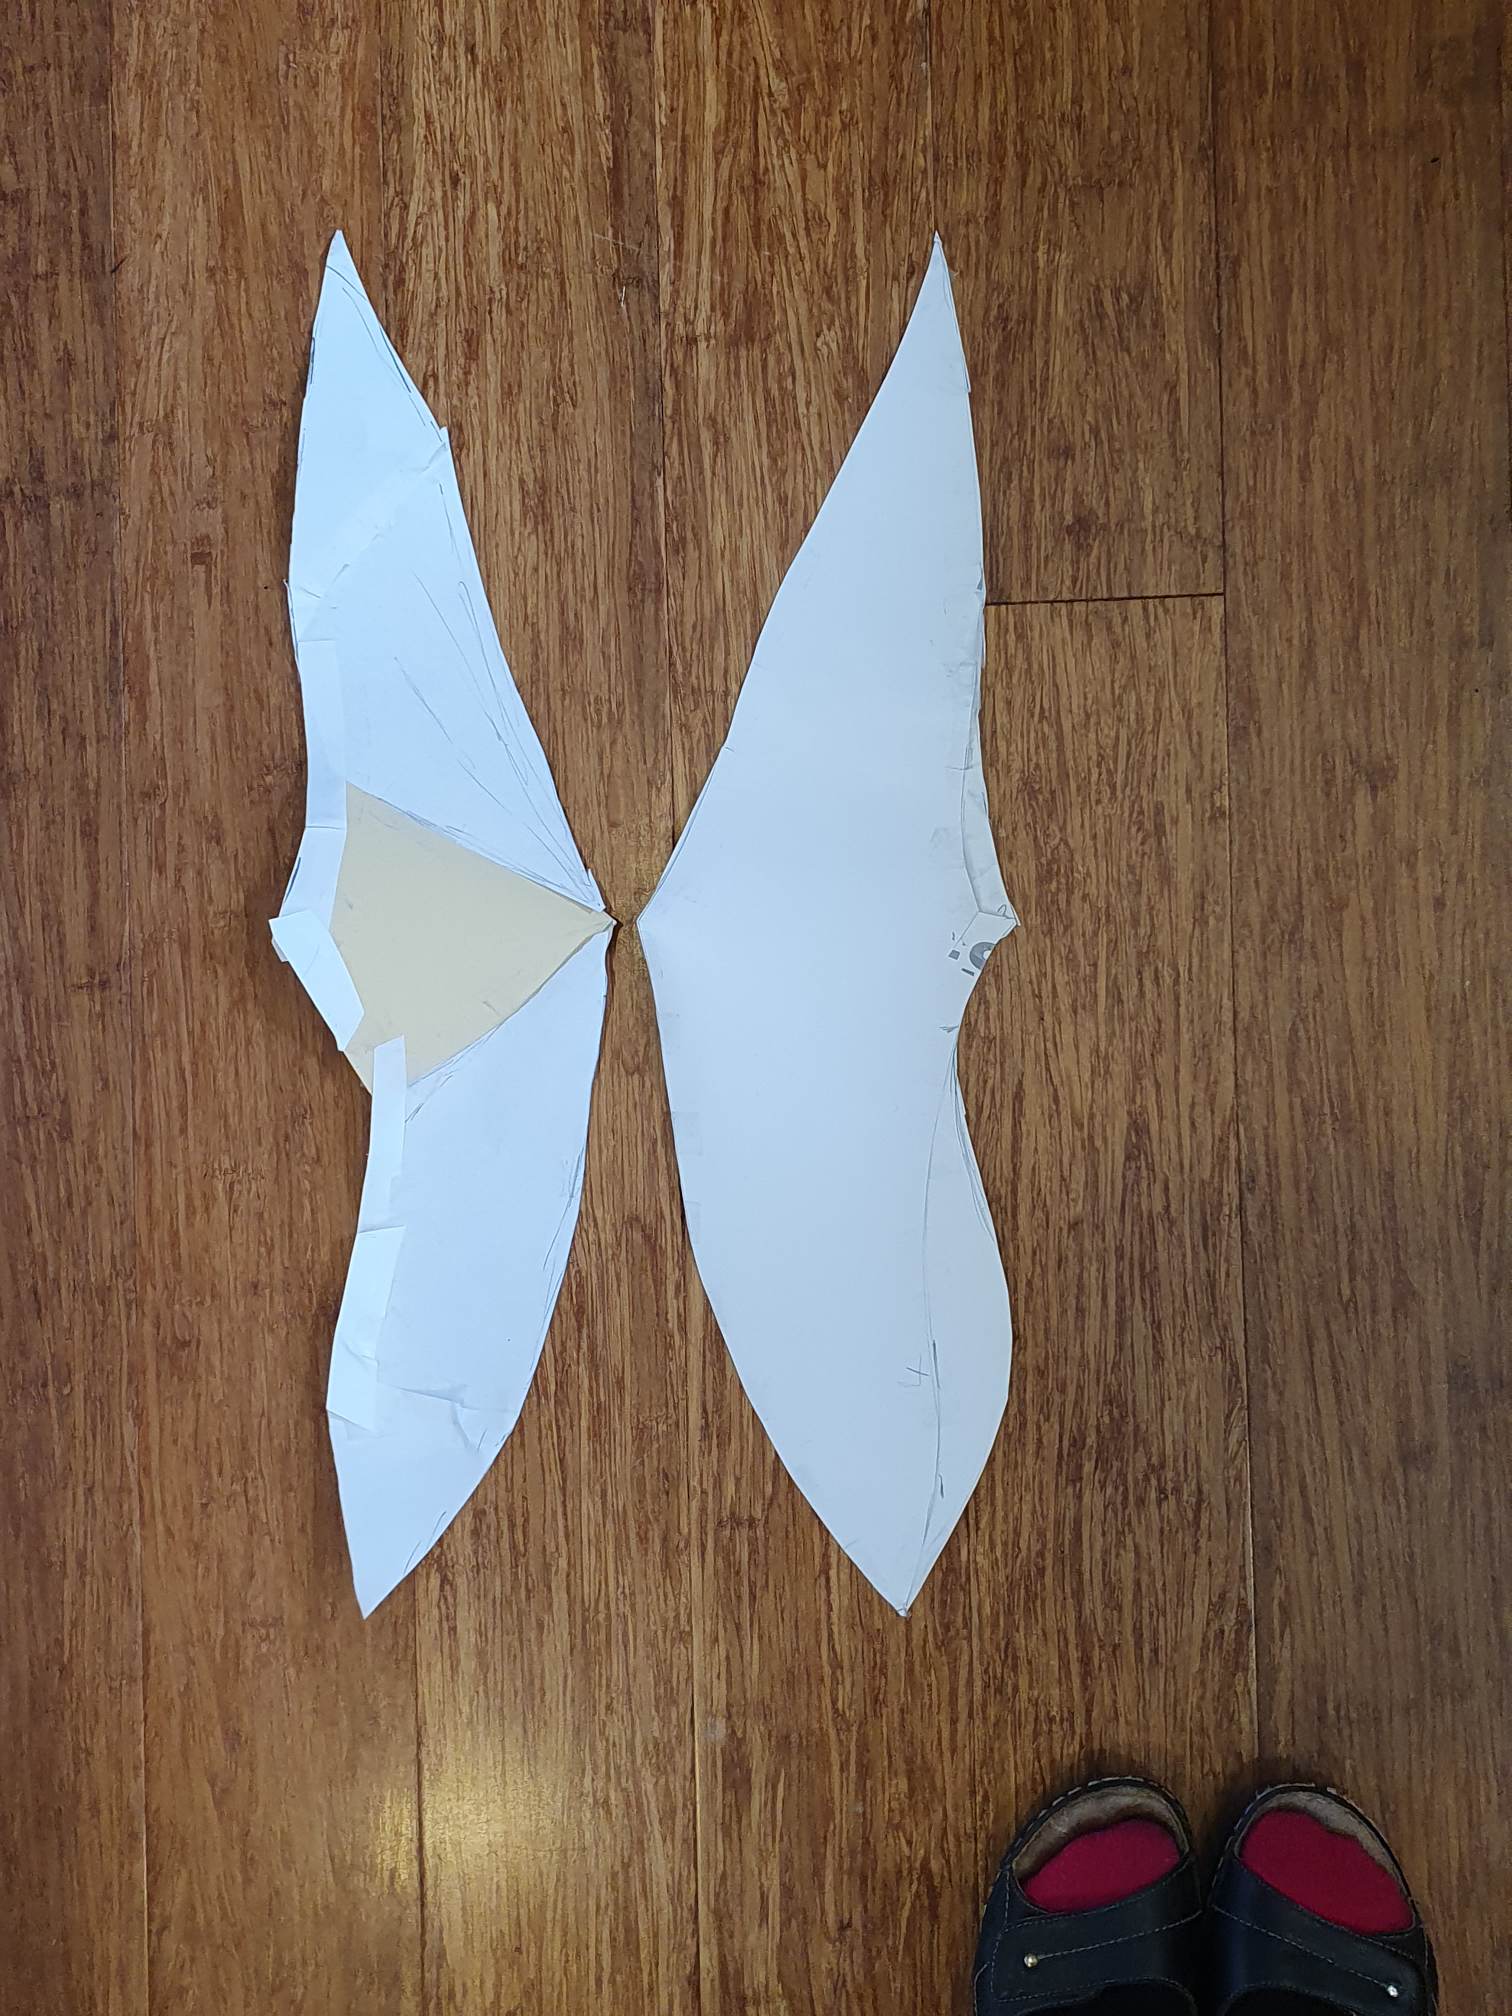
As always, the first step was to pad up the headform to the right size. I started by making cones in light card and checking the proportion on the form. Once I was happy, I pinned the cones to the form and then used heavy paper to mock up the shape, cutting and taping as needed.
When I looked at the final shape, there was obviously a centre seam, and I realised I could cut a seam from the nape up to the point. The final pattern shape was fascinating!
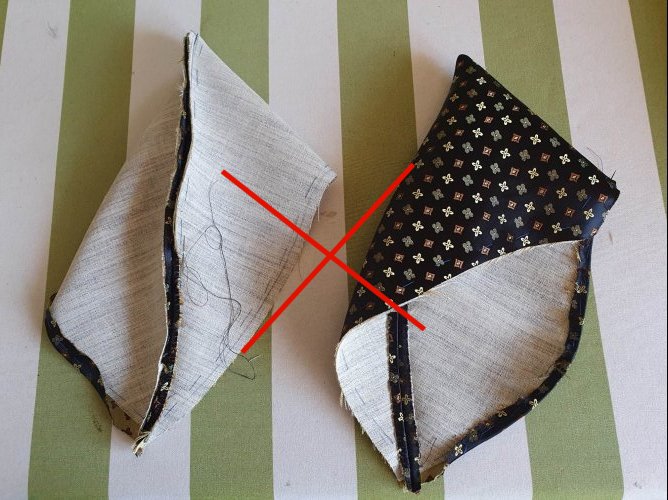
My plan was to make the shape in brocade interlined with canvas, with the points supported by cones in 3mm furnishing felt. I did a quick test to see whether I should sew the brocade and canvas as one, or make each separately. The ‘sewn as one and pickstitched’ was stiffer, so I went with that.
I cut the shape in canvas and brocade, and sewed up the cones.
And – nope – waaay too soft!

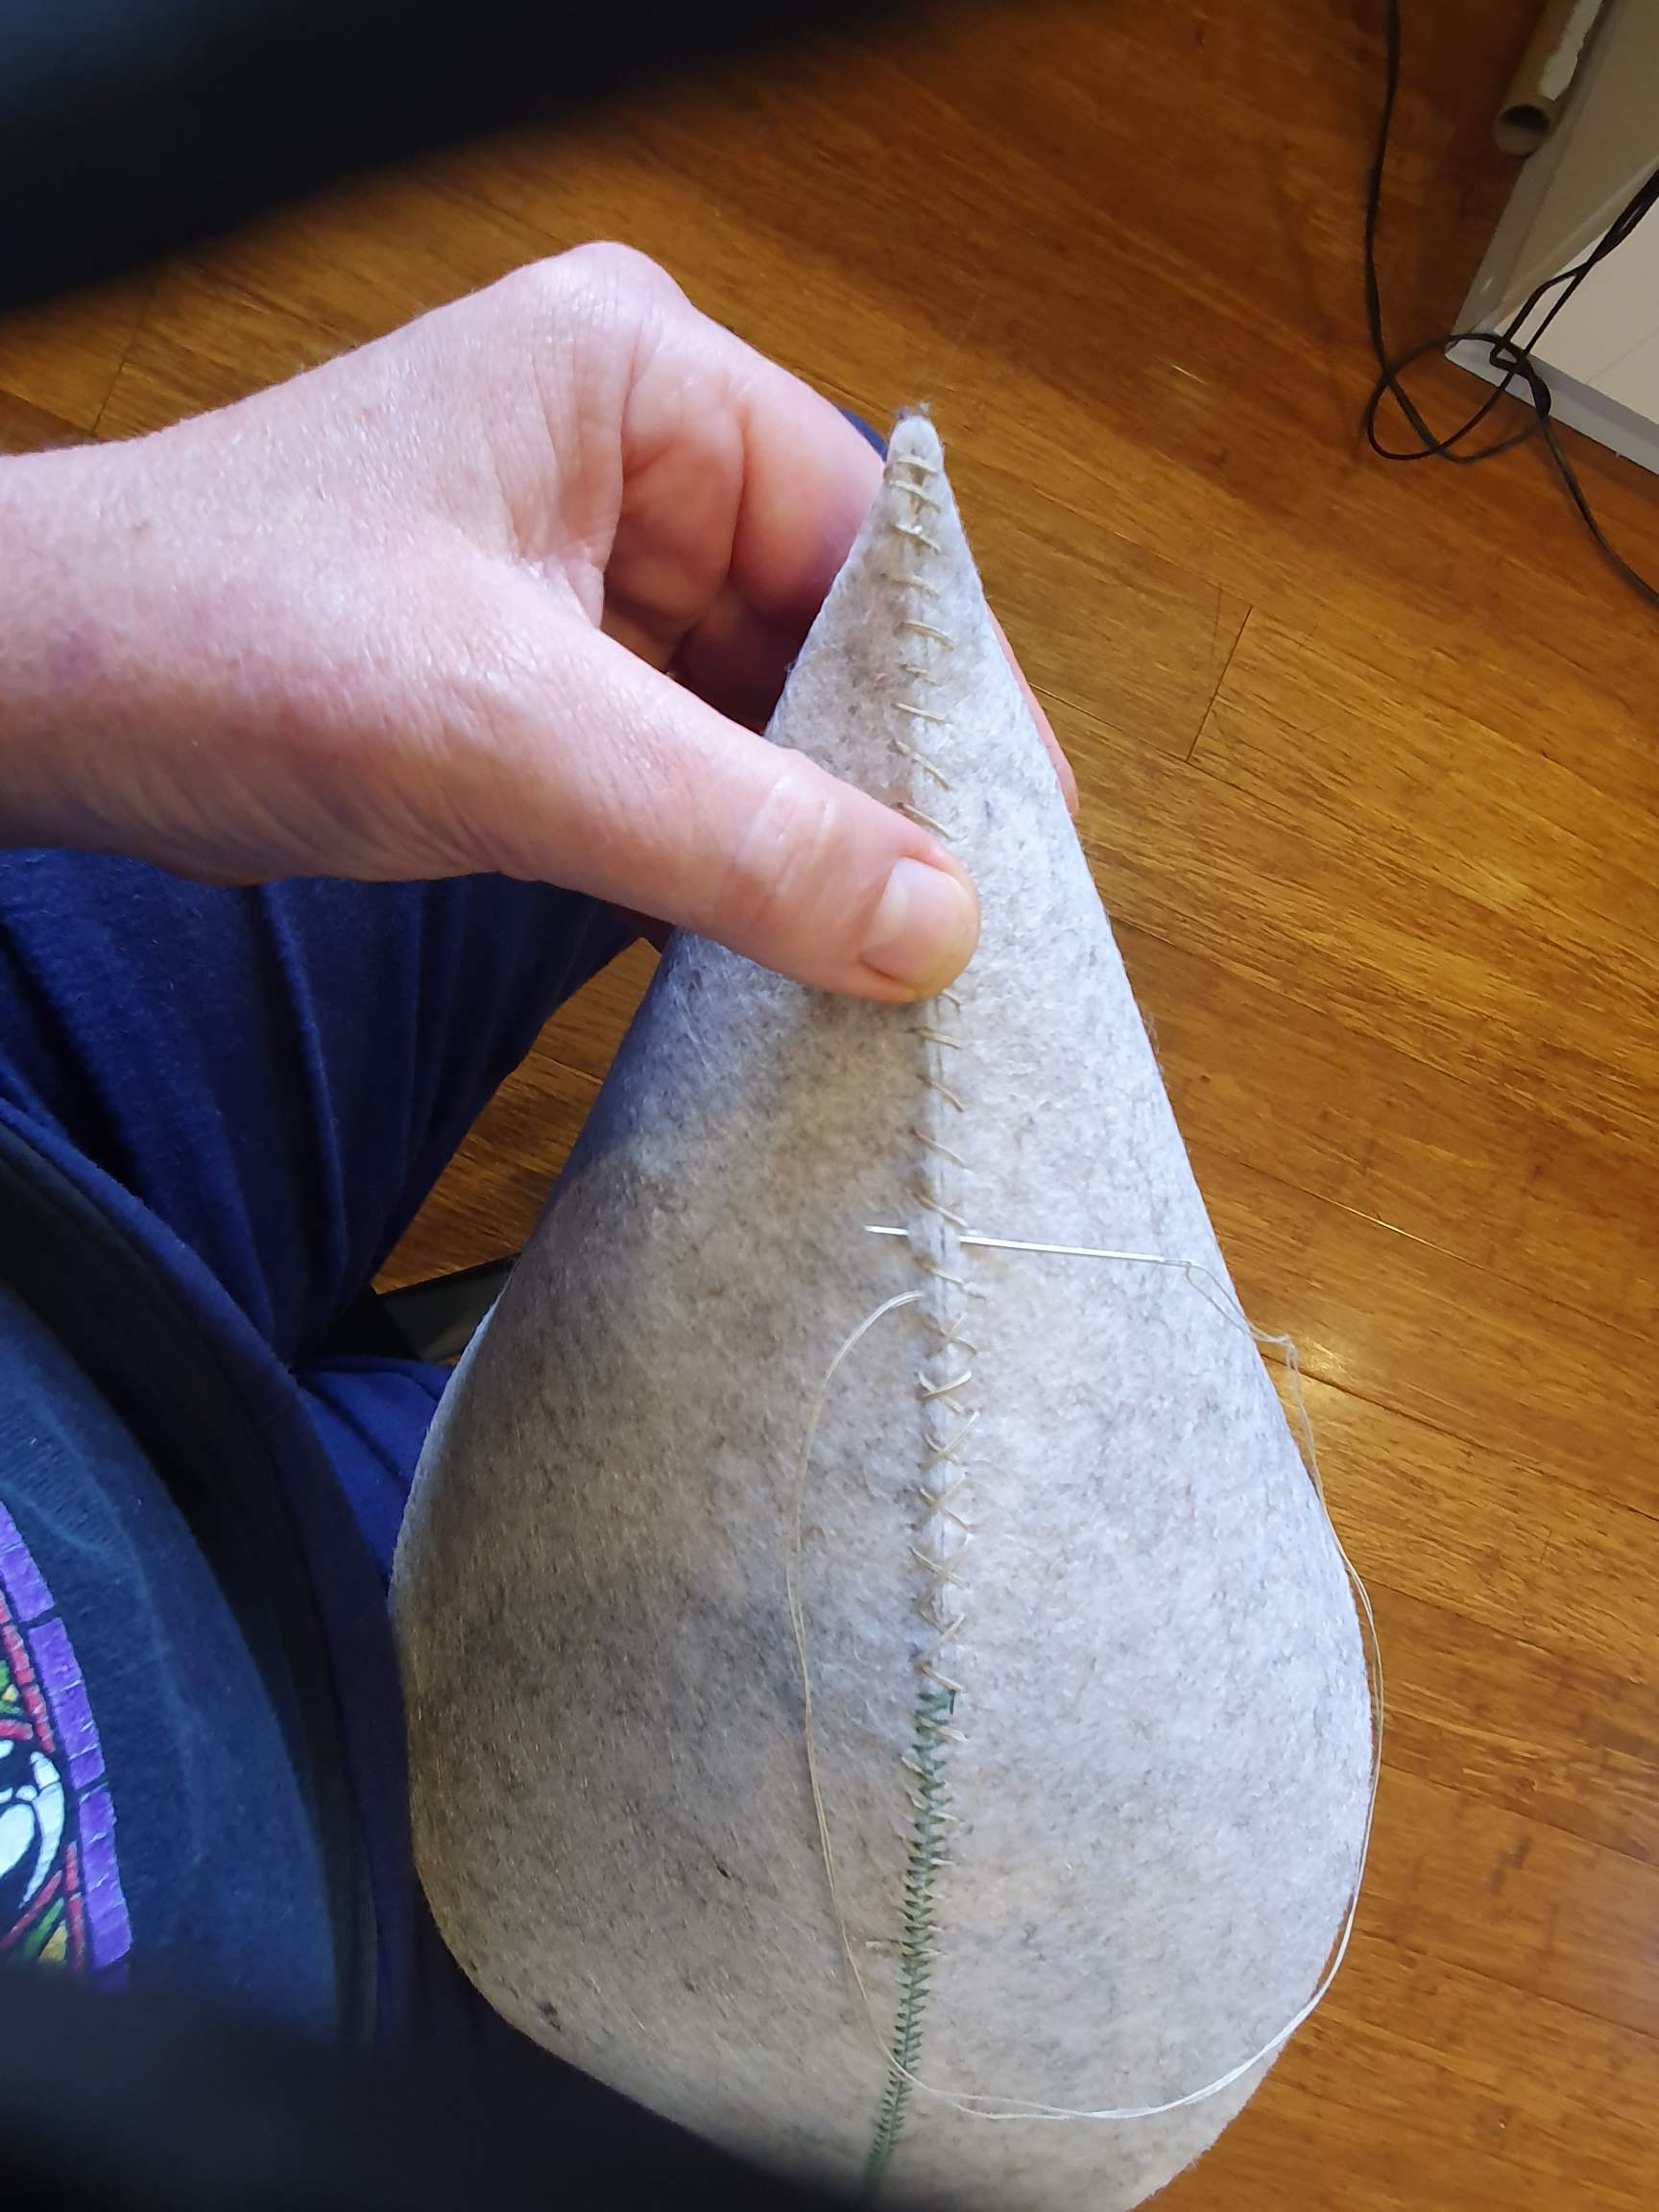
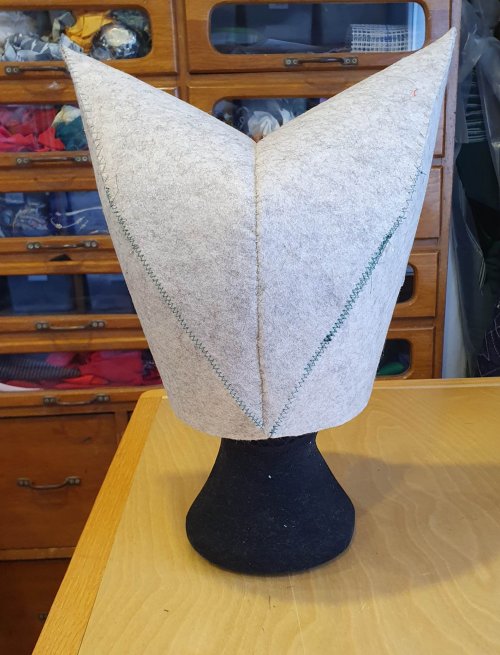
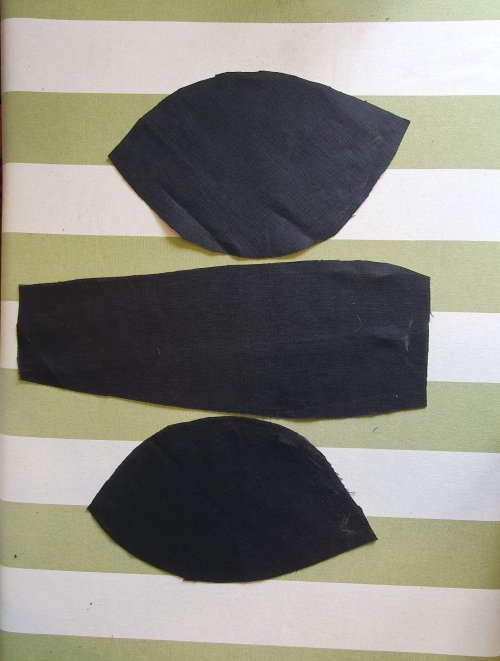
On to Plan B – make the whole shape in 3mm furnishing felt.
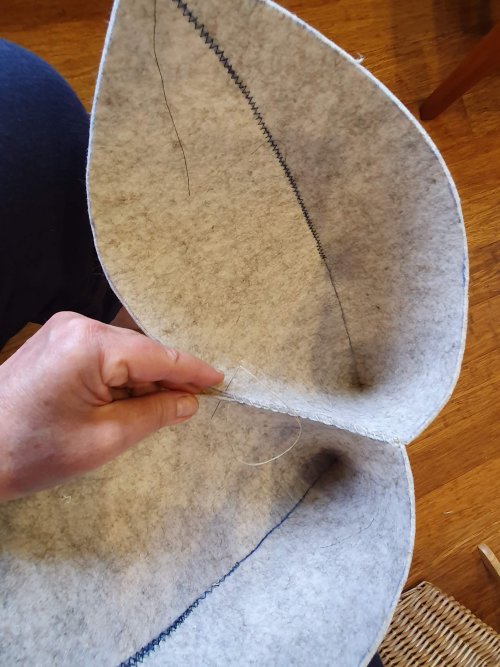
I cut the shapes out again in felt, then sewed the back seam on each side, using machine zigzag at the base and finishing by hand with waxed linen thread. Then I whipped the two halves together by hand. Such a pleasing shape!
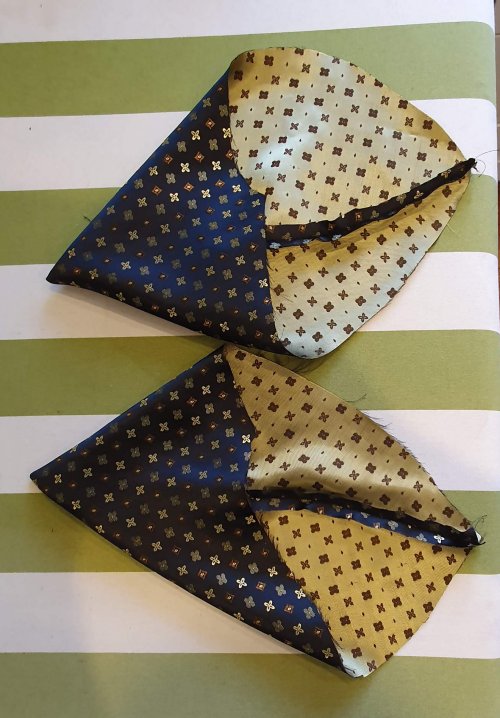
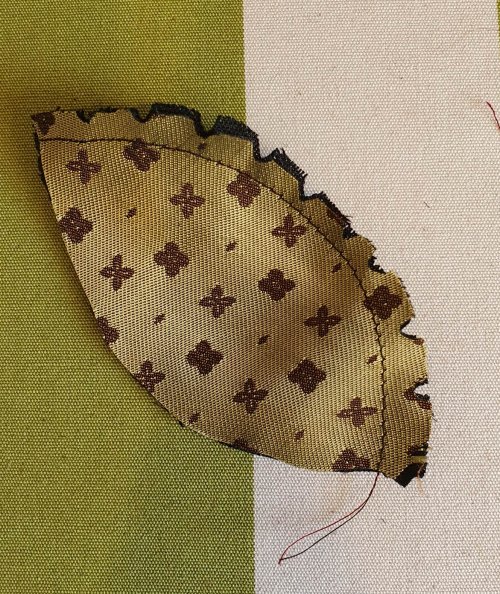
On the brocade cover. I cut the shapes in brocade, allowing 5mm extra on the centre seam and 1.5cm extra on the outside edge. I sewed the main seam on each half, trimmed the top corner and turned them with my bone folder.
I pressed and basted the seams flat, to avoid any folds or bunching when I pulled them over the felt. Then I sewed, pressed and basted the back seam in the same way.
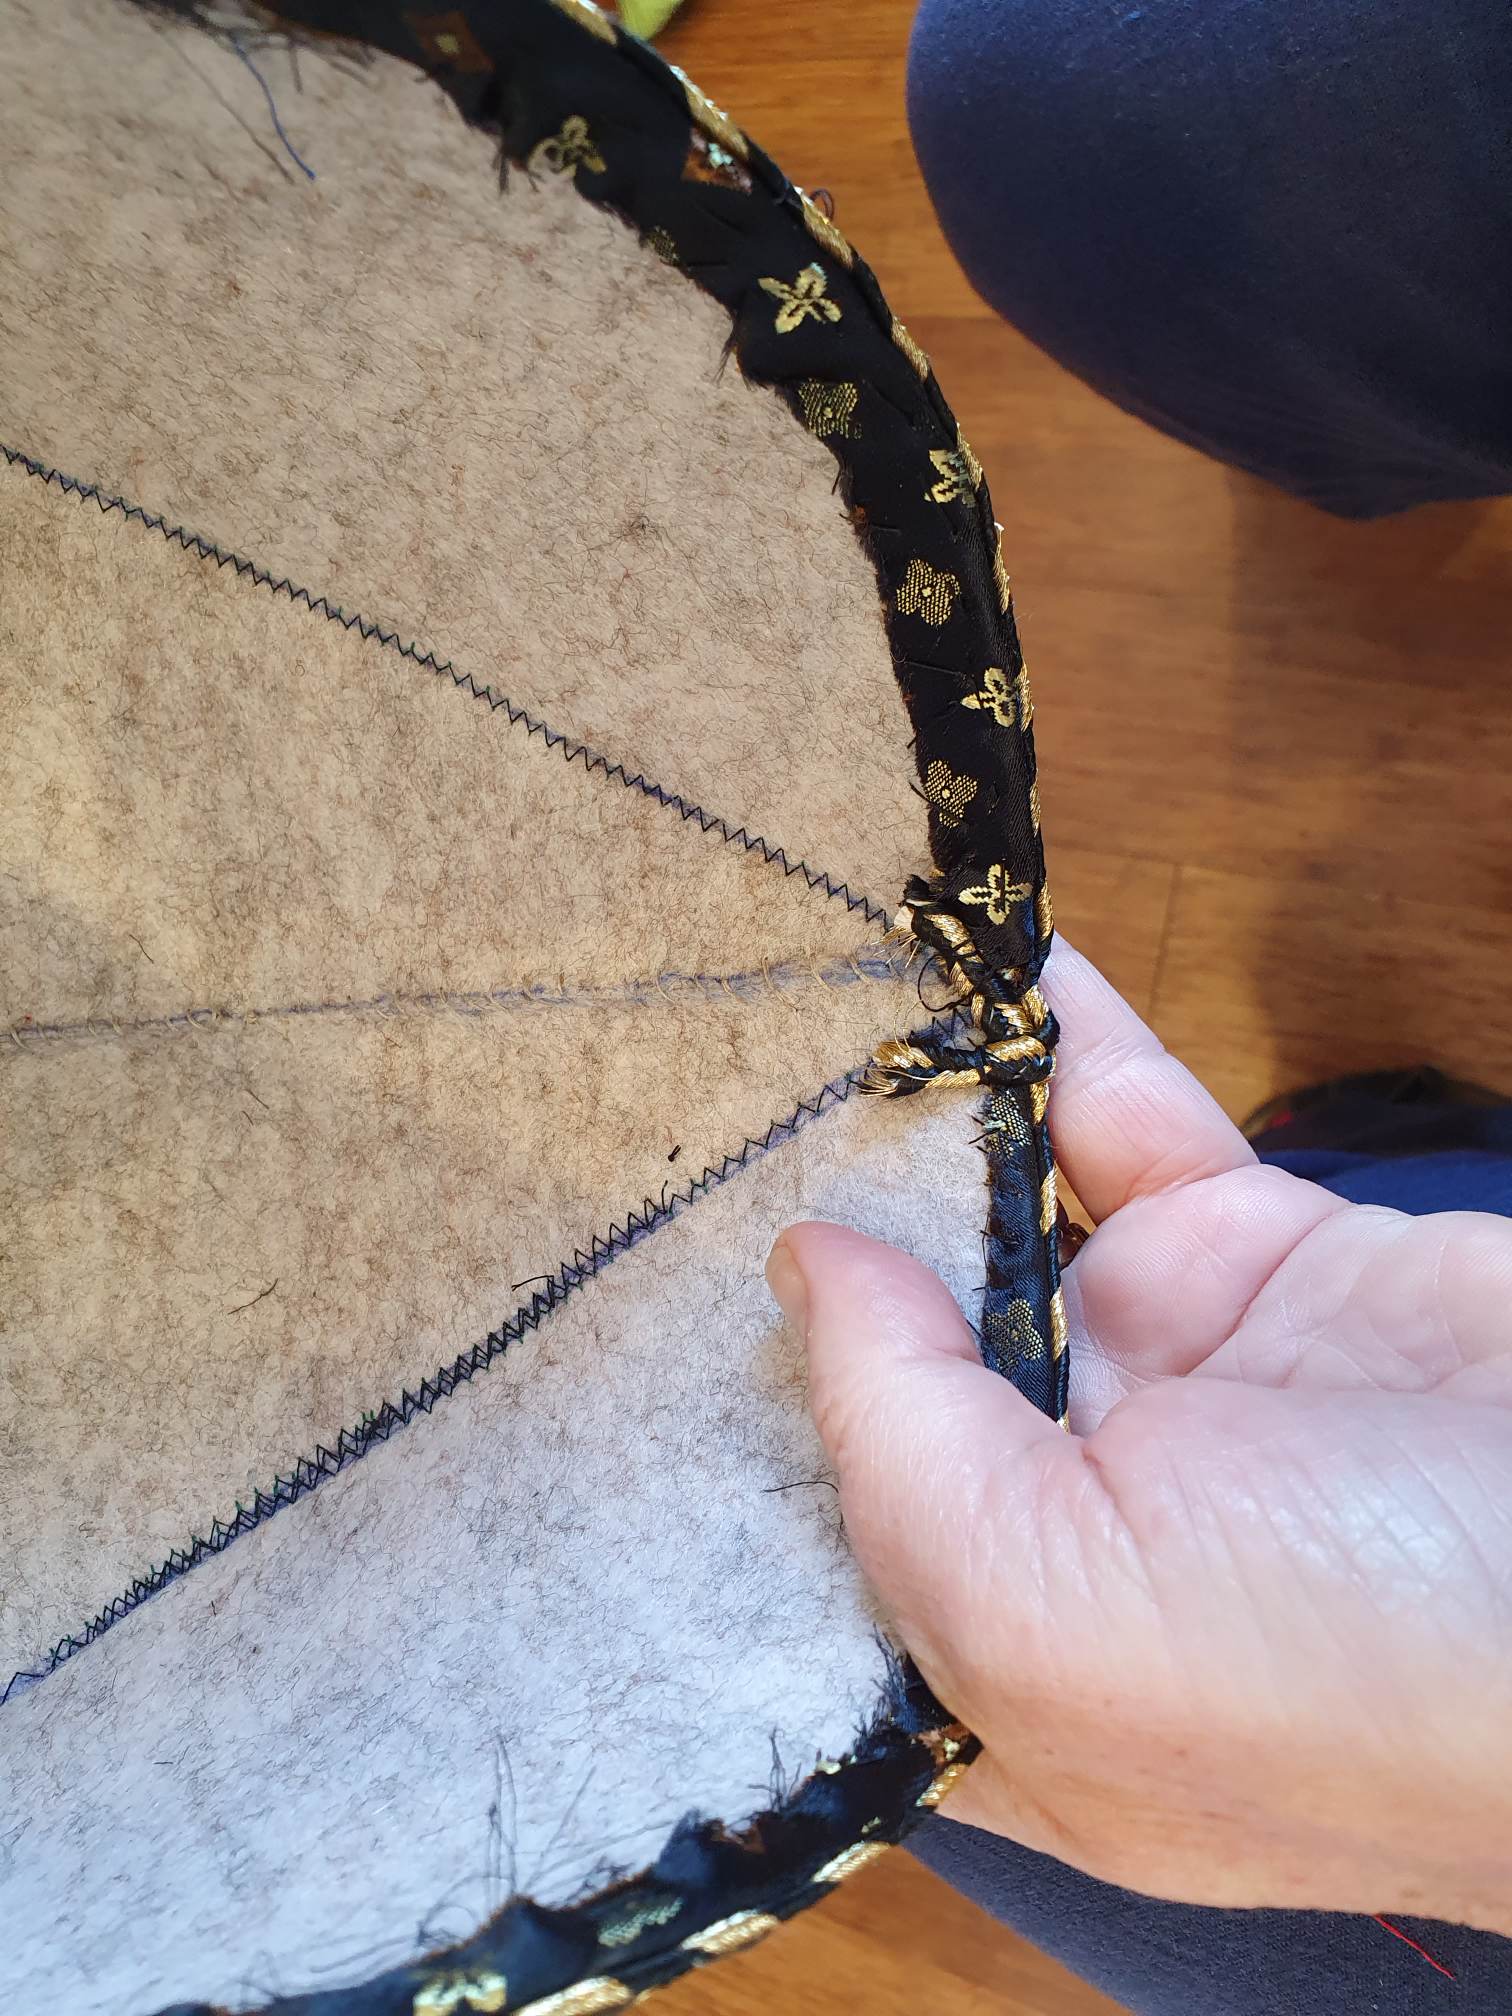
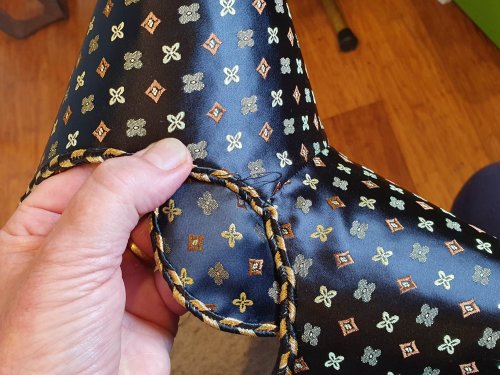
I eased the brocade over the felt base – I had just enough extra to wrap to the inside and baste all around (2-3cm would have been a better extra allowance). I put the escoffion on the headform and looked at braid options – black and gold it is.

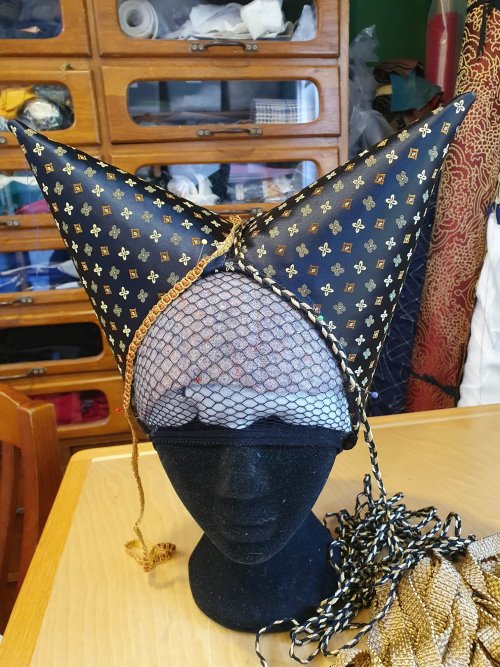
I sewed the braid all around the outside edge, overlapping the ends and sewing them inside for a neat finish at the back.
I made a brow piece of brocade lined in linen to cover Anne’s widows peak – a 15th century fashionista might have plucked her forehead, but that was not an option here! I edged this in braid and added it to front of the escoffion.
Now for the lining. I had tested my lining pattern with the final escoffion on the form, and allowed extra around the outside for luck. I cut a 3 piece lining in black linen, sewed it up and pinned it into the escoffion, trimming the excess. I sewed this in around the edge – done!

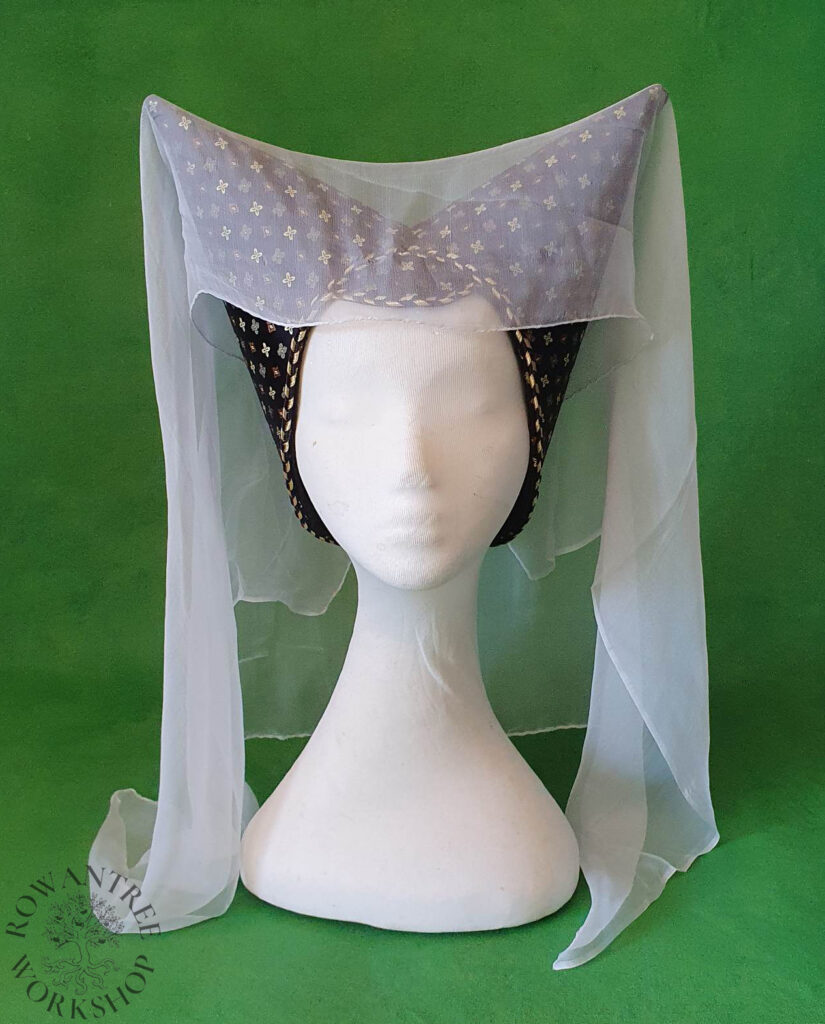
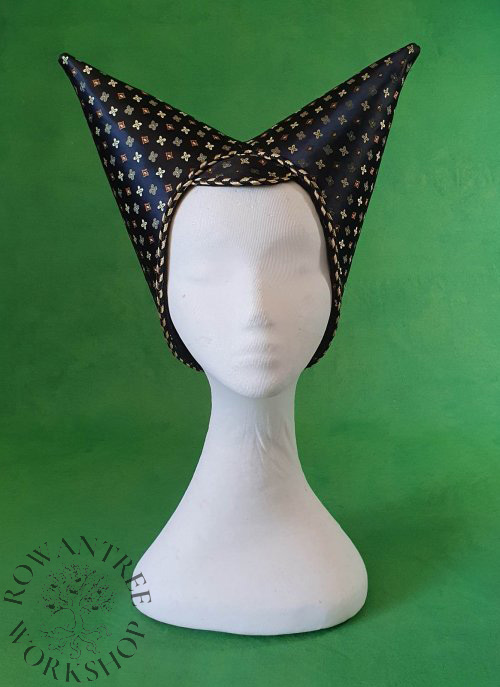
The completed escoffion looks striking, with a somewhat Maleficent vibe – and the black brocade certainly adds to the effect. It could be worn just as is, or with a very fine veil, as seen in the Tiburtine Sibyl painting above.

However, I also wanted a veil, which could be worn in different ways to change up the look.
Veil
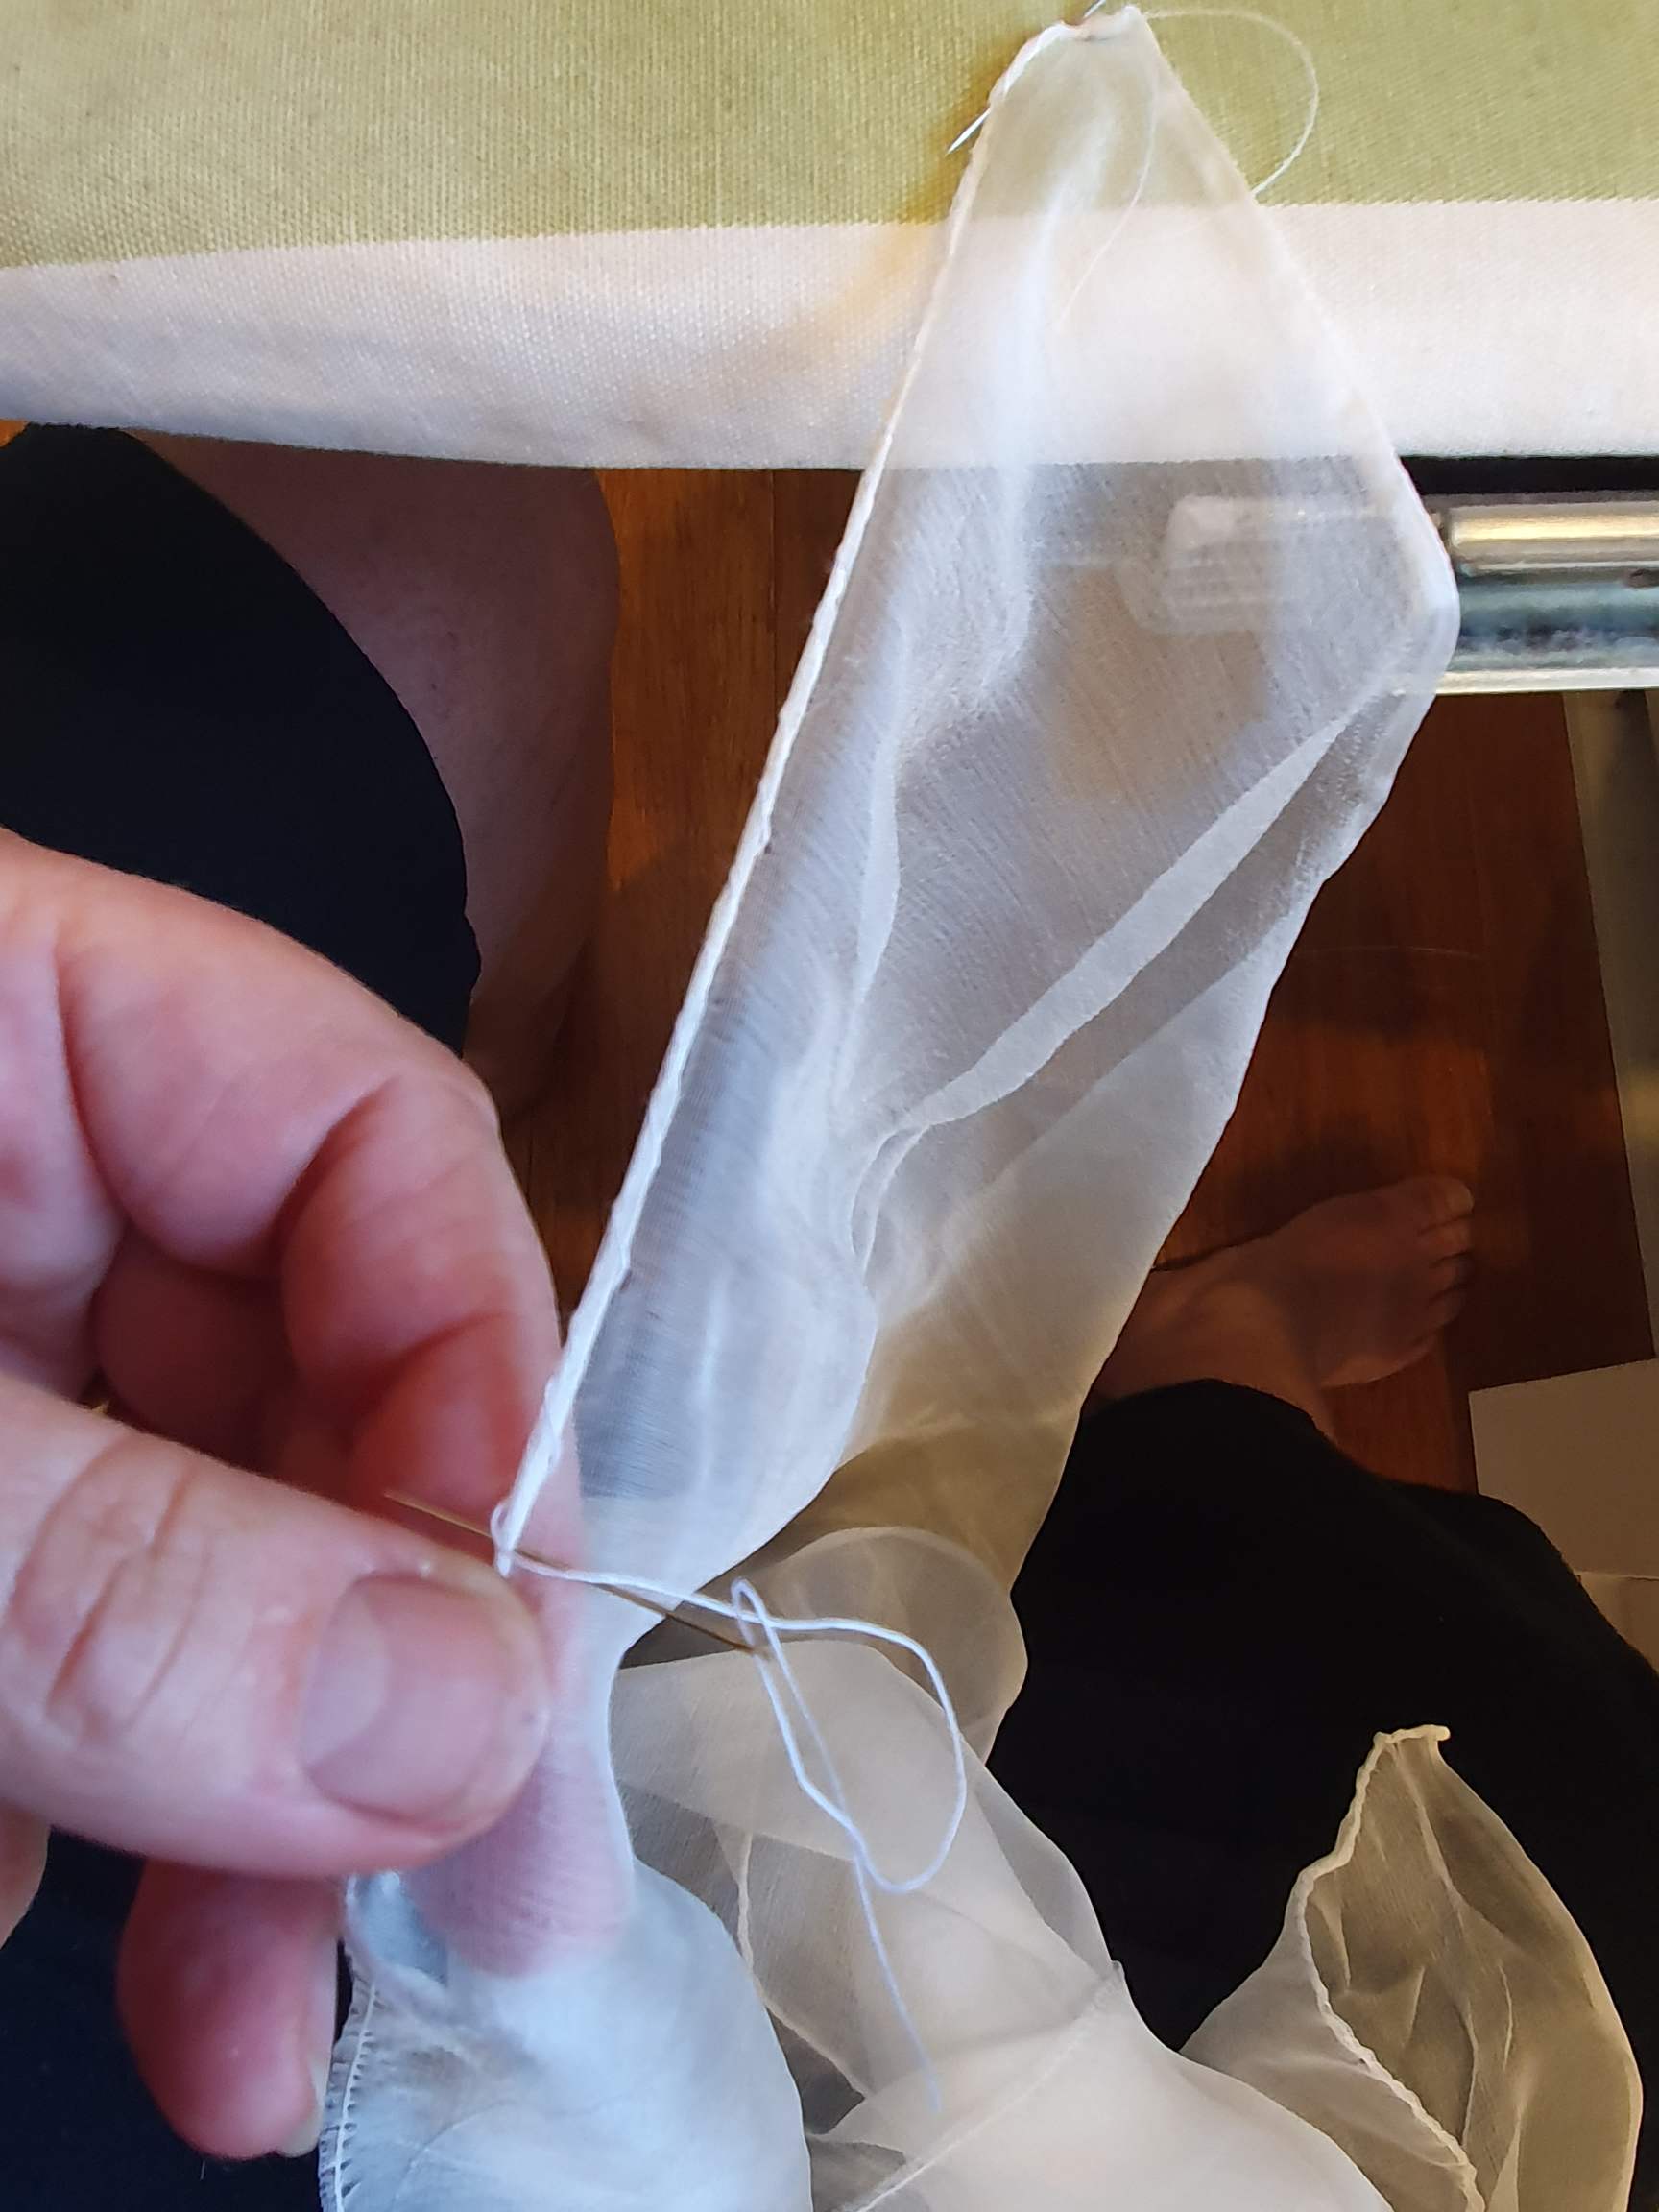
Before cutting the veil in fine silk chiffon, I pulled a thread to get a perfect line along the top and base (the width was perfect, so I could use the selvedges). Using this as a guide, I machine sewed a line using a small stitch length, then carefully trimmed along the sewing line. This process stabilises the edge on the superfine fabric.
I pinned the chiffon to my sewing board and roll-hemmed the sewn edge. This is much easier and faster to do under tension!
The finished veil adds another level to the escoffion. For this look, I pinned it at the centre front and into the top of the cones with fine brass pins – the felt holds the pins well.

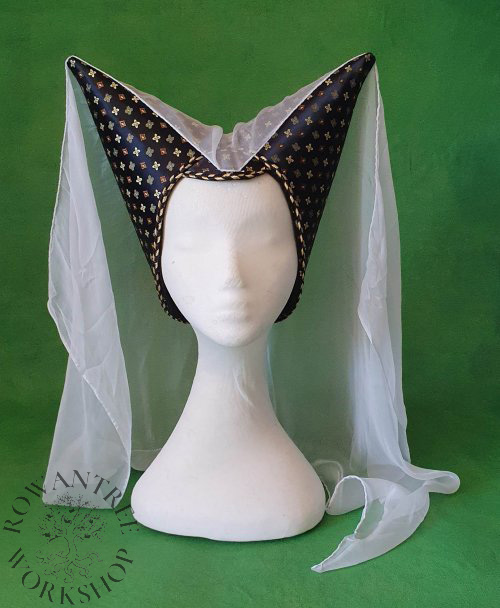
The finished escoffion can be worn in many ways, making it versatile. Wearing it alone, changing the way the veil sits, or using a solid linen veil produces quite different effects, which can be seen in artworks of the time.
I loved making this piece – figuring out the geometry was so satisfying.
Anne loved the way the Escoffion looked and how easy and comfortable it was to wear.

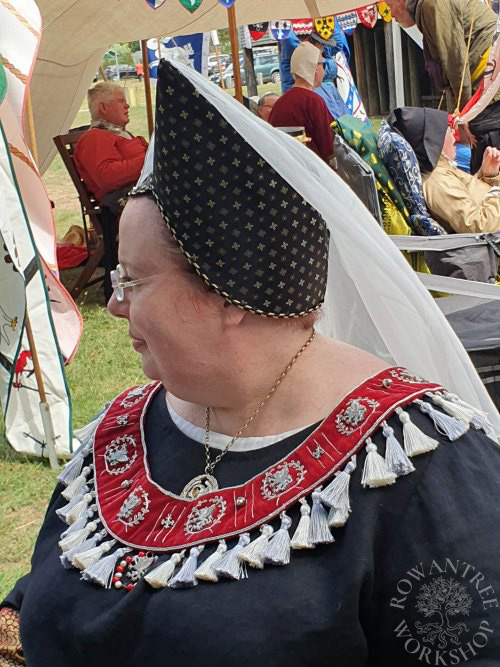
Photo: Robyn Spencer, 6 March 2023