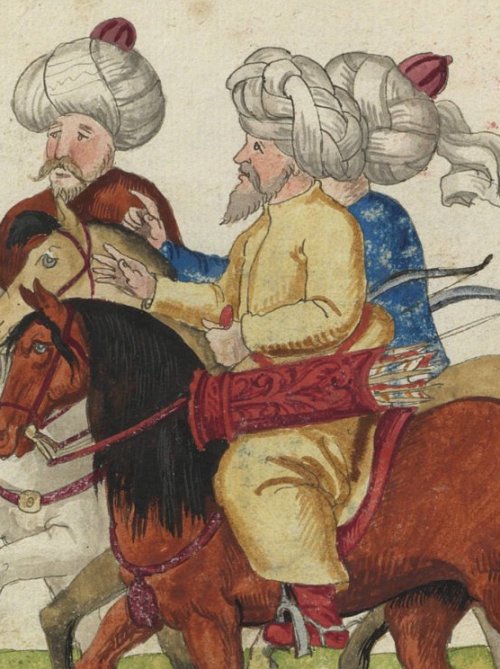
Headwear for a 16th century Safavid man – the Qalansuwa (cap) and ʿImāma (turban), inspired by Persian manuscript illustrations.
For his hat prize, Kamara Skleraina requested 16th century Safavid headwear – uncharted territory for me, as I know little about Persian clothing. Kamara sent some initial visual references and Tariq ibn ben Jalal provided me with some information – and the correct terms to search with.
Research
The Safavid Empire ruled Persia from 1501-1736 – it was a huge empire stretching across multiple countries, with many influences. The qalansuwa and ʿimāma were the iconic male headwear of the time, but have a much older history.
In Arab Dress: A Short History, Stillman (2003) states thatʿimāma has been worn by the Arabs since pre-Islamic times, although originally without a cap beneath. The Metropolitan Museum has the bronze head of a ruler wearing a turban c2300-2000 BC. The western term ‘turban’ derives from Persian dålband via the vulgar Turkish tulbant or tolibant.
The colours and fabrics of turbans varied with both time period and geography. Under Mamluk rule in Egypt and Syria, it was decreed that Christians should wear a blue turban, jews a yellow one, Samaritans a red one, with the white reserved for Muslims. Later edicts liimted the length of turban windings.
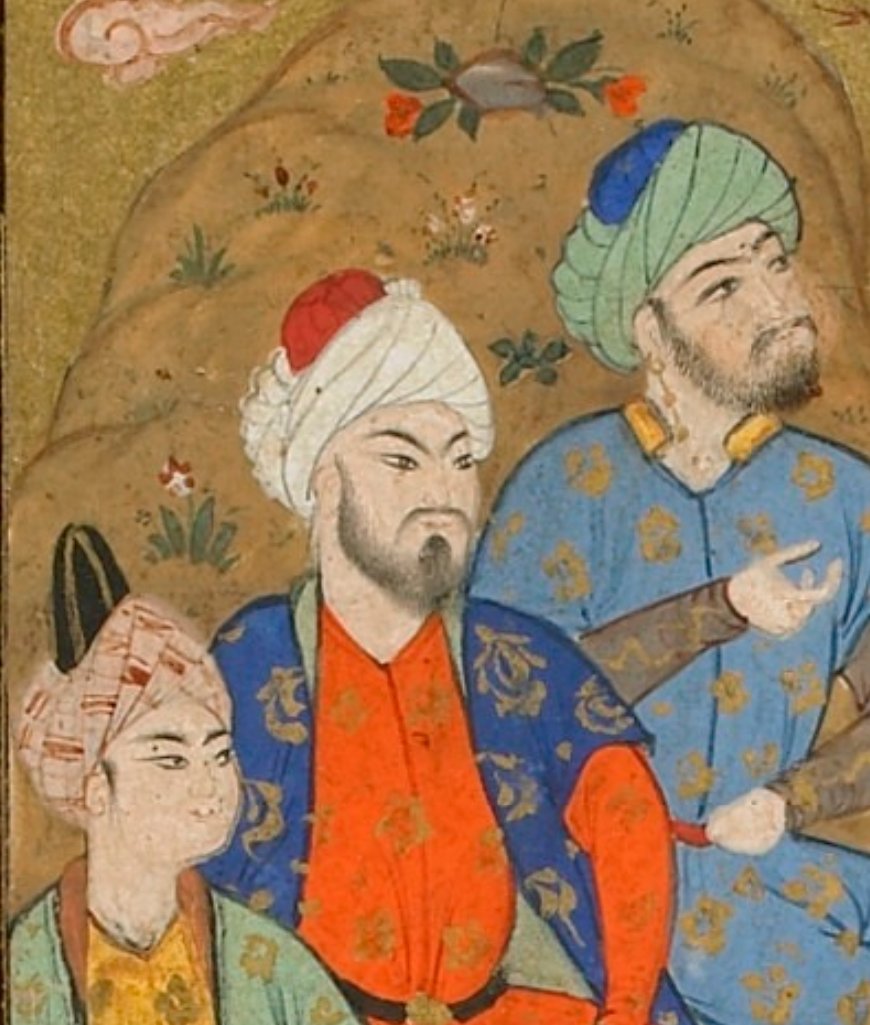
The 16th century Persian manuscripts show turbans in many colours, sometimes in patterned fabric, but white remains the most common colour.

Source: The Met
Although turbans were worn alone, most images show a foundation cap – the qalansuwa. As the Muslim world was conquered and ruled by various ethnic groups and cultures, different terms came into the Arabic lexicon fior this cap, including kalawatta, taqqiya, shashiyya, tarboosh, danniyya and araqiyya.
kul§h, or ãarbåsh).
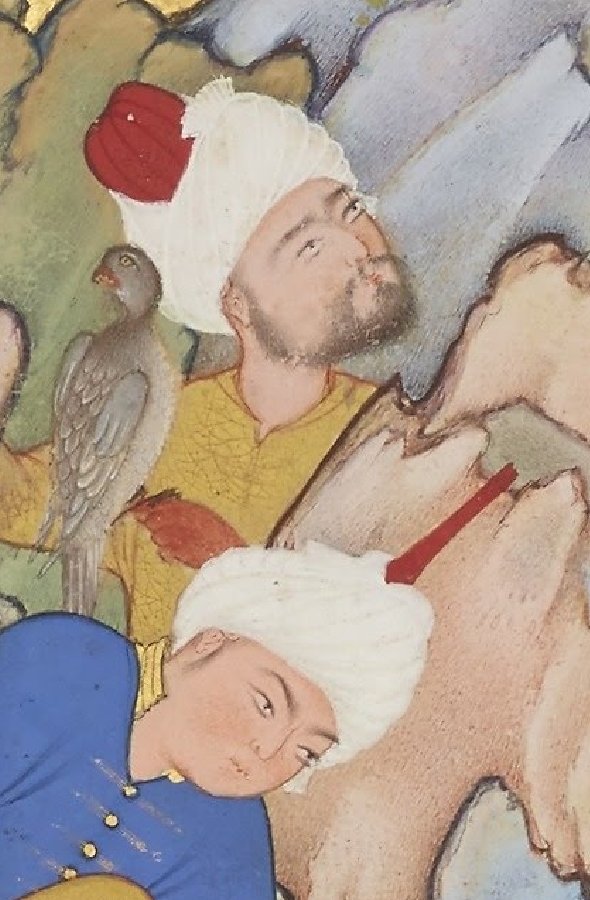
Both tall and short versions are seen in the manuscripts, often in the same painting. I speculated about shape of the cap beneath the turban, assuming it widened into a cone. The Jami image of below shows a cap with a smaller cloth around it, so this shape is clearly visible.
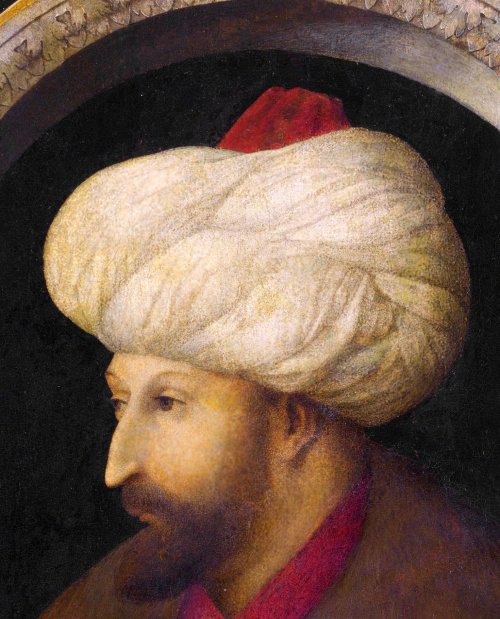
Although some qalansuwa are smooth, most 16th century versions show grooves or folds visible above the turban. The painting of Sultan above (although Ottoman rather than Persian) shows a similar style. Some examples show a button on the top, such as the image from the Codice de trajes below.
The two layers have been worn together for centuries. The 9th century Pact of Umar states “We shall not attempt to resemble the Muslims in any way with regard to their dress, as for example, with the qalansuwa, the ʿimāma , sandals, or parting the hair (in the Arab fashion). . . .”
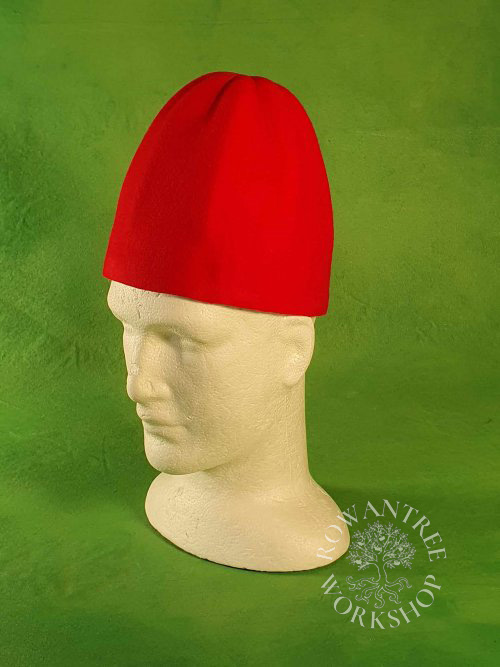
Stillman does not comment on the materials of the later qalansuwa, but the images certainly look as if they were made of felt. Encyclopedia Iranica details the use of felt in Persia from ancient times onwards, including for hats of various sorts.
I also see a link between this headwear and the Fez – the Azhar Fez is still wrapped in a vestigal white cloth, reminscent of the turban. I found a fascinating video on making the Fez, using a supporting layer of woven straw, and then lined in silk.
Based on this, I planned to make the qalansuwa of blocked red felt over a straw foundation with silk lining, and the ʿimāma from a long length of linen gauze which I had purchased by accident some years ago.
Construction
Both the felt and straw will need to be steam-moulded, so I need a firm base for this.
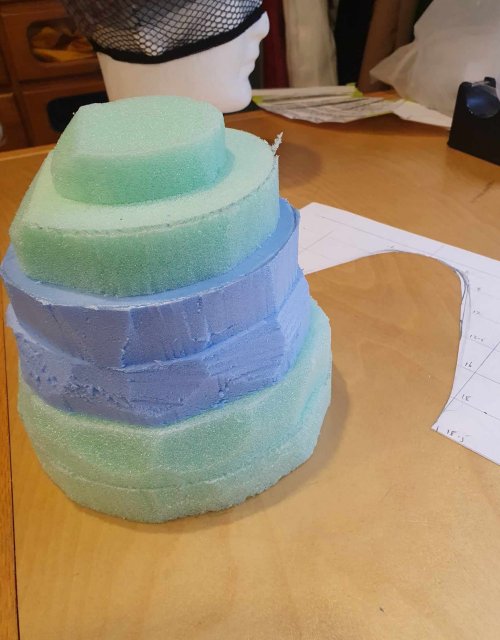
My first step, as always, was to pad up the headform to the correct size. I mocked up a conical cap in stiff paper to check the scale in relation to a stand-in turban – pretty good, although the turban needs to be bigger, and the cap a little shorter.
With this as a guide, I made a custom hat block using layers of XPS foam. Using a card templates for the elevation makes it easier to get the crown the right shape, and calculate the size of the foam rounds.


I glued the layers together and then shaped with a breadknife and file, checking against the template. I didn’t put ridges into the top of the block, because the straw base is too stiff to take this level of detail.
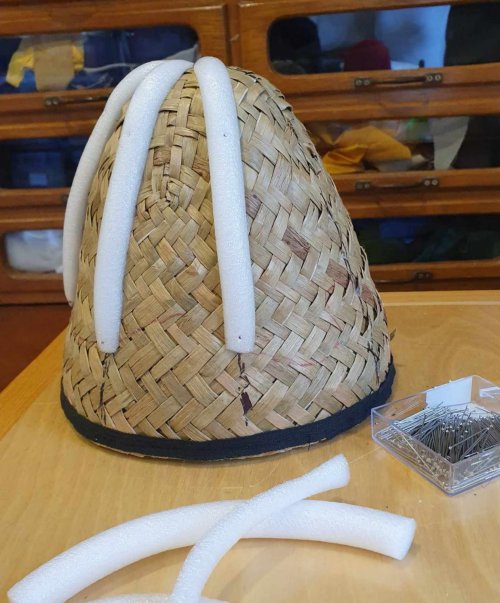
With the mould complete, I trimmed the brim edge off the cheap straw hat, and sprayed and steamed it to soften and pulled this over the foam block, smoothing to fit and securing with a wide elastic strap.


Once the straw had dried, I trimmed it to length on the block and pinned a length of tape around the base to ensure it didn’t stretch. I basted and machine-sewed this to to the base trimmed again, then tried it on the headform – looking good.
With the straw back on the foam block, I marked 8 even segments and added ridges to form the distinctive top. I made these from foam rods (leftover from our renovations), trimmed to shape tand piinned to the straw and block beneath.
I sprayed and steamed the felt hood thoroughly (using my steam iron, held close to the felt) and put it on the block, pulling down hard to mould to the smaller block shape. To define the ridges, I stretched string between the mounds, and tied these under the base, pulling firmly and steaming several more times during the process. Then I let it all dry overnight.


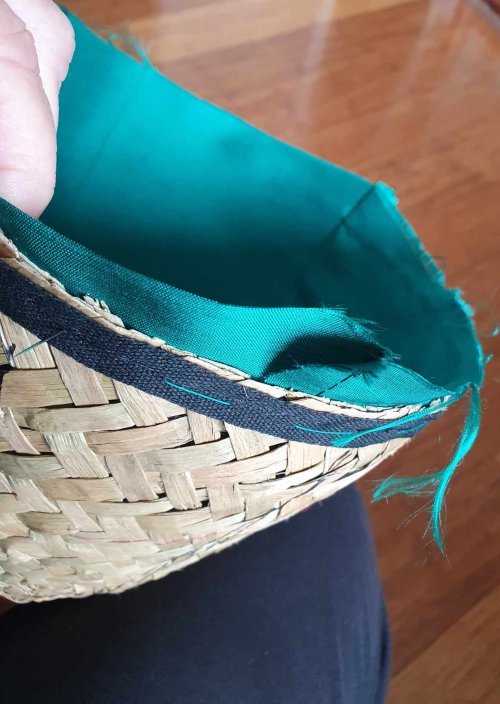
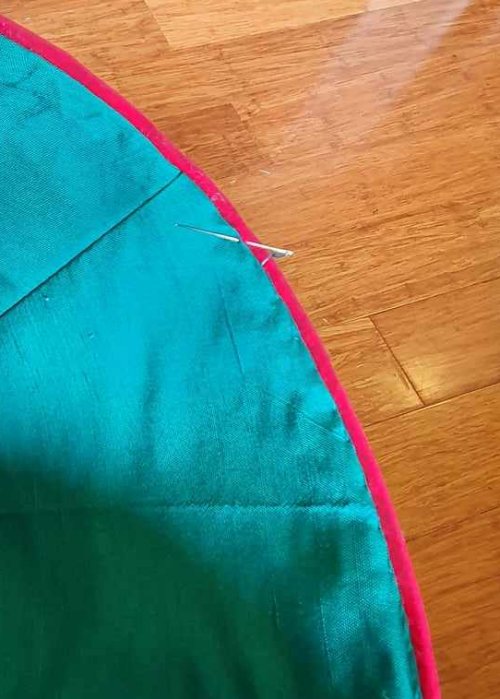
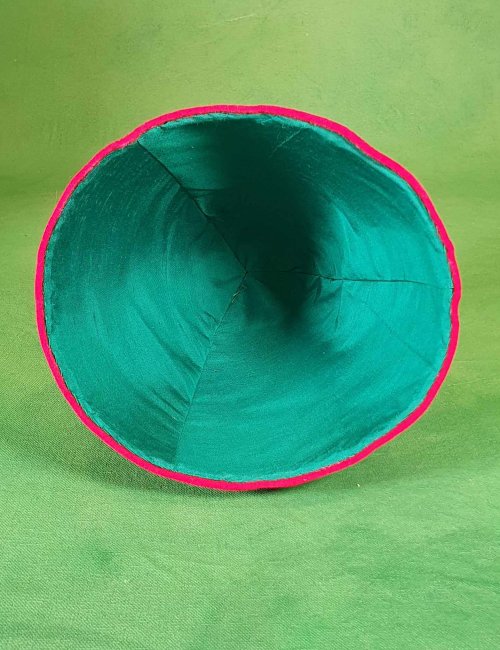
The next morning, I undid the strings, eased the felt off the form, removed the ridge strips and then the straw layer. Using my cross-section as a pattern I make a 3 section lining, tested first in scrap fabric, then cutting in green silk. I slipped this inside the straw, basted and then sewed to the tape on the outside.

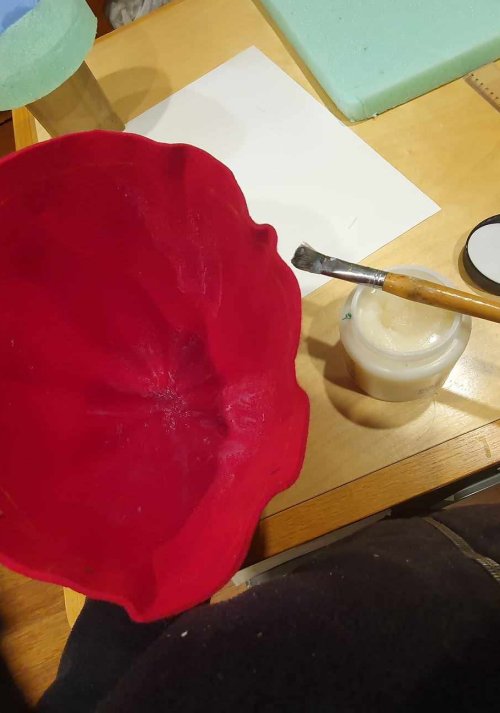
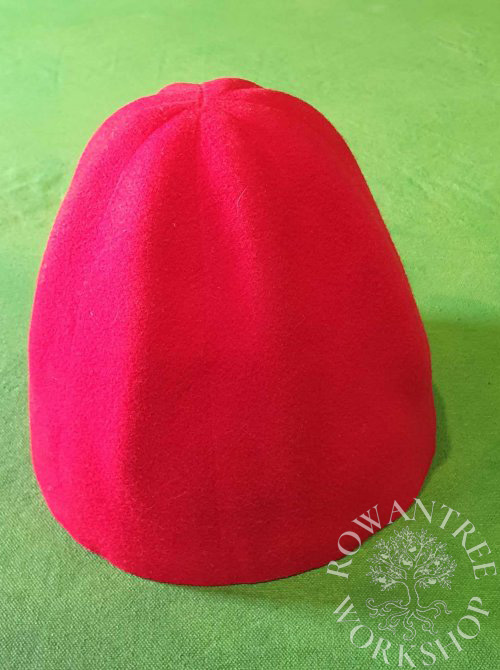
The unsupported ridges on the cap are a weak spot – it would be easy for them to become dented. I could stiffen the felt with hide glue, but thought it was worth trying the Fez approach – gluing to the straw layer. I did a test sample with starch paste to see the effect on the felt and straw: the felt was a lot stiffer, even without the straw.
To reduce the chance of anything leaking through to the silk lining, I brushed the paste onto the felt and then put it over the straw, setting it on the block to dry overnight.
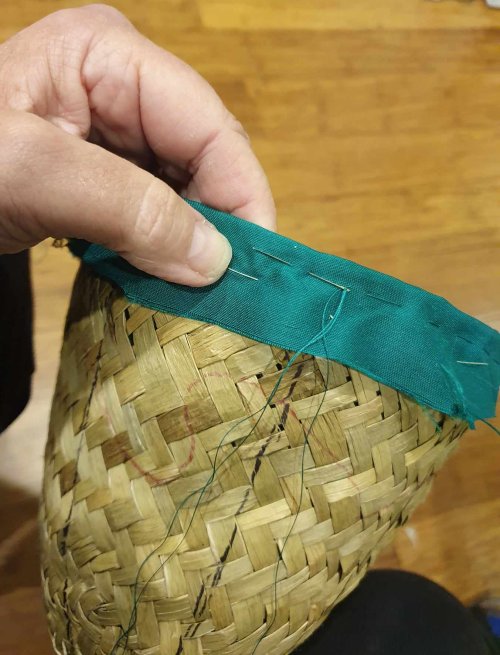
The next day I trimmed the felt around the base, then sewed the lining to the felt with whip-stitch.
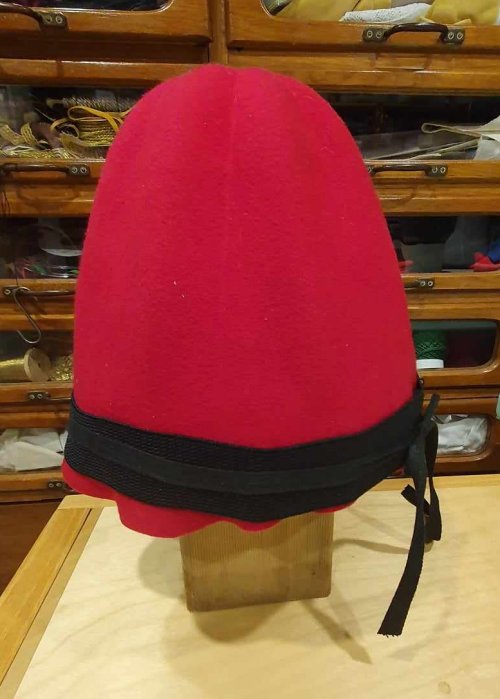
The qalansuwa is done – and I’m really pleased with how good the ridges look.

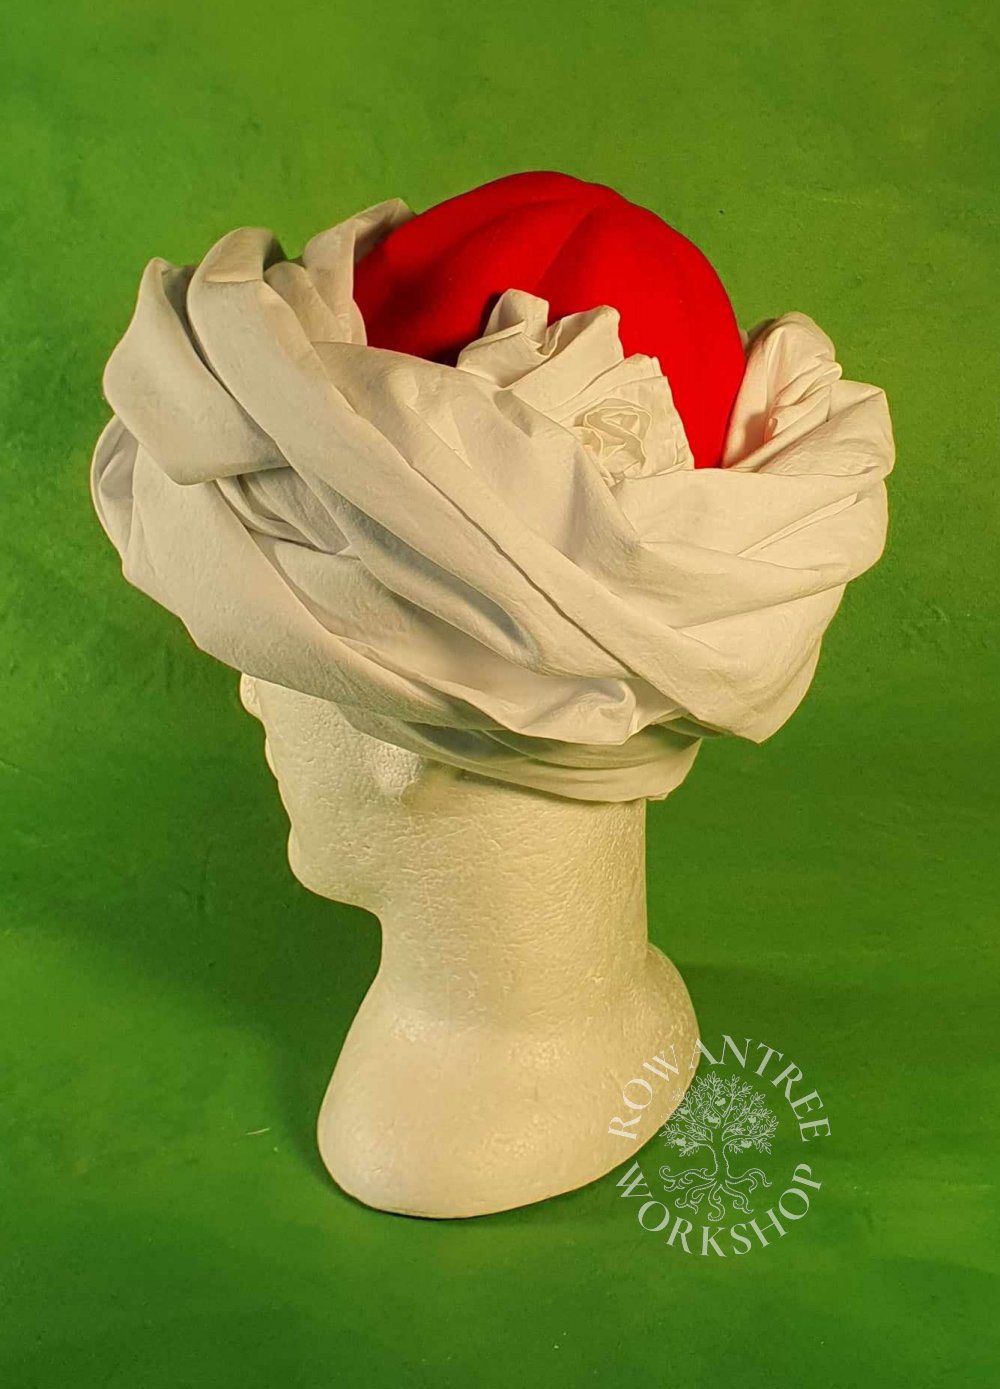
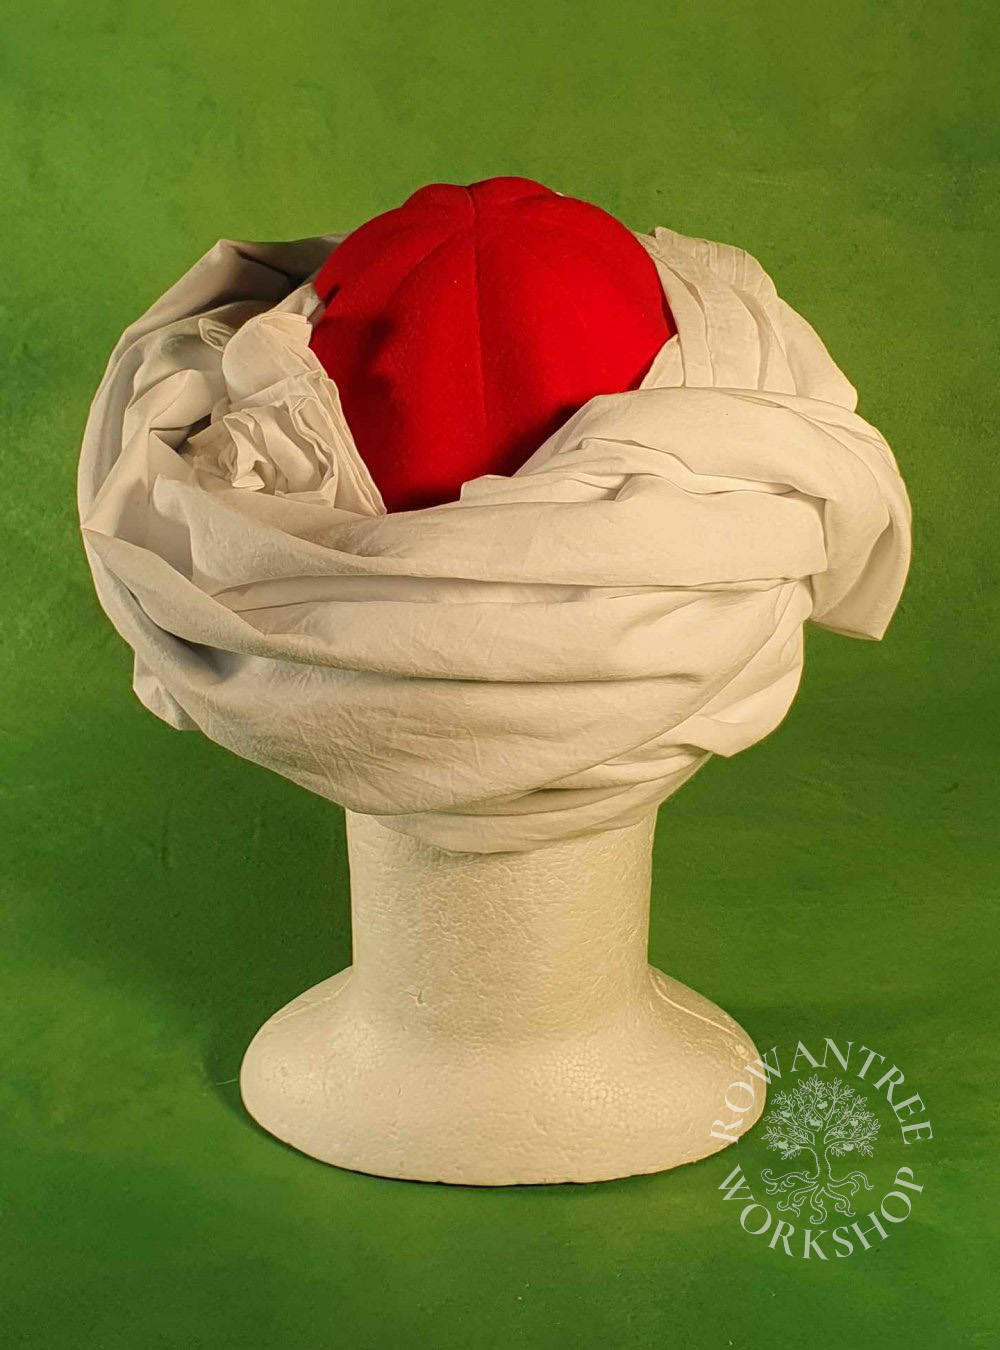
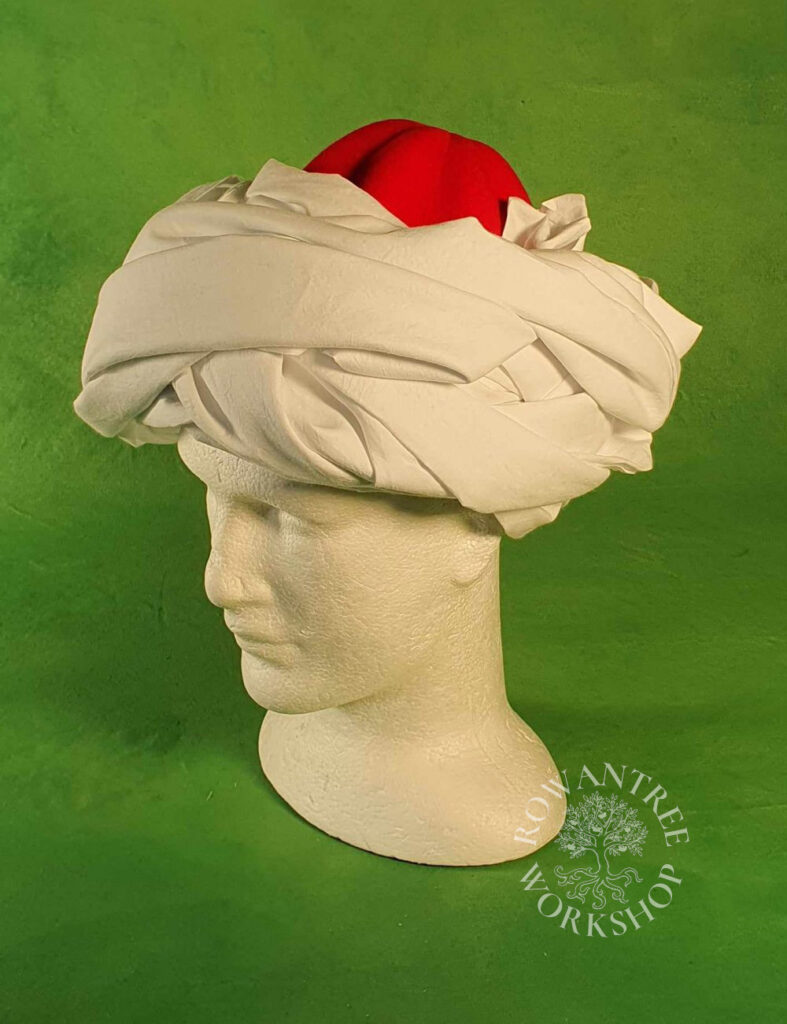
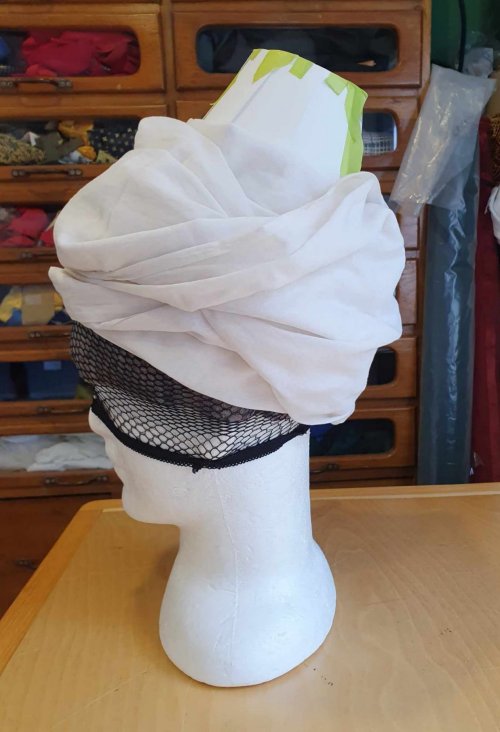
For the turban, I decided the linen gauze was just too coarse. Instead, I went through my stash and found some very fine cotton 90cm wide. Modern turbans can be quite long, but I found that 4m gave me a nice fat looking wrap.
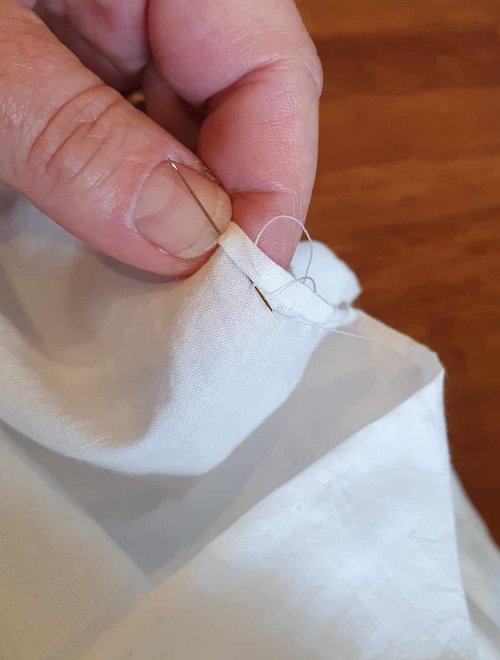
I made a fine hem on each end – the images look like the ends are crisp rather than ragged.

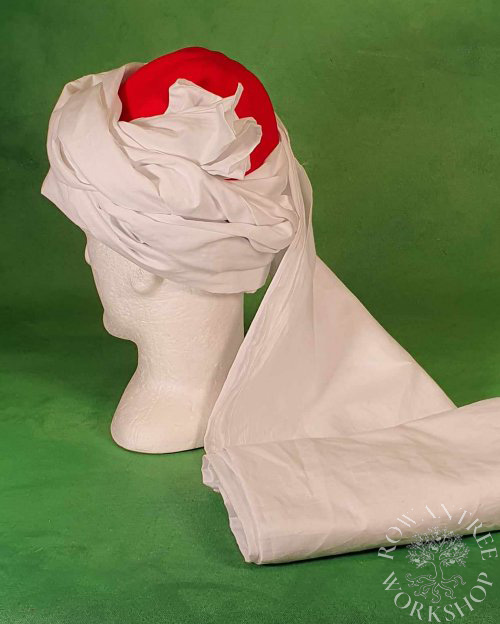
I folded this lengthwise in 4, then wound it around the cap, twisting the linen as I went to make a nice bulky turban, with the top of the cap still visible. The pleated end of the fabric is visible at one side, just like in the imges.
The final result looks very like the manuscripts, and hopefully Kamara will enjoy wearing it!