A simple version of this cap, which was worn by women across much of Europe through the middle ages.
Linen caps of various types were one of the most common types headwear worn by women. The Birgitte style cap was popular in many countries, especially France, England, Italy and Sweden. Initially worn by women of all classes, they stayed in use by women of middle and lower classes into the 15th century.

I have made many of these caps for friends – they are simple, effective and deal with a host of hair issues!
Research and Design
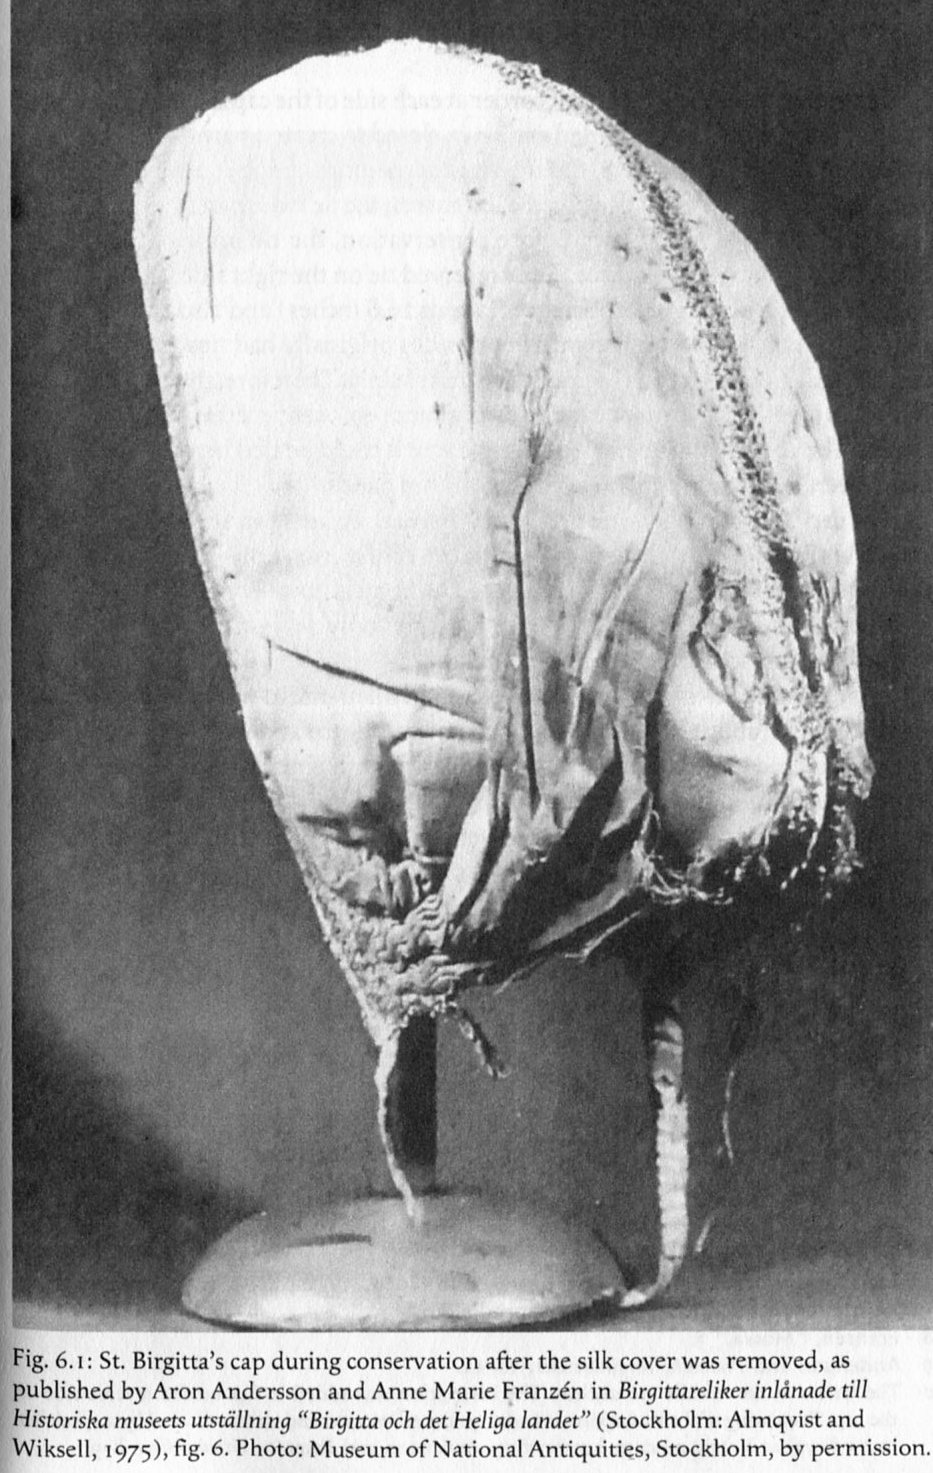
The name ‘Birgitta cap’ comes from a linen cap revered as a relic of St Birgitta, a 14th century Swedish saint. The cap was first conserved and published in 1973. In 2008, it was re-examined and the findings published (Dahl & Sturtewagen 2008), sparking a flurry of versions in the medieval re-enactment context.
Source: Dahl & Sturtewagen 2008

Source: Dahl & Sturtewagen 2008
The extant example is made from very fine linen (32 threads per cm), with a central seam worked in an openwork lattice, using linen thread. The front edge is bound with a band of fine linen, gathered at the back and decorated with simple embroidery. The long tie is also made from a narrow strip of fine linen, folded over and sewn along the open edge with running stitch.
Dahl & Sturtewagen were not able to open the cap completely, but concluded that the shape was a simple rounded rectangle. They proposed a possible construction method, and how it might be worn.
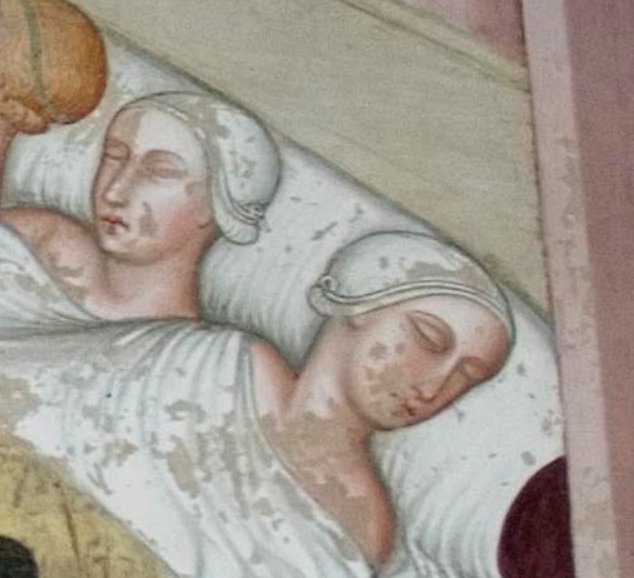
Images of the cap, with its distinctive tie, abound in medieval manuscripts and other artworks from the 13th and 14th centuries, and into the 15th. These examples are typical – see Larsdatter.com for an extensive collection. Some images show an indication of a central decorated seam, but others do not. The image from Les Cent Nouvelles Nouvelles shows the shape and long tie loop clearly.

Source: The Morgan Library
Source: Wikimedia
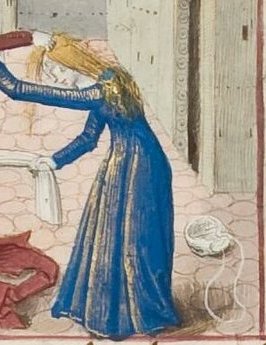
MS Hunter 252 f.186r, c1475-1500
Source: University of Glasgow Library
Construction
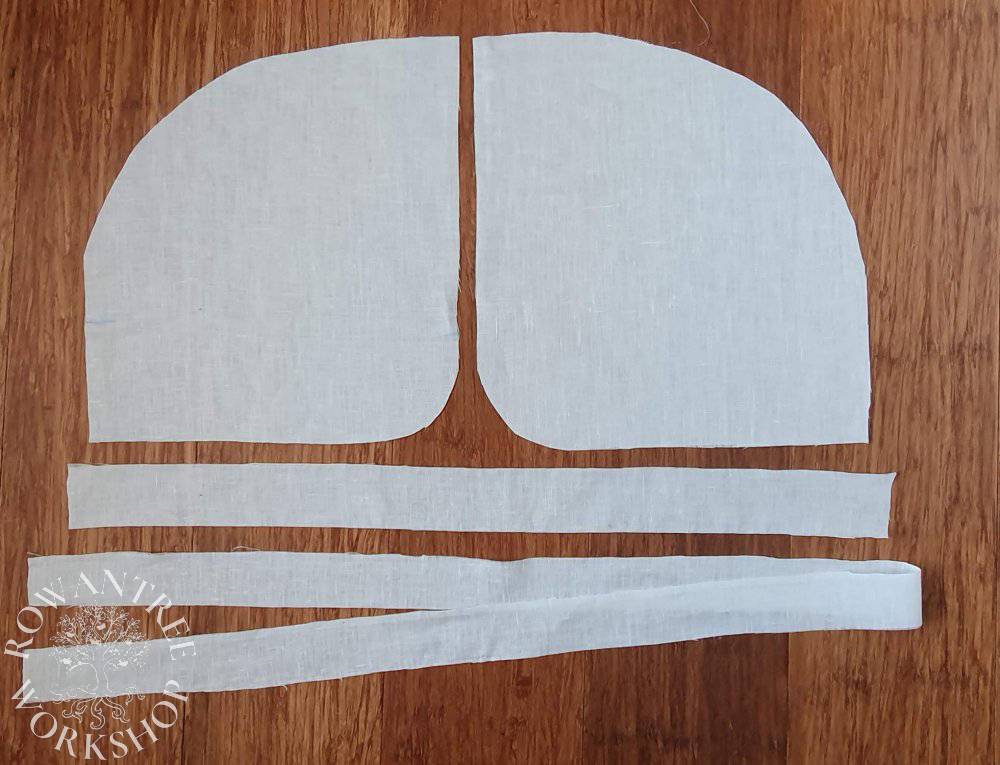
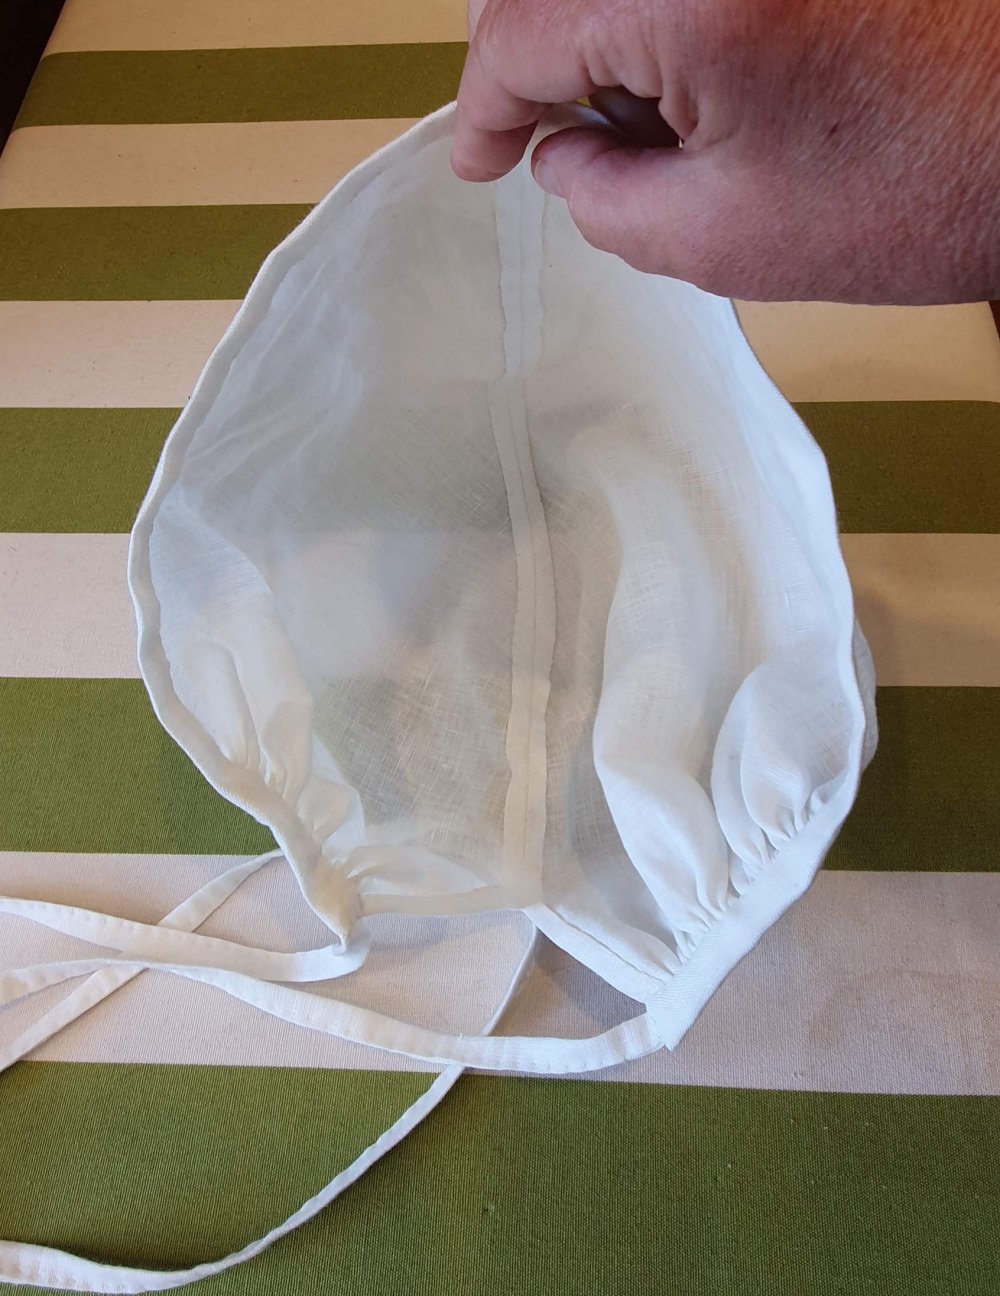
My pattern started with the rounded rectangle shape and size proposed by Dahl & Sturtewagen, but a little larger (they noted that the cap was very small). After the first test run, I rounded off the front corner to get a smoother line around the face. And I added a seam allowance along the top, in place of the insertion stitches.
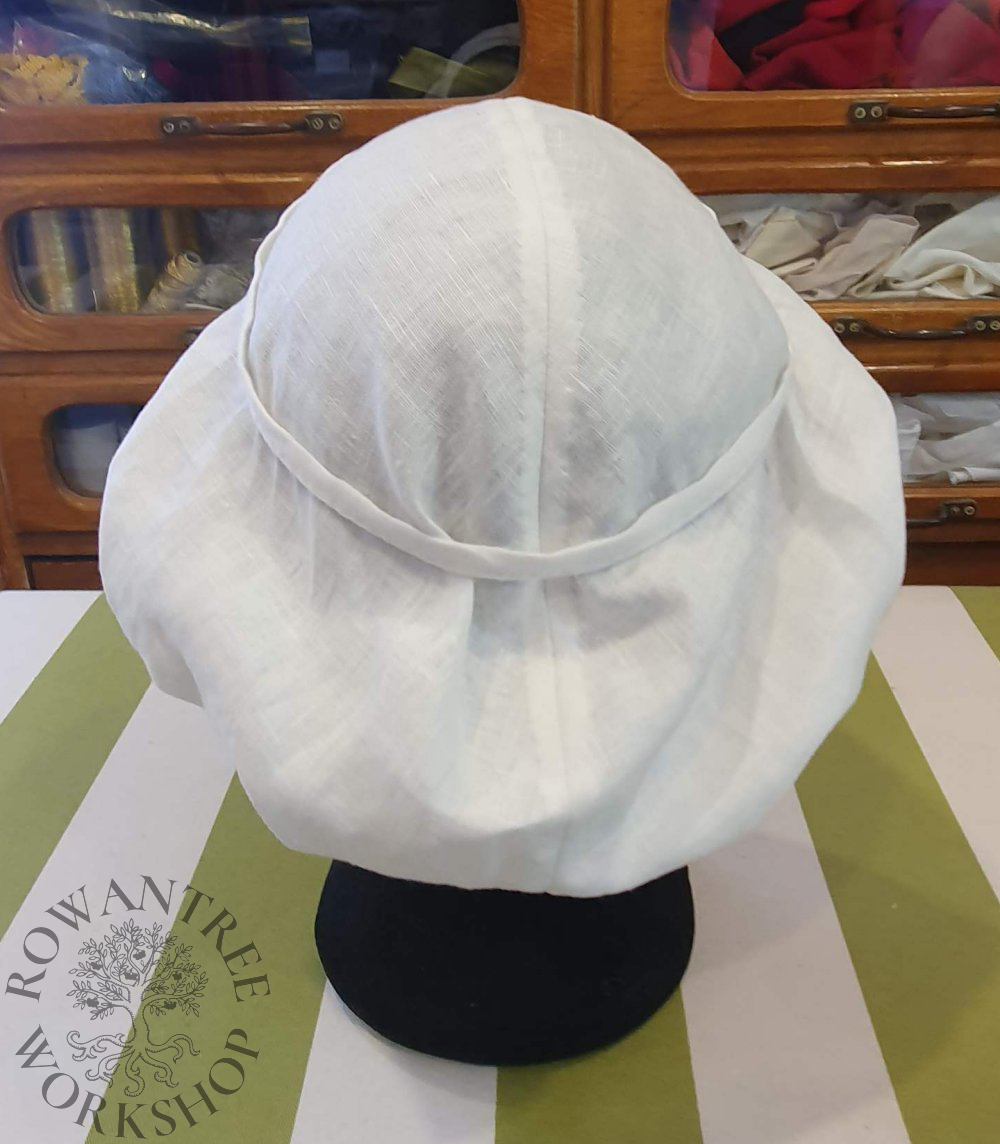
For this simple version of the cap, I’m doing a plain seam and binding, without the embroidered embellishments. I cut the main pieces, binding strip and tie strip from fine linen:
- Sides: 2 of 24 x 27cm, rounded as per image below( this size will fit most women)
- Binding: 4cm x 54-59cm (depending on head size)
- Tie: 30mm x 1.1m – 1.4m (depending on head size). Or use a length of 5-7mm twill tape or similar.
I suggest making a test version in scrap fabric to get the right size. One option is to try it out on a padded headform,
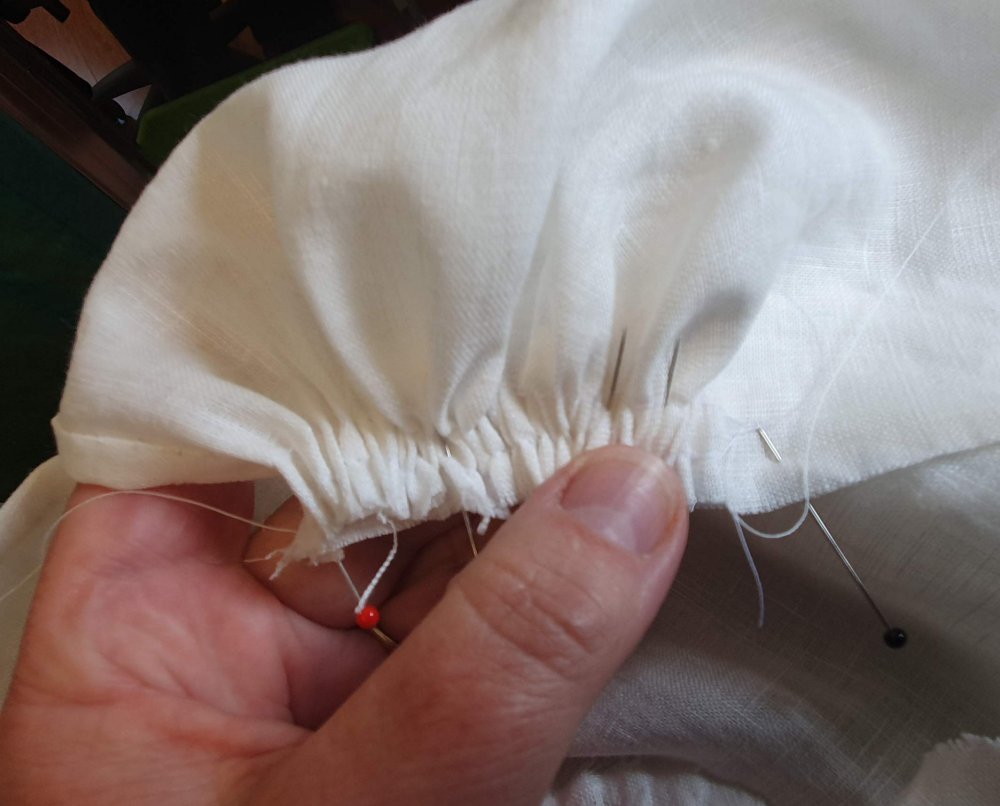
I sewed a 1cm curved seam from the centre front, leaving a 7cm slit at the base, and then felled both sides of the seam down with fine linen thread.

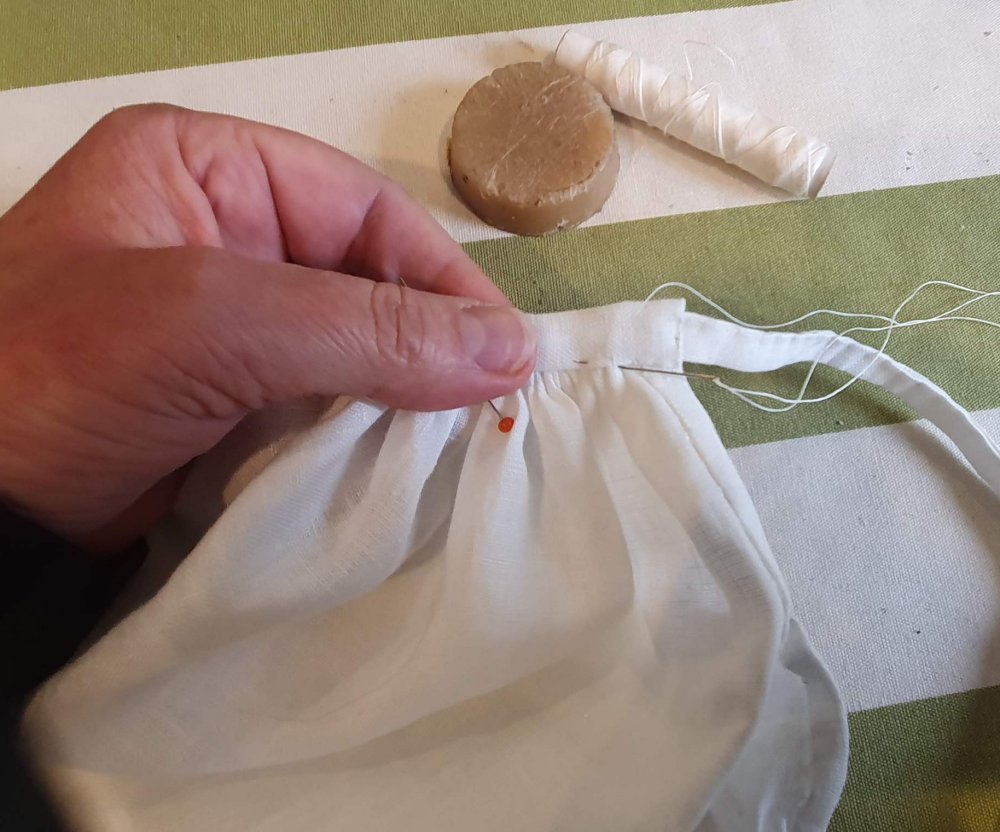
I ran a pair of gathering threads along the base sections, and up the front 7cms. I turned in the ends of the binding strip and pinned them to the open seam at the back of the cap, right sides together. I pinned the middle to the centre seam, then pinned the binding down to the top of the gathered section on each side.
Finally, I gathering the base of the cap to fit the remaining sections of binding. Then I sewed the binding strip to the edge of the cap, making sure the gathers were well secured (if hand-sewing, use back-stitch).

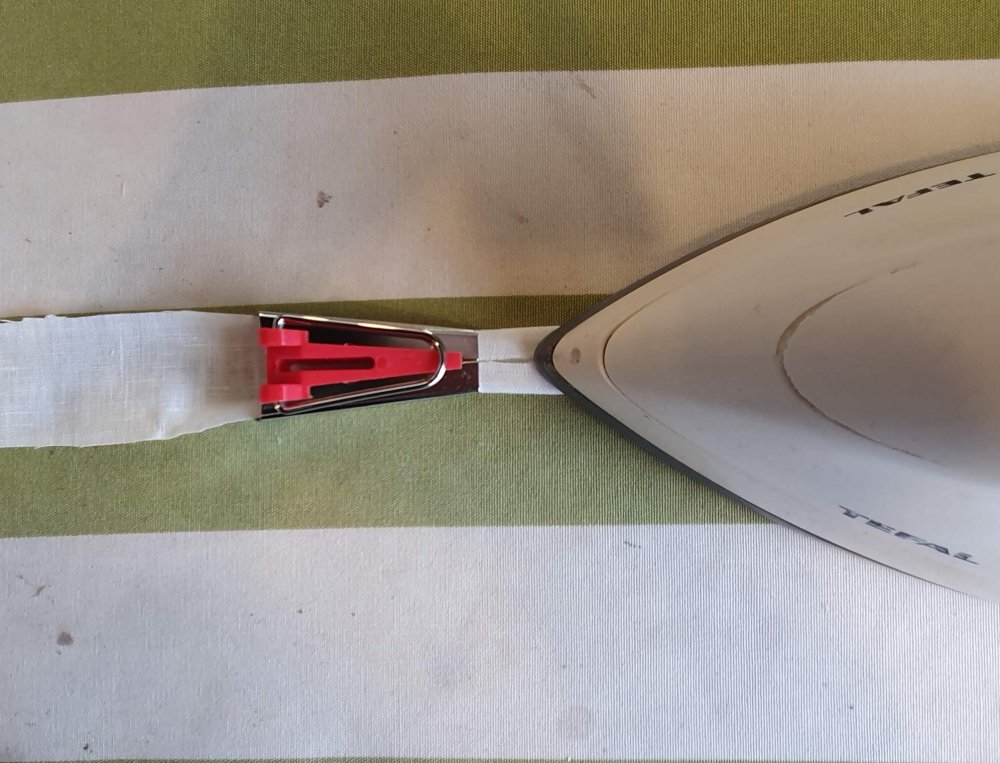
For the tie, I folded and ironed the strip using an 18mm bias-binding maker – an easy way to get an even, narrow strip. I folded it in half and sewed the long edge (fine twill tape works well as a quick version tie).

I sewed the tie into one end of the edge binding, then turned the binding and slip-stitched it to the back along the seam, leaving the other end turned but not sewn closed. I tried on the cap and adjusted the length of the tie (see Wearing the cap below), then trimmed and sewed the end into the open end of the binding.
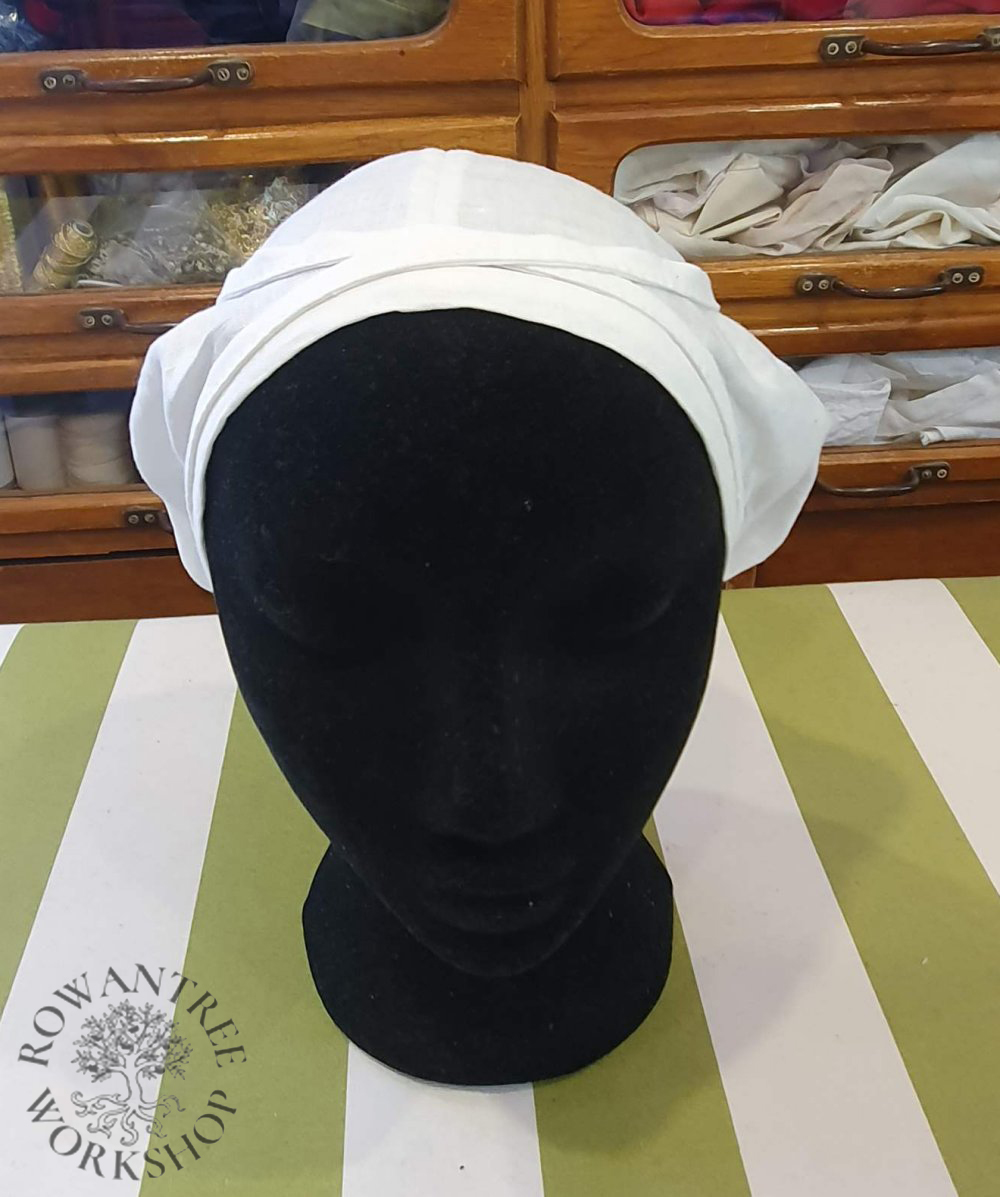
Wearing the cap
To wear the cap, you cross the ties at the back, bring them to the front and cross again, then push the remaining loop firmly down around the top of your head.