

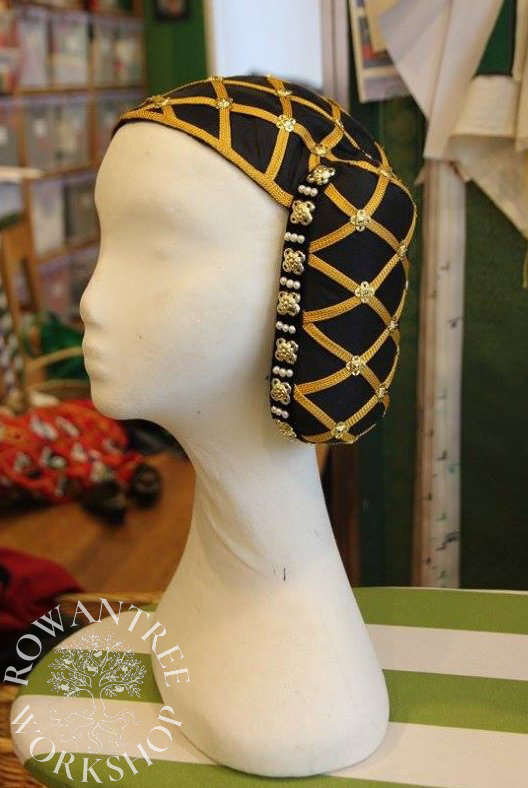
A noble woman’s netted headdress, known under various names – crespine, crespinette, caul or tire.
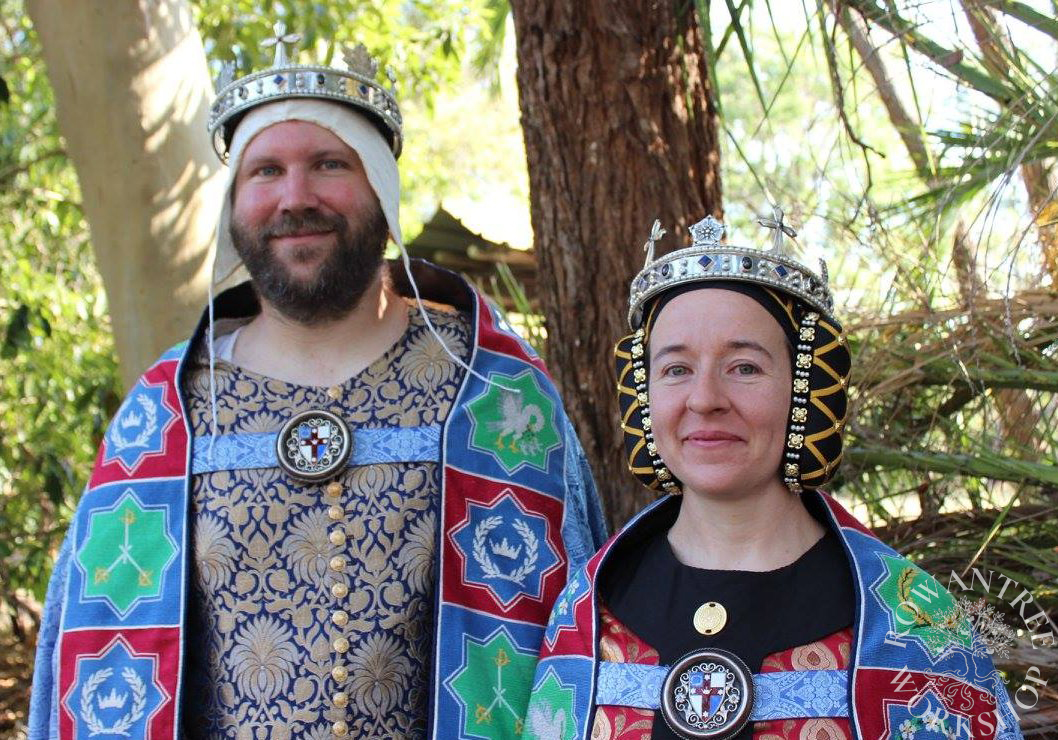
I was asked to make this headwear for my friend Tailltui, to complete a royal 14th century outfit. It needed to be luxurious, lightweight, cover all of her hair (often coloured) and be wearable alone or under a coronet. Her preferred colours were black and gold.
Research and Design
I was given the first image by way of inspiration – a late 14th century French sculpture of Isabela Bavorska. I found some related images – including some wonderful pictures of the back of the same scupture!
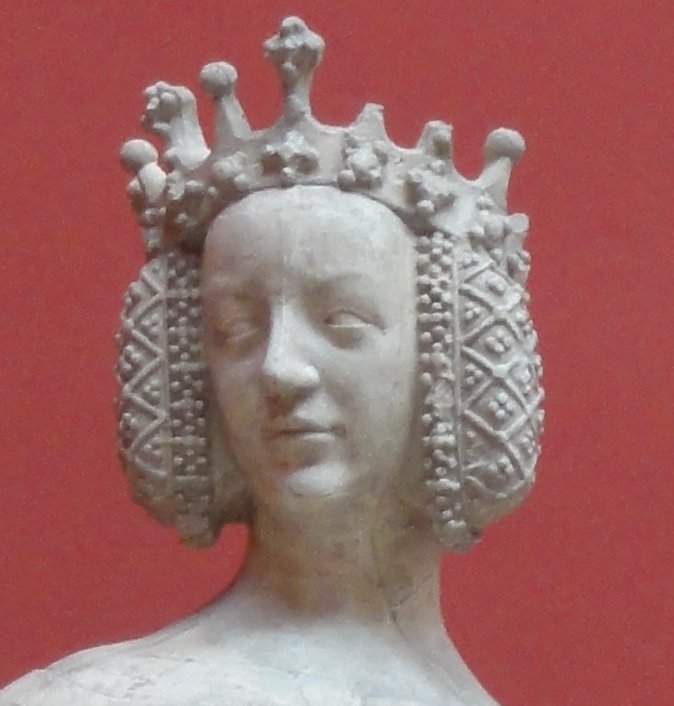
Source: Wikimedia
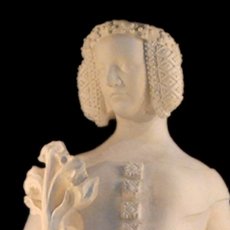
Source: Wikimedia

Photo: LTC Peter C Barclay
This headdress would be perfect – covers the hair, rich to look at, could be worn with a crown…
The back view shows how smoothly the fabric of the headdress flows from covering the crespinettes on to the back of the head. In this example, they were not separate covered elements, but integrated into the whole.
The headdress is covered by a substantial caul, which varies to adjust to the shape of the head. The intersections are decorated and the spaces between hold a set of four dots in a diamond pattern.
I interpreted this as a caul of braid laid over a silk foundation, with decorative mounts on the intersections and groups of four pearls in the spaces.
Construction
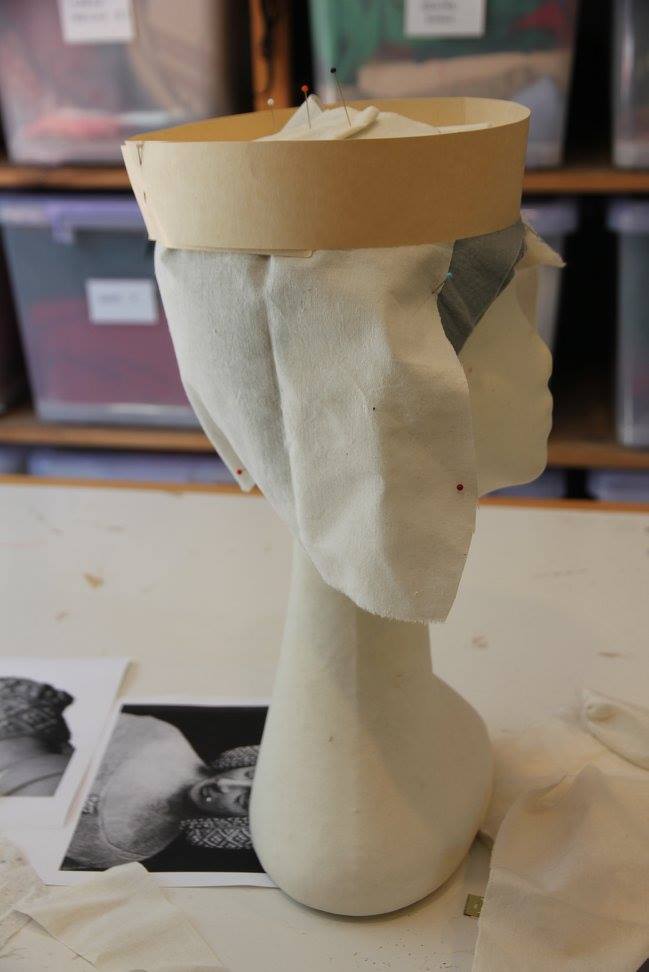
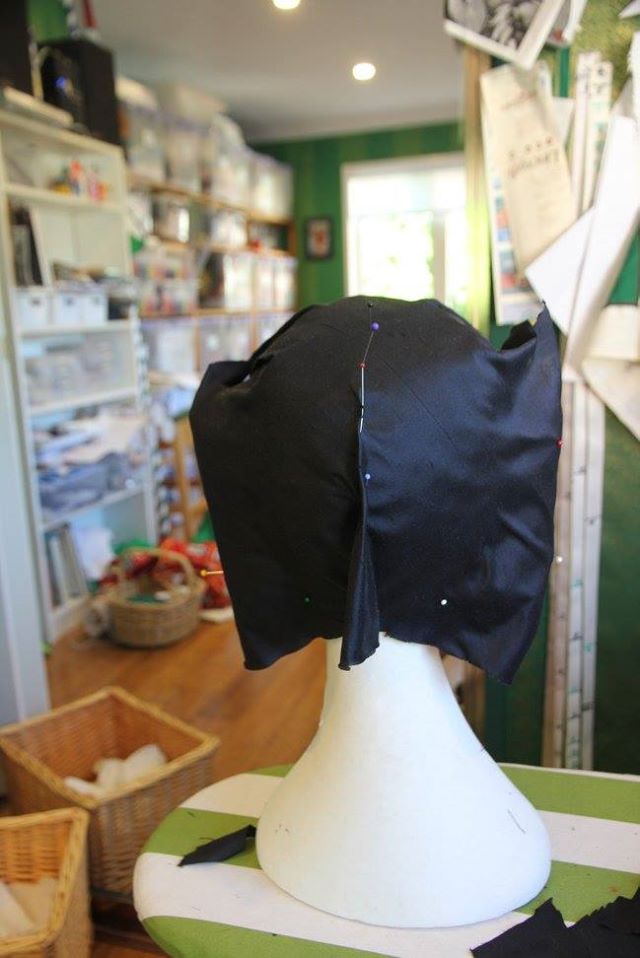
I started by padding up my tall headform to the right size. I mocked up the crespinettes in 3D to establish the size and proportions – and how they would work with a crown. I draped scrap fabric over this to try out options for making the cap.
I thought a lot about how to support the crespinettes. Thin leather with rabbit skin glue, pasted paper, wire mesh, stiffened felt… In the end I decided that millinery buckram (canvas with water soluble glue) would be the lightest and reduce hearing the least.
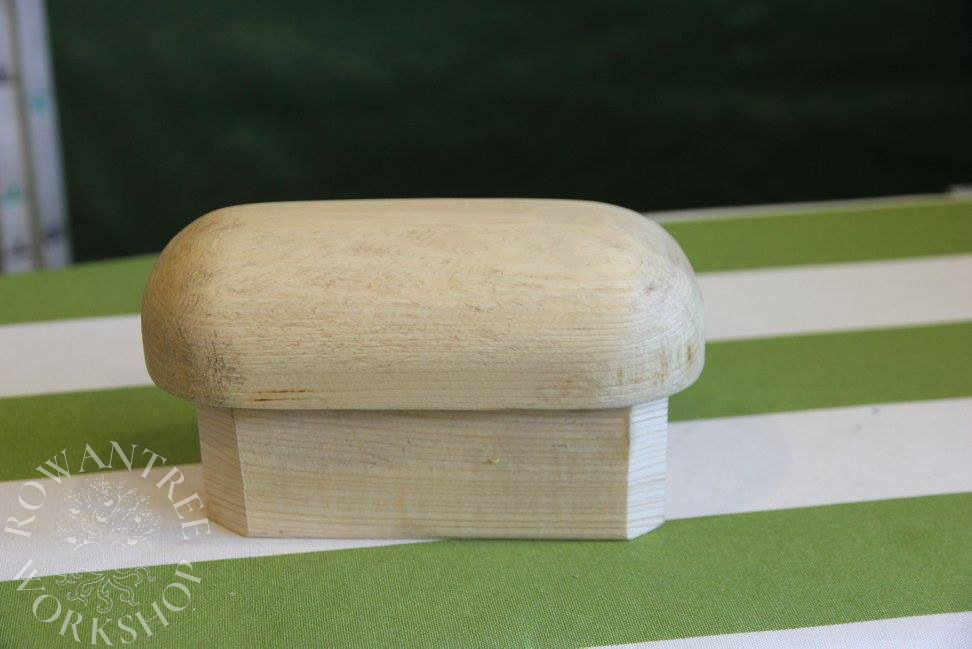
I needed a mould in order to shape the buckram for the cauls, so I spent a few hours making a one out of scrap timber. I roughed it out with the dropsaw and bandsaw, then shaped with drawknife, plane and patternmaker’s rasp. Then varnished to make it waterproof.

I wet the buckram and stretched it over the mould, let it dry overnight and then trimmed it. I shaped millinery wire around the wooden mould to ensure it was the right shape and size. Millinery wire is tough and springy – you must shape it completely before you attach to the buckram , or it will distort the shape.
I sewed it to the edge with glovers stitch. Note the large overlap on the wires, to ensure the shape stays stable and the ends don’t poke out.


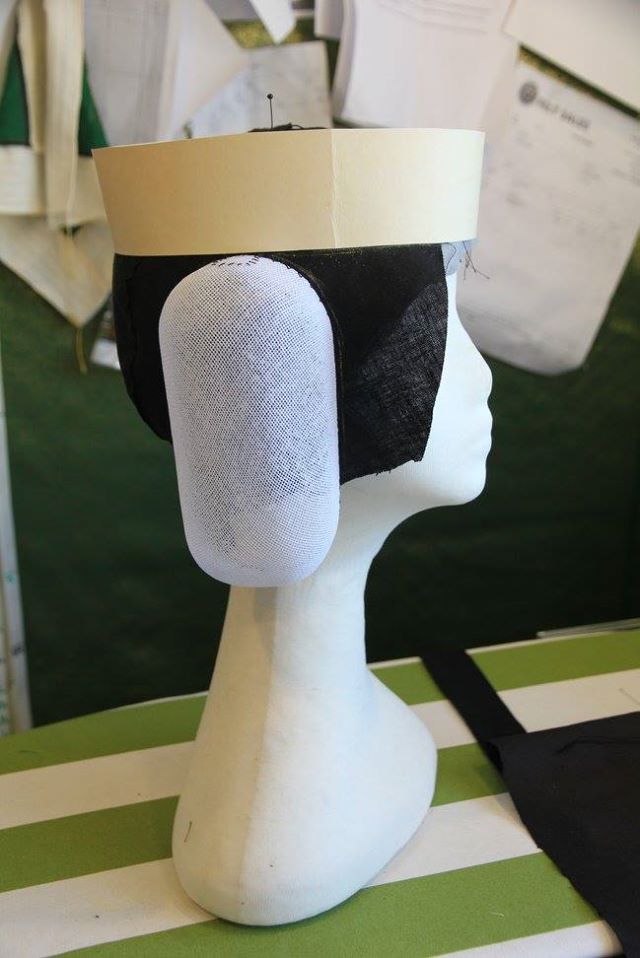
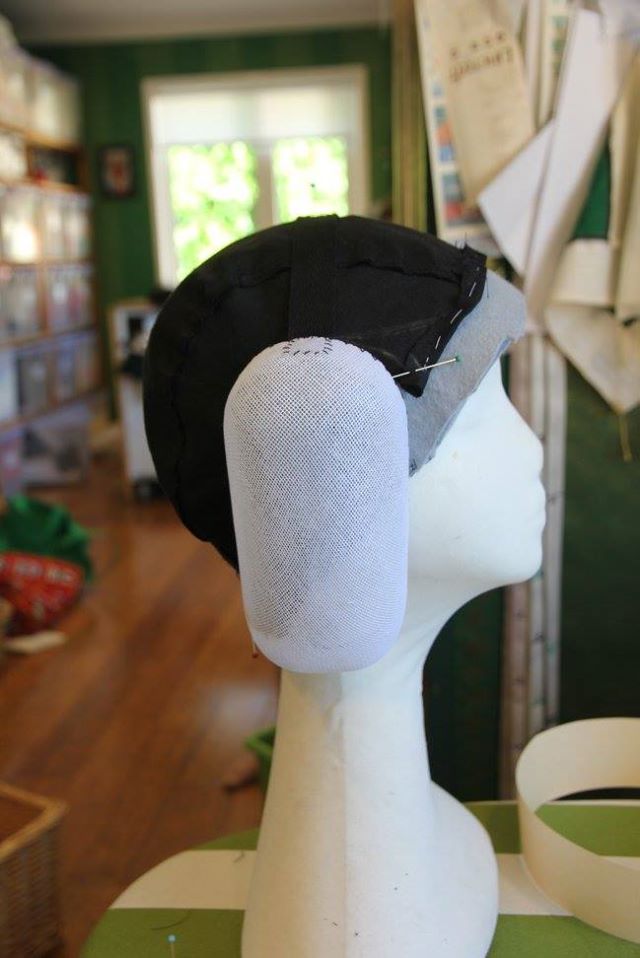
I made a 3 piece lining in black linen, and put this on the headform, then pinned on the buckram shapes. I used a cardboard circlet to check if they would sit properly, and adjusted the height. I sewed a piece of twill tape between the tops of the shapes to avoid any stretching, then sewed this to the linen lining.
I trimmed the lining back to the edge of the shapes and inside them, sewing them to the lining.I finalised the shape at the brow and nape, and basted up a hem on the lining.
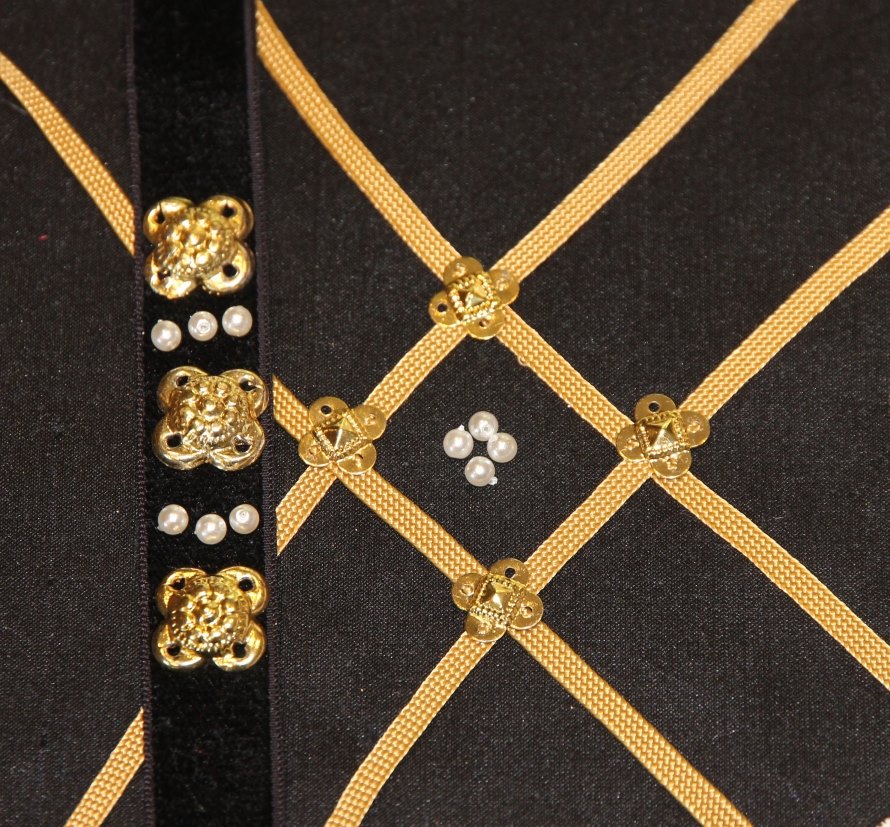
Now on to the fun part – trying out the decorations. I had some suitable gold braid – hopefully enough – which went well over the black silk taffeta. I had taken apart an Indian dancing headdress, which yielded 100s of ideal gold plated quatrefoil mounts in two sizes – large for the borders and small for the intersections. And the peals would lift the whole thing.
The black silk needed to lie smoothly over the side cases, so after making a rough pattern, I draped it on place over the headform, and pin-fit seams at the back and over the cases before sewing. I turned hems around the edge and sewed these to the lining.
I pinned on the braid, starting with the cases – the most visible sections. My aim was to hide the seams in the silk under the braids, where possible. After laying half the braid, it became clear I did not have enough! But I did have a heavier braid in a richer gold, which will do the job.
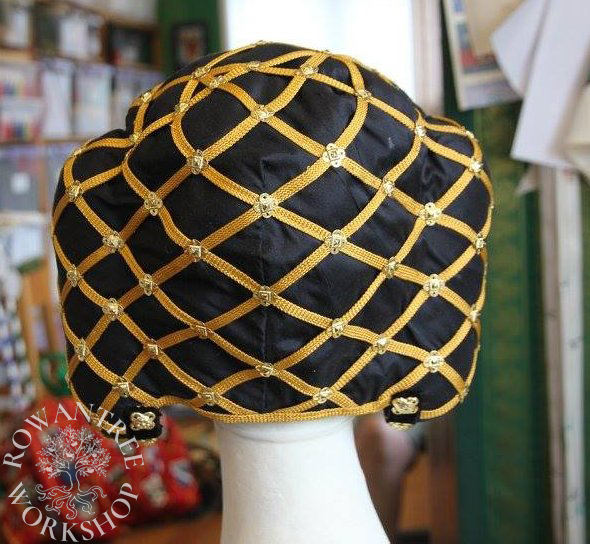
I laid out the braid again, starting with the cases and working both sides to keep it even. Once I had a section done, I sewed the braid to the base with matching gold thread. I took my time with the netting over the top – hard to get it even looking on such a complex shape! Then I sewed the small gold mounts over all the intersections.


To finish off the crespinettes, I sewed larger gold mounts to black velvet ribbon, with sets of freshwater pearls between, as seen in the statues. Then I sewed the ribbon to the edge of the cases.
Finally, I lined the cases in black linen, taking tucks as needed to lie smoothly in the shape.
I had planned to add a group of 4 pearls into every section, as per the original sculpture. but I realised it would add considerably to the weight and – more significantly – make it hard to wear the crown with any comfort So I left them off – the piece looks finished and rich without them.

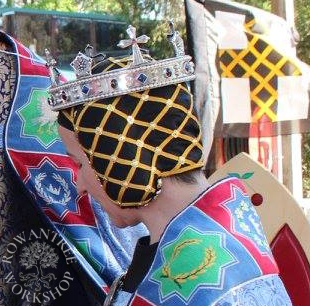
I was so happy with this one!
Tailltui was also thrilled with the result, and reported that it was indeed light and easy to wear.
Afterthoughts
Some time later, I made another version of this headdress in black and silver.