

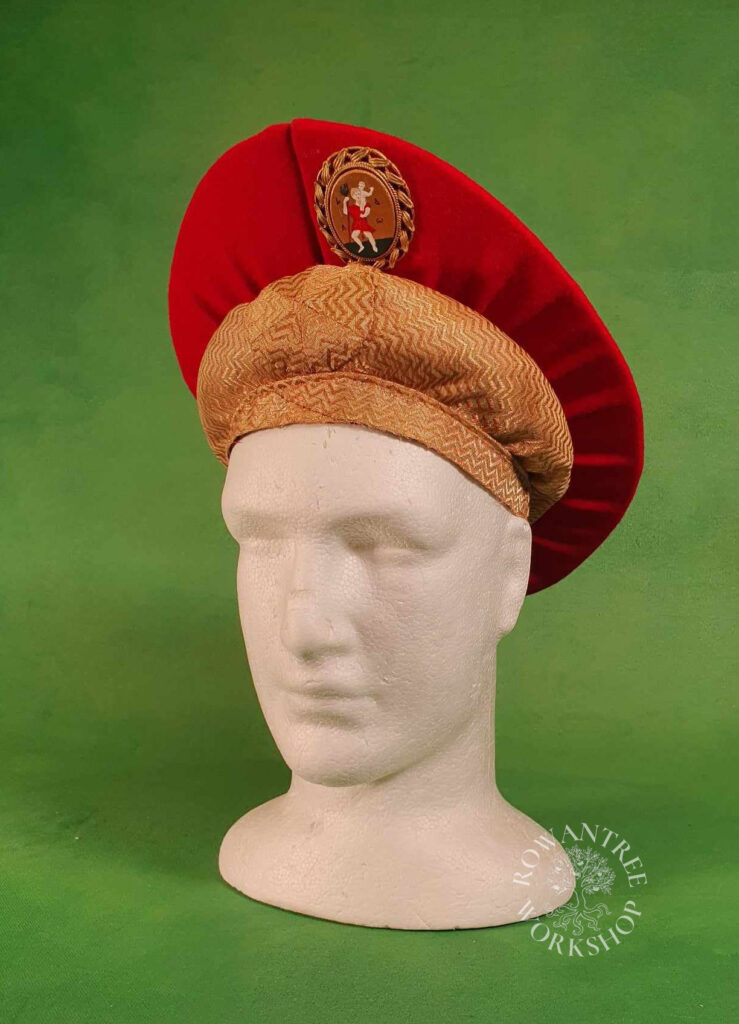
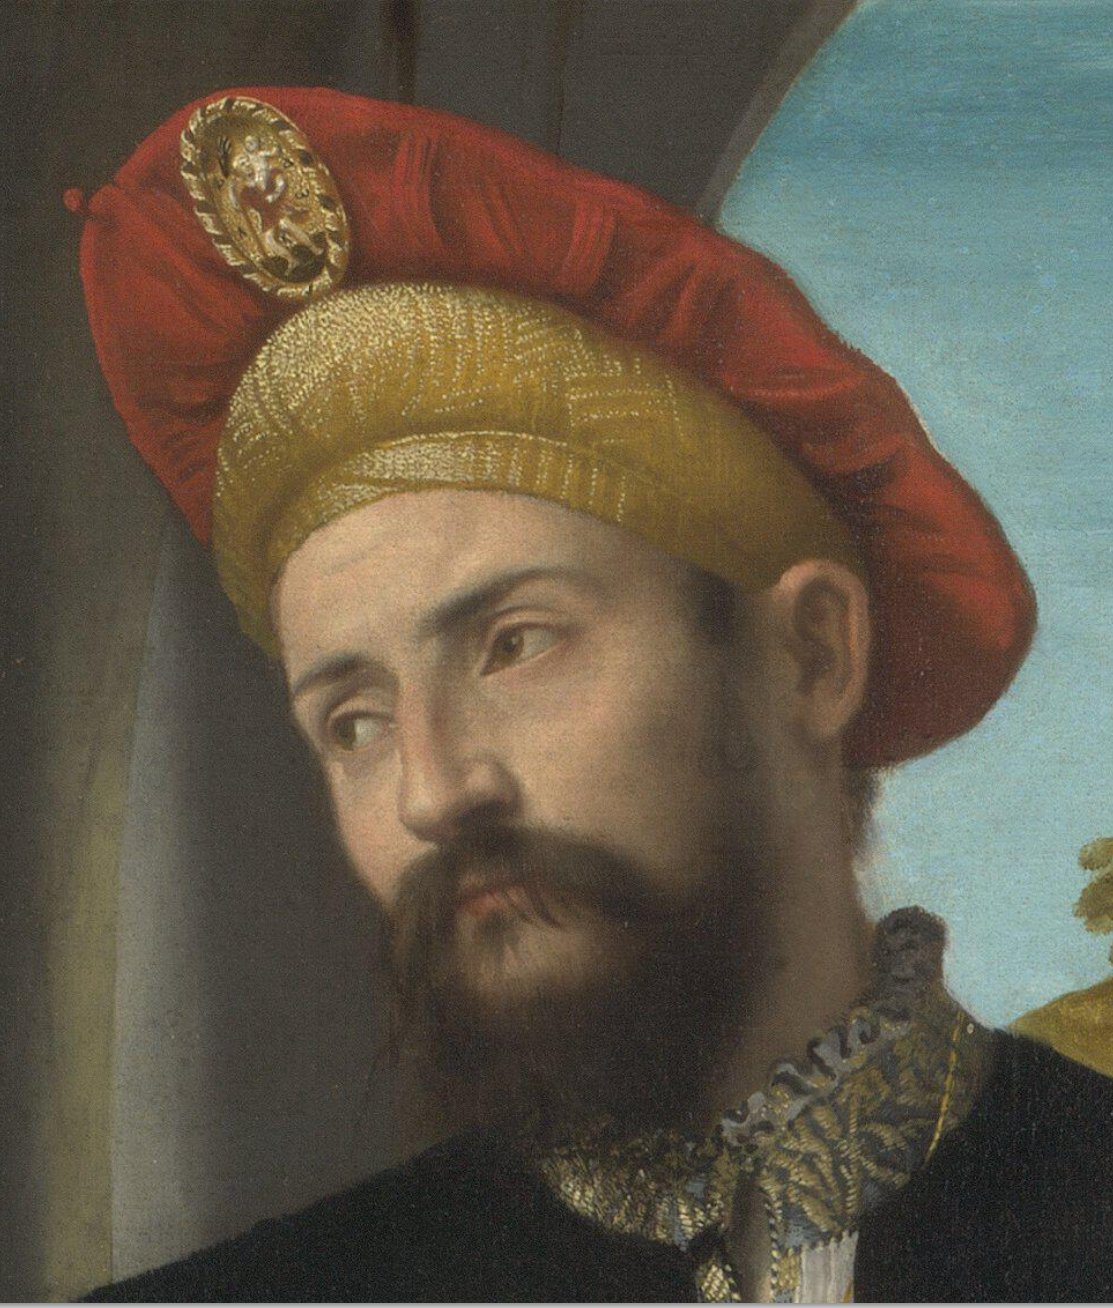
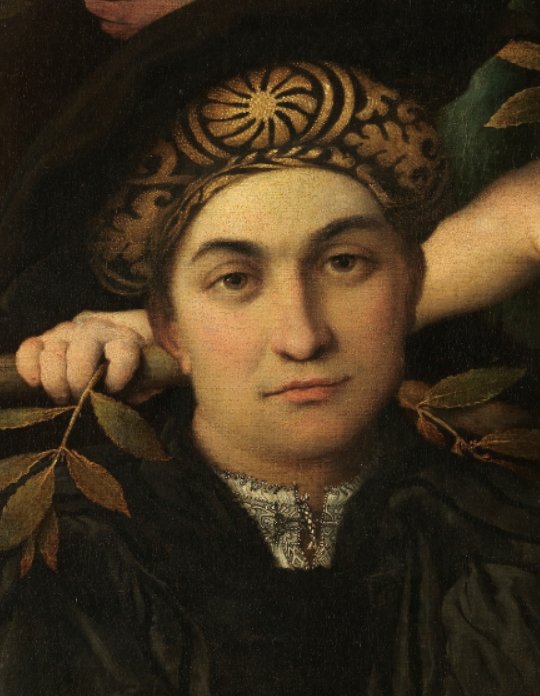
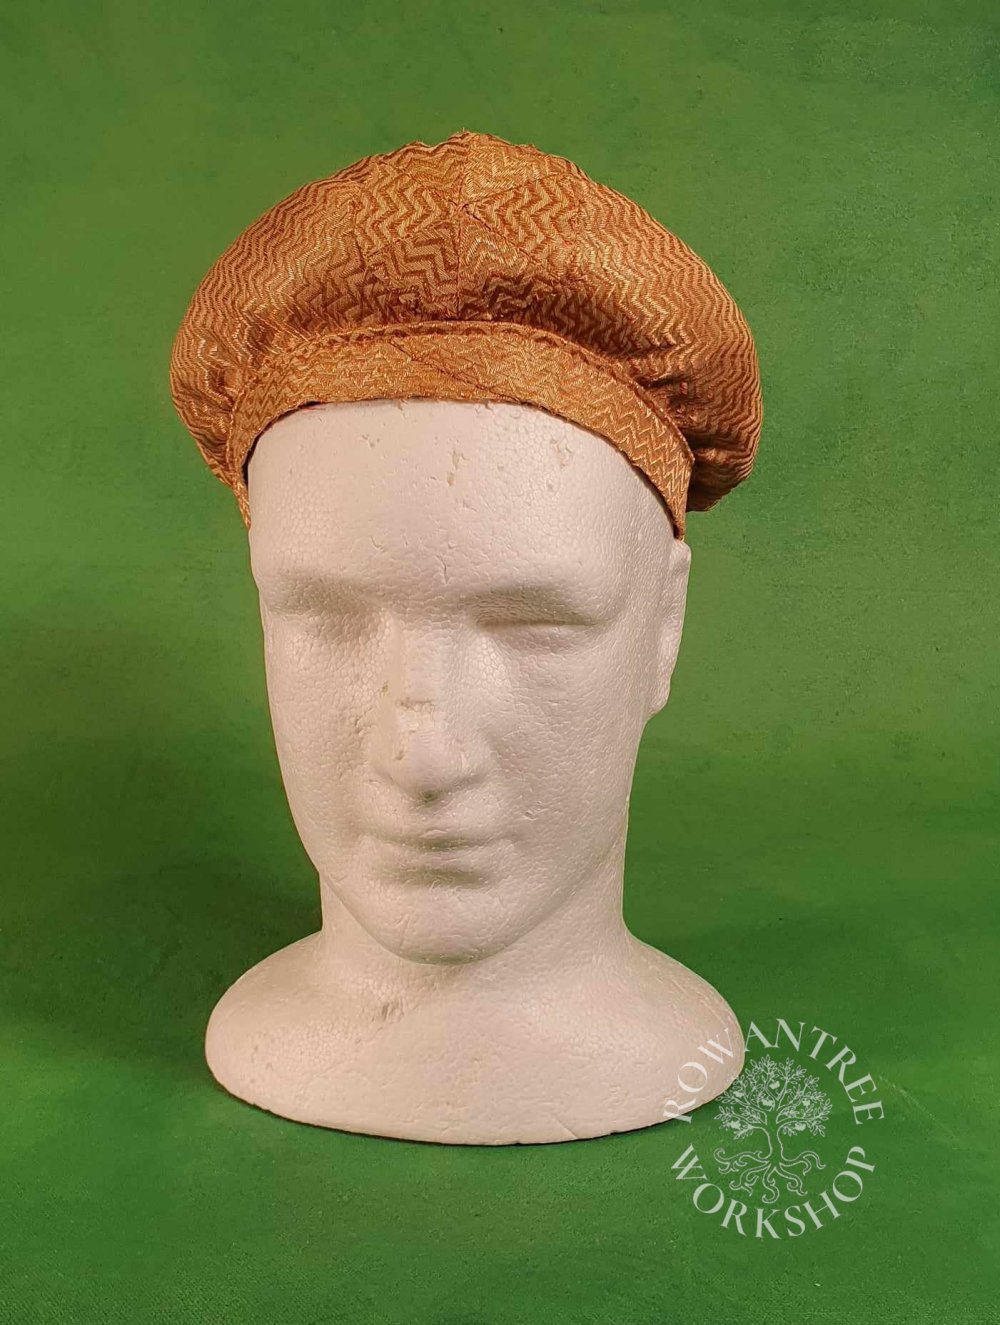
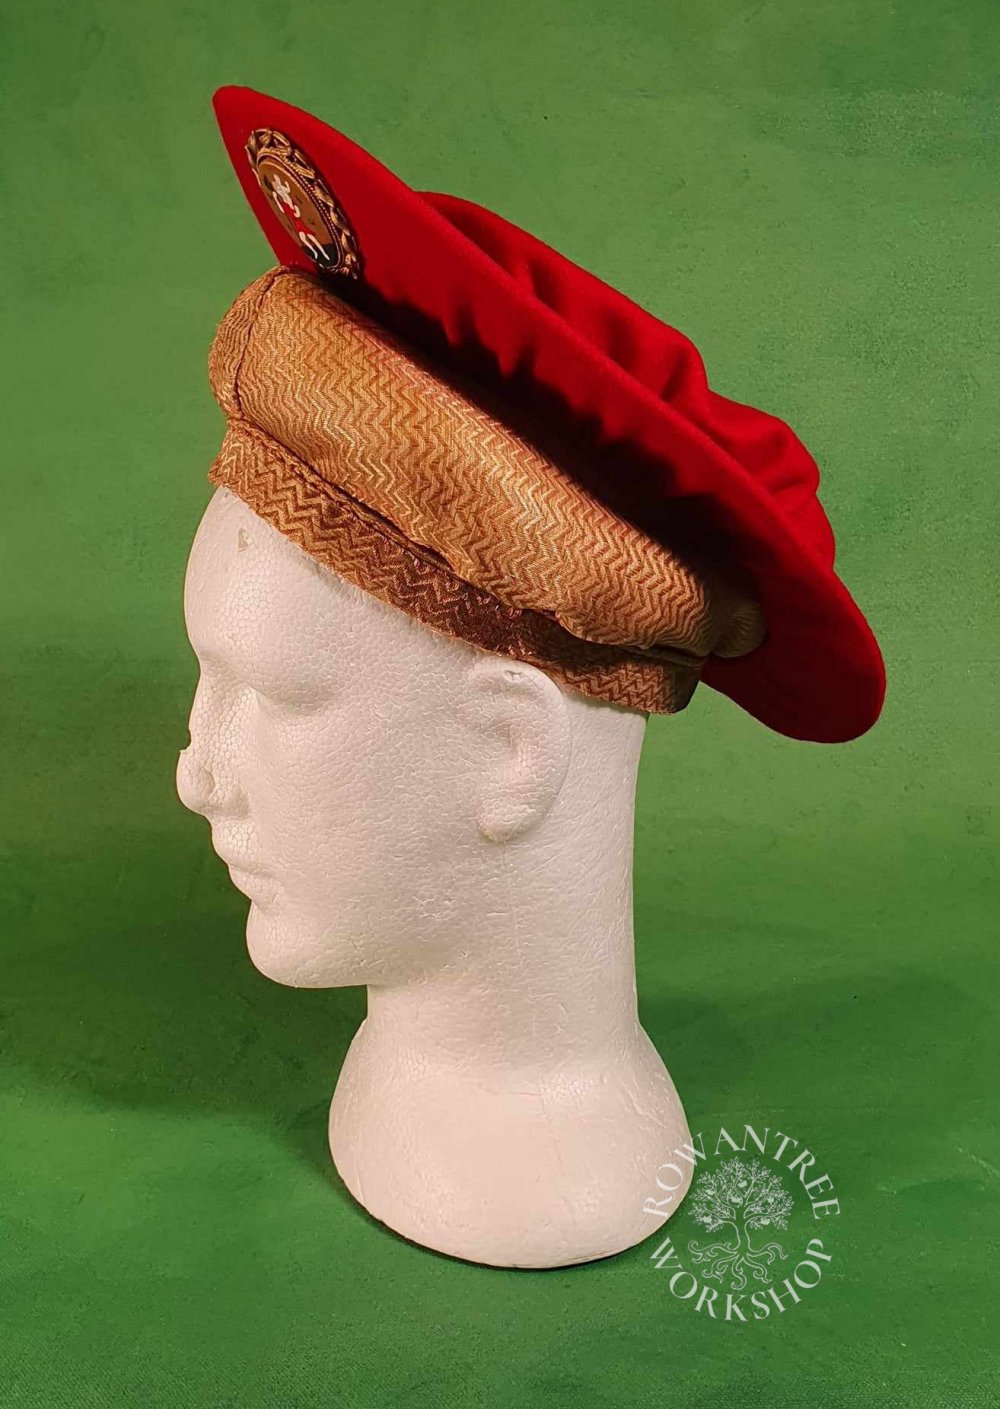
This hat is inspired by ‘Portrait of a Man‘ by Moretto da Brescia, depicting a young noble man wearing a gold balzo and red wool berretto.
This style of headwear was fashionable across Italy, Germany and Spain over the first half of the sixteenth century. The German terms for the two layers are haube and barett; the Spanish terms are rollo and benete.
Kit Hackforth won this Prize Hat some years ago, but took a few years to decide what he wanted…
Research & Design
Brescia is a small town in northern Italy. The National Gallery, which holds the Moretto painting, notes the “red felted-wool cap that was a speciality of Brescia. His enamelled gold cap badge represents Saint Christopher carrying the infant Christ“, so I looked to see if I could find any more information about this – or any other images of the style.
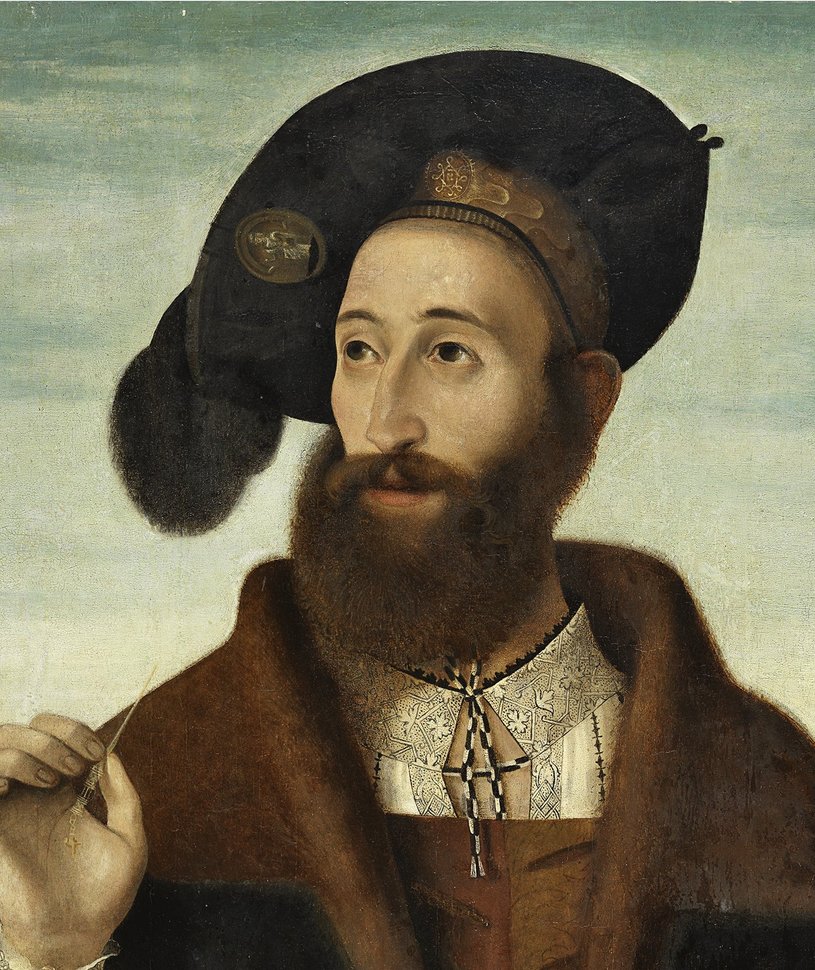
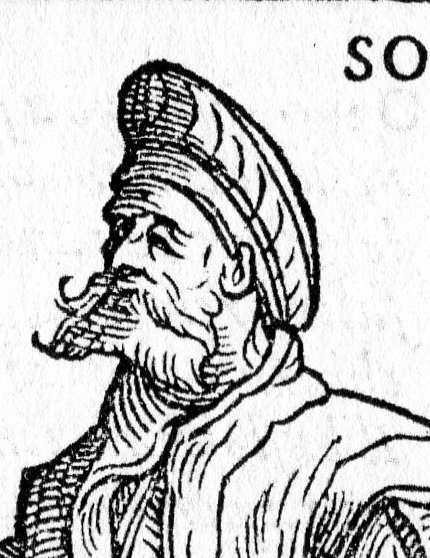
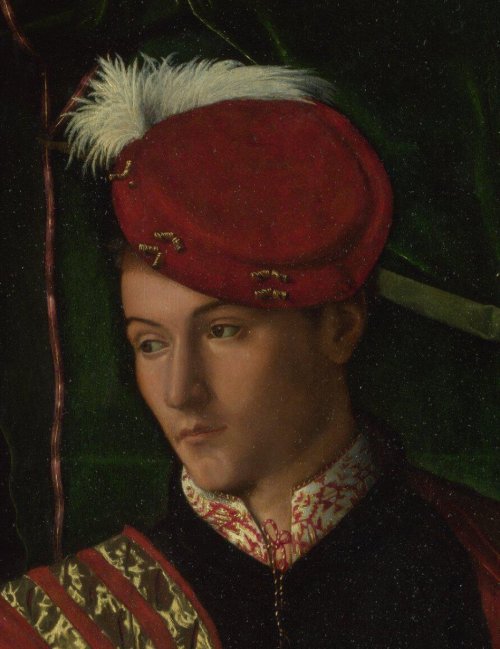
I found another similar combinaton in contemporary painting by Bartolomeo Venetto, although in black and with different medal. And a similar look with the peaked brim in the woodcut of a garrison soldier, in Vercellio’s Habiti Antichi et Moderni.
Versions of this style are also common in both Spain and Germany, although without the distinctive front peak.
Source: Thyssen-Bornemisza
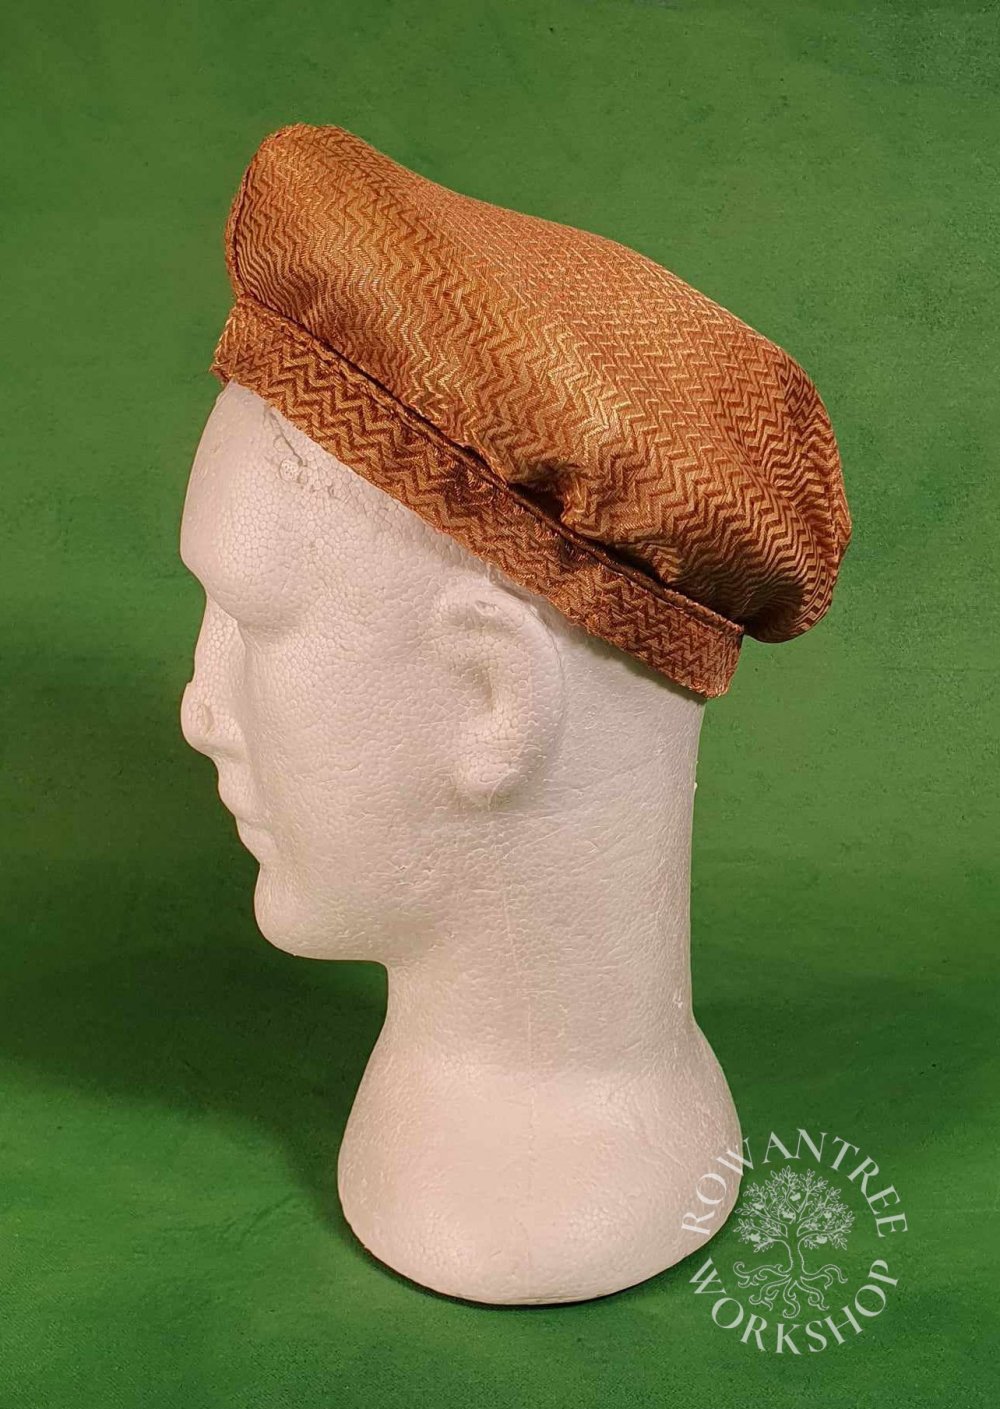
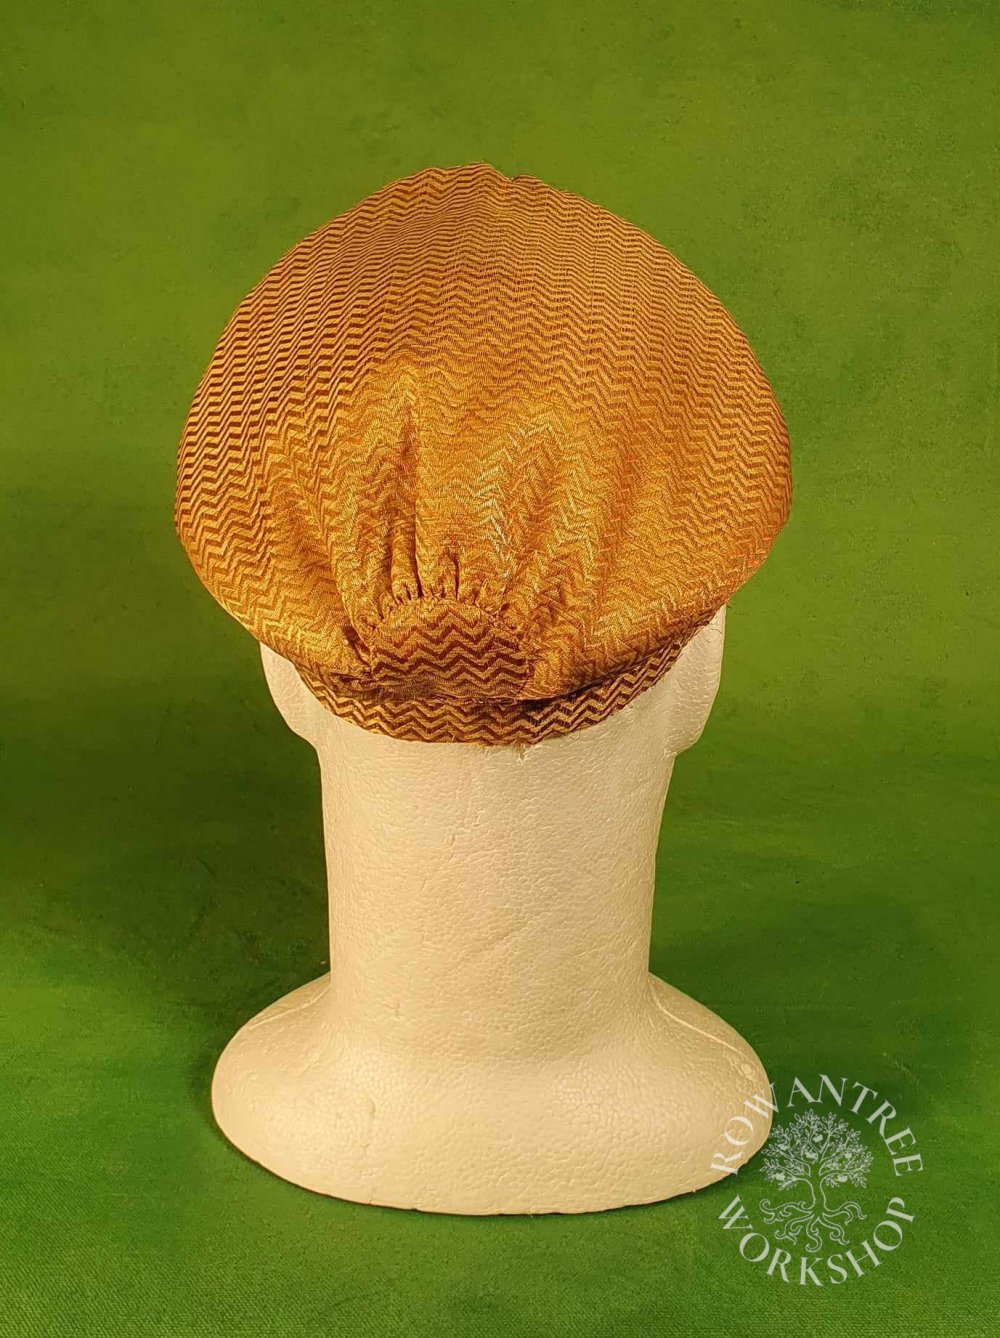
As is the case with so much 16th century headwear, this hat is made of two layers.
The base layer is the gold balzo, worn over a padded support to give the bulge. Balzi were made of many materials and techniques, incuding fabric, netting and sprang – this one looks like gold brocade. The bulge and central ‘star’ can also be seen in the painting by Lotto below, and in many Spanish and German examples (Zandler-Seidel (1990) notes the German term for these decorations as stern – ‘star’; I can’t find the Italian term).
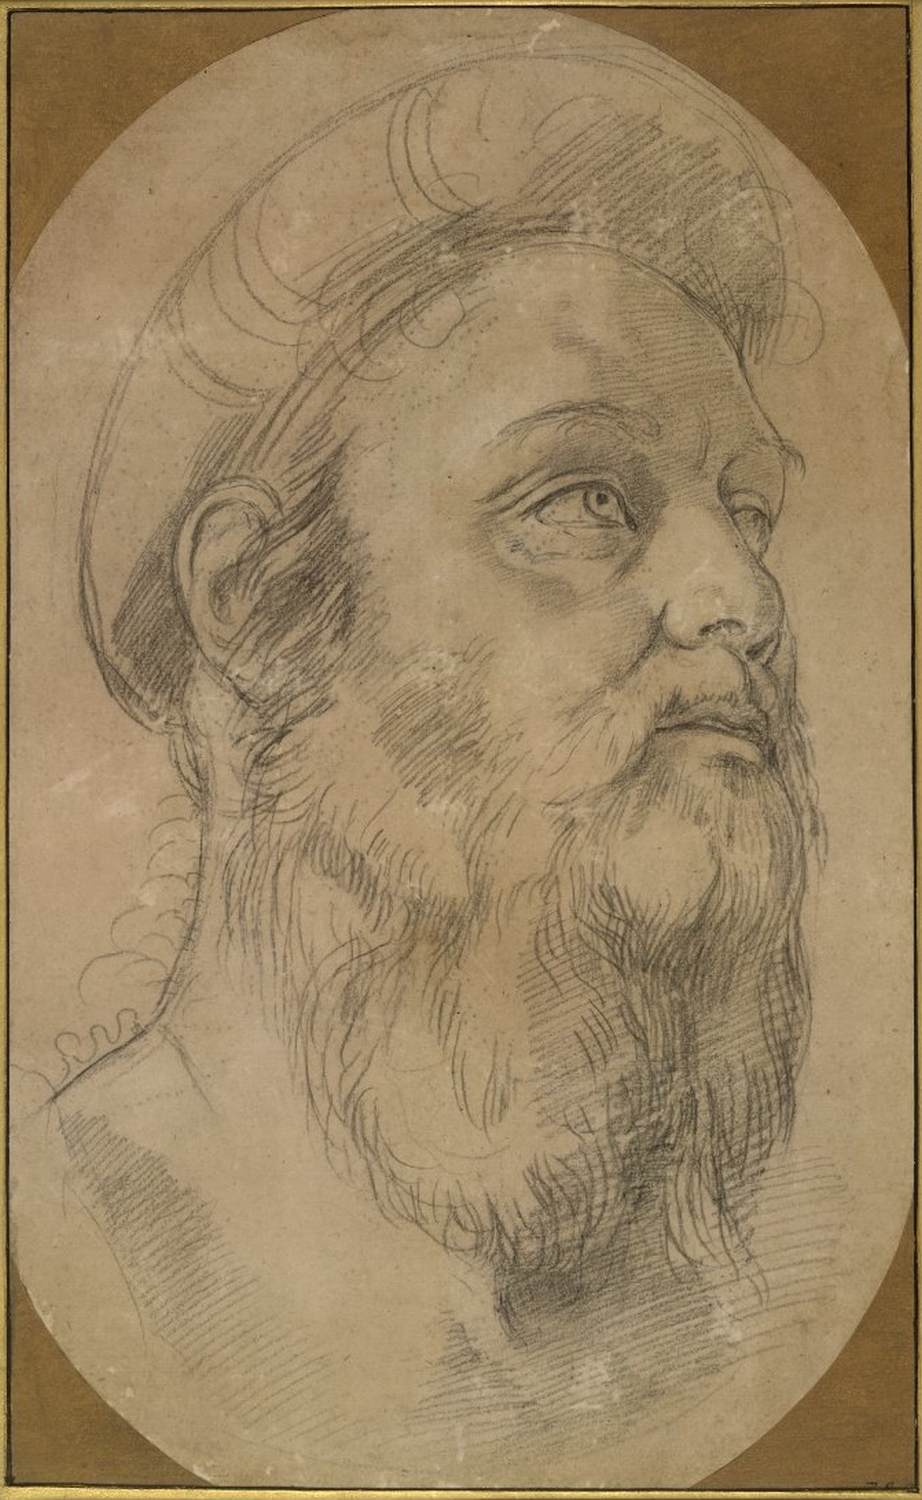
In the Moretto painting, the balzo is finished with a band wrapped up at the front, with a fine piping at the join. Another Moretto painting shows a more structured balzo with a distinct padded ridge as an external feature.
In all cases, the balzo/rollo/haube can be worn alone or in combination with other headwear.
Source: Prado
Source: British Museum
Source: National Gallery
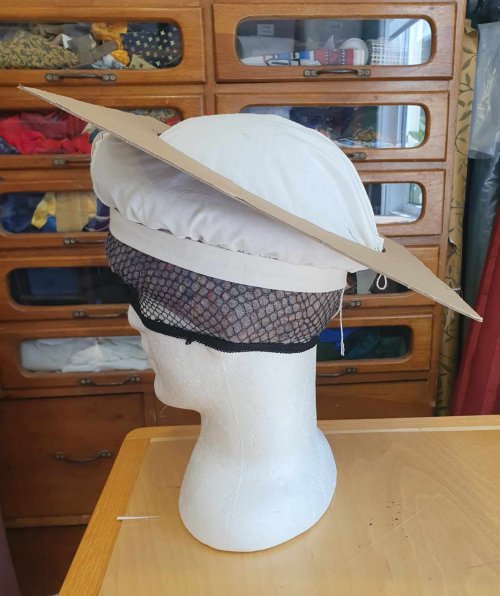
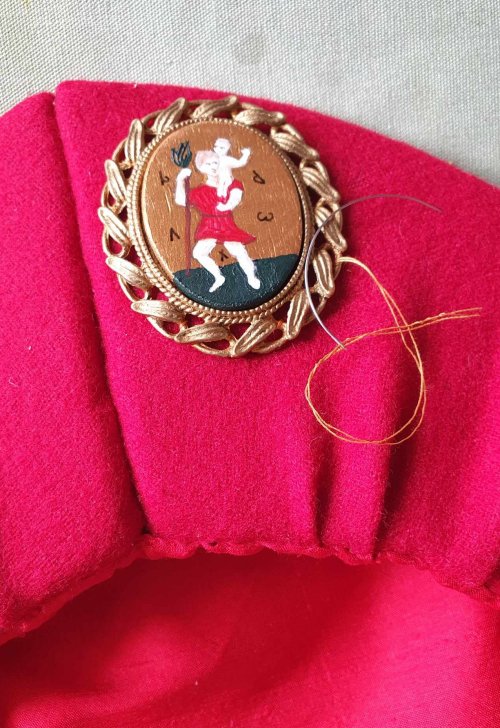
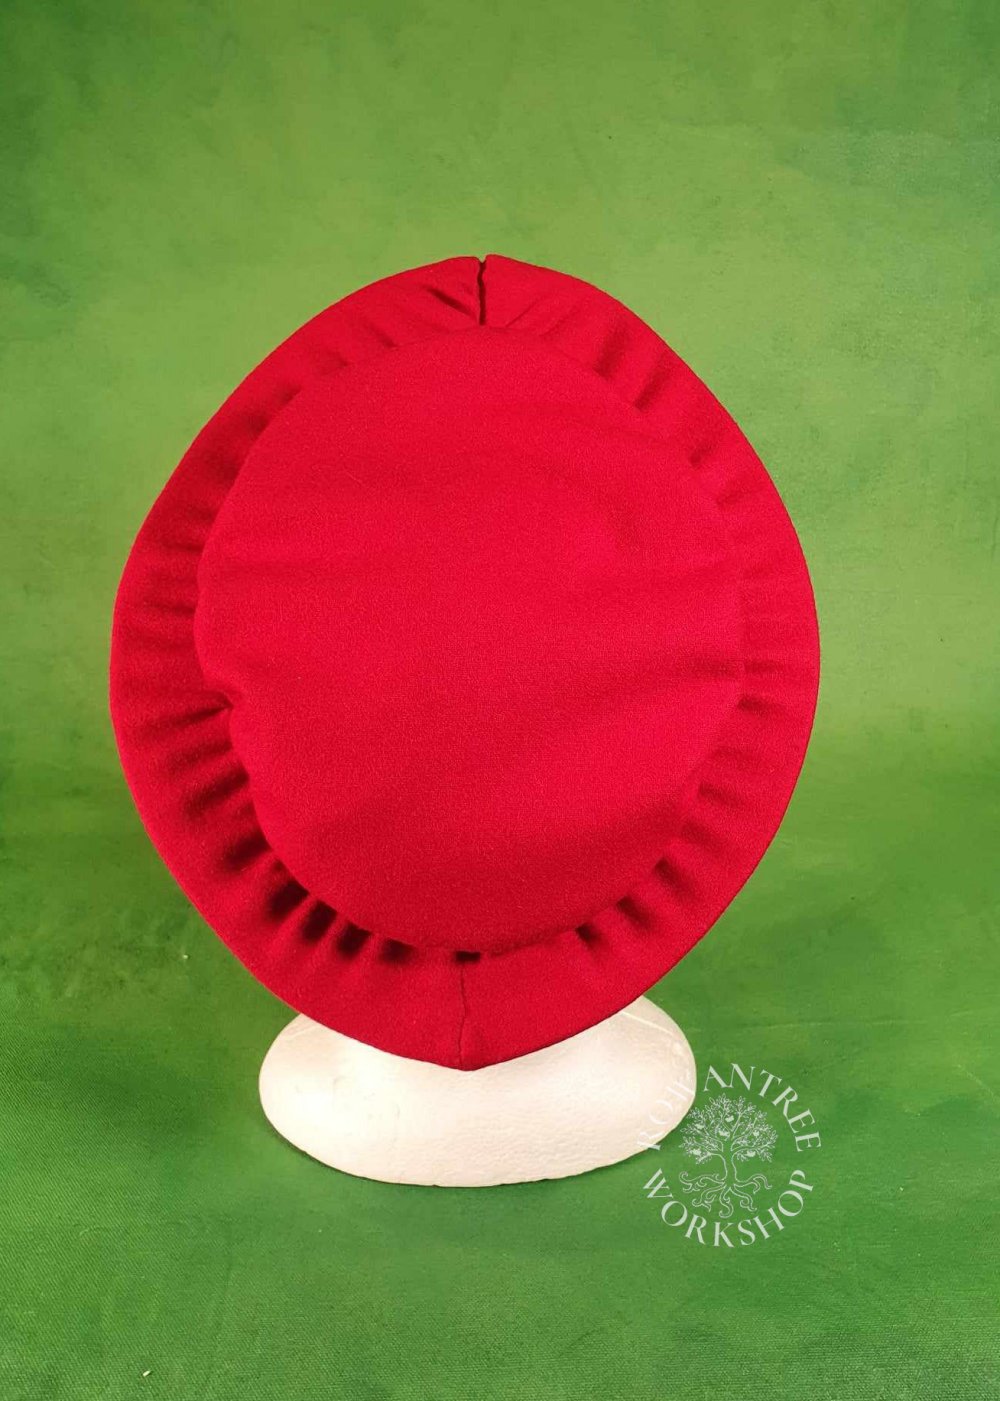
On top of the balzo, is the red wool barretto. Again, it is similar to the German and Spanish versions, with a stiffened brim and a soft crown. In Moda a Firenzo, Landini (2011) describes similar Italian hats made with felt or parchment to stiffen the brim.
The Moretto portrait clearly shows a peaked stiff brim wrapped in red wool, gathered in to the headsize opening, with the St Christopher medal at one side of the brim split. The crown itself is not visible, but contemporary hats show a simple gathered crown – more like an English flat cap than the structured German Baretten, as can be seen in the portrait of Ludovico Martinego above (although this one looks knitted).
My plan was to try and make the hat as close as possible to the one in the Moretto painting.
Although I could have built it into the balzo, I decided to make a removable padded roll, so this could be washed if needed (heads can get very sweaty). I had some nice heavy linen which would work well, and my friend Mathilde gave me some carded wool for padding – her failed dye experiment was ideal for the job!
I had some lovely red wool to cover the berretto, but nothing suitable for the balzo and I was having no luck sourcing online. My friend Ursula offerred some gold and silk brocade which looked wonderful – although very stiff, which was going to be a challenge.
Construction
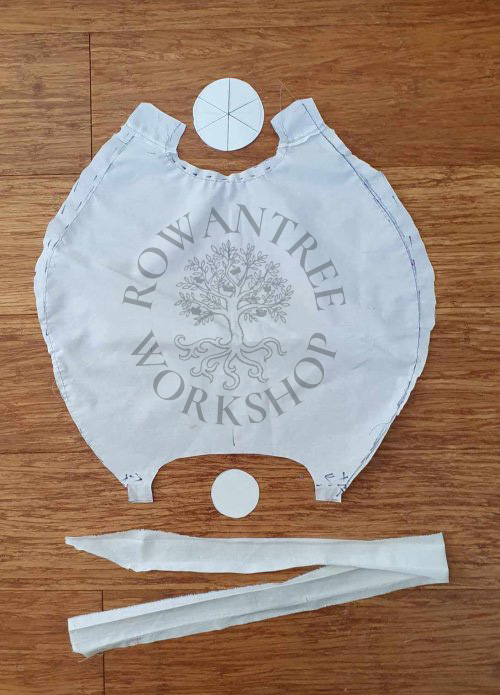
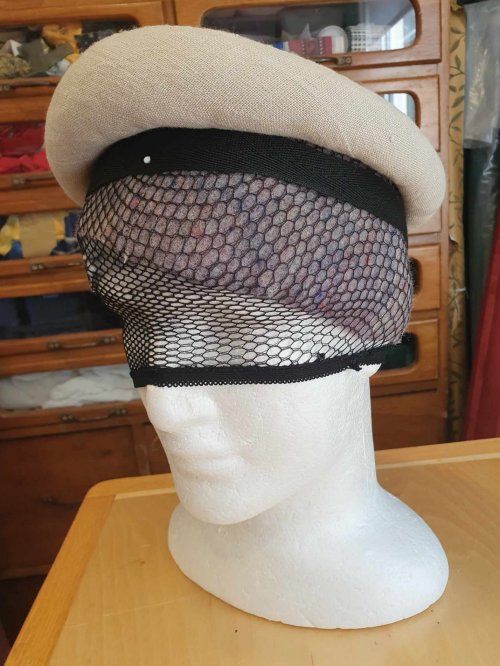
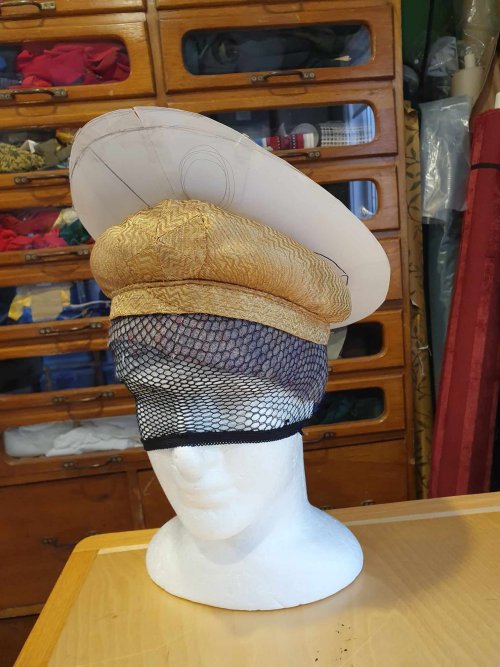
As always, the first step was to pad up a headform to the right size, to use for my patterning and mockups.
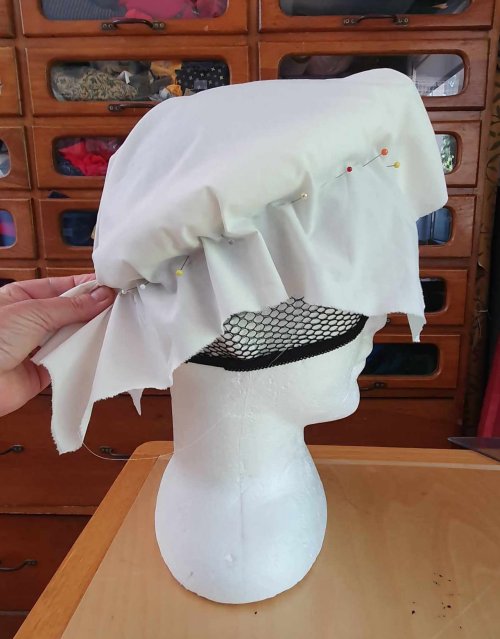
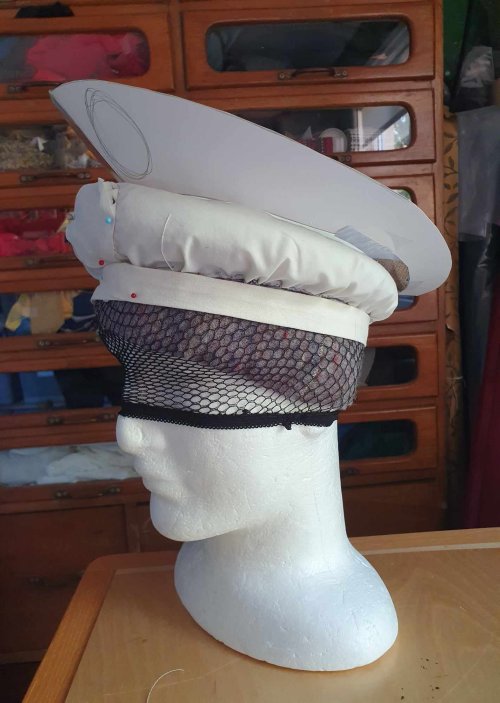
I made up a temporary padded roll in synthetic fleece as a base, and then tried a first version balzo using the haube pattern I had made some years ago. It did not really work – the padded roll meant the sides had to be gathered, yet the front needed to be smooth.
Take 2 – I used scrap fabric to drape over the roll, trying to reduce gathering. I ended up with the front gathered into a circle – where the front decoration would cover it! The simple back gathering seemed to work well enough, so I left it until I could finess the pattern once the padded roll was finished.
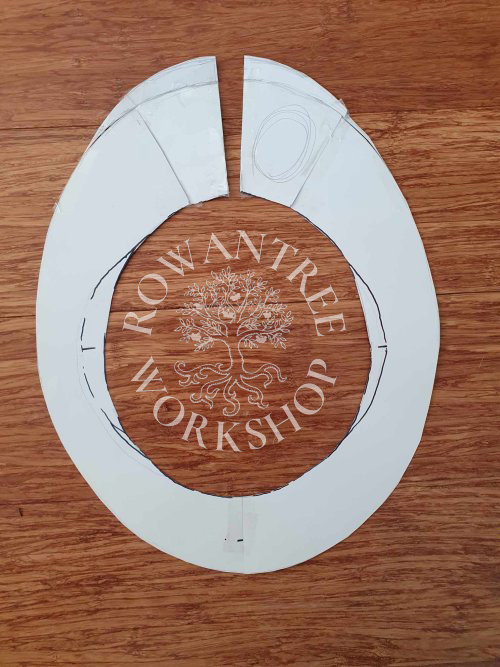
I checked my cardboard headsize templates to see which was the right size. The berretto started as a flat oval pattern with a deeper front brim, which I cut and taped to get the front lift. Version 1 had too much lift – I’ll have another go once the balzo is built.
The patterns will need to be refined for each layer, but this is enough to get started….
Balzo
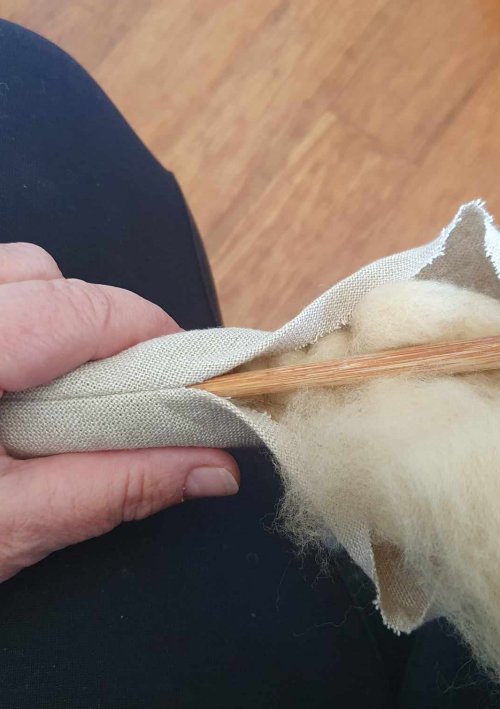
The first step was to make the padded roll. This would be firmer than the mockup and smoother in shape.
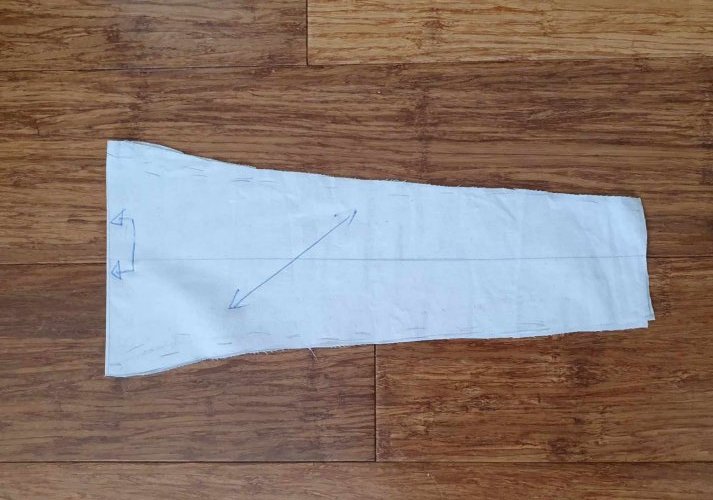
Laying my mockup roll onto scrap fabric, along the true bias, I pinned along the roll and then trimmed the excess. I tried it on the headform to check it still fit, then unrolled it and averaged out the shapes to make a symmetrical pattern.
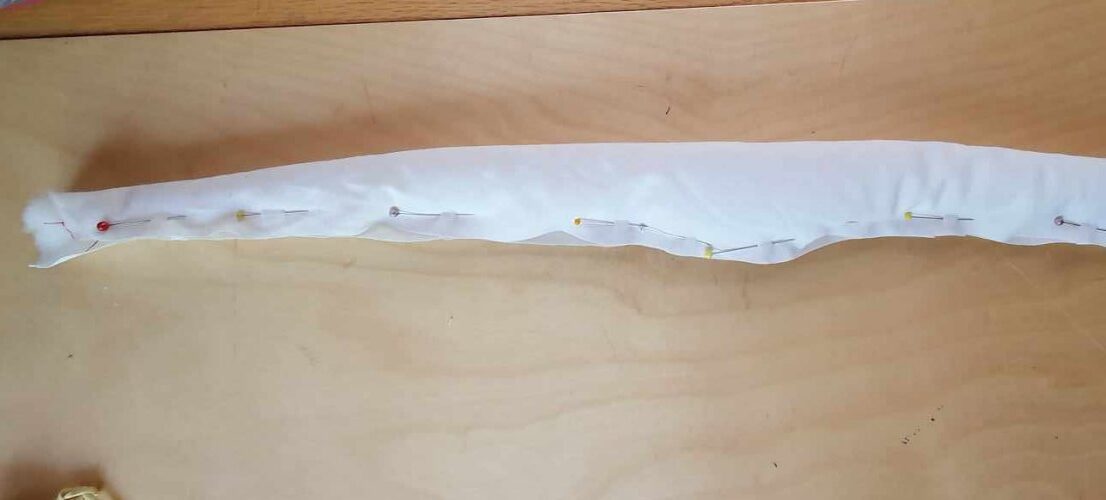
I cut the roll cover from soft heavy linen, adding a little at the ends as insurance. I sewed the seam from each end with straight stitch, leaving a gap in the middle. The straight stitches ensure the seam will go to the inside, since it can’t stretch.
I stuffed the roll with carded wool until it was firm (but not hard), then sewed up the open seam. I tried it on the headform again, trimmed the ends to length and sewed them together. Roll done.
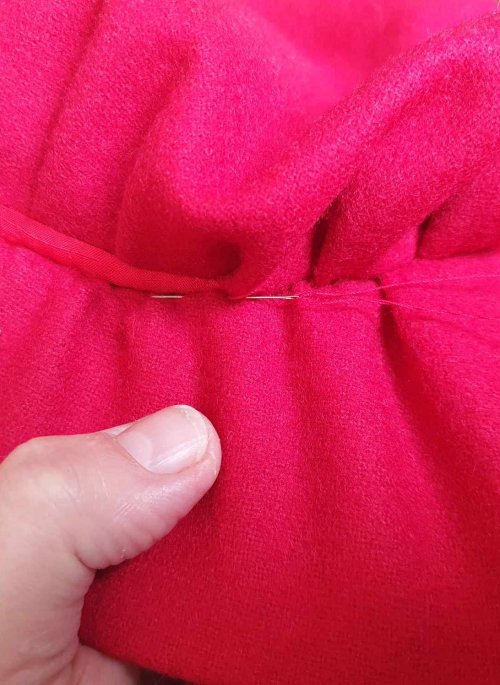
With the roll pinned on the headform (from underneath, so I could remove the pins with the hat on), I could make a better job of refining the Balzo pattern. I started with my draft and re-pinned, trying to make the line as smooth as possible over the roll. The front worked better then the back, so I replaced the back drawstring with a smaller circle.
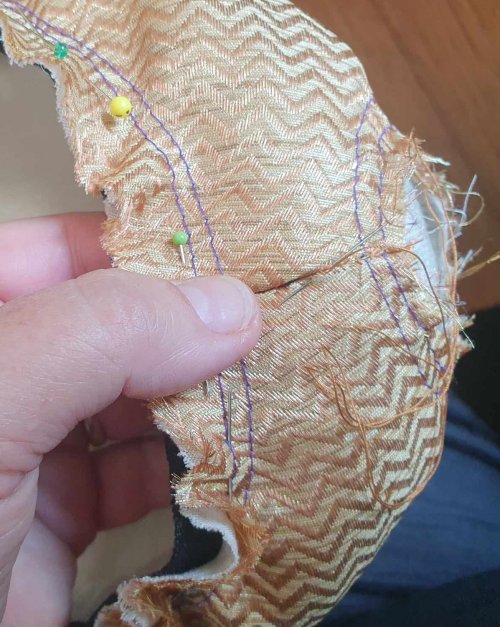
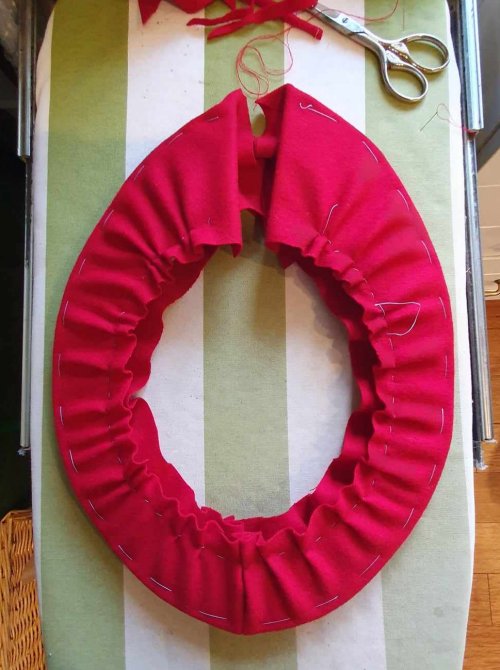
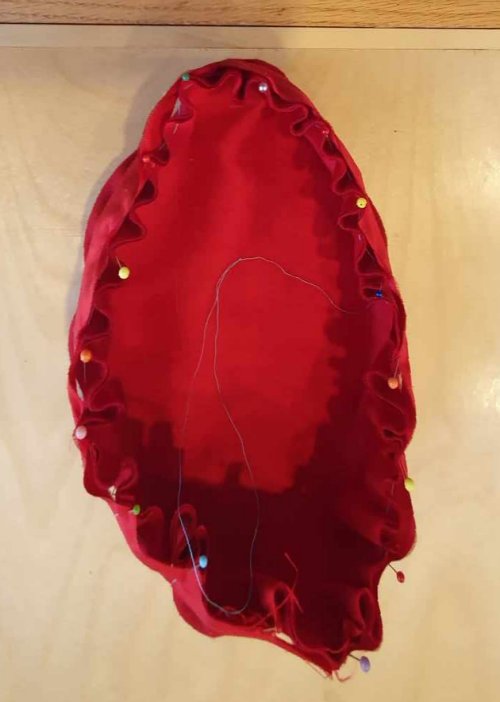
With the balzo pattern finalised, I cut it out of the gold brocade and a fine linen lining. I basted these together, then ran pairs of gather threads around the two end circles and separate sets down the two sides.
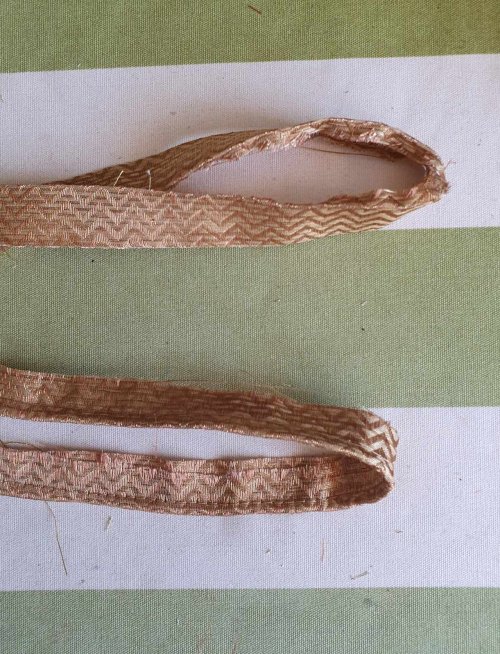
I cut strips for the piping, tested a few cord sizes and ended up using heavy string for the core. I cut the band and pressed hems down the long sides, but left the stars for later.
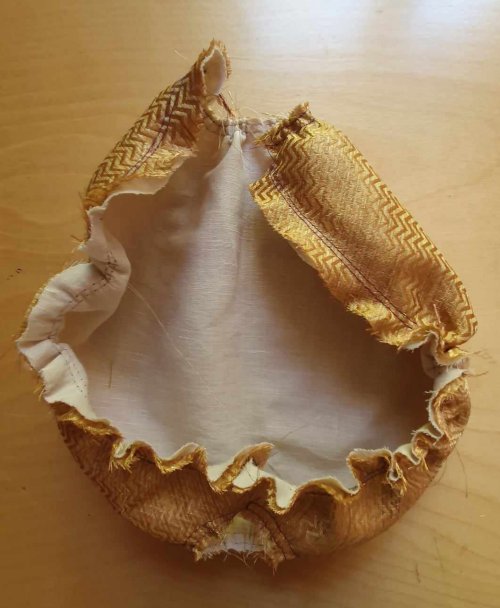
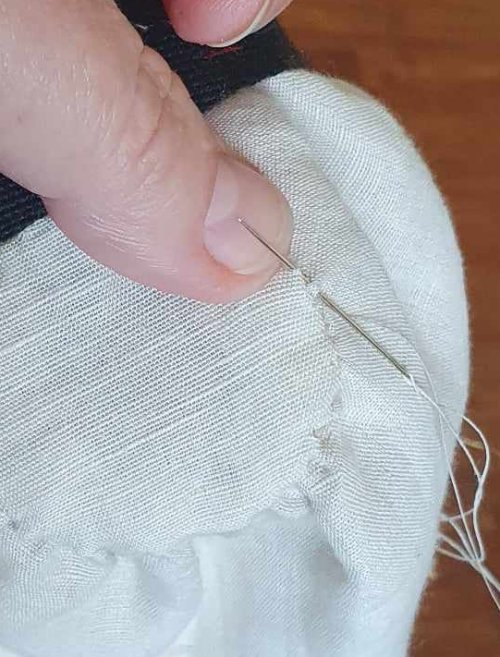
The balzo will be gathered into a band, so I started with a foundation band in black twill tape, sewn to size and pinned to the headform.
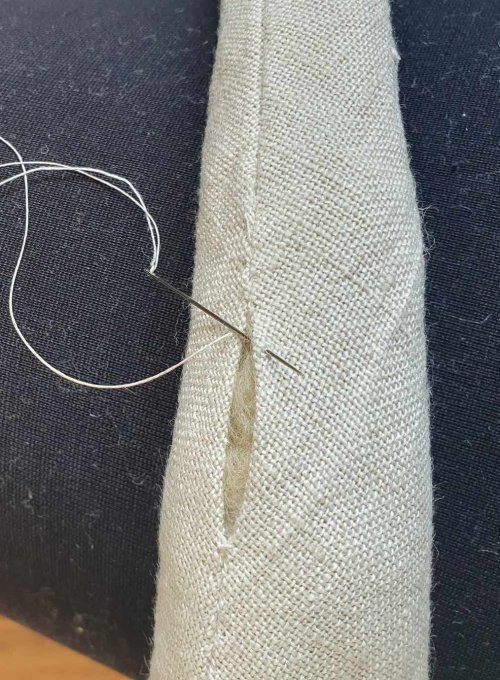
I smoothed the balzo over the roll and pinned it, adjusting the various gathering threads to minimise pleats. Once I was happy, I removed the pins holding the band and roll and pulled the whole lot off the form. I sewed the front and back seams, using the roll as support, then basted the balzo to the foundation band.
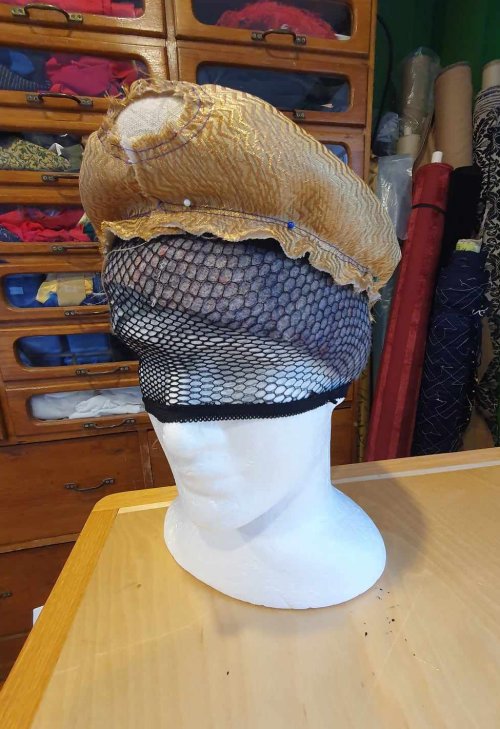
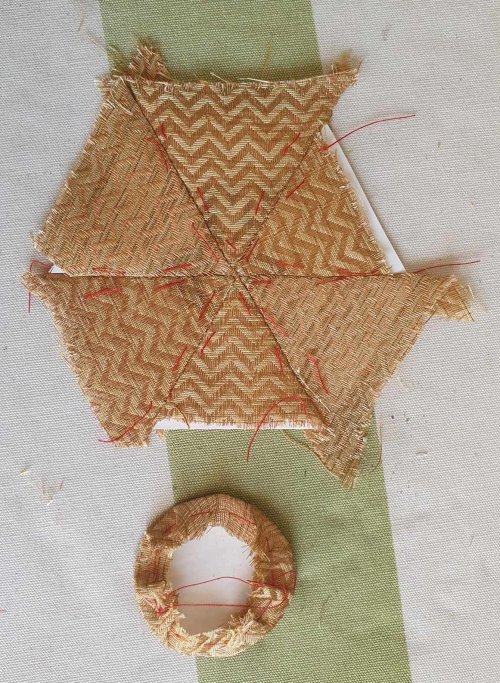
The front star is a feature, and I wanted to make use of the brocade pattern to enhance this.
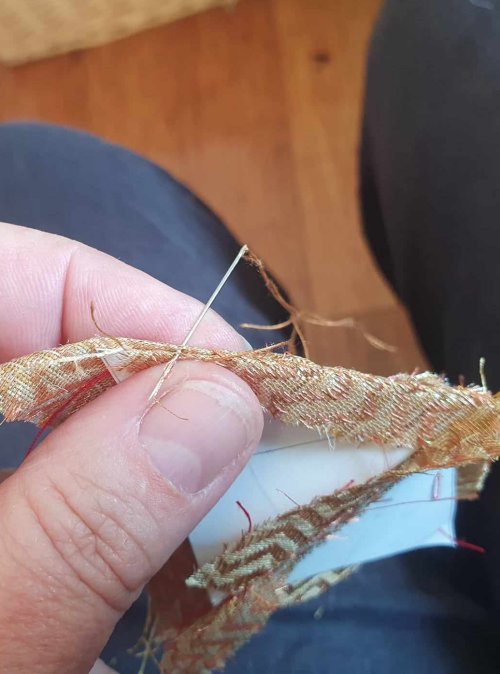
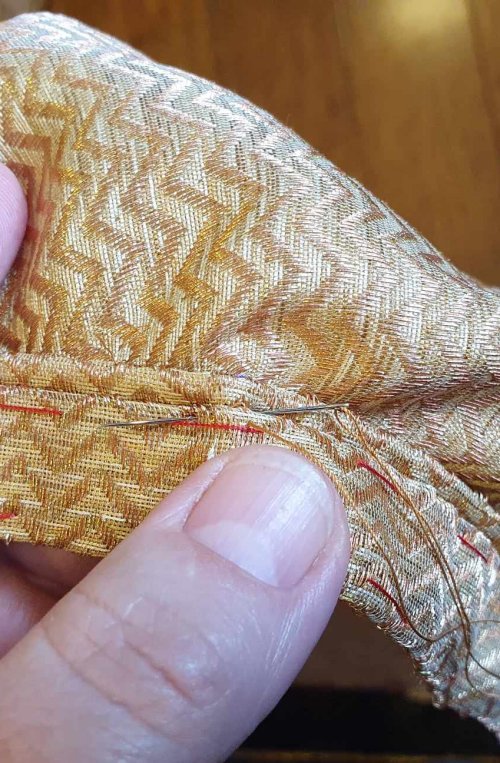
I used a quilting trick – basting paper templates to the brocade, then whipping the sections together along the seams. I made a simple round template for the back, gatherering to fit. Once pressed and the templates removed, they kept their shapes perfectly – and the star design looked great!
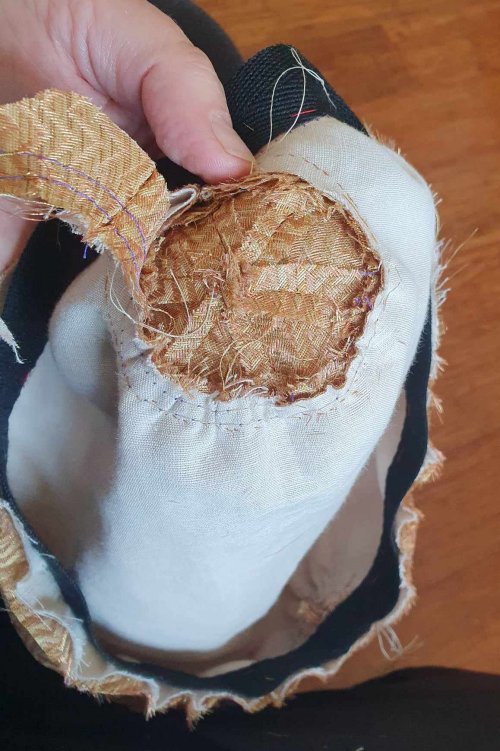
I checked the size of the front ‘hole’, trimmed the star and basted its hem. Then I sewed it over the hole (without the roll) and repeated this at the back.
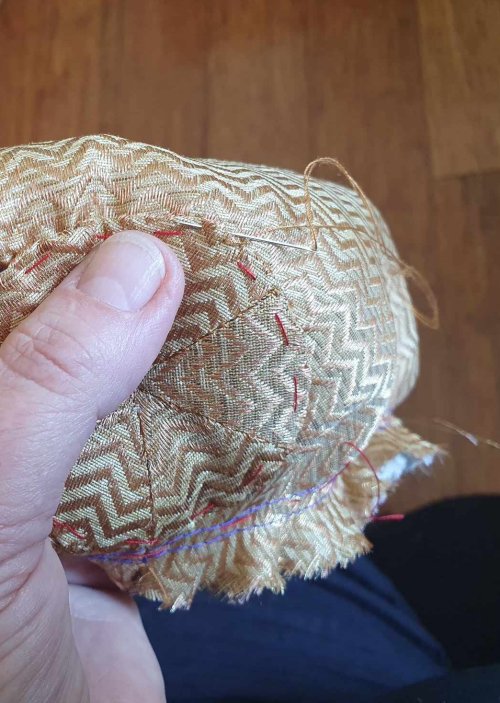
Inside the balzo, I trimmed back the excess gathers behind the star, then sewed on a circle of linen to cover the edges.
For the band, I first trimmed off the excess fabric about halfway down the twill tape, grading to reduce bulk. I wrapped the piping around with a back join, then pinned and basted, making sure it was the right height from the base of the twill tape.
I pinned and basted the band over the piping, with the diagonal overlap at the front, then sewed it around the base. Finally, I sewed the top of the band, catching in piping, then removed all the basting I could still see.
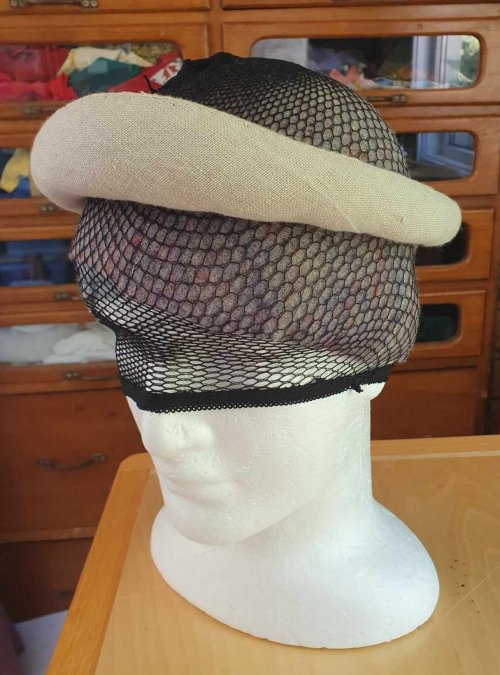
The balzo is done!
This could be worn by itself, or as the base layer for a different hat – mix and match.
Berretto
The first step was to refine the pattern, using the completed balzo as the base. I reduced the flare until it matched the portrait, then used the pattern to cut the brim from 3mm stiff furnishing felt. I planned to re-use the outside of the brim pattern for the simple gathered crown.
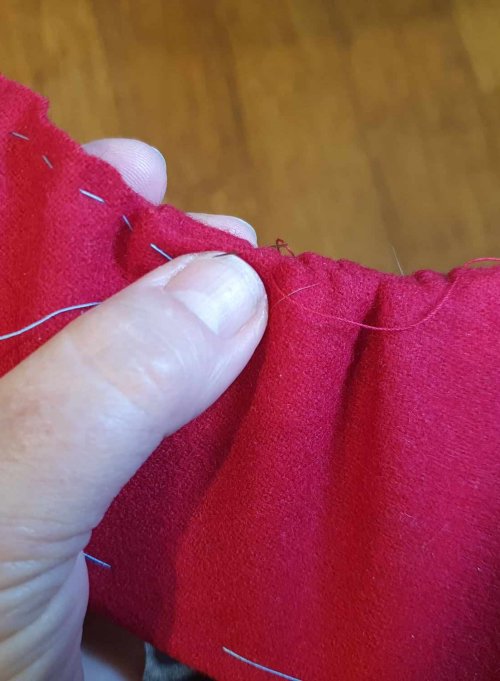
I used scrap fabric to test the pleating over the brim – a smooth edge, with gathers into the centre. (It turnd out I should have used a heavier fabric for this test – the final wool behaved differently.)
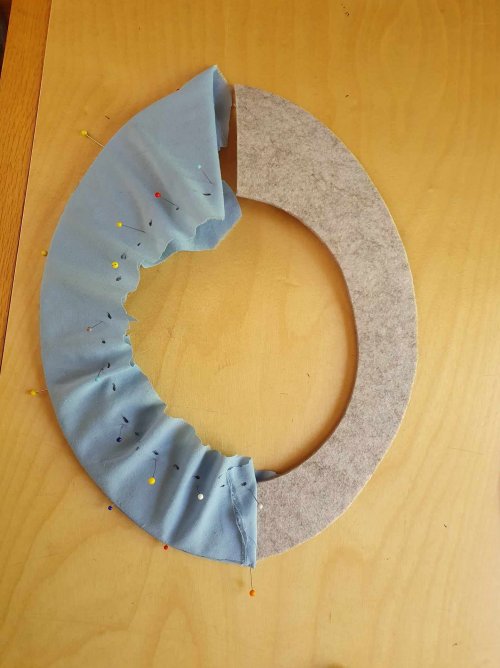
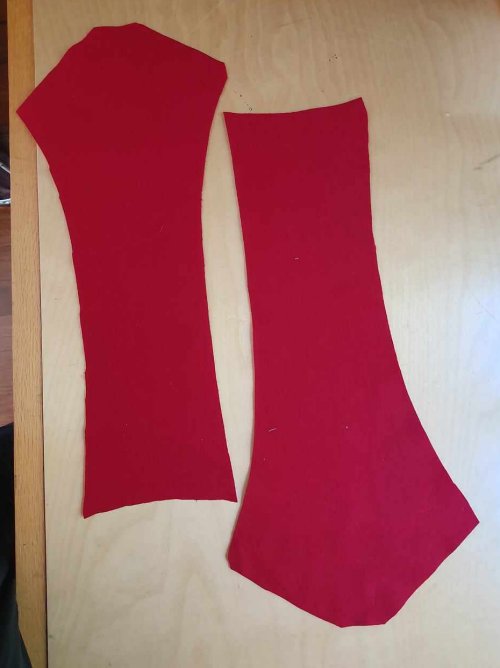
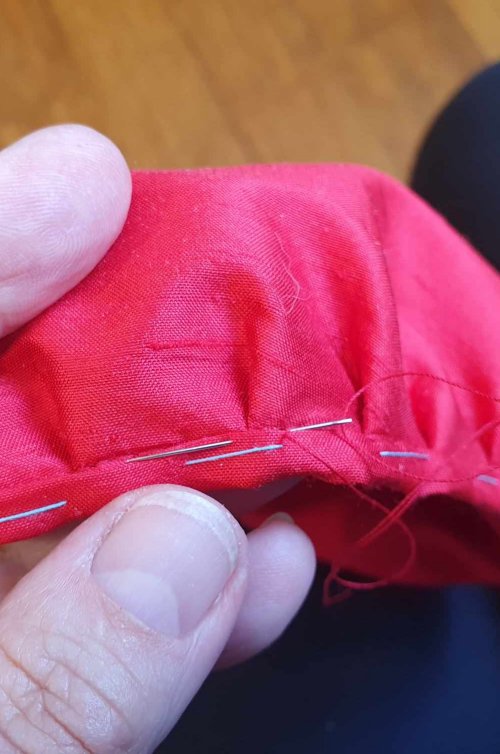
I didn’t have much of the red wool, so I cut the brim cover in two parts and joined them with a back seam.
I basted the cover along the outside edge to get a smooth finish, then gathered it into the centre and basted the pleats in place. I folded the ends over – and realised I did not have enough fabric to make the centre front edges smooth both outside and in. Sigh. I should have used heavier fabric for the test.
I did not have enough to cut another set, so I focussed on making the outside smooth, catch-stitching the wool to the felt base.
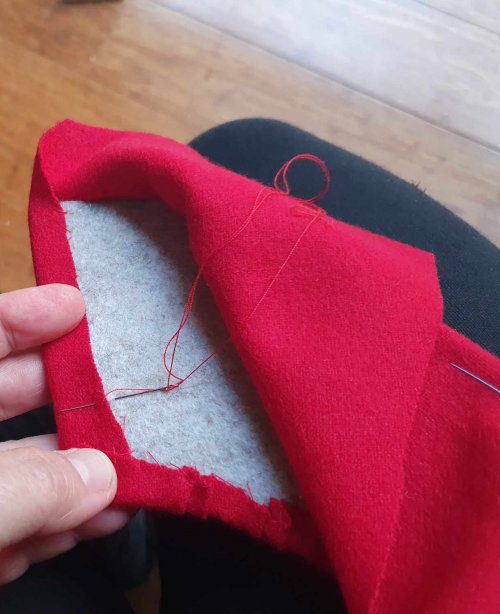
On the inside, I wrapped the outside over the felt edge, then basted and trimmed the excess. I folded the inside and sewed along the edge. Then I sewed the brim together at the front seam, from the inside.
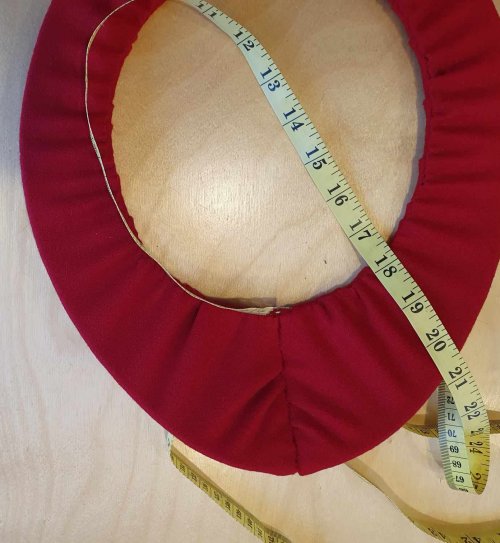
This ended up being quite thick, so I checked the internal circumference – still OK.
On to the crown.
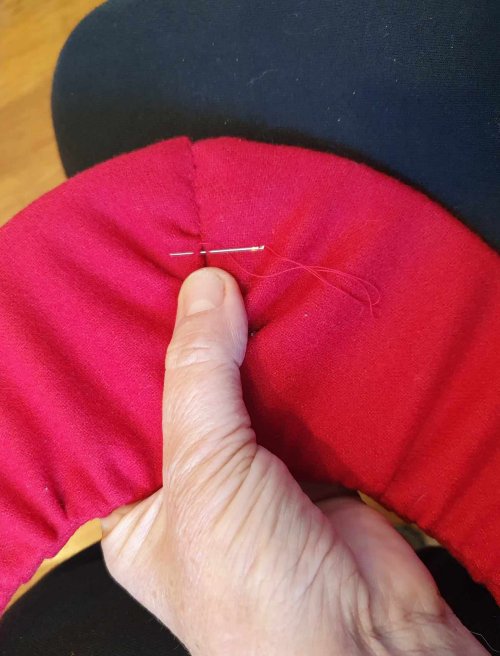
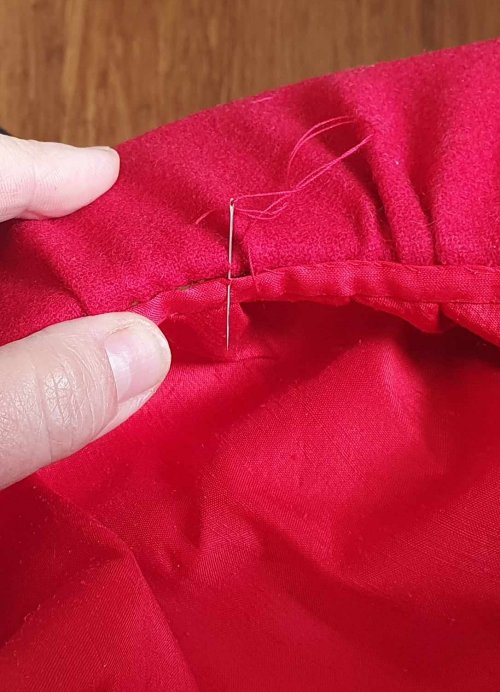
I cut a red silk lining, and a long strip of silk to bind the edge, then sewed the binding strip to match the circumferernce. I basted the wool to the lining, then ran gathering threads and drew up the pleats, pinning to the band. I sewed on the silk, turned over the edge and then sewed down the binding.


The crown is oval shaped, so I matched it to the brim, pinned in place and whipped to the edge of the brim. But because the brim is so flat, I could see the binding from the outside – which won’t be covered by a hatband. So I sewed it down again from the outside – not ideal, but workable.
At this point, I thought of a much better way to deal with the pleated brim and crown. Rats.
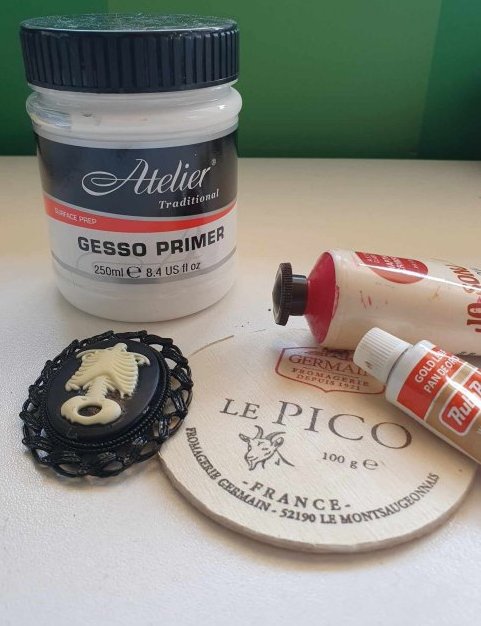
Onwards to the ‘jewel’ – the St Christopher medal which is a distinctive feature of these hats from Brescia. The original in this painting would have been worked in enamels, in an ornate gold setting – beyond my skills (and my purse).
I knew I could get a suitable brooch frame, and I considerered a few approaches to the medal itself – painted on vellum and sealed, or modelling in FIMO, which had worked so well for the Portuguese Gorra ‘jewel’. But it would be hard to model so much fine detail, and I’d read mixed reports on painting the clay.
So I cut a small oval from the thin wood of a cheesebox, sanded it and painted with gesso and gold craft paint, then painted the details. I took apart a steampunk brooch and used a wirebrush to remove the plastic finish before painting in gold. The end result was surprisingly effective!
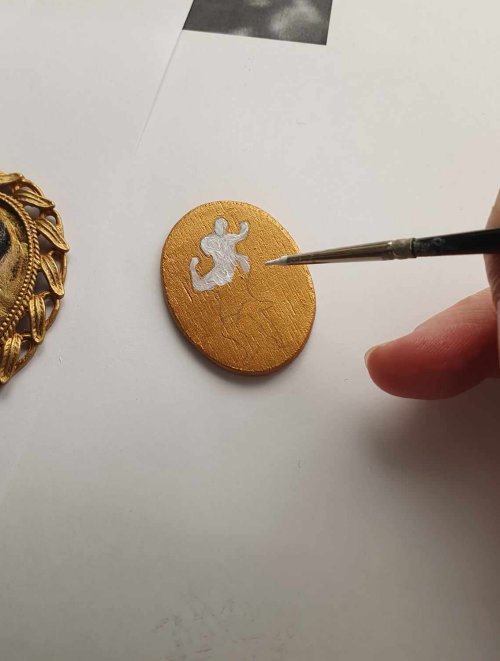
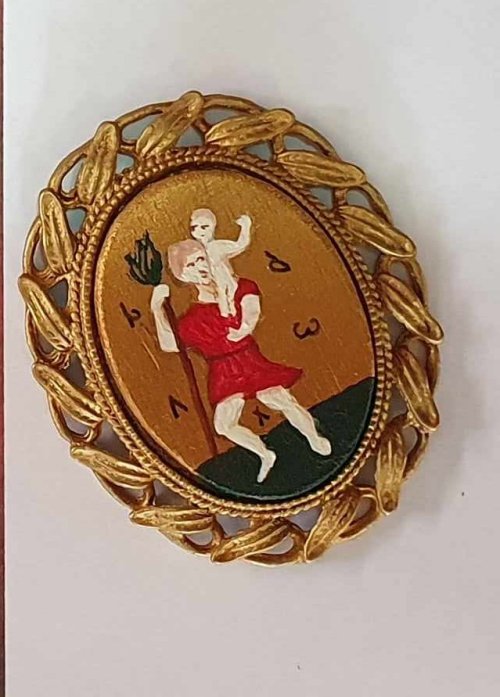
I used a fine curved needle to sew on the medallion – the ornate rim and thick felt beneath made this tricky. Sewed to the front brim, the medallion really does complete the look.
I was pleased to have finished the hat, so I could sent it to Kit at long last – I hope he likes it! I know he plans to make the rest of the outfit in the portrait to match…
Afterthoughts
Unlike most of my projects, the afterthoughts started while I was still making the hat!
First, I am really pleased with the balzo, and delighted by how good the medallion looks.
However, I can think if several ways to improve the berretto. The pleated inside rim of the brim and the thickness of the wool meant that my standard approach did not work well. I should have done some tests before I cut the wool.
If I was doing this again, I would…
- Use a heavier fabric when I was mocking up the brim cover – this would have shown up the pleating issue
- Not trimmed the front ends off the cover, so I had enough wool to make both sides of the front brim smooth
- Cut a small divot into the centre back of the brim felt, to account for the thick back seam (or ideally, start with more wool, so there was no seam)
- Make the crown a simple circle (the egg shape did not gather nicely) and a bit larger
- Manage the whole headsize opening differently. I’d baste the front and back pleated covers together just inside the brim edge and trim, then baste the crown on, trim again and bind over the 3 layers with the silk band. The brim may need to be made larger to compensate – a test sample would show how much.