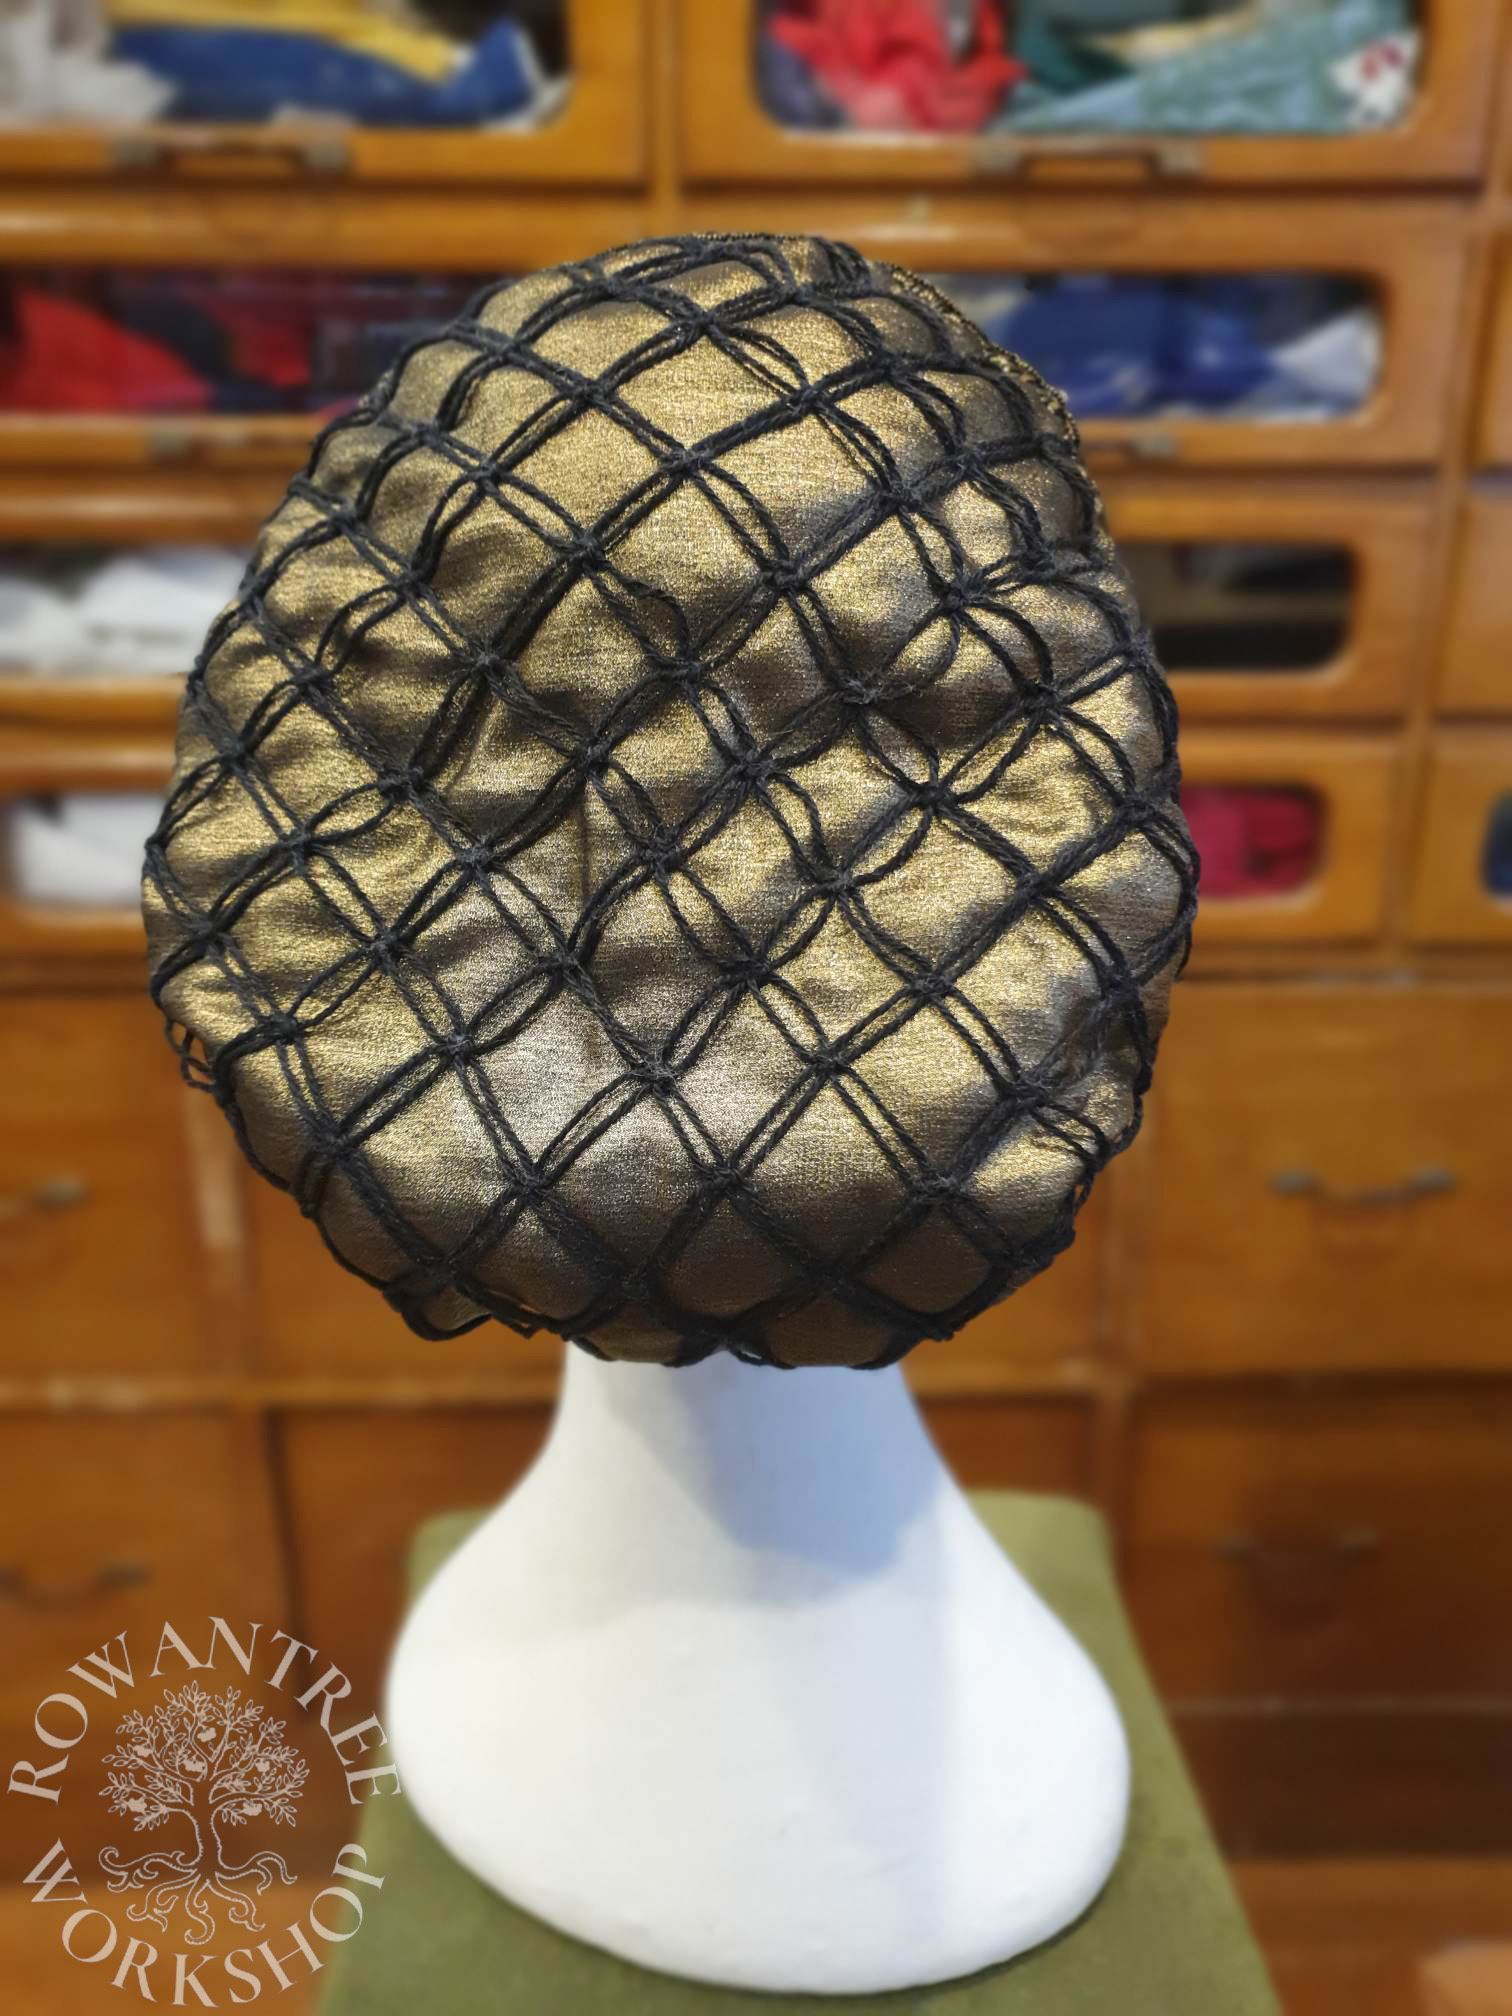
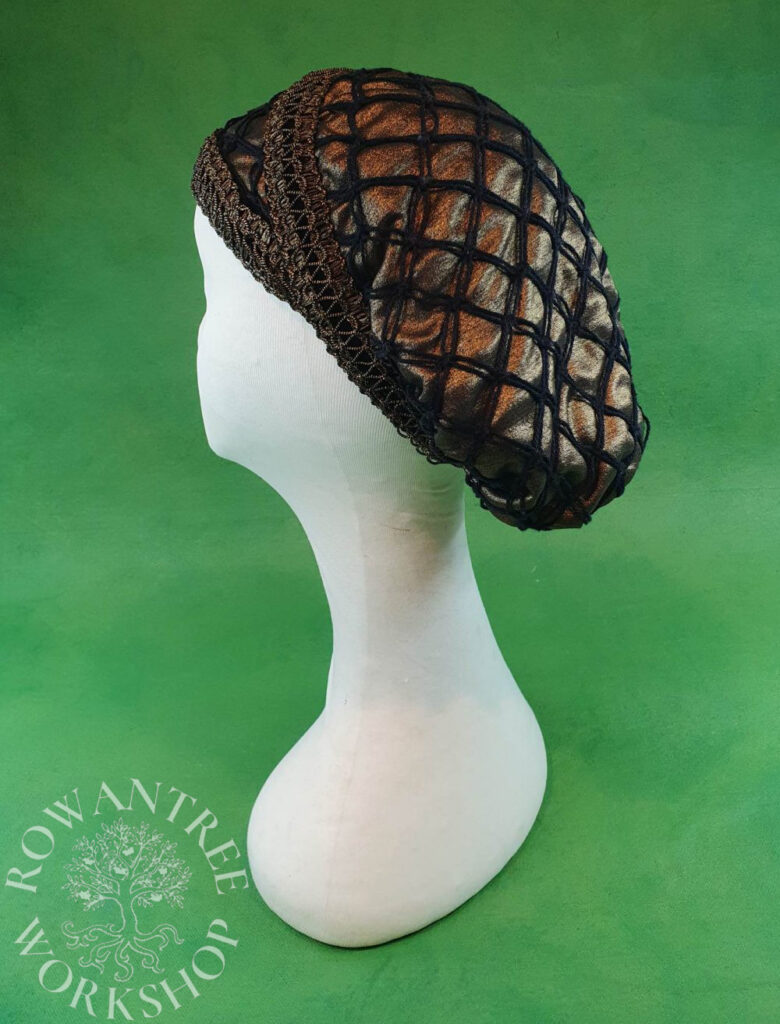
An early 16th century German Haube (caul), with a net of knotted silk, suitable for a noble lady.
After finishing my green velvet gown, I naturally wanted a new hat to go with it. With just over a day to go before the event, a new hat was not an option, but I thought I could manage a new Haube to give my old red Barett a new look.
Research & Design
Hauben were worn by noble women either alone or under a Barett. Textiler Hausrat (Zander-Seidel, 1990) details several types, including Goldhaube” (golden coif), “Haarhaube” (hair coif), and “Stirnhaube” (forehead coif).
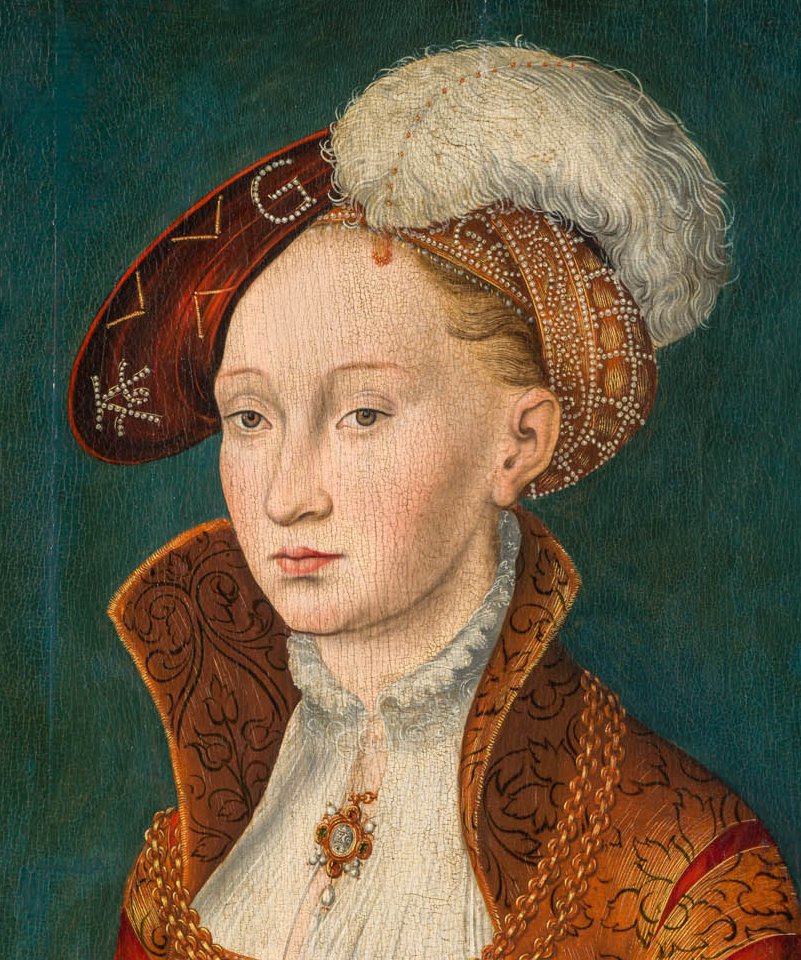
The Cranach portrait which inspired my green gown (the first image below) shows a Haube with a net of small pearls over a fabric base. The pearl net is the most common version, but I didn’t have enough time or small pearls to make a net (the right scale of net takes some 5,000 x 3mm pearls).
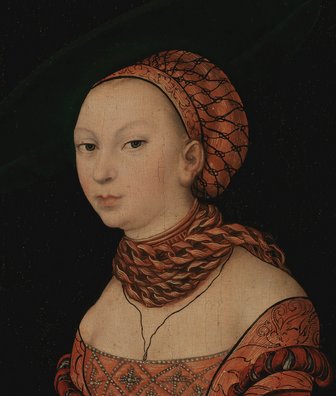
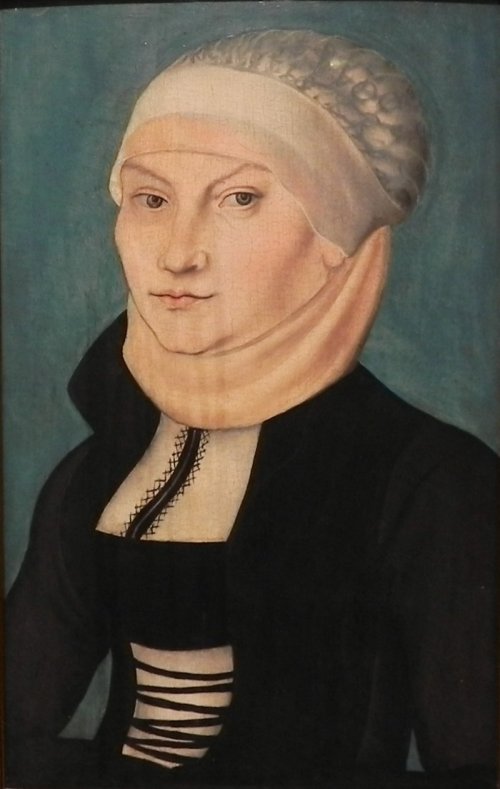
However, I recalled a couple of examples with a plain knotted net. The Portrait of a young Lady at knee-length below shows a black net made with Josephine knots, over a (?silk) fabric base, while the portrait of Katharina von Bora shows a similar net over a white base, under a fine veil.
Source: Antiques Trade Gazette
Source: Wikipedia
Although many examples shows a one-piece Haube gathered into a band, others (such as the first example) have an extra forehead section. I find the two-part construction works much better with my short hair – the extra section provides more grip.
I had suitable materials in stash: the dark gold silk I used for the Brustfleckt on the green velvet gown, some rich gold and black braid for the band, and several options of cording for the net.
Construction
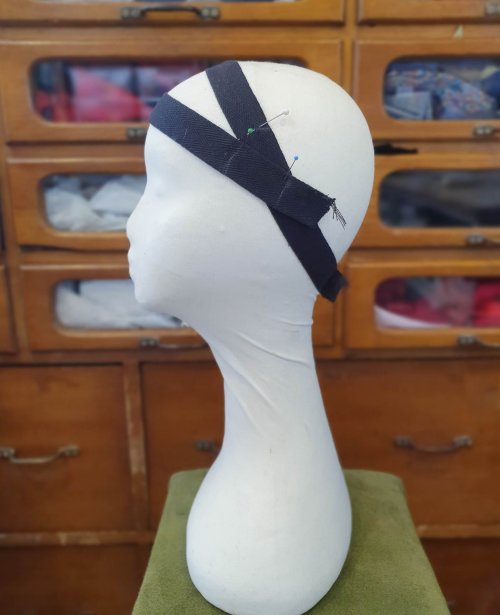
Because the gathered silk and braid both add thickness, I need to work from the inside out to make sure the Haube is not too small, so I started with my headform. (Since I have a very small head and short hair, I didn’t need to pad up my headform to get the right size.)
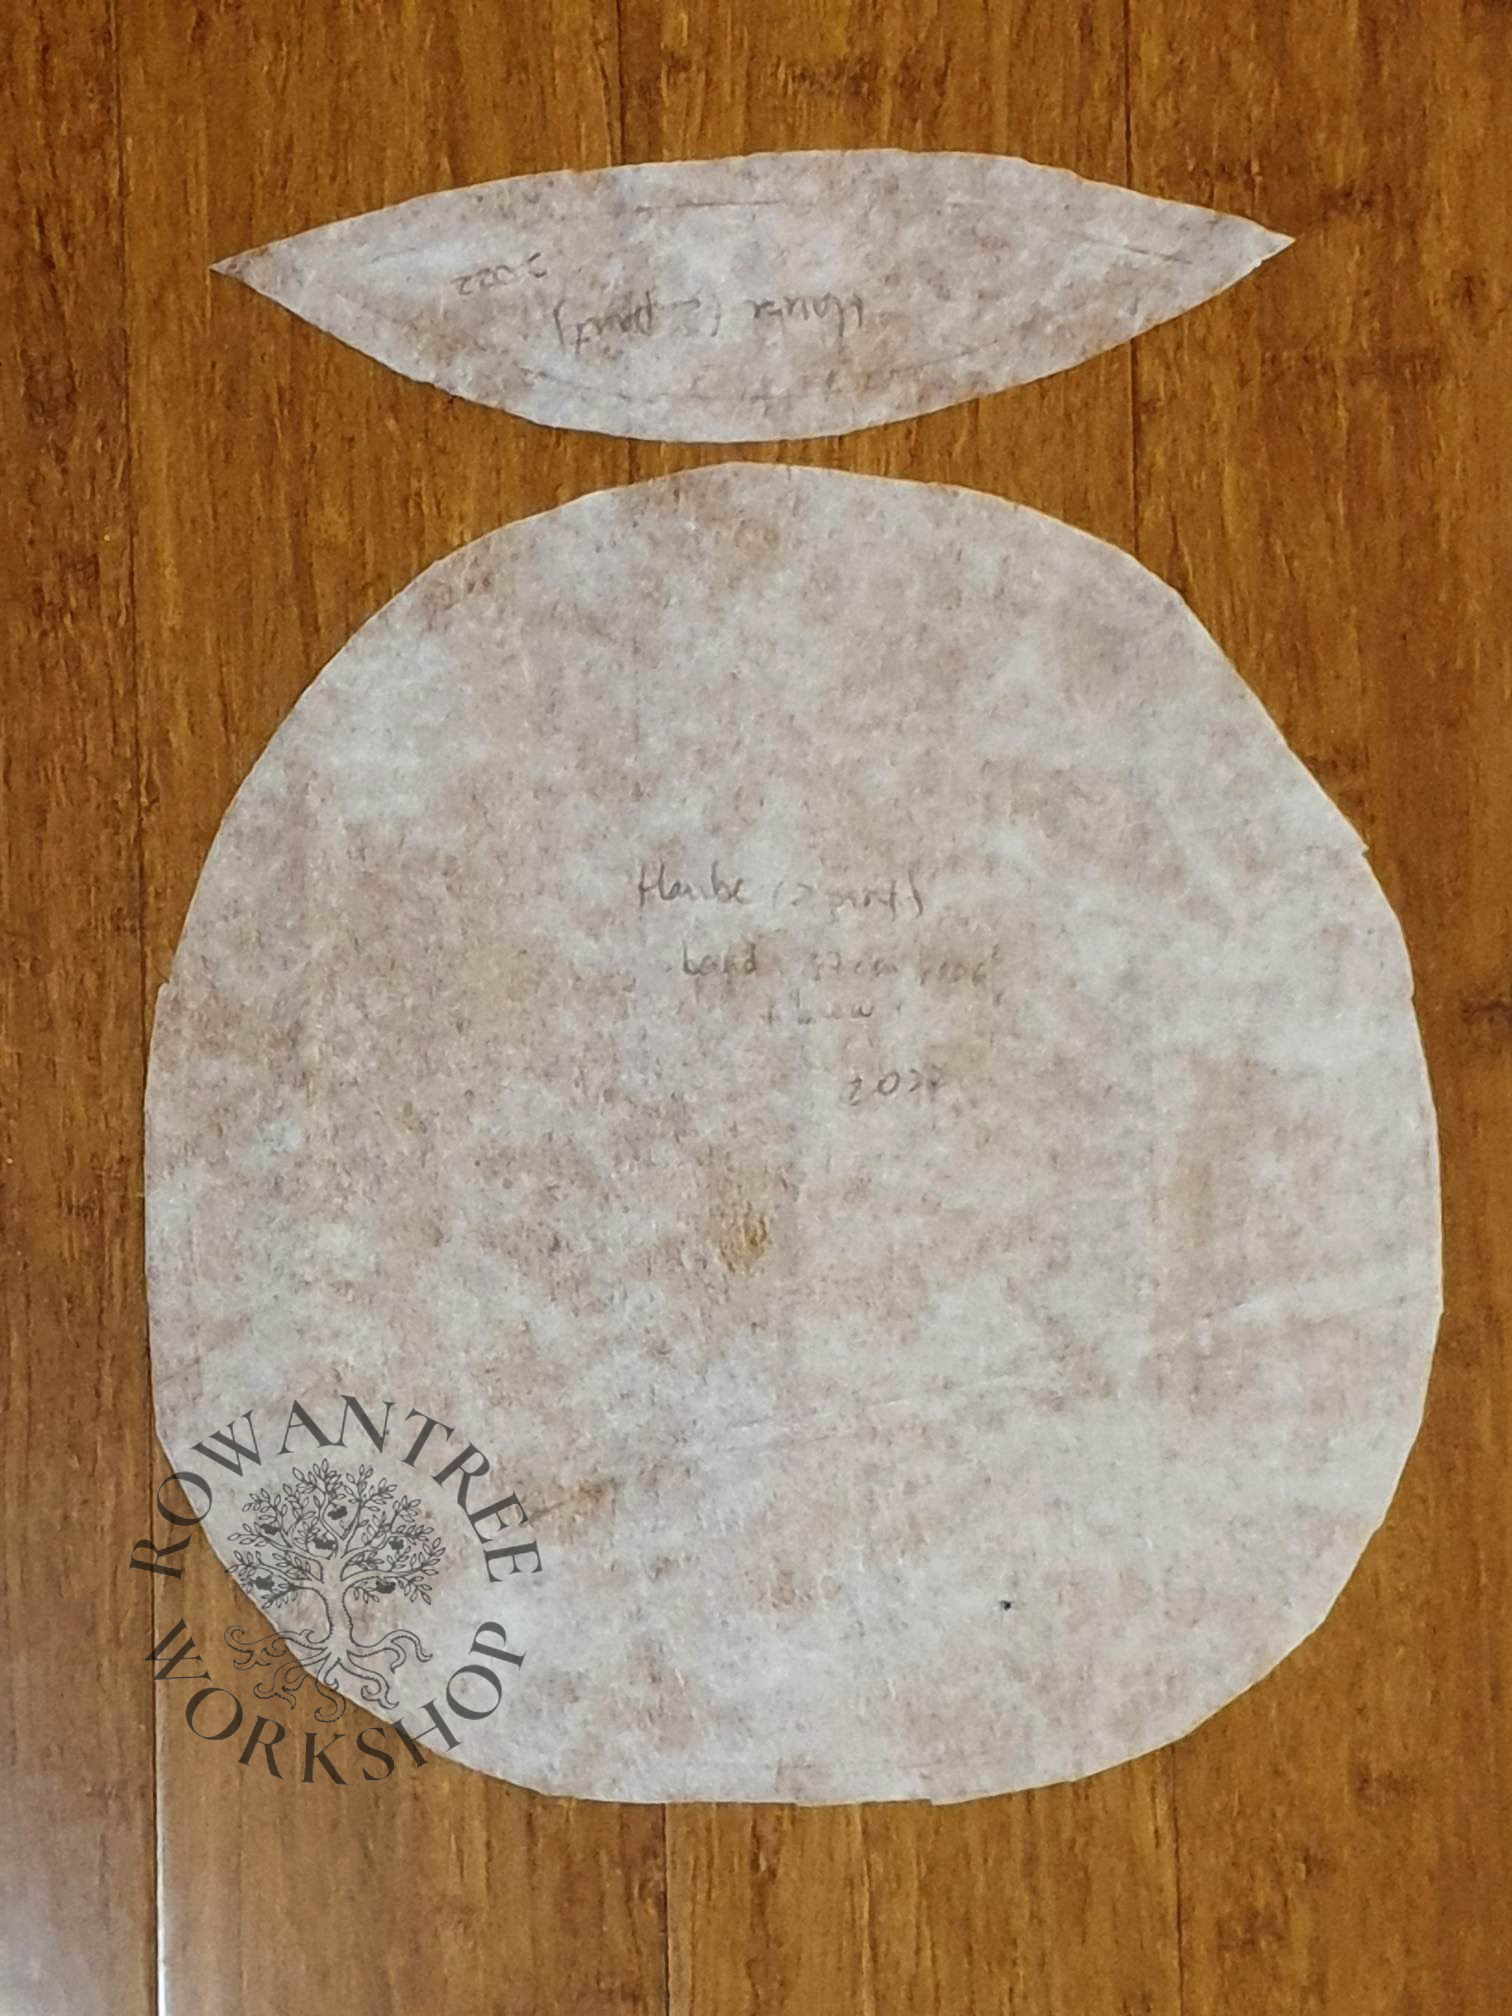
I laid out a foundation of wide twill tape to get the proportions and angles for the main Haube and the forehead section. Once it looked right, I marked the intersections, took it off the form, sewed the pieces together and put it back on the form to check sizing. These tapes will form the lining of the bands in the finished Haube.
I based the main pattern on one I had used for an earlier Haube, but flattened the top due to the 2 part construction. For the forehead section, I traced over the twill tape foundation to get the right shape and size.
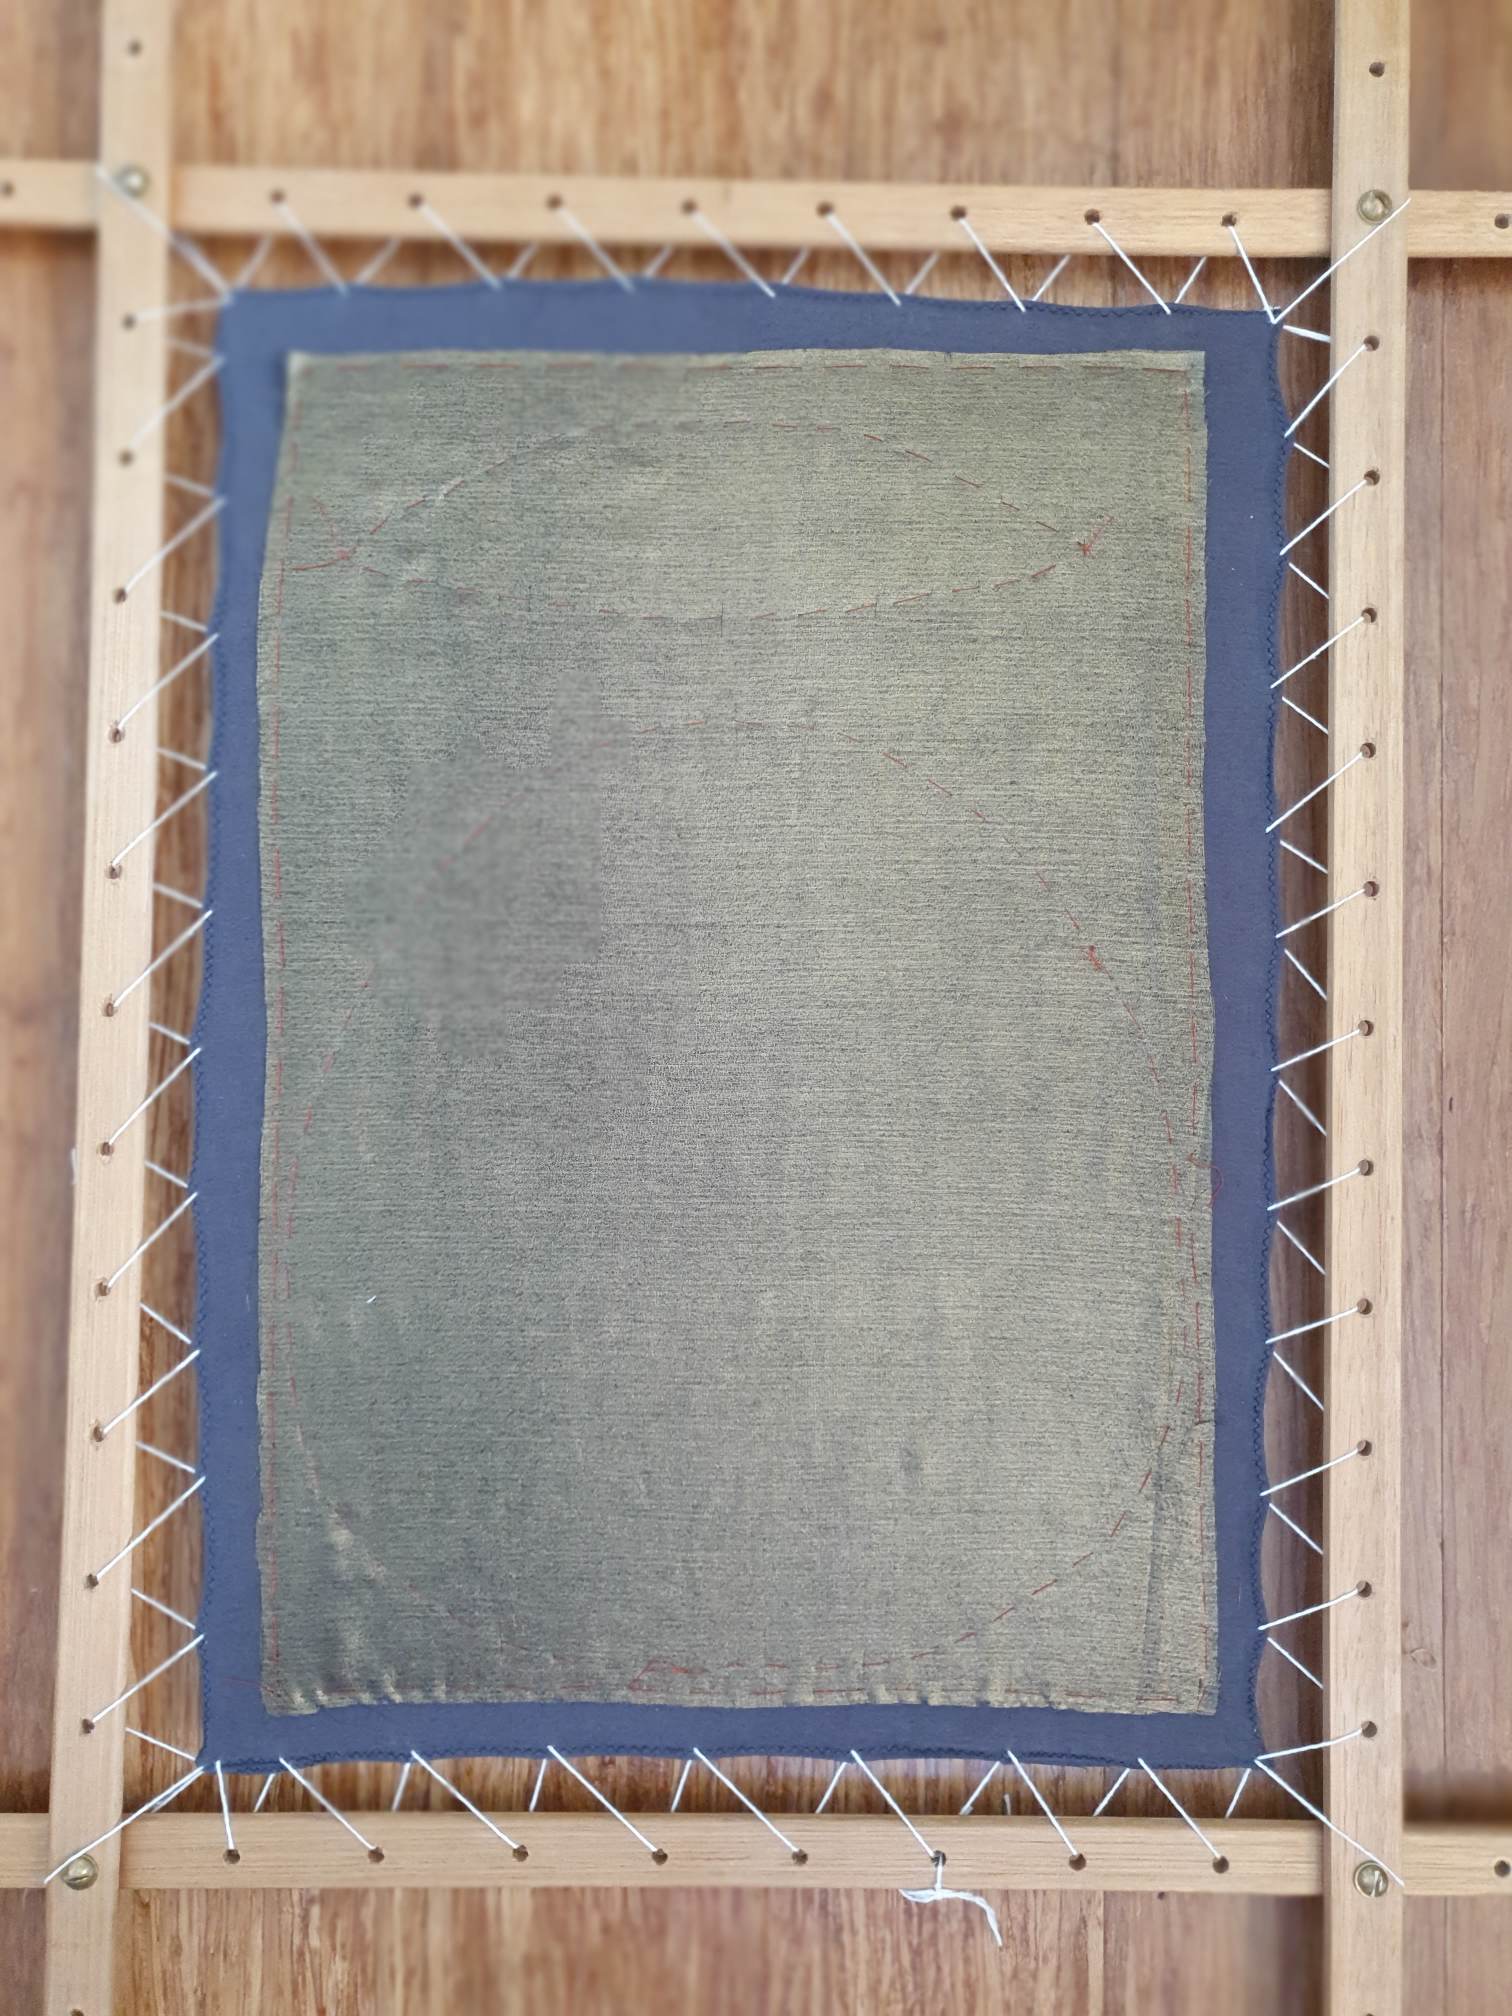
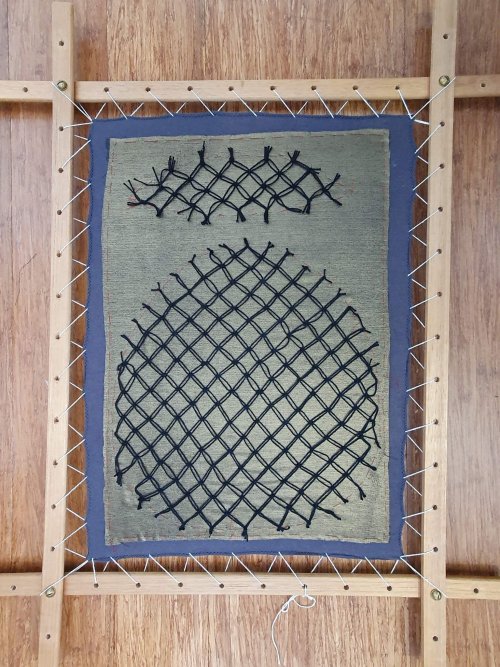
Now I knew how much silk fabric I needed, I cut this and mounted it onto linen, then sewed string around the edge to make it strong enough to whip into. I set up my slate frame and stretched the silk tight, then basted the outlines of the pattern pieces.
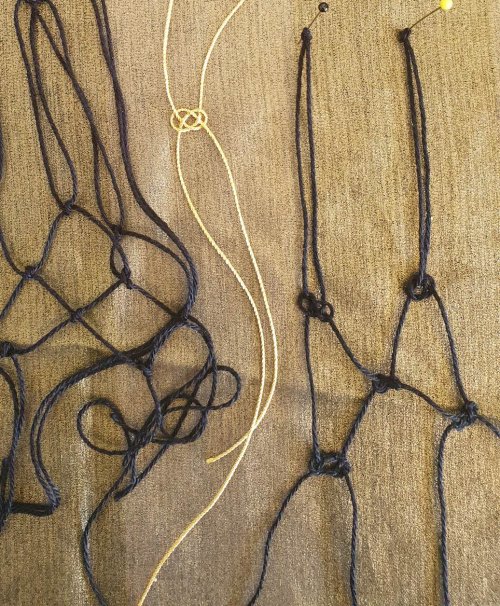
The next step was test the Josephine knots. They worked well in the stiff gold cord, but the effect was too bright – I wanted a rich dark look. My black silk thread was the right colour, but too soft to hold the Josephine knots open, so I needed another solution.
After a bit of hunting (aware I was running out of time) I found Dürer’s Portrait of Captain Felix Hungerspeg, which shows a man’s Netzhaube with a net of knotted doubled cords. Square knots over the middle threads produced the right look, and it worked with the black silk!

Source: Wikiart
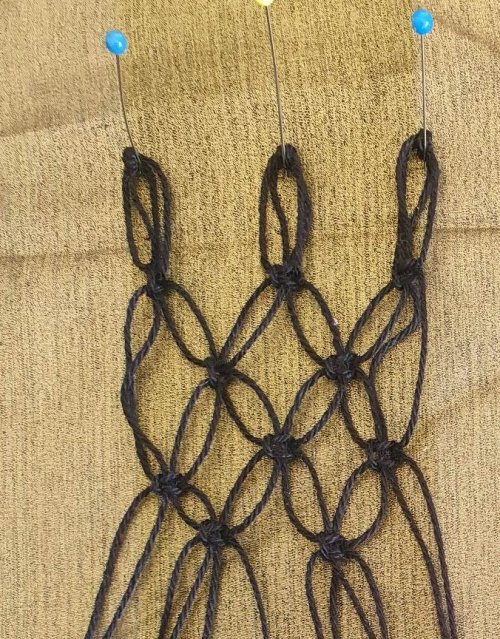
To ensure accurate spacing, I placed my pattern over a 1″ grid on top of my ironing board and put a pin in every junction. I worked the knots to cover the forehead section, un-pinned the completed piece and then worked the main caul in the same way.
I pinned the net to the gold silk on the frame, sewed around the edges and then stitched down every intersection to ensure it would not shift in use.


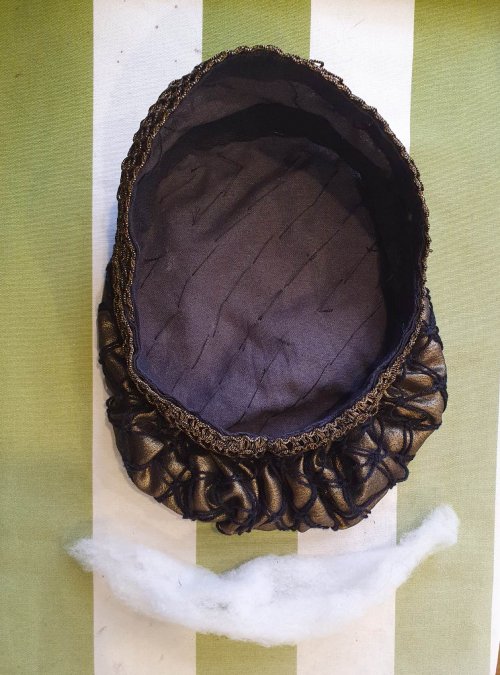
Once the net was secure, I cut the shapes out with a 1cm seam allowance. I ran a pair of strong threads around the main caul, ready to gather it up to form the ‘bag’ at the back (more gathers) and sides (less gathers).
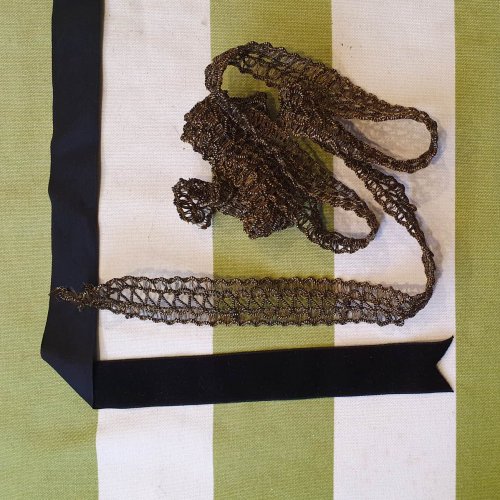
Next, the decorated band. I sewed the dark gold braid onto black velvet ribbon – much easier when pinned to my ironing board to provide tension.

At this point, I had to leave for the event(!), but I’d done all the hard parts and still had 3 hours travel time…
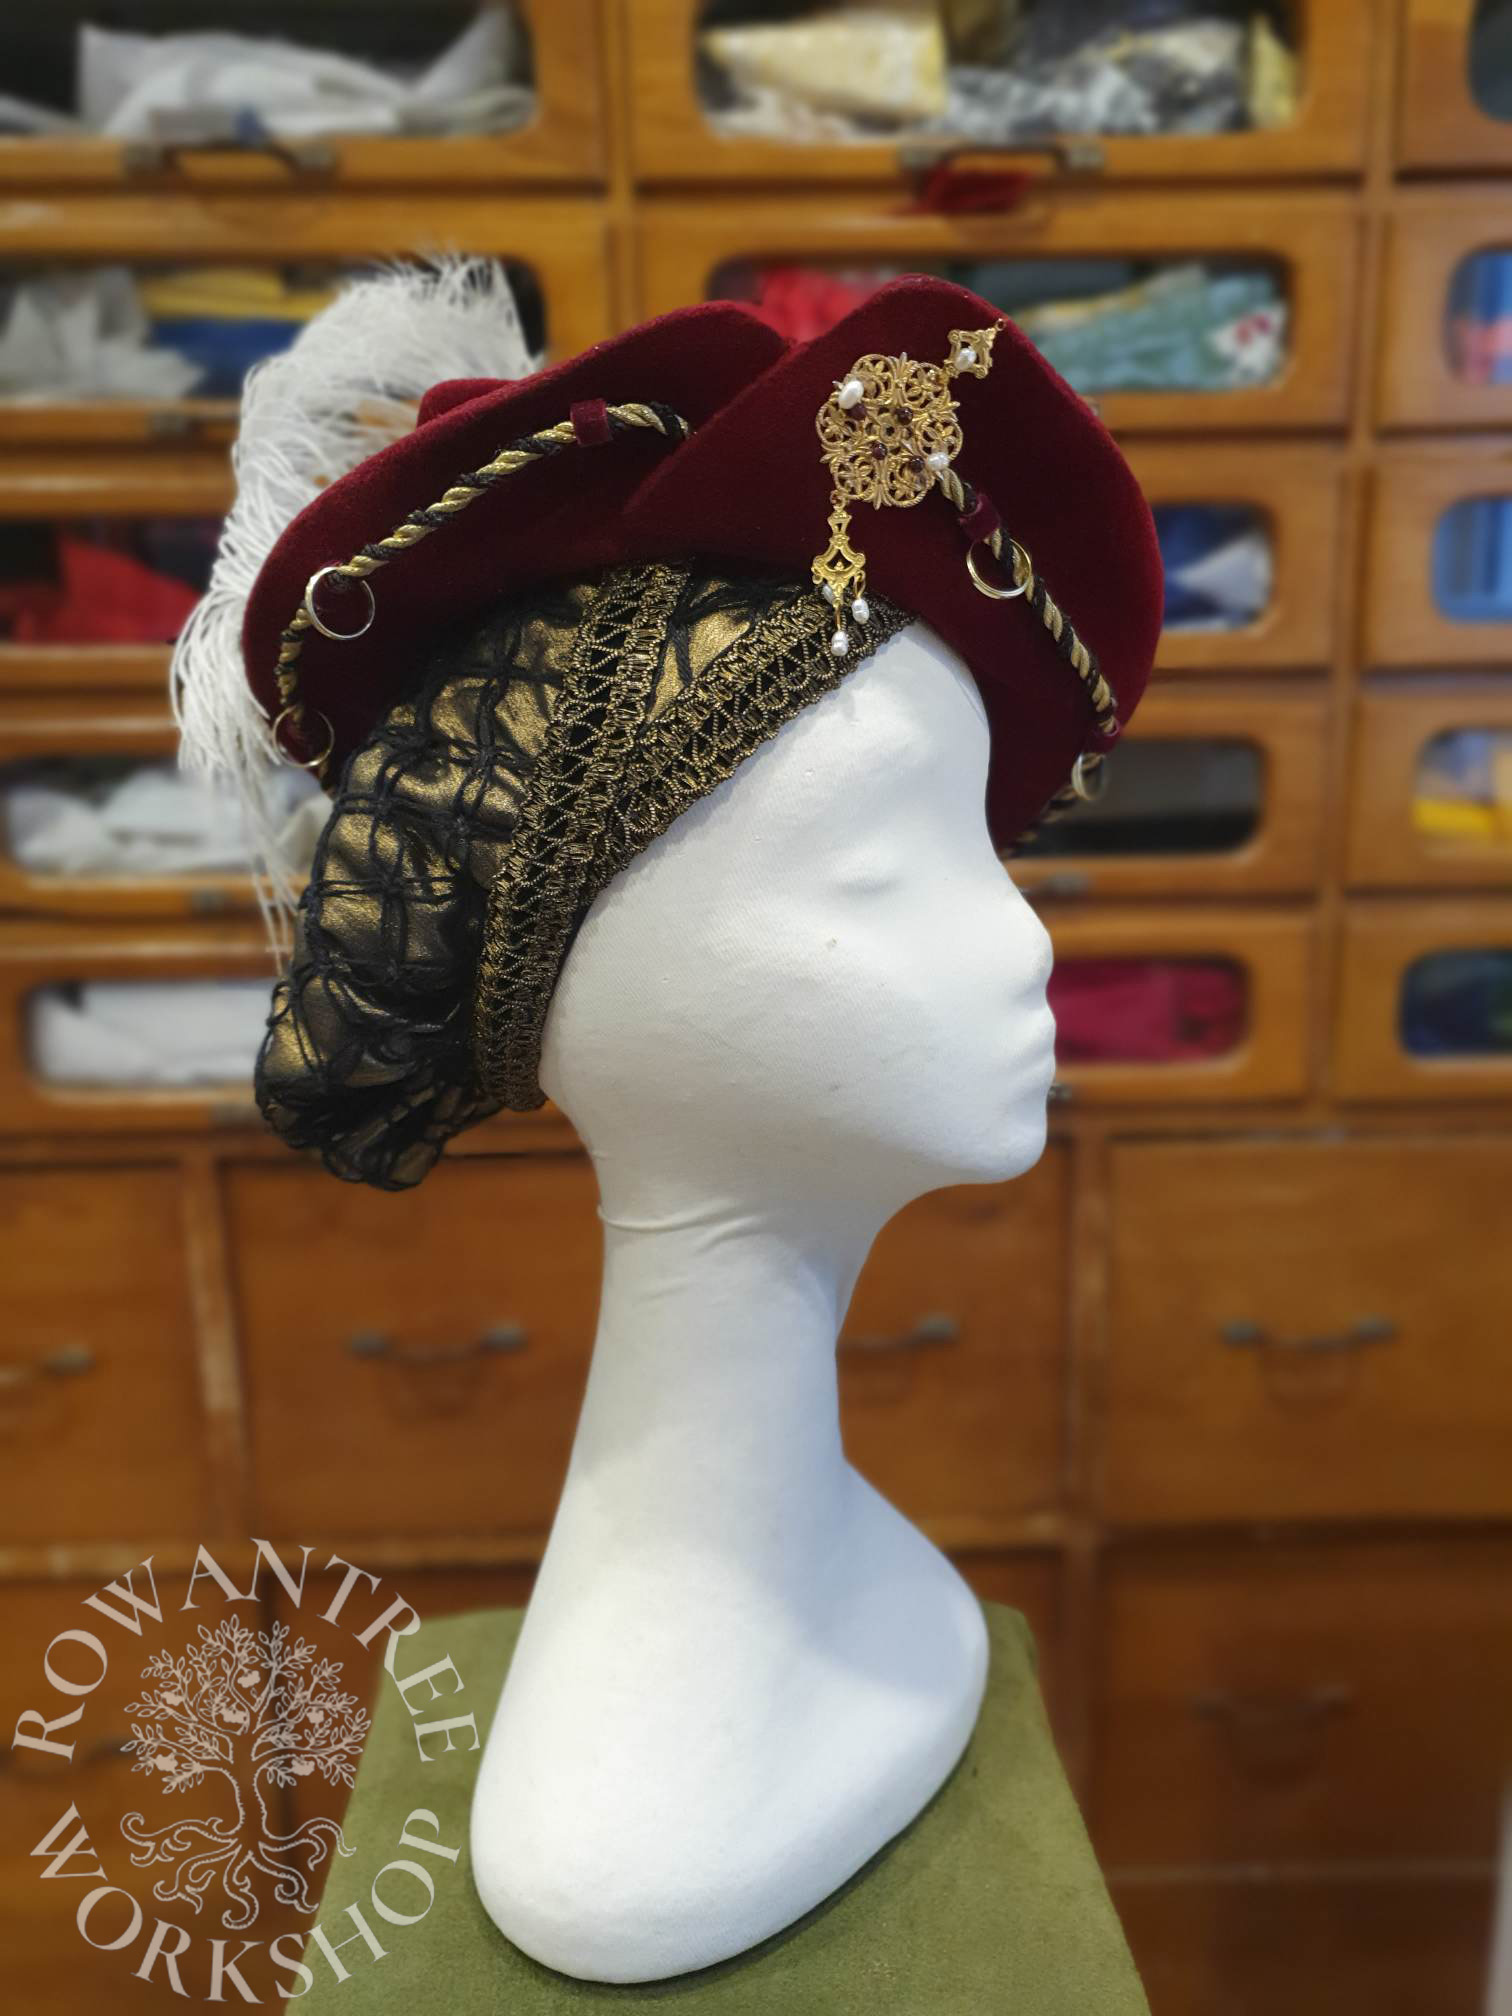
I gathered the caul to the twill tape and basted it in place, and sewed on the un-gathered forehead section. Then I sewed the braid band around the forehead over the top of the twill tape, along both edges, hiding the raw edges of the silk. Then the longer band around the head (there are no construction pictures of these steps, because I was sewing it in the car).
I did get it finished in time to wear. I added a small roll of wool batting in the back to compensate for my lack of actual hair and wore it with my red velvet Barett.
A useful addition to my headwear collection!