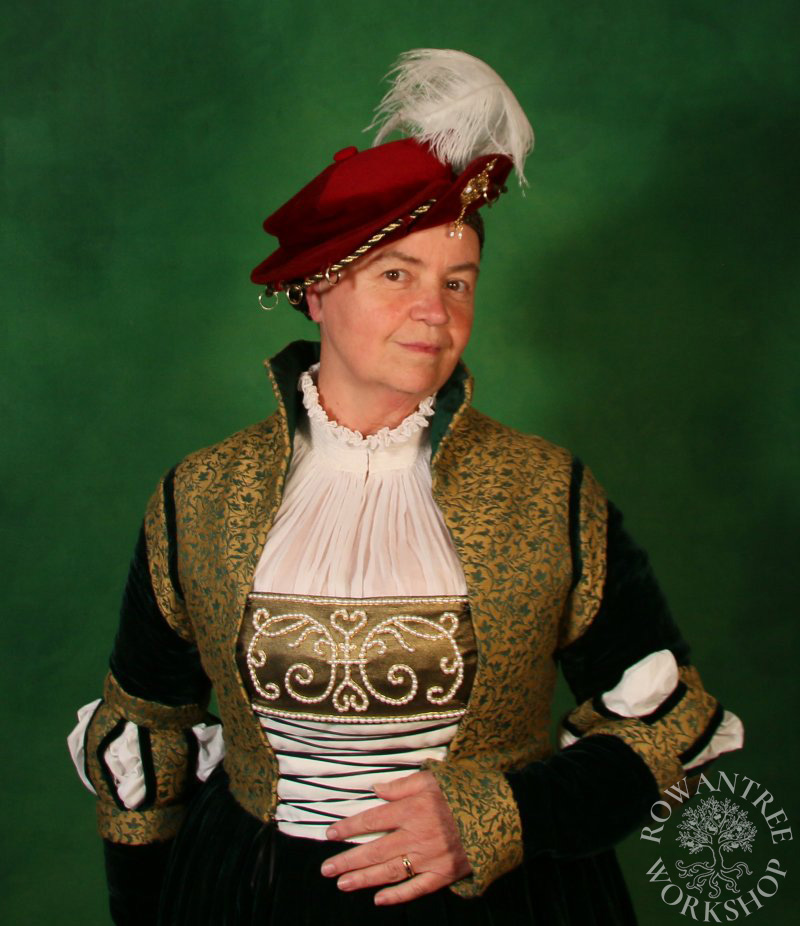
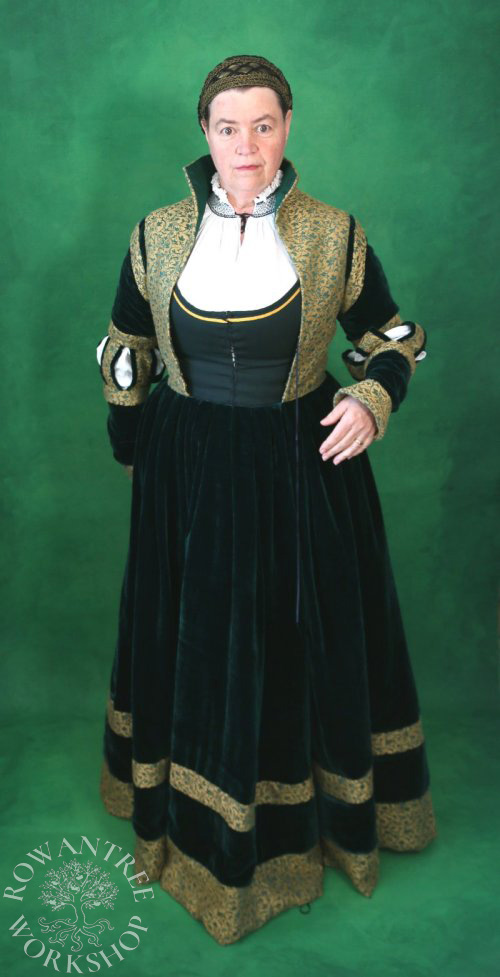
A high necked gown in velvet and brocade. This style was worn by noble women in eastern Germany from 1520s-1540s. It’s often called a ‘Cranach Gown’ because Lucas Cranach the Younger painted many noble women and Biblical allegories of women wearing this style.
This Cranach style was the very first court gown I made, and I made many more since then. But this was my first new noble class gown in many years
Some friends were planning an event set in 16th century Ruritania and asked everyone to wear clothing from 1540-1570. I needed to find something that could be worn in 1540, but that would still work for my usual 1520-30s time period.
This was an opportunity to use the fabric gifted to me from my friend Mistress Francesca’s estate – a roll of green silk velvet and several meters of green/gold brocade. I wanted a high neck gown (haven’t made one for decades) and simple sleeves – silk velvet is such tricky stuff to work with.
The rest of the materials were are all from stash – green silk scraps from my green silk Rock (30 years ago!), light horsehair canvas, linen, olive green silk taffeta and freshwater pearls.
Research & Design
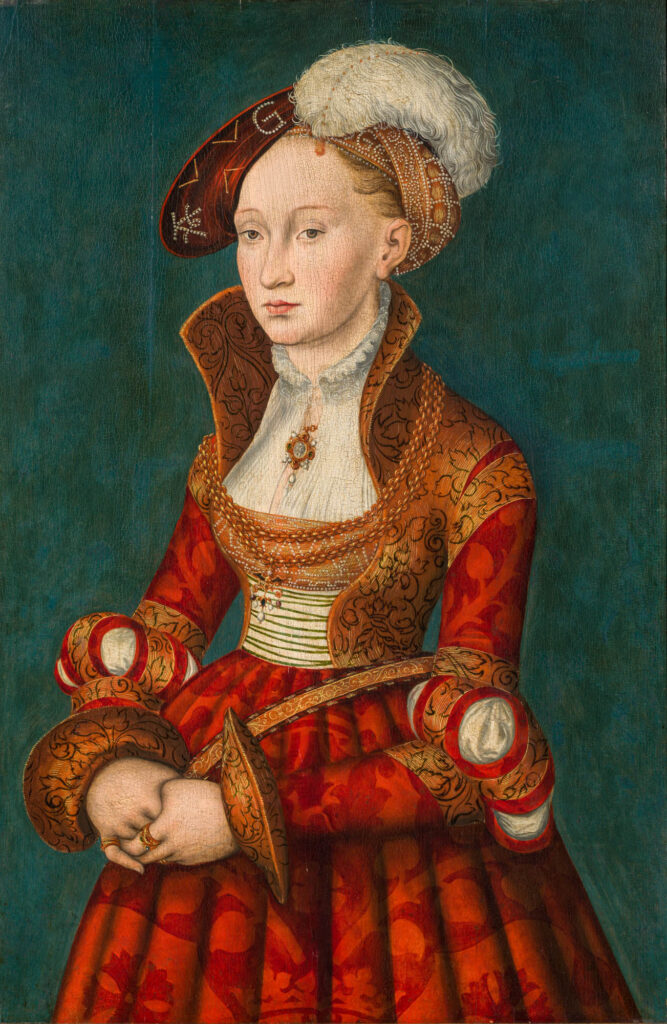
Looking through the Cranach Digital Archive, I found several suitable styles – but my favourite was Bildes einer junger Fraulein which had several unusual features, including a bodice made entirely of brocade. There are other examples of this style, such as the Portrait of Princess Maria of Saxony which also has a dark lining for the collar – something I would need to get the gold brocade away from my face (So NOT my colour).
Source: Antiques Trade Gazette

Source Wikimedia

These days I need support, so I planned to wear this new gown over my black linen Unterrock. This meant I needed a false white panel at the front, to go under the lacing below the Brustfleck. Although there are examples of lacing over a solid velvet panel, such as the image of St Barbara above, I prefer the look of the white linen. And while many paintings are obviously laced over the Hemd (you can see wrinkles), some are not.
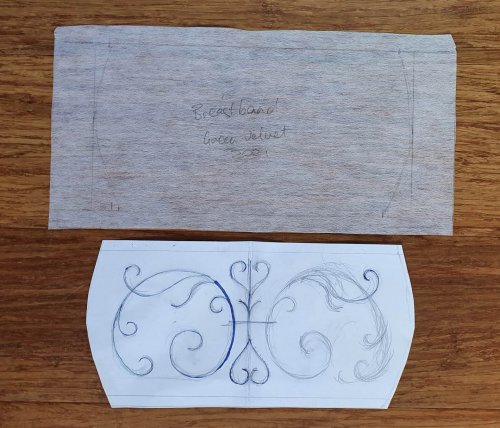
The first stage was to pattern the bodice, while wearing the Unterrock.
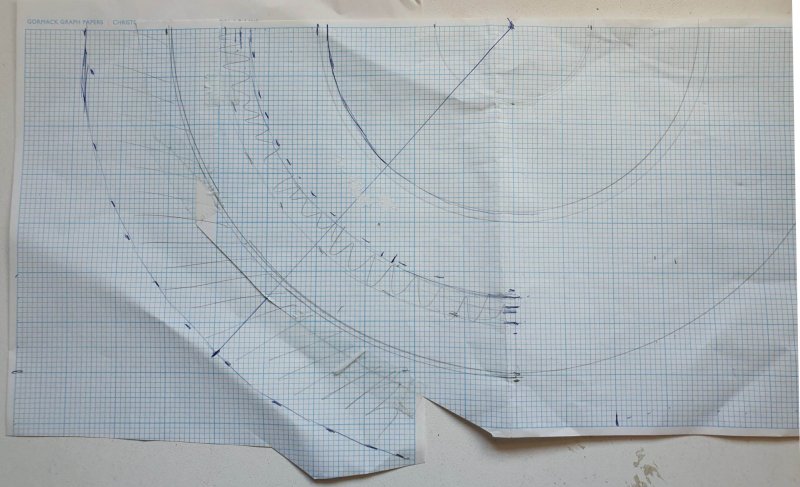
I had made a high necked gown decades ago, so I used that as a starting point for the pattern. Once the bodice was working, I drafted the sleeves and made a toile to test these too. I planned a half circle skirt but left the banding details until I knew how much brocade I had left after cutting the bodice and sleeves.
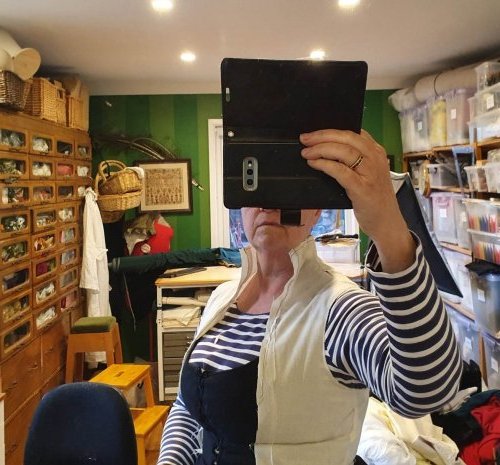

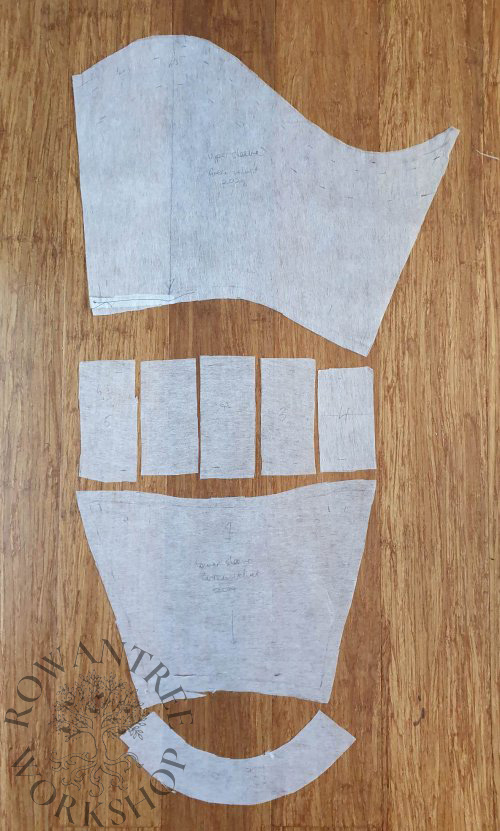
First, the bodice – the high neck needs serious support.
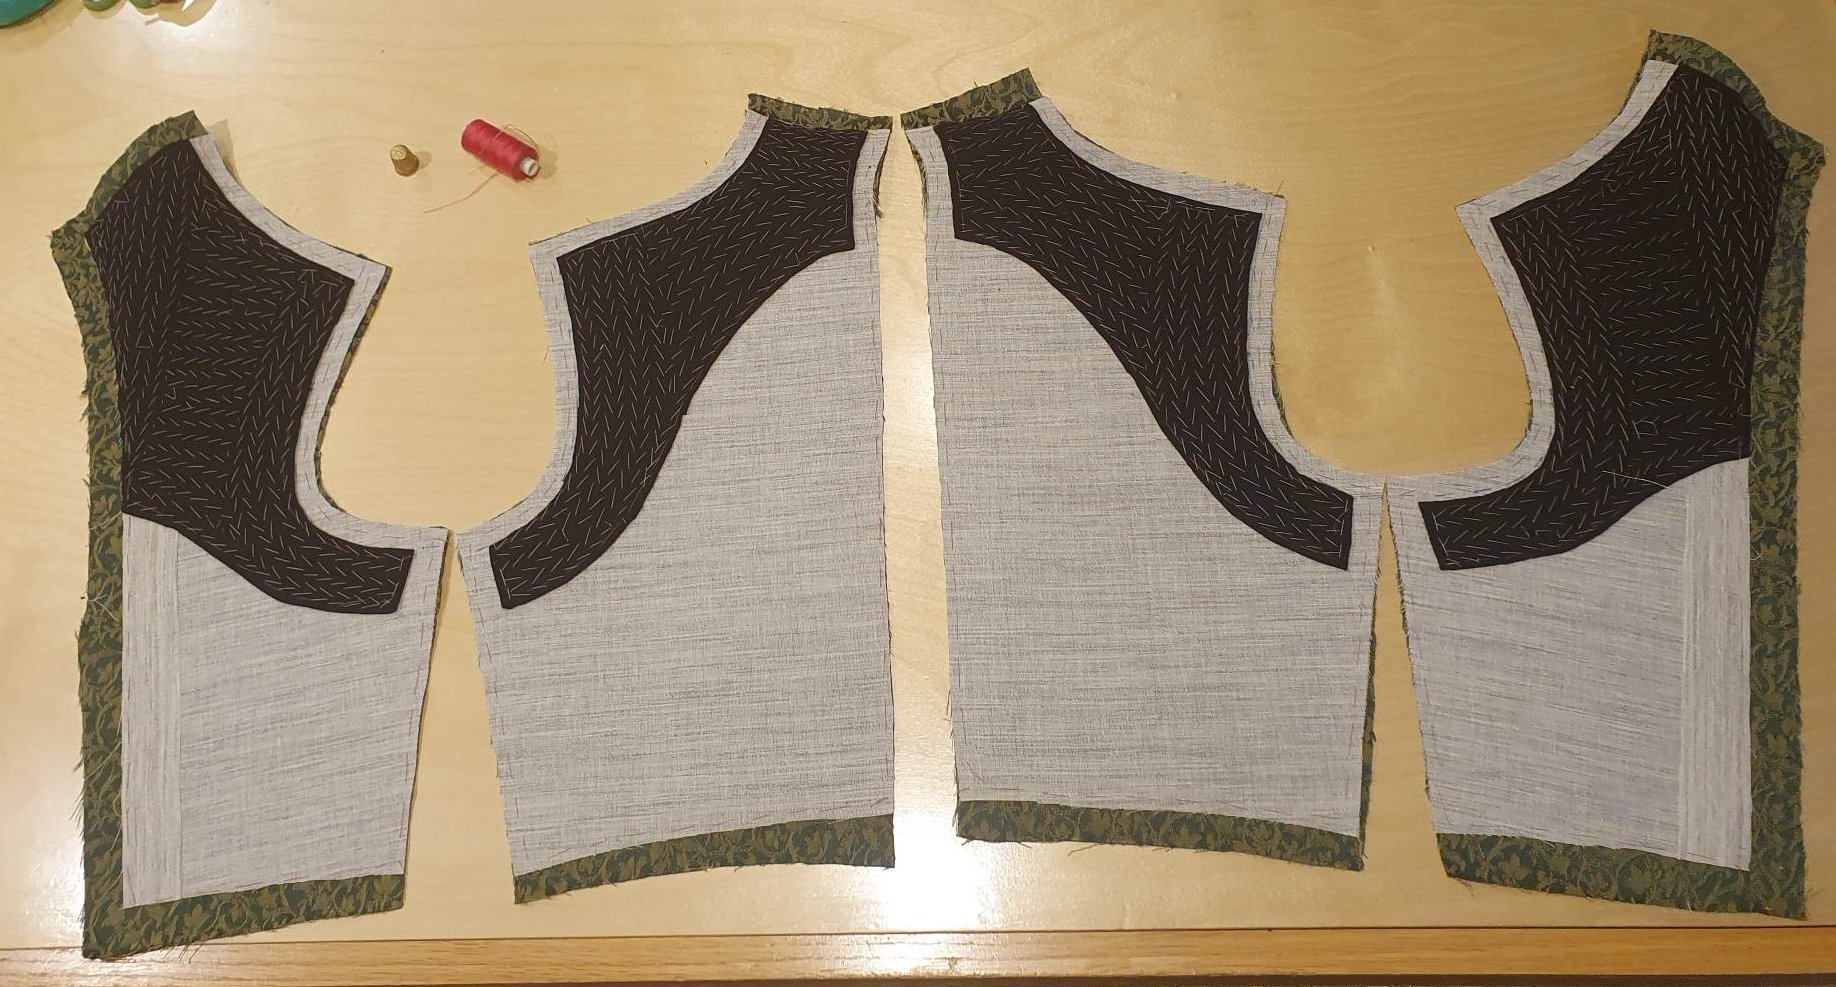
I cut the bodice out of canvas, added extra canvas down the front edge, then pad-stitched melton wool to the neck, armscye and front edge, managing the stitch direction and shaping as I sewed, to get the corners of the collar to curl out. Then I basted the prepared canvas pieces to the brocade.

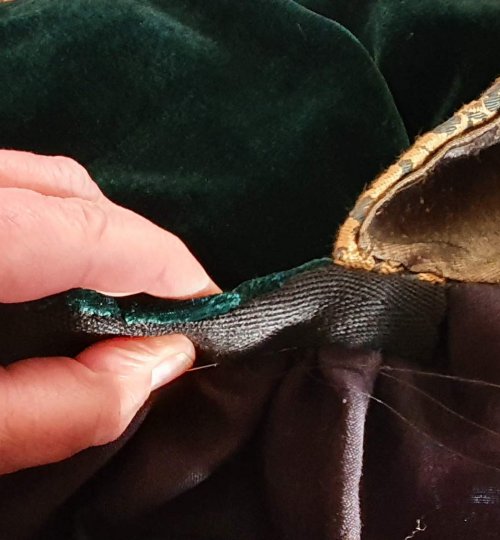
Once I had sewed and pick-stitched the side and shoulder seams, I turned the brocade hem in all around and catch-stitched it to the canvas. I slip-stitched in the gold silk lining, with my few scraps of green silk reserved for the inside of the neck.


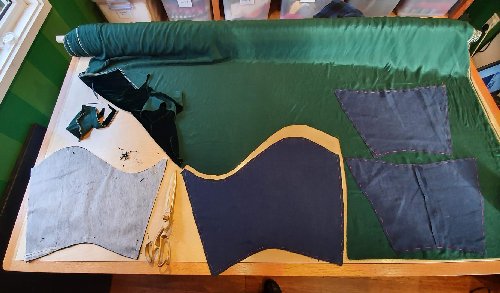
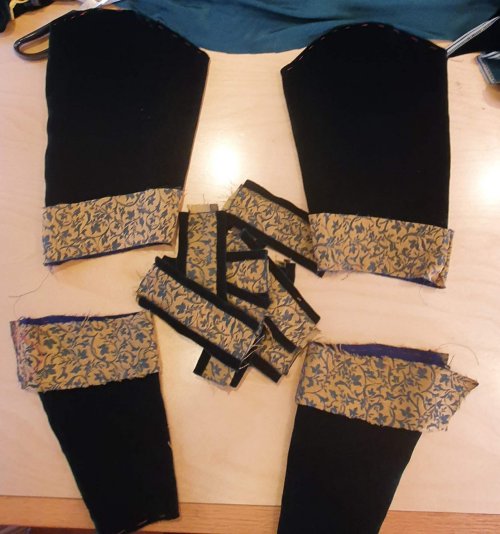
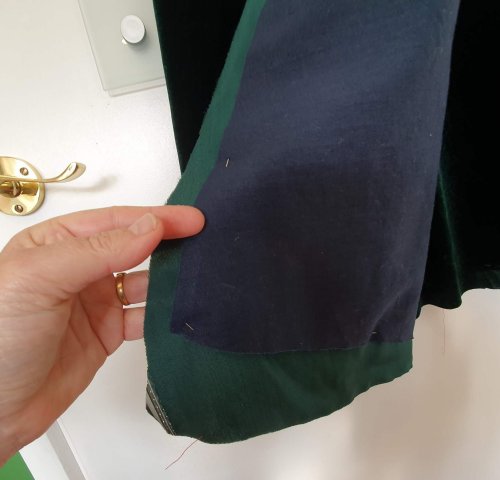
Next, the sleeves, which are mostly silk velvet – notoriously difficult to manage!
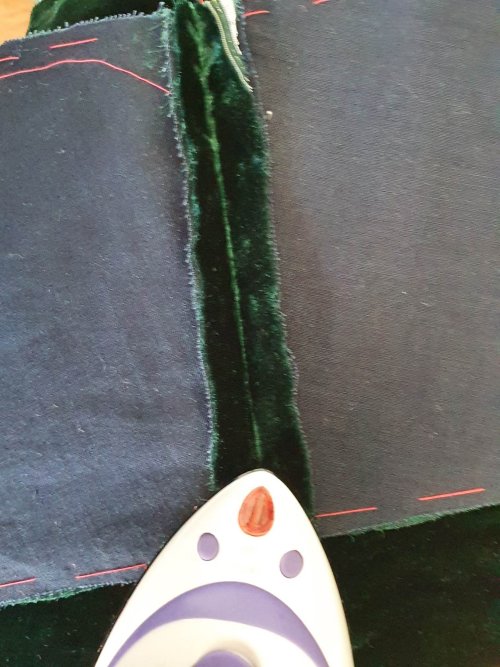
To make it easier, I basted the linen interlinings to the velvet first, then cut out the pieces. I hand-basted the pieces together before machine-sewing the upper and lower sections (with a walking foot), and then pressed them using another piece of velvet on the ironing board, to avoid crushing.
I cut the brocade bands for the upper and lower sleeves, basted these to the free edge and slip-stitched the other edge in place. The elbow strips were fiddly, as I was using up scraps of brocade. I basted and sewed the silk velvet edge strips to the brocade, turned and basted to the back, then lined with silk.
I sewed these to the upper and lower sleeves (in the correct size order), making sure the lower arms seam was rotated to end at the wrist-bone, and then lined these sleeve sections in silk.

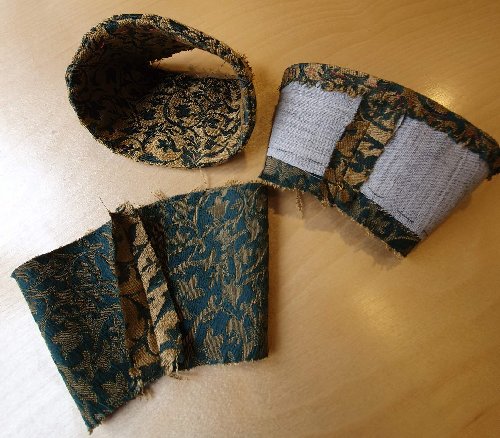
The cuff is made of the same brocade fabric inside and out. One side is stiffened with canvas, then the top hem catch-stitched down.
I stitched the outer cuff to the outer velvet of the sleeve, then spread the seam open and basted. I slip-stitched the inner cuff in, along the open end, and hand-stitched ‘in the ditch’ where it joined the sleeve. Then I turned it inside out, slip-stitched in the lining at the top and then at the base, along my stitching line.
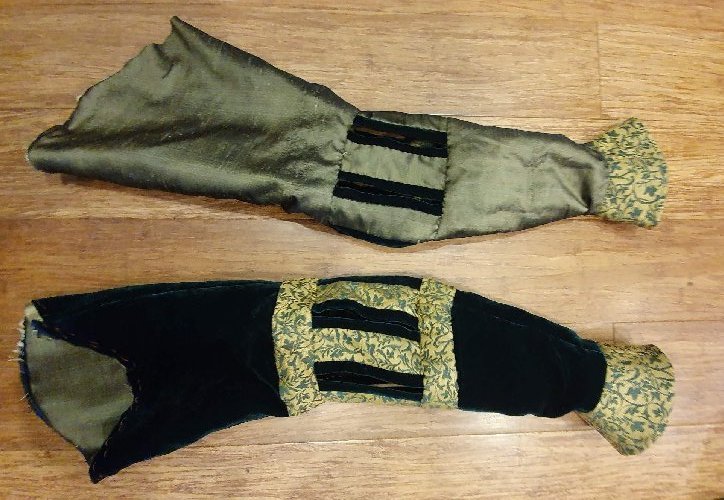
I basted and sewed on the sleeves, and then checked my pattern for the shaped guard around the top of the arm against the finished sleeve. A little tweaking before I cut this out and slip-stitched it on place, then slipped in the top of the sleeve lining. Main bodice complete!
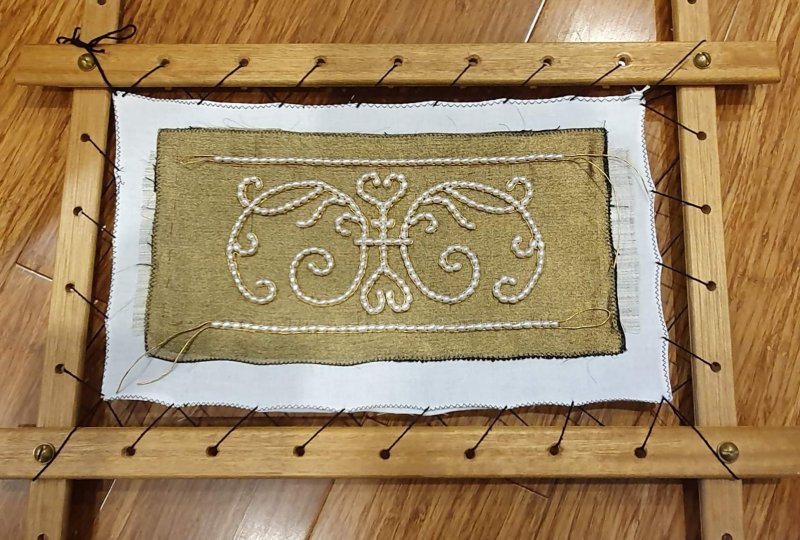
Next, the Brustfleck.
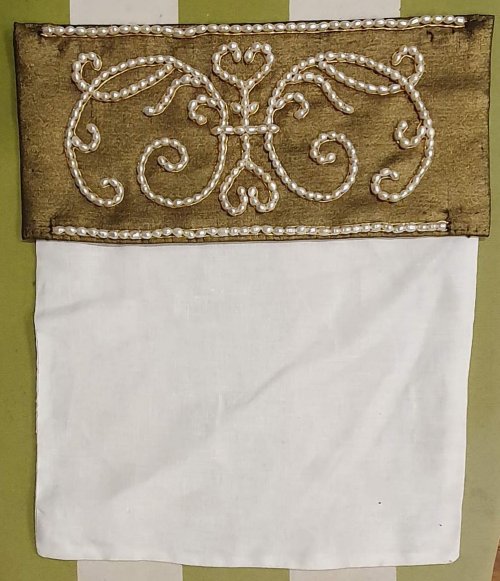
Once I had the bodice finished, I could try it on with the Unterrock and check the size and positioning for the Brustfleck. The decoration was limited by the number of freshwater pearls I had on hand, so I went for simple swirls based on (yet another) Cranach Portrait of a Woman from my target date range.
I set up my slate frame with some shot gold silk mounted in waste fabric, then couched down the freshwater pearls, and outlined with couched gold cord. I cut it off the frame, backed it with canvas and linen, ready to add to the bodice.

On to the skirt.
Now I knew how much brocade I had left to play with, I could calculate the bands for the skirt to make the best use of it, and then plan the velvet bands. The top of the skirt is 3x my waist (over the Unterrock), to give full pleats. I cut and assembled the brocade sections of the skirt, leaving only scraps.
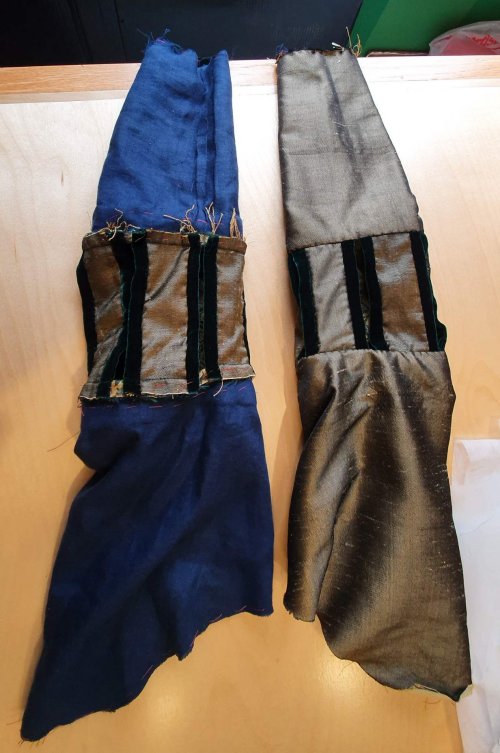
For the velvet pieces, I basted the linen interlining on first, then cut out the silk. I basted and sewed the pieces together for the narrow strips, but I knew the large panels would drop, so I pinned these to soft hangers and let them relax.

Then Covid.
The event was called off and without that incentive, the project went on hold. Like so many other people, I lost my creative spark for quite some time. I cooked, gardened and coped with lockdown…
A year later….
Covid was being managed and the event was rescheduled. I had started teaching online and got my mojo back. Time to get this project finished!
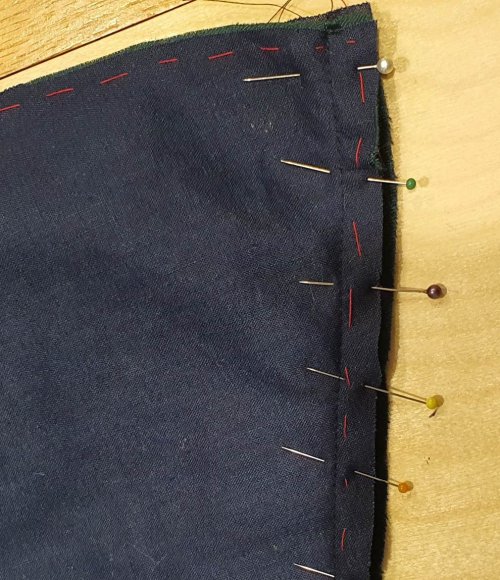
After a year’s hiatus, the large velvet skirt panels had dropped badly (actually, a benefit of the long delay!). I hung them on my wall pinboard so I could undo the side and edge basting, then re-pin, re-cut and re-baste. I sewed the side seams, then trimmed the interlining and felled the velvet edges.


I lined up the hem panels to check I had enough length of each layer. Because of the velvet, all the long seams had to be hand basted first, but it does reduce frustration when sewing! I added the bands one at a time, to build up the whole skirt, staggering the ends. Once basted and sewn, I whipped the seam allowances to the linen interlining.

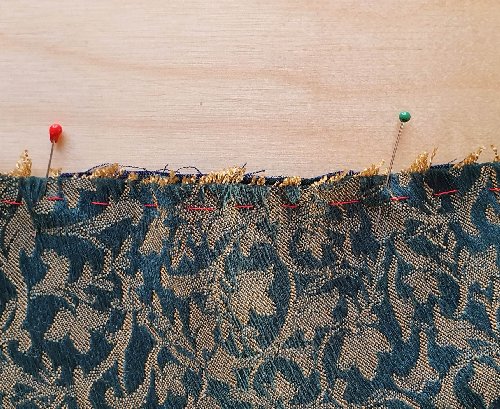
At the top of the skirt, I cut a shaped 15cm linen facing, sewed this to the top then folded under and slip-stitched to the linen interlining, ready to pleat onto the completed bodice.
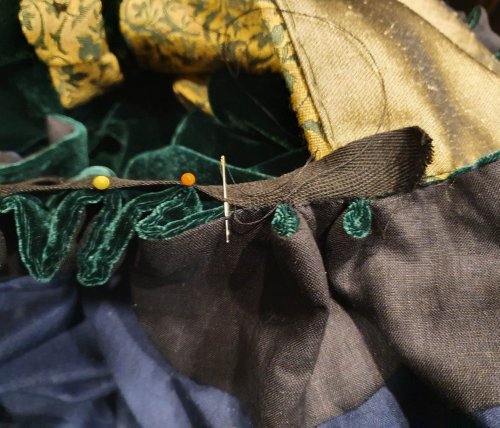
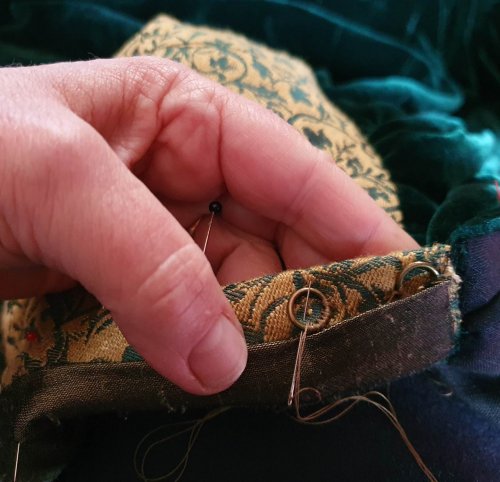
I sewed a piece of 2cm twill tap to the edge of the bodice to hold the pleats across the front gap, then folded the bodice, dividing and pinning at the half-way mark, then quarters, etc up to 32nds. I did the same for the skirt, then matched the marks to pin them together.
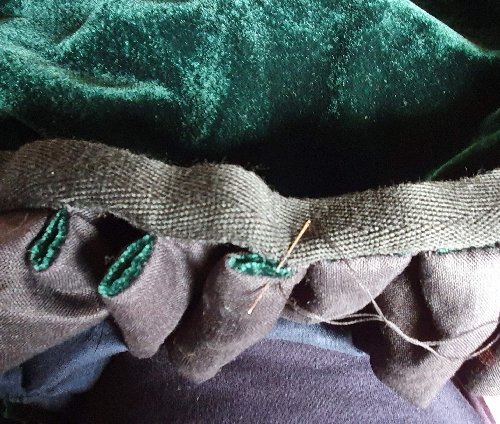
Pleats are done in 2 stages – first whipped to the bodice, then squashed flat and whipped again into the back of the previous pleat. Across the open front of the skirt, I pleated onto the twill tape, which is then sewn to the back of the pleats. A hook and eye keeps the skirt closed.
I tried on the new Rock over the Unterrock to get the hem length, with the Brustfleck pinned in place. At this point it became clear that the straps on my linen Unterrock were too wide – they were visible in the corners. Luckily I had made a new twill Unterrock with narrow straps, which was fancy enough to work with this gown!
Once I had trimmed the hem, I used it to pattern the hem lining in heavyweight light green linen – not ideal, but my stash choices were limited and it would not clash too badly. I cut the lining, sewed around the hem, then slip-stitched to the interlining, neatly hiding the back of all the bands and adding fullness to the skirt.
To finish off, I added hooks for the Brustfleck and brass lacing rings to the bodice, before slipping the lining down (it was basted in place until I could add the fastenings). I worked buttonhole bars on the Brustfleck and tacked on the linen panel (so it can be removed for cleaning if needed). Finally, I made an aglet for the lacing braid.

I got it finished a few days before the event, so there was no last minute rush – I had time to do it all properly.
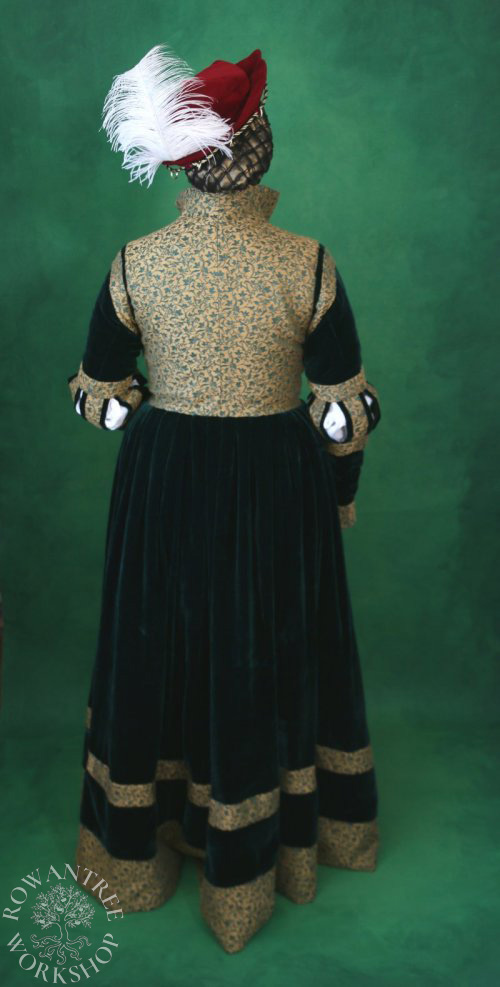
I had planned to make a fine gauze Goller, but ran out of time, so I wore it with my Halshemd – a bit too heavy, but a better look than a low-necked Hemd for this outfit. I wore an old favourite Barett and made a new Goldhaube from the same silk as the Brustfleck.
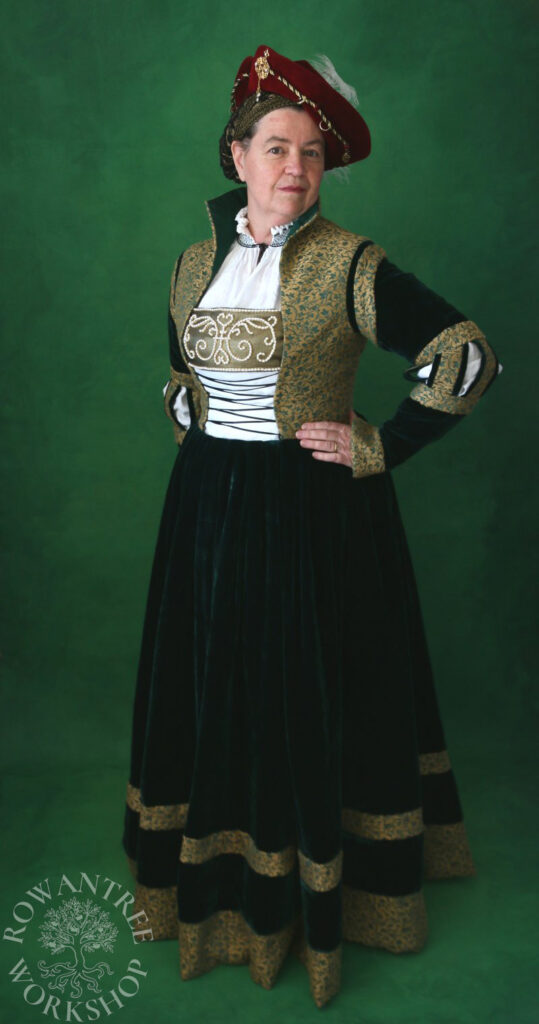
I was really pleased with the end result – it had been worth the long journey and I had done Francesca’s fabric legacy proud.

Afterthoughts
More than a year later, I did finally make the fine pleated Goller. I really like the contrast between the fine linen above the Brustfleck and the solid white below.