A rich vest style Goller of silk brocade lined with fur, suitable for a well-off merchant’s wife in early 16th century Germany.
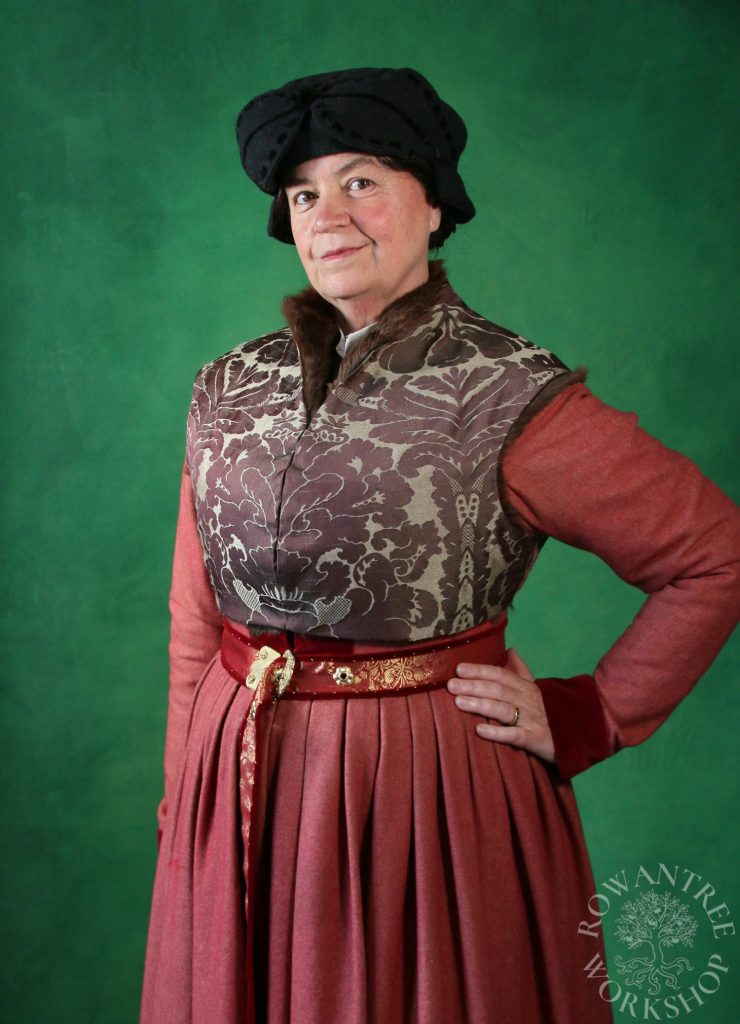
I’ve had this one on my wish list since I made the Schlappe (hat) from the same portrait last year, and was reminded of it when I made my blue wool Goller earlier this year. Then when I pulled out all my recycled fur to find something for the lettice cap, I found some lovely rich brown fur, which would be ideal for this piece.
I had a winter event coming up, and it would be nice to have something new….
Research and Design
The Goller comes in several forms and was worn by both men and women. They cover the chest and shoulders and were used to provide modesty, warmth and/or as a fashion statement. The various forms of Goller were an essential part of a woman’s wardrobe in early 16th century Germany. Versions were worn by woman of all classes, in a range of materials depending on the wearer’s status.
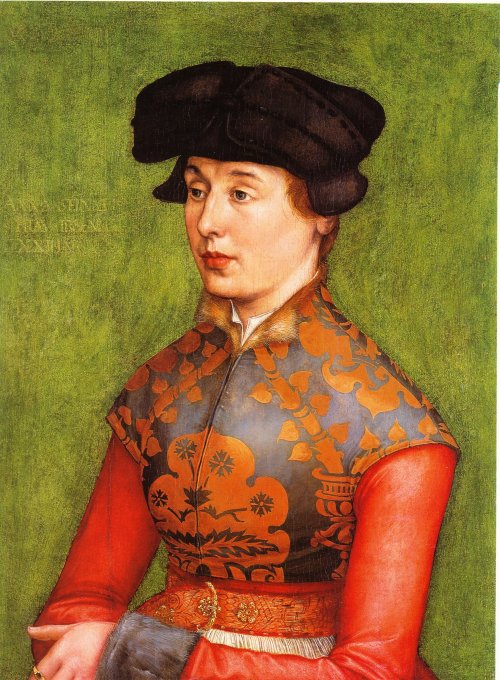
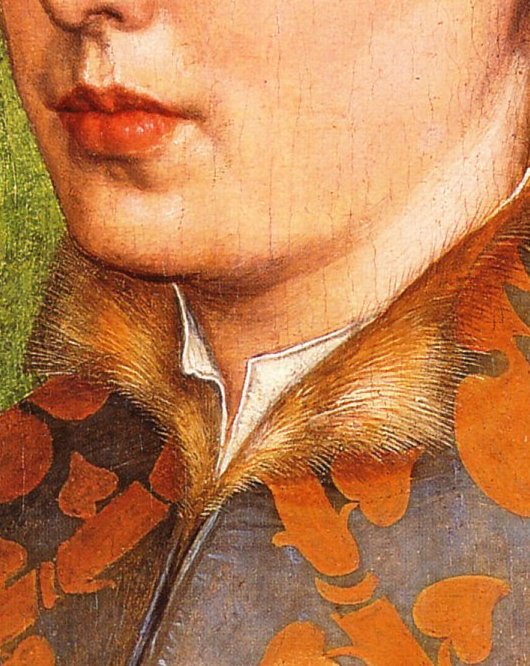
The main inspiration for this Goller was the Portrait of Anna Dürer, the wife of Hieronymus Flaischer from Nuremberg. I love the bold brocade, so carefully matched down the front opening and the fur adds to both warmth and luxury.
Textiler Hausrat (Zander-Seidel 1990) identifies this style of Goller as the ‘sleeveless jacket’ or ‘jacket-like’ type, and notes that, unlike the common cape style, this vest style stayed in fashion for women from the 1520s into the 1570s. It has a front opening with a small gestalt collar (or no collar) and stops just under the bust, well above the waist. There are no sleeves, although some examples extend to a small sleeve cap.
The style was popular with women of all classes, made with appropriate materials. Zander-Seidel identifies the version worn in the Portrait of Anna Dürer is a ‘Damastgoller’ – a Goller made of damask or atlas (silk satin), clearly made for a wealthy citizen’s wife. She wears it over the top of a linen Goller, visible at the neck.
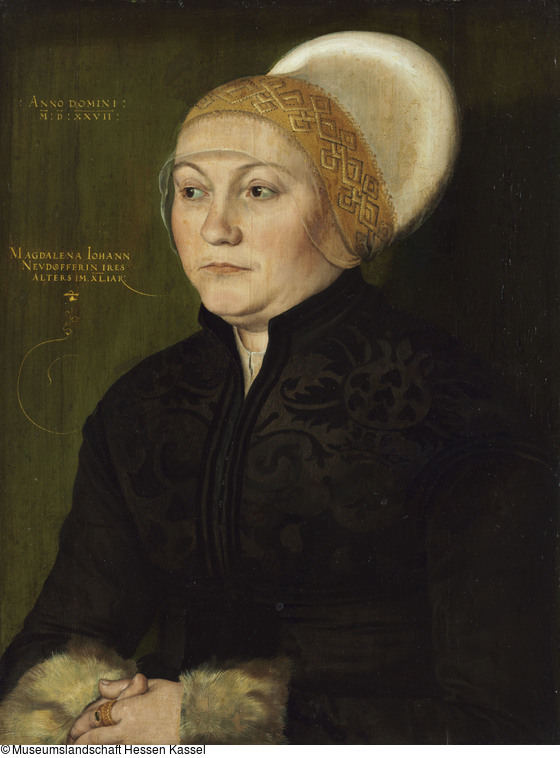
This same arrangement of Damastgoller over linen Goller can also be seen in the Portrait of Magdalena Neudörffer by Barthel Beeham, with a dark brocade decorated with narrow bands and the hooks and eyes clearly visible down the front opening.
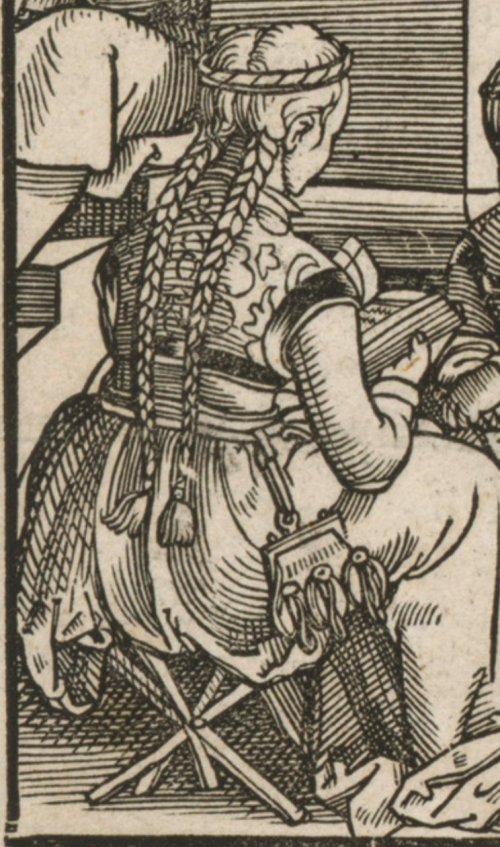
The Damastgoller in the woodcut by Georg Penz also shows brocade, with broader velvet guards at the armscye and base, although no indication of fur lining.
Source: State Museums of Berlin
Fur-lined Gollars of this style were worn by lower class women, made of wool rather than damask. The woodcut of the Boerenfeest (The Nose Dance at Gimpelsbrunn) by Sebald Beeham shows a Goller of similar cut worn by a Bauer (peasant), also lined in fur. The simple shawl Goller was often fur-lined.
Different classes were restricted in their use of rich fabrics and furs. Drei Schnittbücher (Barich & McNealy 2015) includes a set of sumptuary laws from the Tirol, which allows merchant’s wives to wear satin and damask, velvet trim and many furs – vair, marten, polecat, fox and rabbit – but not sable or ermine. Peasant women were allowed only woollen cloth, with rabbit and lamb as linings. Judging by the colour and hair length in the Portrait of Anna Dürer, the fur might be fox.
This woodcut from The Book of Trades (Amman & Sachs, 1973) and painting from the Die Hausbücher der Nürnberger Zwölfbrüderstiftungen show the furrier, who made fur linings from new or recycled furs. Furs were expensive, and even royalty had their fur linings recycled and remade (Landini, 2011). Linings were made up as a separate item with their own hems etc, and then sewn to the completed outer garment.
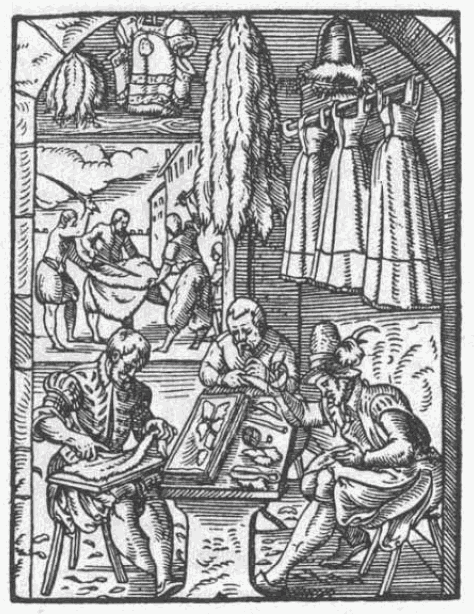
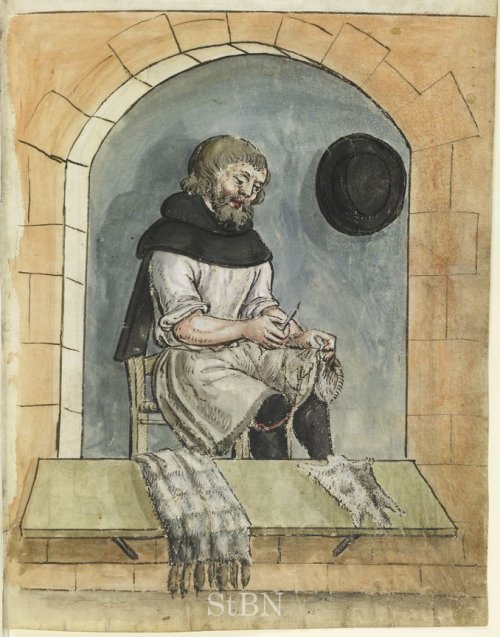
Source: Germanisches Nationalmuseum
My version of the Damastgoller is modeled on the Portrait of Anna Dürer, using brocade with a large scale branching design similar to that on the portrait, and lined in fur.
I am making this Goller from stash – heavy silk brocade leftover from a friend’s project, linen interlining, and a recycled fur coat for the lining. I hope I can match the brocade as beautifully as the example on the Anna Dürer portrait!
Construction
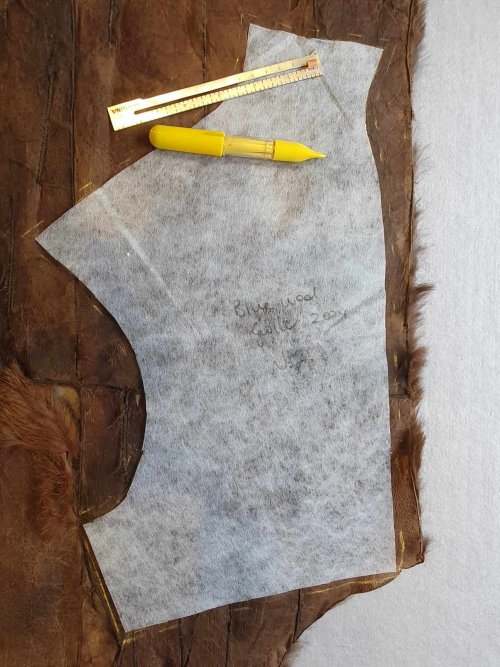
I started with the pattern I made for my blue wool Goller a few months ago, since this is essentially the same cut. However, the fur lining adds a lot of thickness, so I need to add extra seam allowance to the pattern before cutting the fur – and adjust again before cutting the silk outer shell.
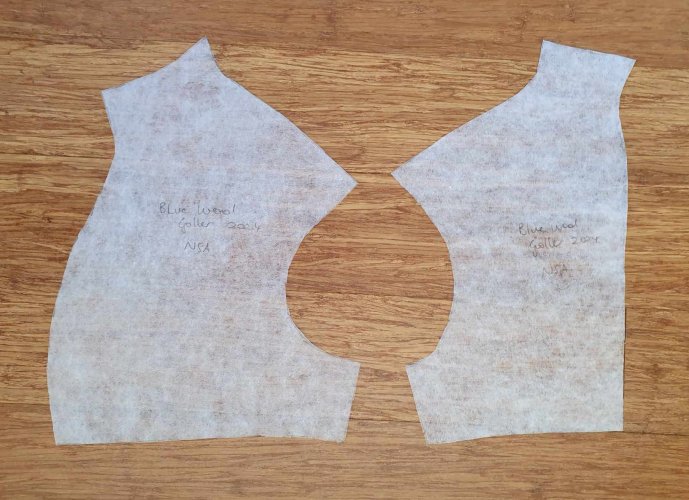
Having learned from an early fur-lined Goller that fur direction is critical, I looked carefully at the portrait. You can see fur at the collar, but not at the lower edge – the fur lining is running ‘up’. This means the Gollar will not ride up in use, as it would if the fur ran ‘down’.
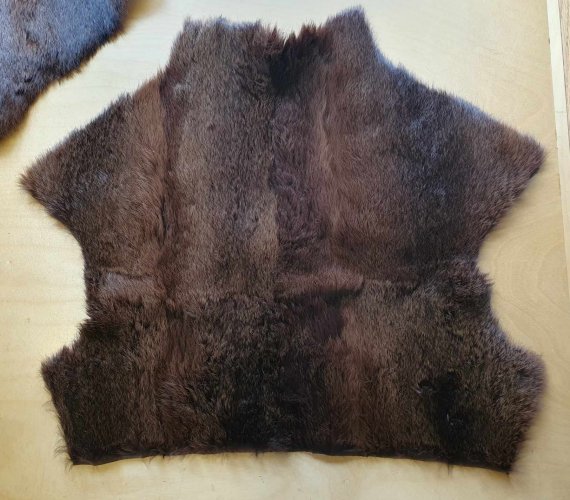
The old fur coat was in poor condition, with many ripped seams and weak areas. But the fur itself still looks good and pelt matching does not matter in a lining (although fur direction does), so I will use the best bits and reinforce where needed.
I laid out my pattern, matching fur direction, and added 5mm all around – extra size in the seams (side and shoulder) and for small hems (neck and base). I added 1.5cm at the front in case my calculations were off. I carefully cut the pieces out with a razor blade, cutting the skin but not the fur.
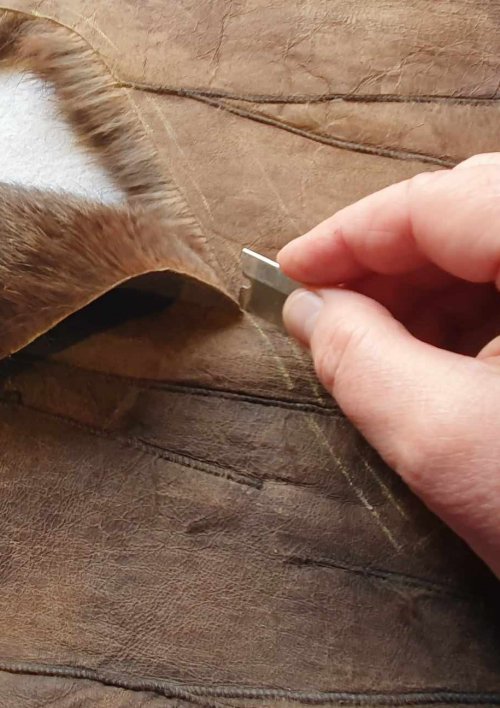
Despite choosing the best sections, I needed to deal with some small rips and reinforce weak areas with 3M Micropore surgical tape (which sticks well to skin). Some sections needed both tape and stitches.
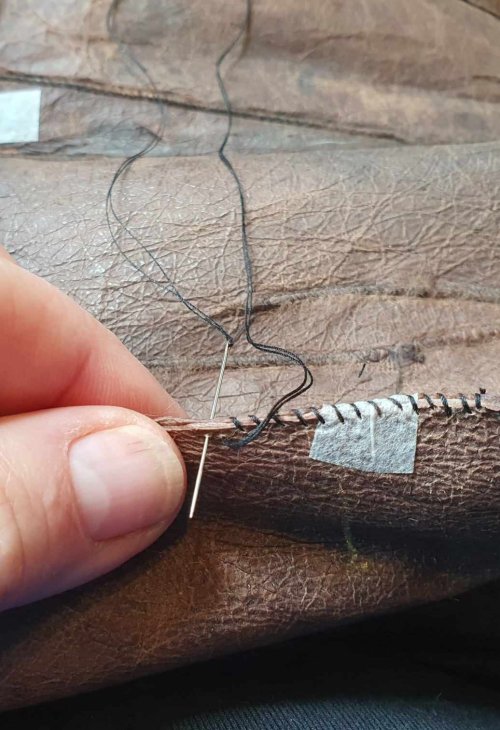
Starting with the shoulder seams, I marked match points along the seams and then joined them with Micropore tape (in place of pins) before whipping over the seams with waxed silk and a very sharp needle. (You can use a sewing machine and fine zig-zag stitch, but I prefer the finer control of handsewing).
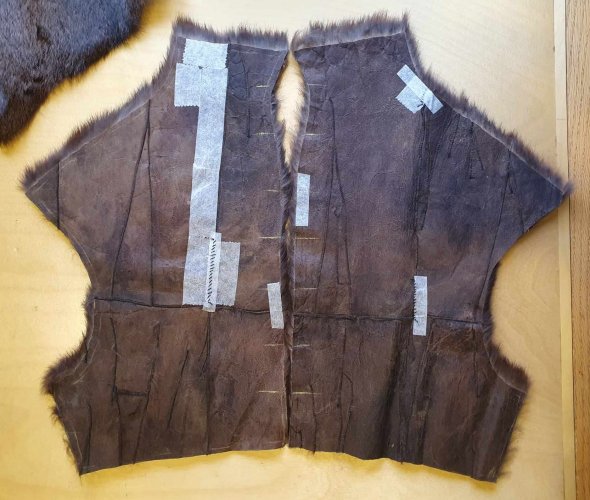
Before going further, I taped the side seams and tried on the lining over my Unterrock and Rock. The tape was not strong enough to hold under pressure and broke, as did another fragile section of skin. Rats!
At this point, I needed to pause the project to prepare some classes and finish the Galero, both of which had deadlines.
Once I had time again, the change in seasons meant I was not going to get to wear the Goller this year, but I didn’t want it hanging around as a UFO (UnFinished Object), so onwards…
I repaired the torn area, added tacking stitches to the top and base of the seams, then tried it on the form again, holding the front in place with metal clothes pegs. This worked much better! It needed adjustment in several places, so I marked these and took it off (carefully), then trimmed and re-sewed.
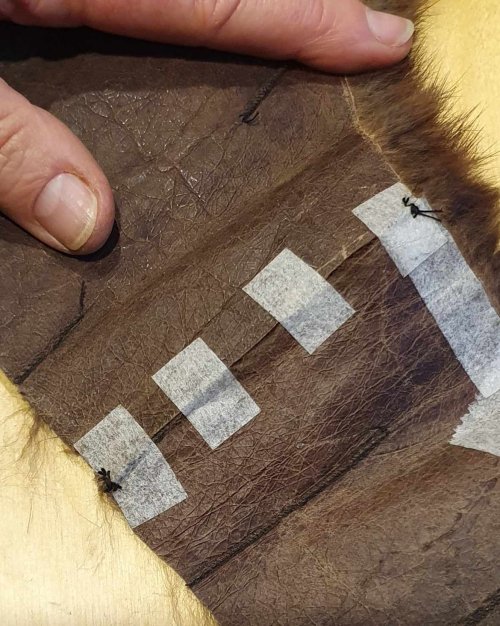
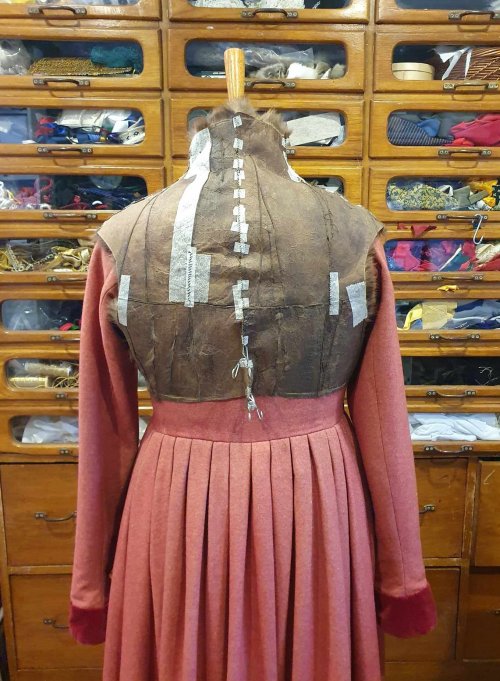
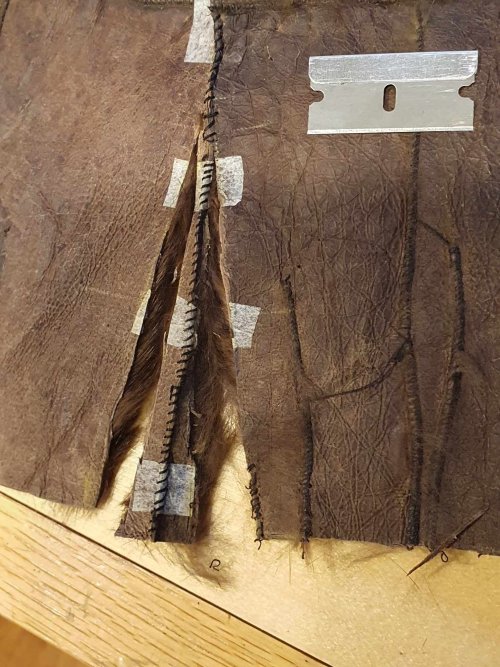
To be sure it fits well, I needed to try it on me again (the dress form is only approximate), but I wanted to finish the armscye and lower edges first, which will strengthen and stabilise the fragile skin.
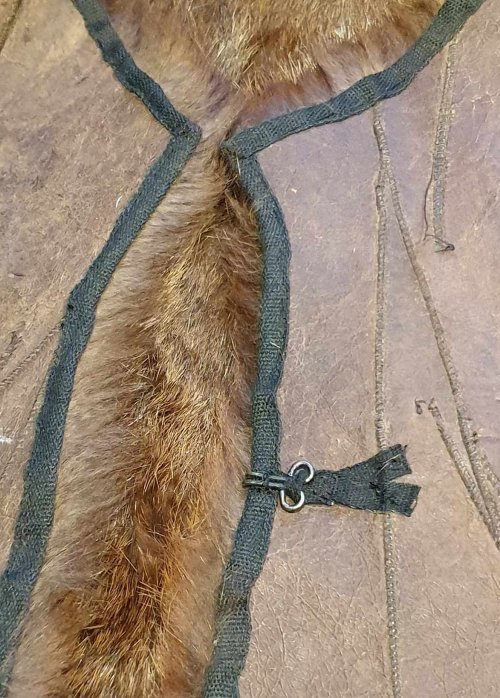
I whip-stitched black cotton tape against the fur side along the base and armscyes – the tape has a slight curve, which helps it sit easily around the armsyce. Then I turned the edge and carefully basted the cotton tape to the skin.
With these edges stabilised, I put on all the layers, then tried the Goller on again, comparing it to the painting. I needed to reduce the collar height and trim the fronts – making sure the sides are identical, so the brocade will match down the front.
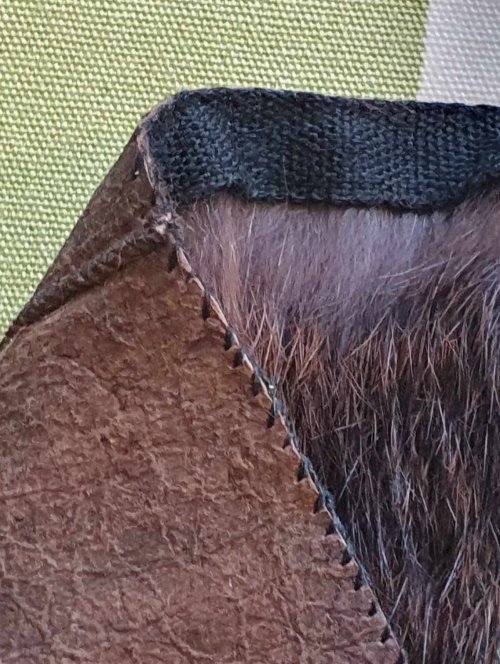
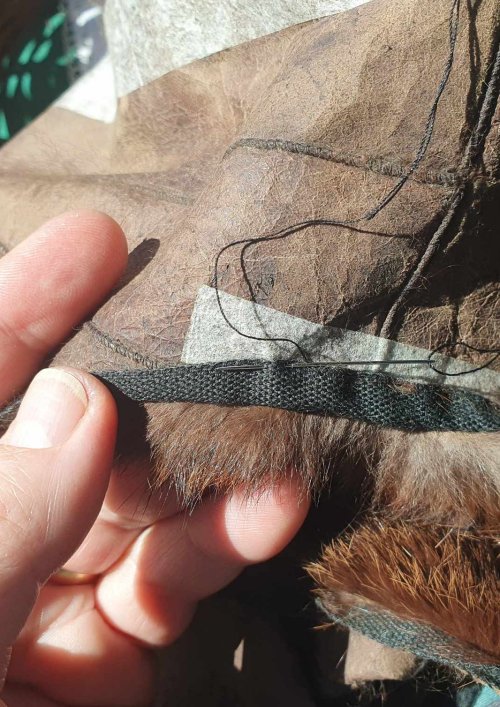
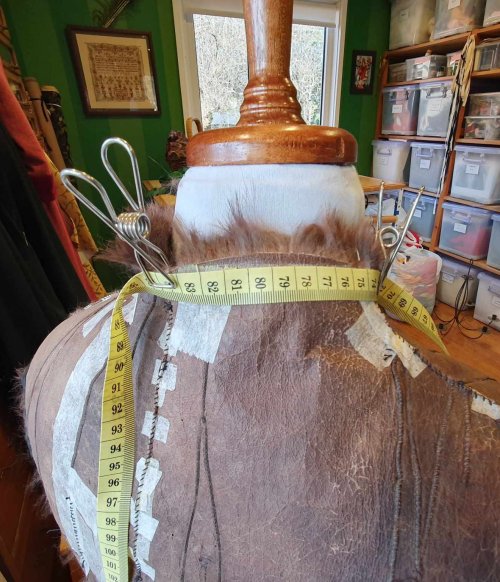
With the final adjustments made, I sewed tape to the front and neck edges – so glad I am finally done with this stage!
Next, the front fastenings.
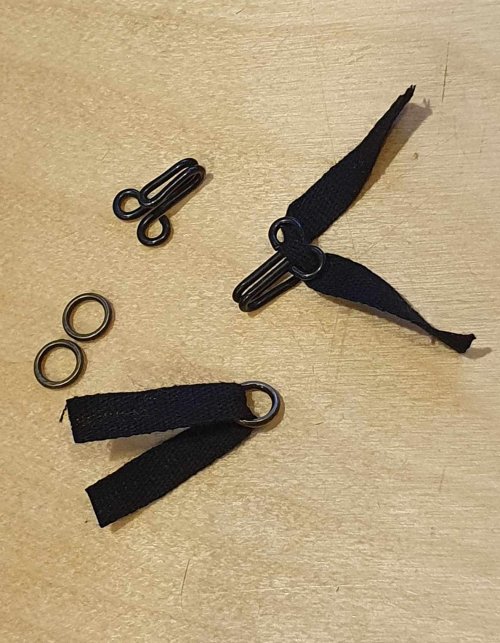
You can’t just sew hooks and eyes to the skin – they will break away. Instead, I’m looping narrow tape through the ends, then sewing this down in several places, to spread the load. The matching eyes were too large, so I’m using rings instead.
I sewed them on, lining up the edges, then put on all the layers (again) and tried the fur on. I needed to move a few of the hooks and rings to make it sit smoothly – it took a few rounds before I was happy. Although this is fiddly and frustrating, it is worth getting it right so the Goller will sit well when finished.
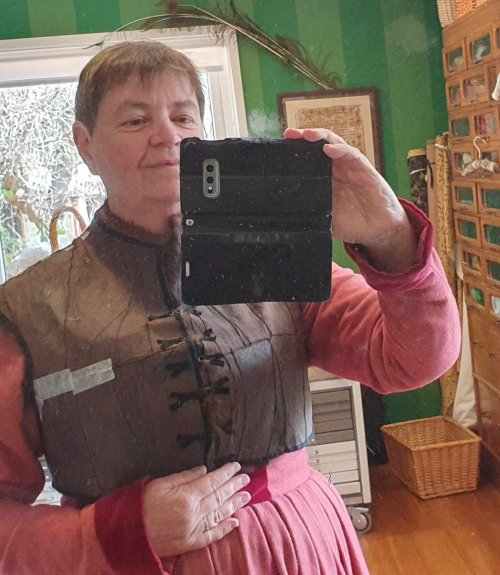
I cut an oversided copy of the pattern and draped over the fur lining on the dressform, to see what adjustment I need to make before cutting the silk. I cut the revised pattern from the brocade, carefully matching the pattern at the centre front and back.
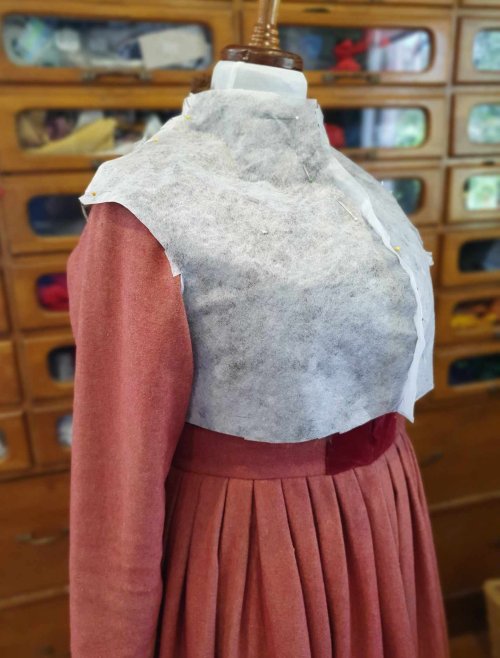
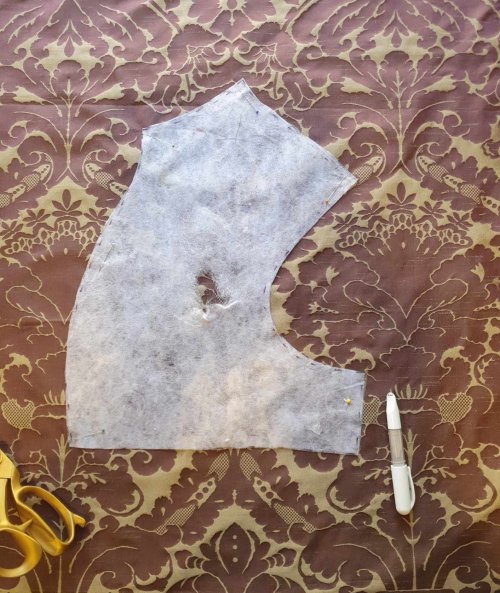
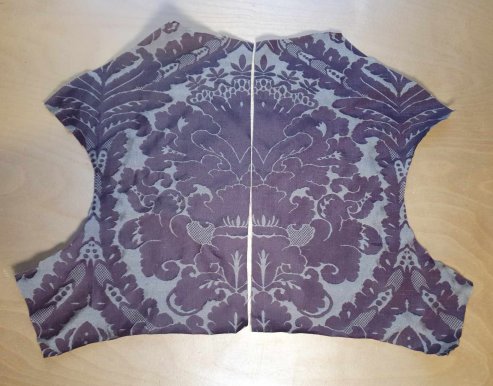
I’m adding a heavy linen interlining so the fur seam lines don’t show through the brocade, ensuring a smooth look. I tested whether this would look better with the 2 layers sewn as one, or as separate layers. I also tested if the edges should be doubled (fabrics treated as one), or the silk wrapped over the trimmed linen edge.
Result: the silk works best as a single layer in both cases.
I sewed the linen together at the back and shoulders, clipped and pressed, then pinned this to the edges of the fur on the form, marking the edges and the underarm seamline.
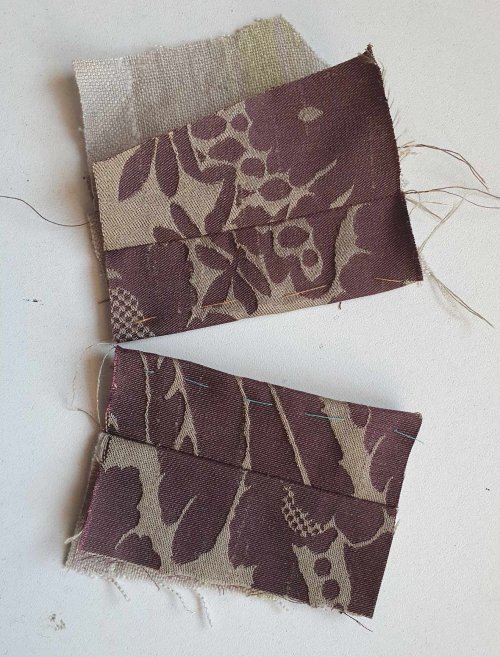
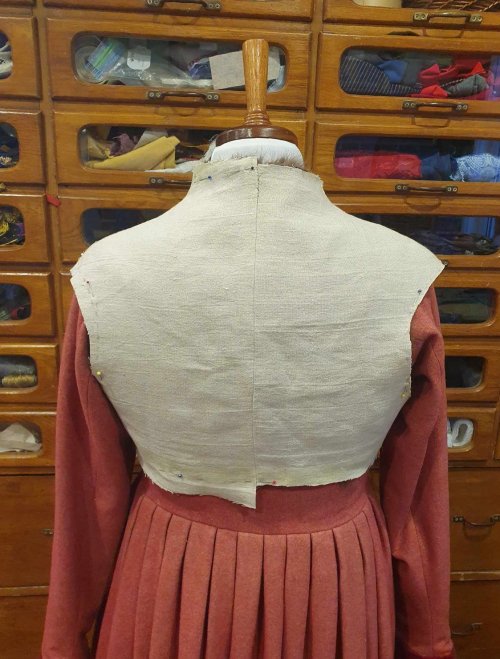
To ensure the pattern matched, I used pins to line up the layers, then basted and sewed the silk back. I clipped and pressed, then pinned this to the linen on the form inside out and marked the adjustment to the back of the collar. I trimmed, clipped, sewed, pressed and pinned back on the form.
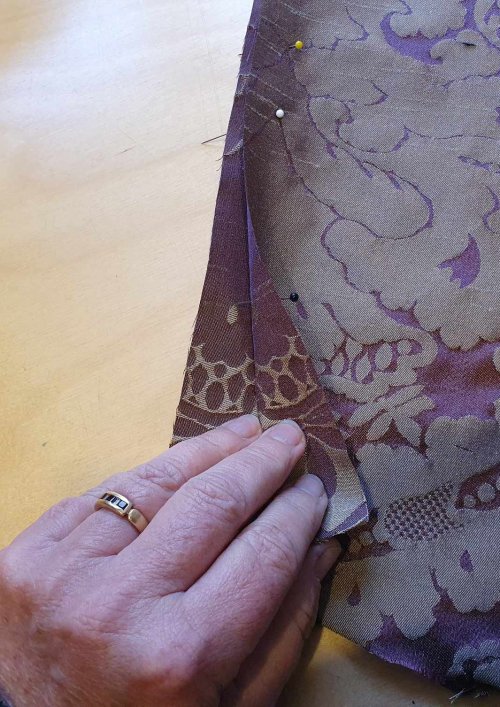
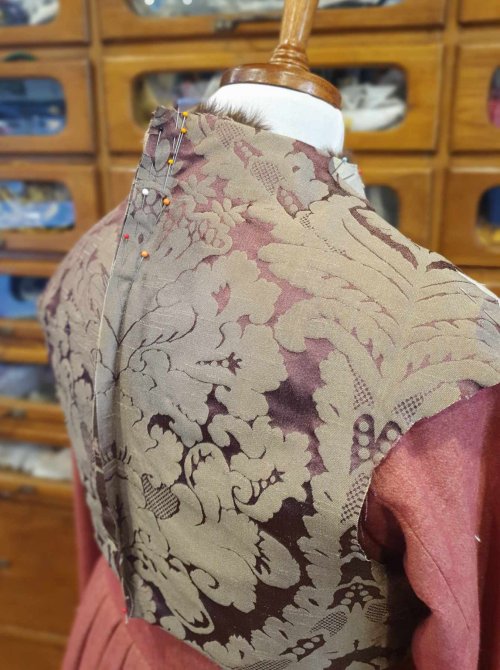
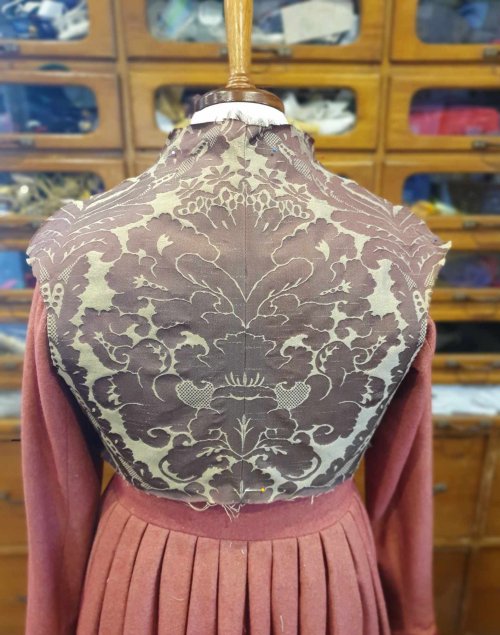
I pinned on the fronts, marked the shoulders and sewed these, then pinned it all back on and marked the side seams. This sounds really finicky and time consuming, which it is, but the matched patterns is what makes this garment pop – as you can see in the inspiration portrait.
Keeping the layers together, I unpinned them from the form, then basted the layers together and removed the pins. I sewed the side seams, then folded the silk over the linen edge, clipped and trimmed, and basted in place.
I checked it over the fur lining on the dress form (again) and adjusted the edges. Getting the fronts to match exactly was tricky – it’s a serious curve, and so obvious!
I took the fabric off again, then catch-stitched the silk to the linen lining and removed all the basting. Back on the form (again) for a final pinning to the tape edge of the lining and removed everything from the form.
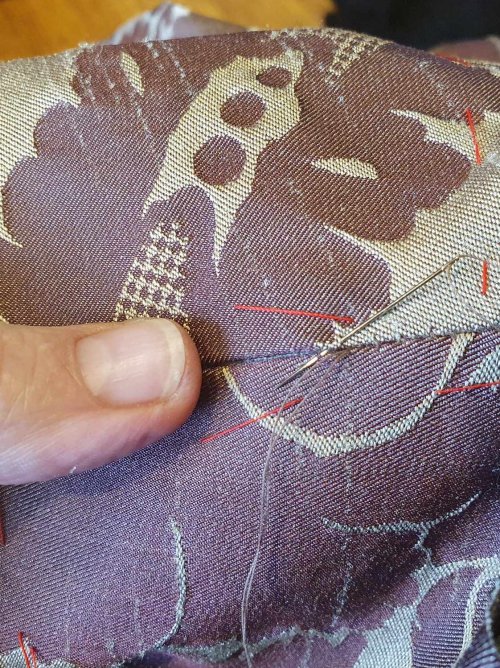
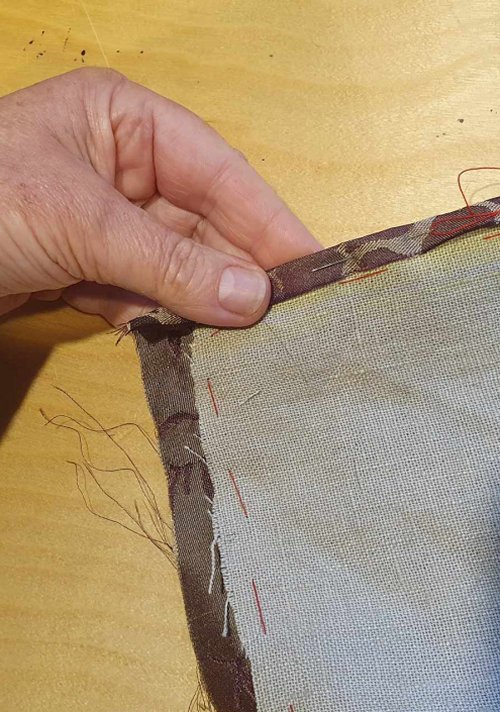
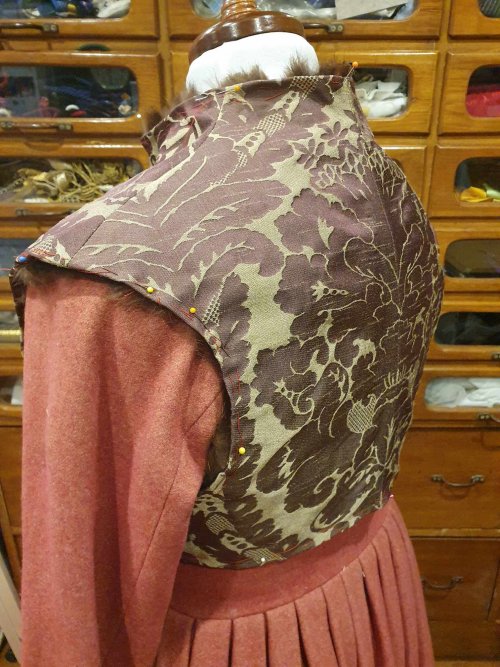
I basted the fur lining to the silk all around, then slip-stitched the tape edging to the brocade, a little back from the edge – neck, base and armholes – removing the basting as I went. This was easy along the base, but tricky at the neck with all the fur in the way!
I left the front basted and tried on everything (Unterrock, Rock, Goller) for the last time to check the front line, then took it off and slip-stitched the fur lining to the silk down the front.
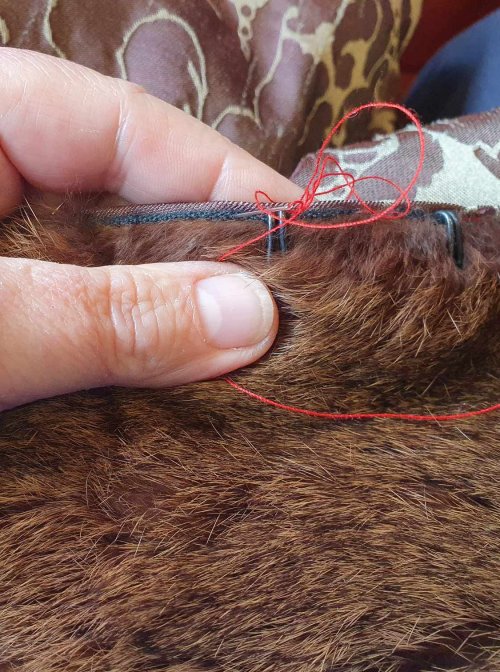
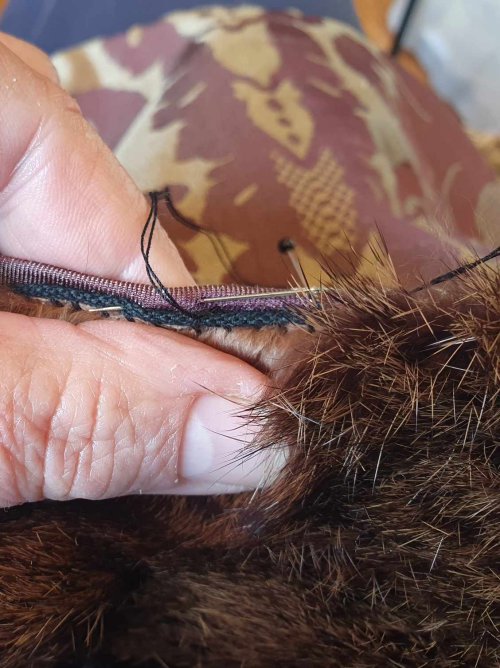
The Gollar is done!
I am really pleased with the end result, especially the pattern matching on the brocade, and how comfortable it is to wear. Running the fur ‘up’ inside makes it sit really well, even after active movement.
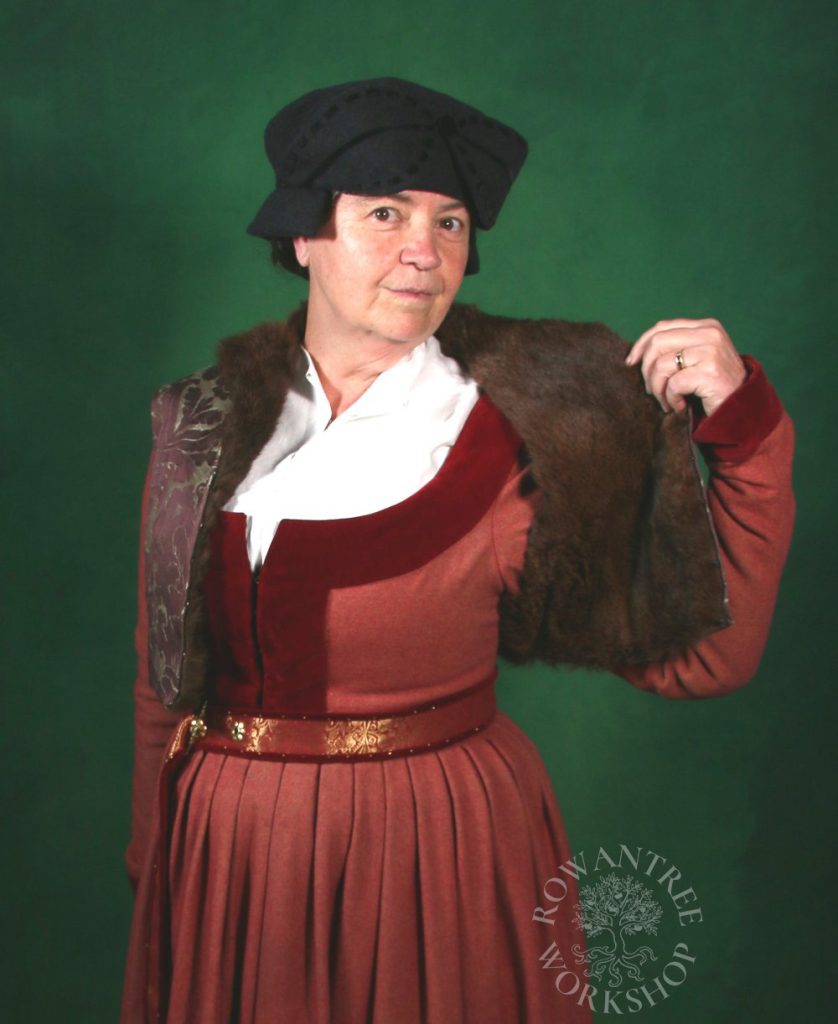
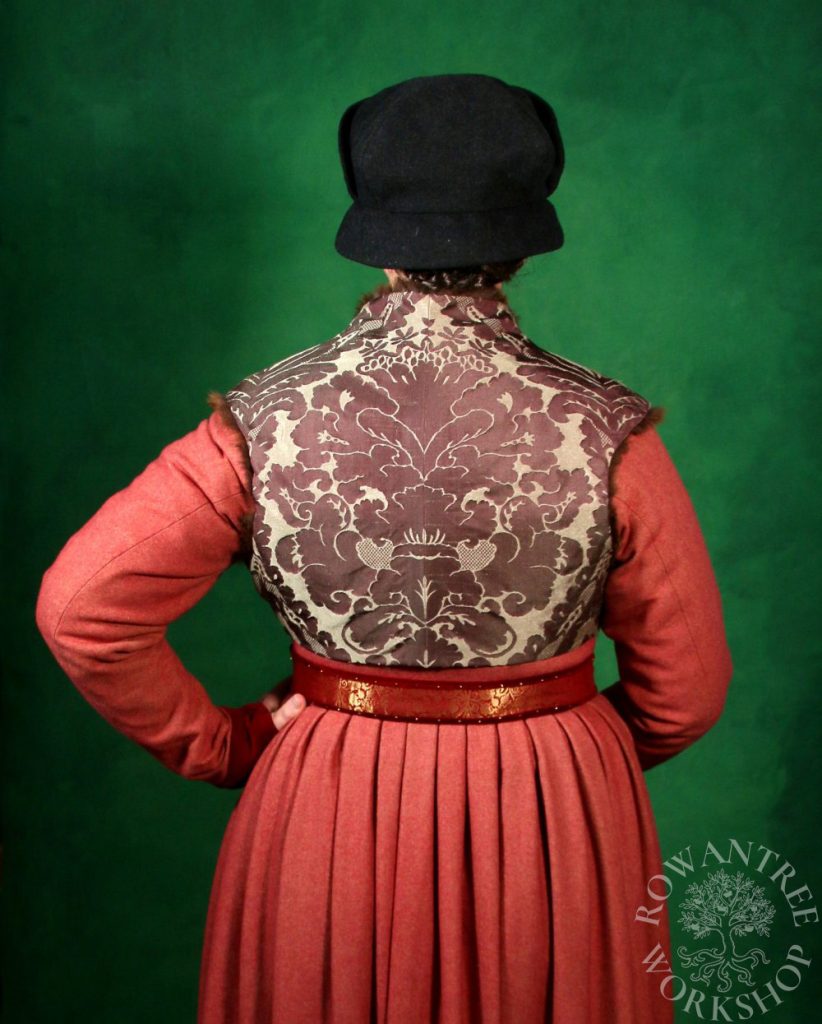
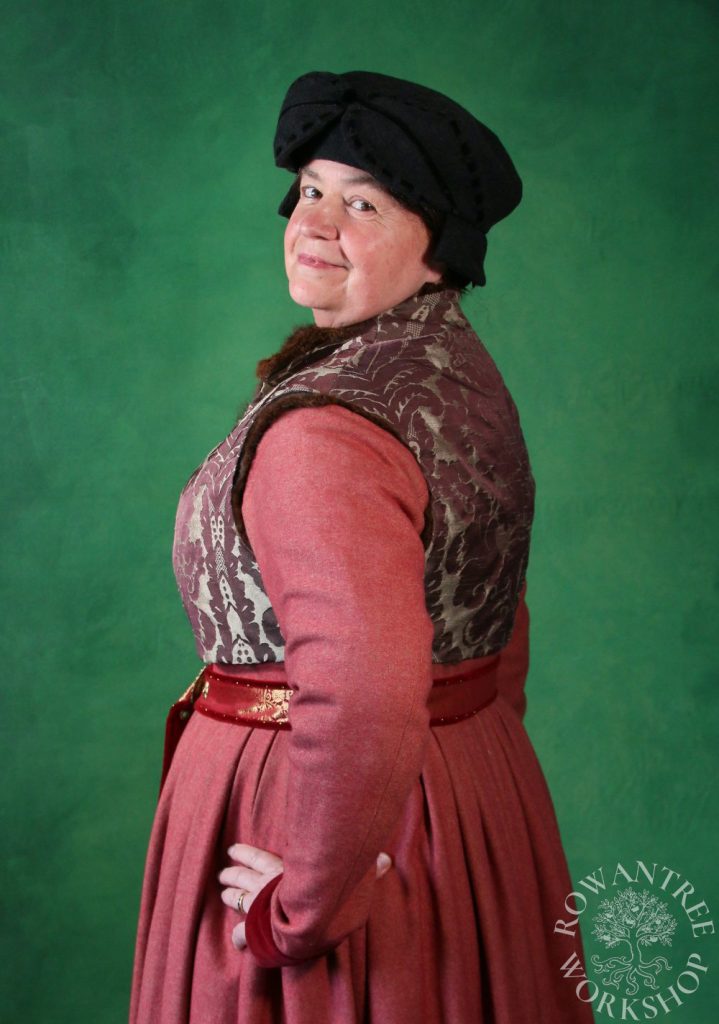
To match the painting, I’m wearing the Damastgoller with my pink wool Rock over a Frauenhemd (chemise, not visible) and linen Goller, my white linen Schurzfleck (apron), my black Schlappe (hat) – and my new brocade belt.
I can’t match the slope in her shoulders…

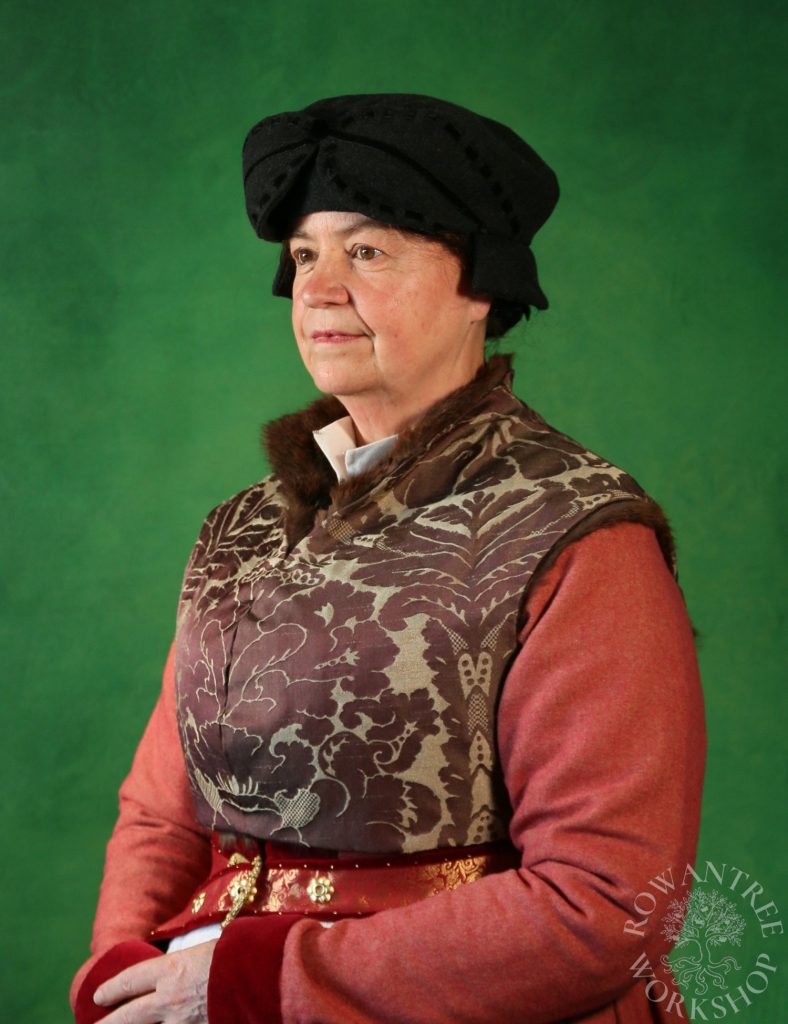
I look forward to wearing it out in the world once the colder weather returns…

