

This style of hat was worn by German men and women, particularly middle classes, during the early-mid 16th century, as an alternative to the Barett. It was worn over dressed hair or (for nobles) over a Haub.
This style of hat has been on my To Do list for years, but never quite reached the top. Then I was asked to teach a class on 16th century German headwear, including the Barett and Schlappe. I had plenty of Baretten examples, but no Schlappe, so I finally dug out my the research and started patterning…
Research & Design
The term ‘Schlappe’ means ‘loose’. In modern German it is used for slippers (thanks Tiberio!) , but in the 16th century is meant a loose hat, worn by both men and women. Textiler Hausrat, Zander-Sidler (1990) notes the term is derived from the Middle High German “slappe” – a head covering of a bag shape or
with flaps, or the leather nape screen on a helmet.
There are two basic forms of this hat: plain and überschlagen (roll-over).
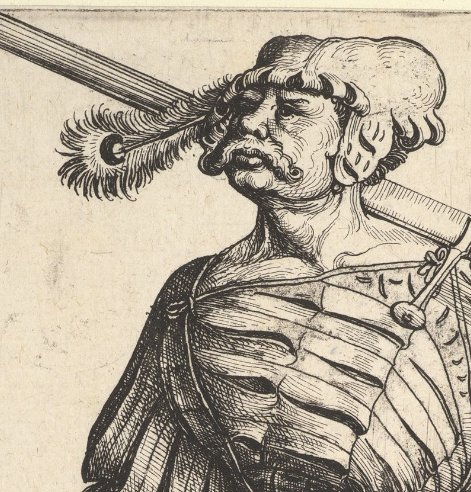
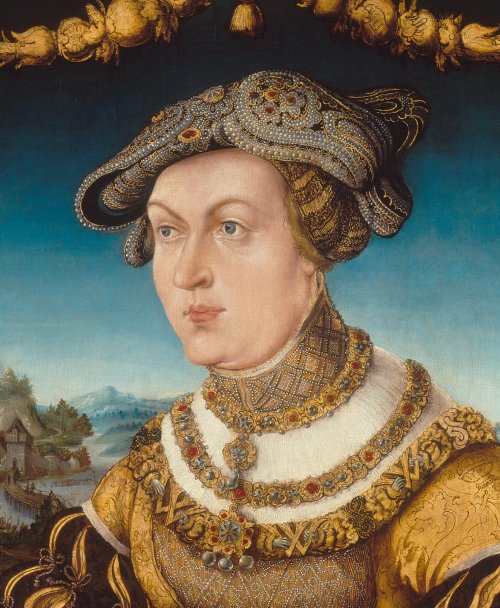
The first is a simple cap with a downward back brim, usually made of knitted and felted wool, like Tudor flatcaps, or made of blocked felt. This style is worn by middle class men and women and by soldiers, directly over the hair. Sometimes the crown is cut in slots, particularly for soldiers (alone or under a Barett) There is also a Cranach portrait with a noble version in velvet and fur, worn over a Haub, as seen below.
This style is similar to the Portuguese Gorra I made earlier this year.

Source: Wikimedia
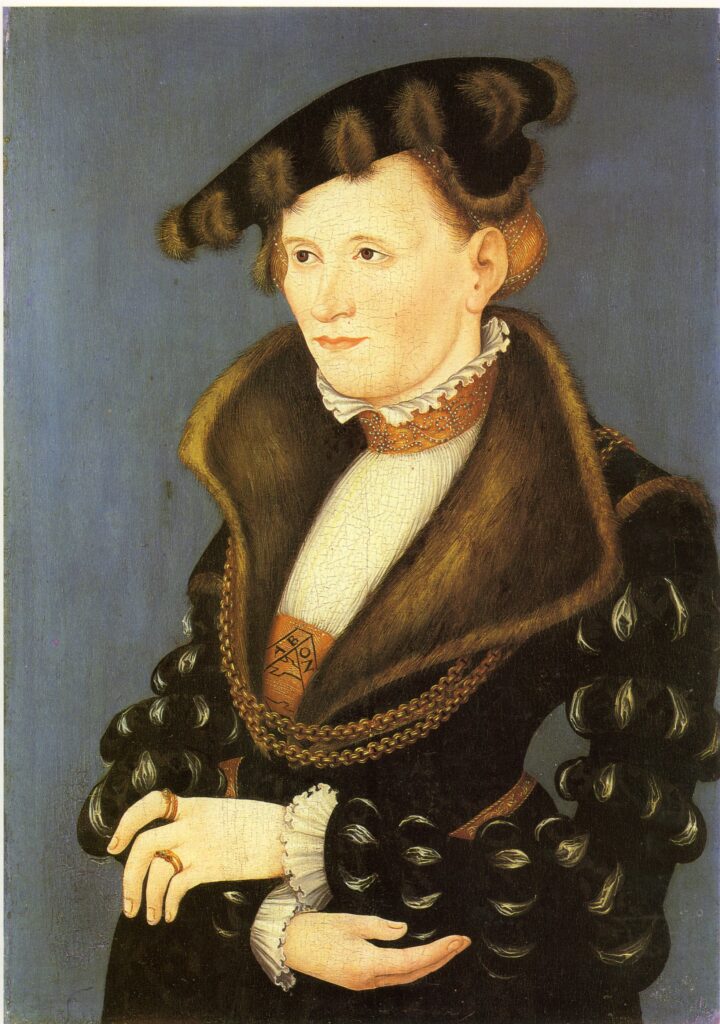
Source: Thyssen-Bornemisza
The second style is more elaborate, with the front brim in überschlagen (roll-over) style, with a pair of flaps tied over the brow. The flaps sit on top of the head, or well forward on the brow, or anywhere in between.
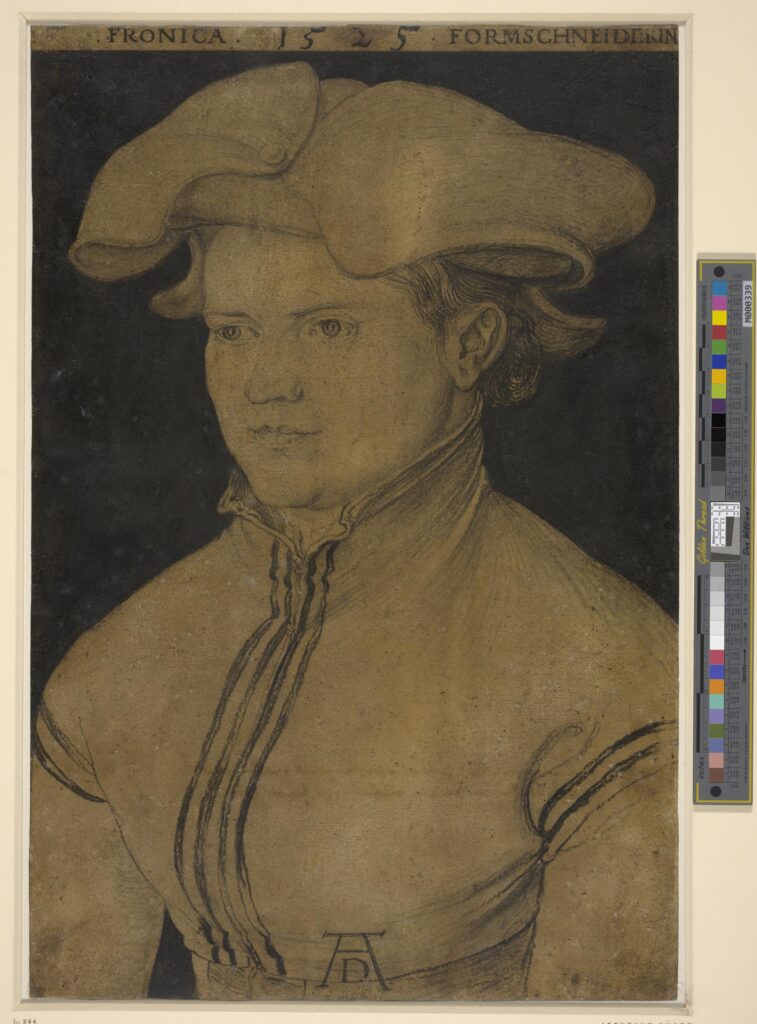
This style can also be made in knitted and felted wool, but is more commonly made in woollen fabric for the middle class, such as the portraits of Anna Dürer and Veronica Andreä below. Noble women wear this style too, usually in lush velvet with embroidery or pearlwork, as can be seen in the portrait of Maria Jacobaea below. This is the style I want to create.
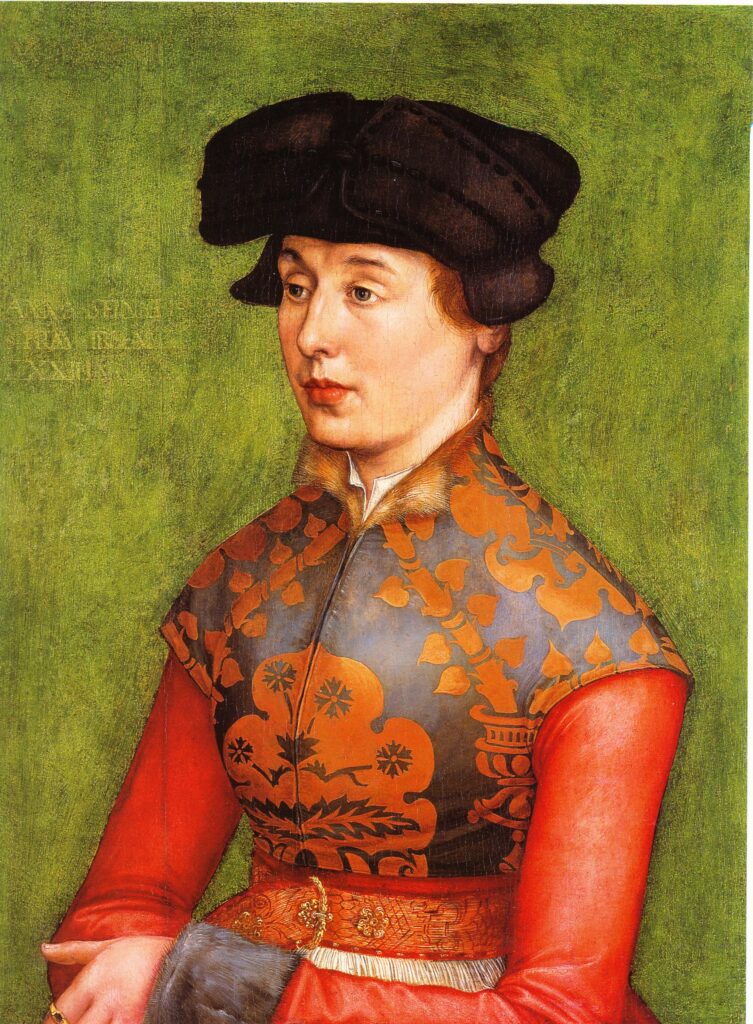
Source: lopud1483
The Schlappe seems to be a Winter hat – the images usually show people in warm clothing. Neither style seems to be worn by Bauer (farmer/peasant) men or women, and I’ve not found any images of Trossfrau (soldier’s wives/camp followers) wearing Schlappen either, which surprised me.
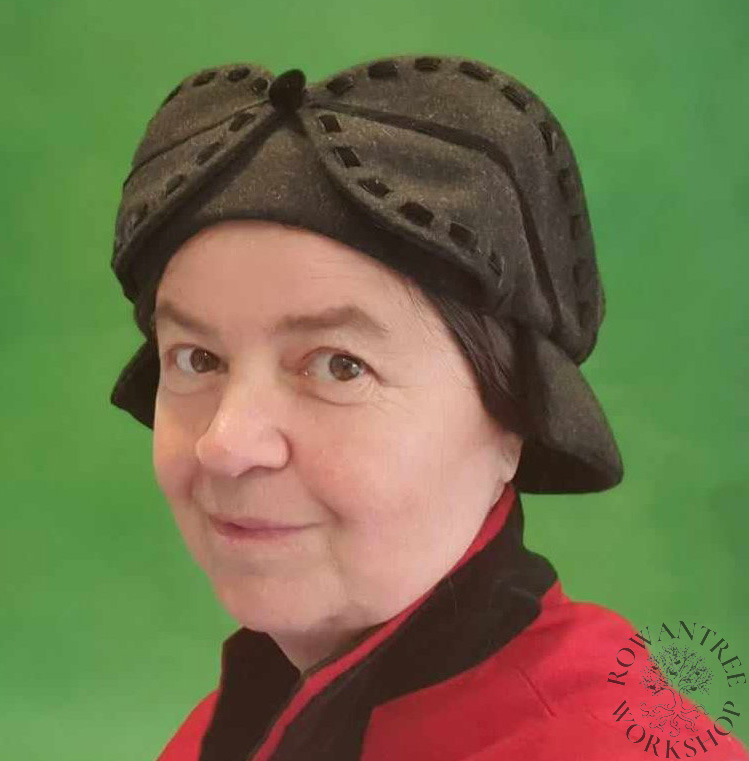
For my first Schlappe (I suspect there will be more), I loved the restraint of the Anna Dürer portrait, with its subtle ribbon decoration on the front brim flaps. I had some fine charcoal grey wool left over from making an Elizabethan suit, which I thought would work well.
My main issue was my very short hair. Middle class women typically wore the Schlappe over a pair of plaits, either hung long over the back, or bound up like Anne Dürer above. Before I could pattern the Schlappe, I needed to come up with a hair solution to get the right look.
Construction
Hairpiece
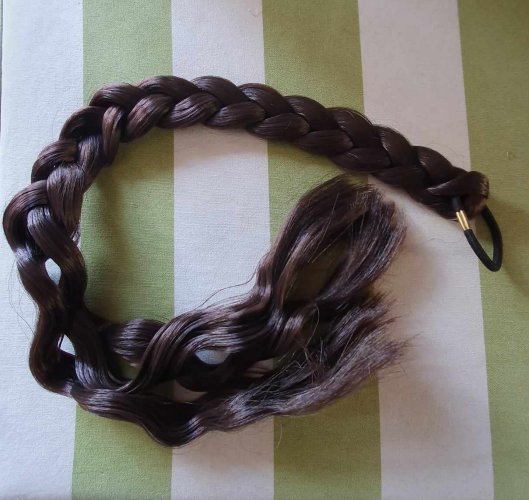
First, the hair. I looked at commercial hair pieces, but they were much too expensive for this experiment. So I found a cheap false braid at a party shop, which I carefully unravelled and combed out.
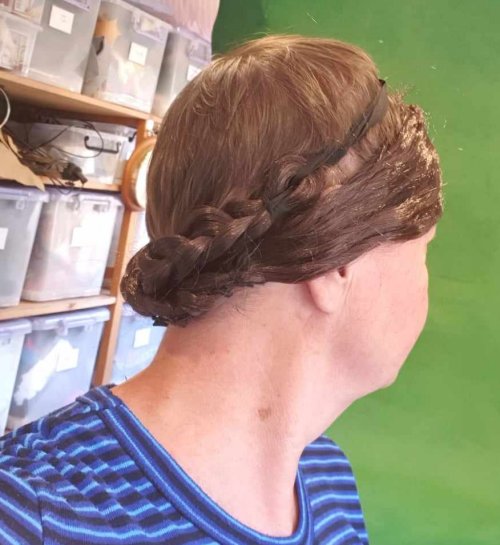
I hemmed a strip of black linen, long enough to tie around my head. Then I machine sewed the middle of the hair to the middle of the band, to make a ‘part’. I tied the band to my headform (I have a small head, so there is no need to pad it up). I marked a spot on each side, clear of the knot at the back, then sewed the hair to the band again to create bangs along the side, covering my ears.
Then I braided the loose hair and tied it up on top. The shape looked pretty good on the form, so I tried it on. It was easy to tie up the band and then tie up the braids and it felt secure – success!

Schlappe
With the false hair on my headform, I could pattern the actual hat. I measured over the hair to give an updated head size.
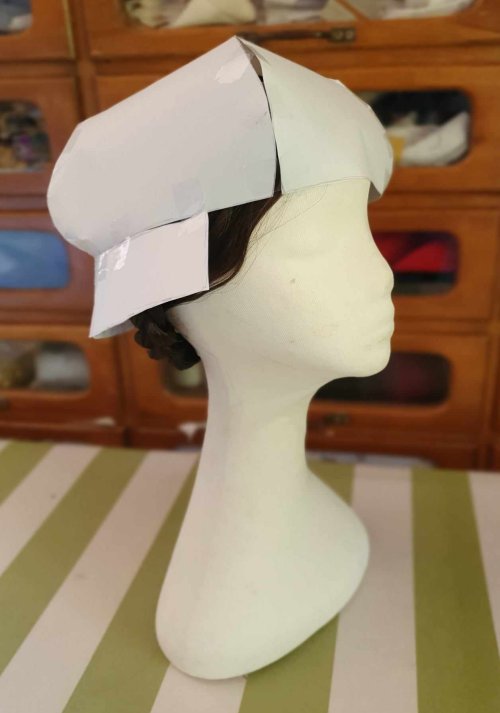
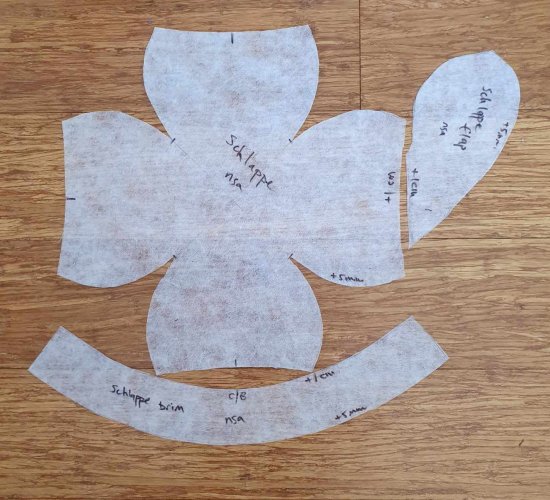
I considered using a variation on my usual Barett pattern, but the images did not seem to have the distinctive cross seam on top. So I made a one-piece pattern for the crown and tried the crown and back brim in stiff paper – easier to see problems than in soft fabric. The brim curves out over the hair at the back.
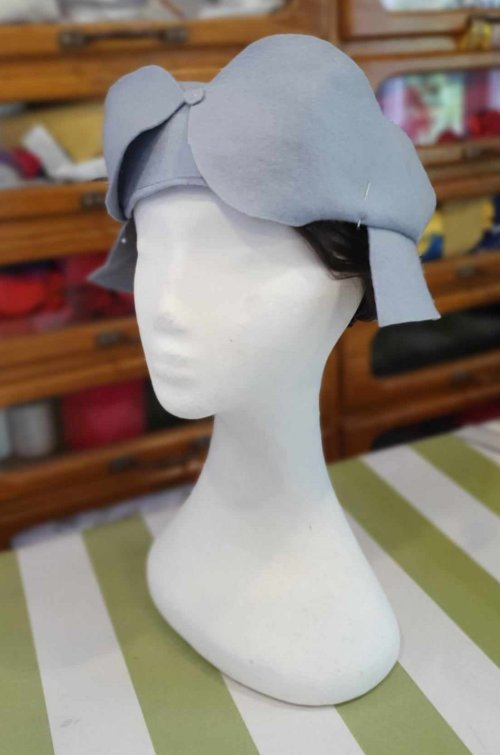
Once I was happy with the paper version, I made a felt trial, including the front brim sections, but only single layers. Looking good!
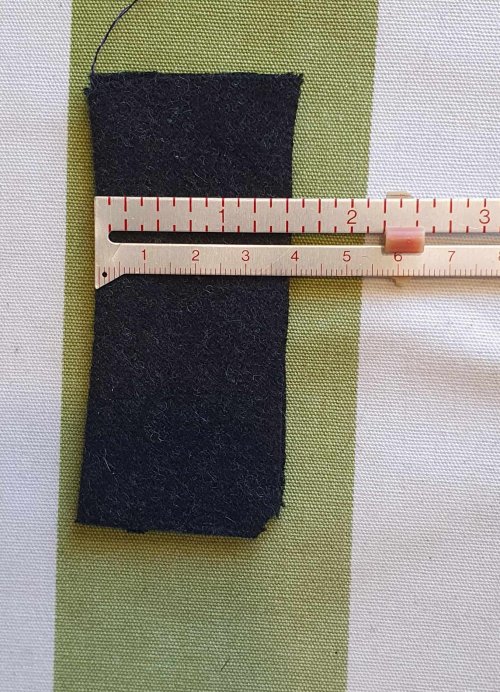
I make my pattern without seam allowances, as these will vary with the types of fabric. To test this, I sew a small measured sample and see how much gets used up in the seam (‘turn of cloth’). In this case, only 2mm- basically the margin of error drawing around the pattern.
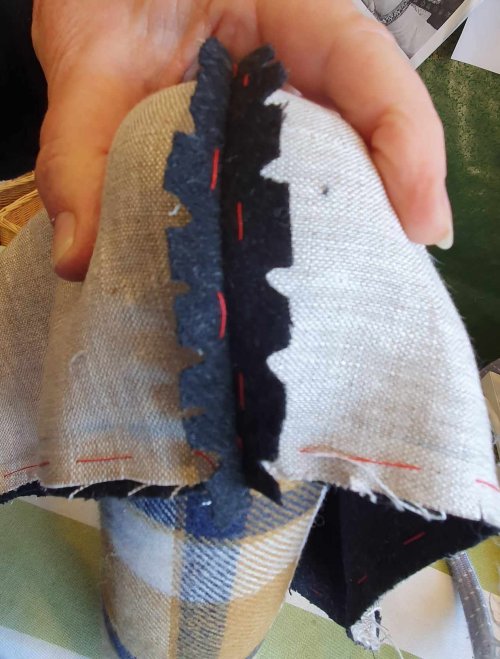
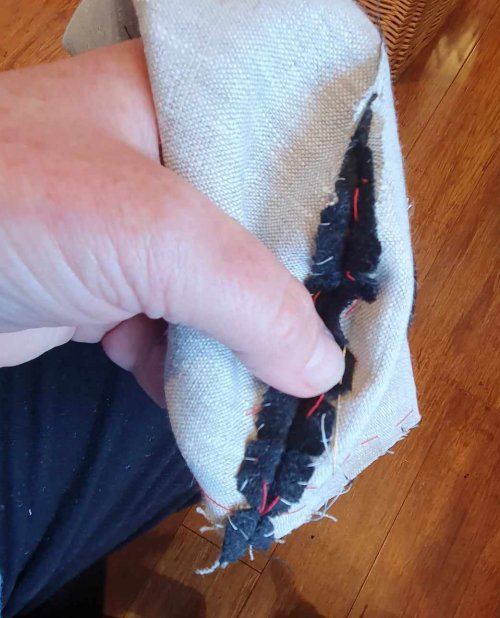
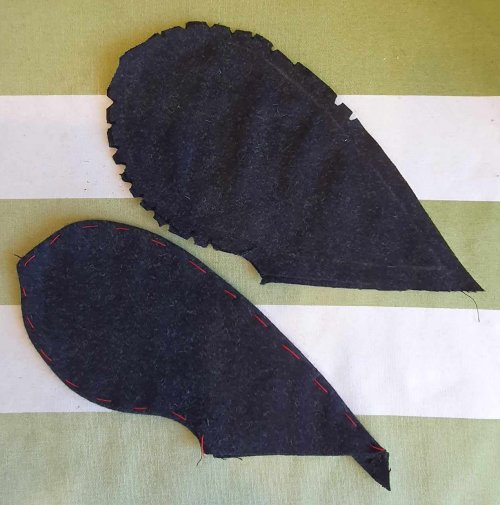
I was clear that the fine charcoal wool did not have enough body support the crown, so I cut an interlining in light linen and basted this to the wool.
I sewed the seams on the crown, then clipped and pressed them over a ham to set the curve. I sewed the seam allowances lightly to the linen lining – this will ensure the curved corners stay looking good. Finally, I turned the corners out and pressed again to set the curve.
Next, the brim.
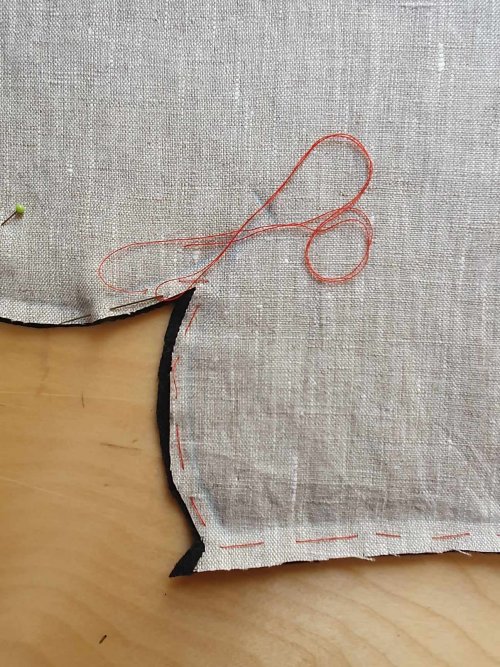
Because this wraps around the head, the lining needs to be smaller than the outer layer. To see how much I needed to allow, I pinned the brim sections together and wrapped them around my thigh to approximate the curve. I needed to trim off 1cm.
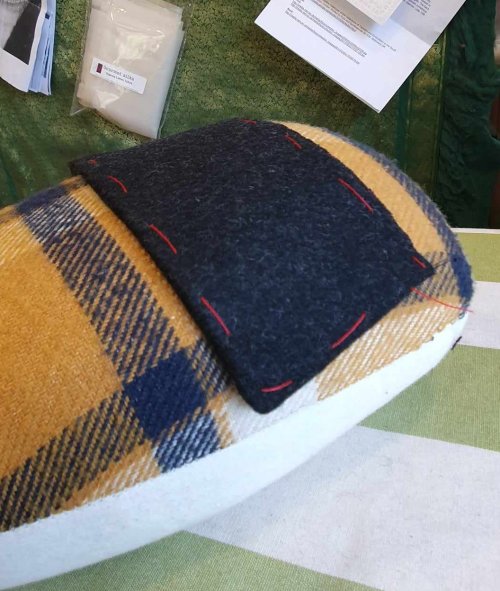
I sewed the brim pieces together around 3 sides, easing the pieces together. Then I clipped the corners and turned the brim, pushing the corners out with my bone folder. To avoid lining creep, I carefully rolled the seam in my fingers and basted to hold it in place. Then I basted along the open edge, to keep the two sides in place and pressed it over the ham to set the curve.

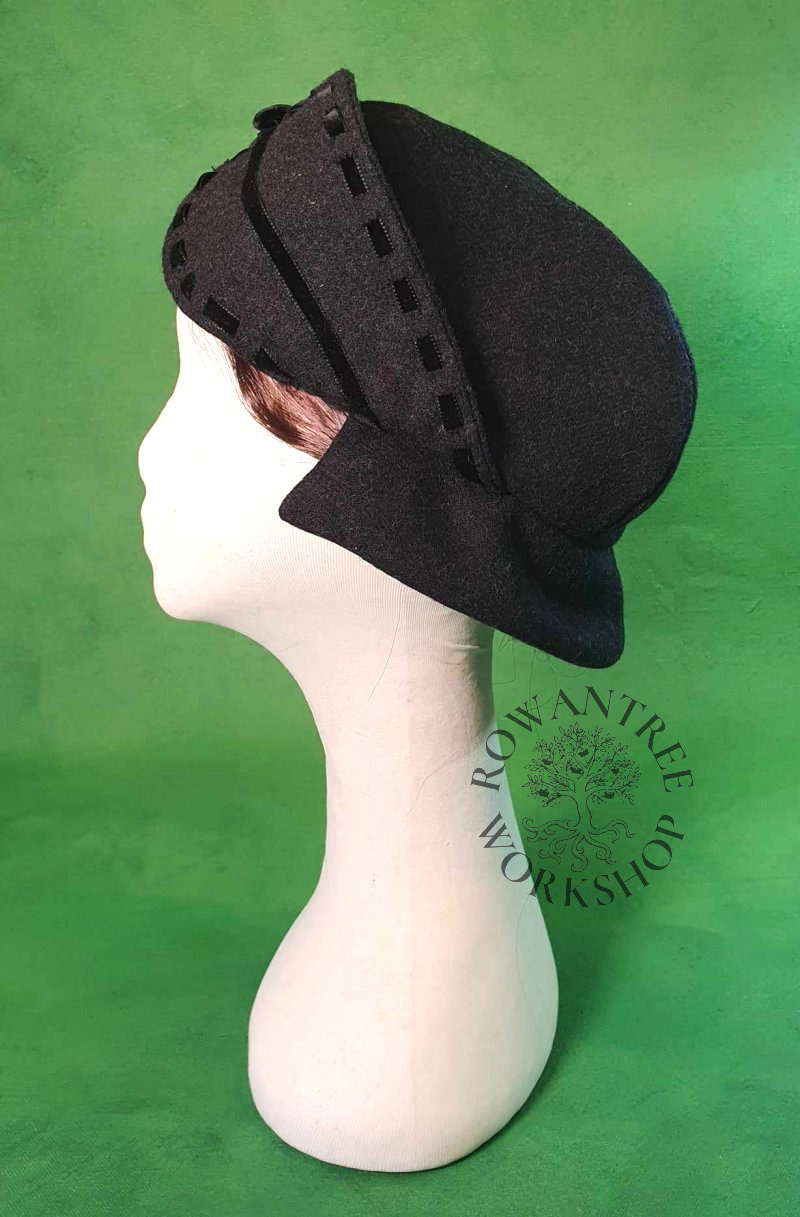
On to the front brim. The front brim flaps on the Anna Dürer portrait are decorated with a central ribbon and then a line of laced ribbon around the edge.
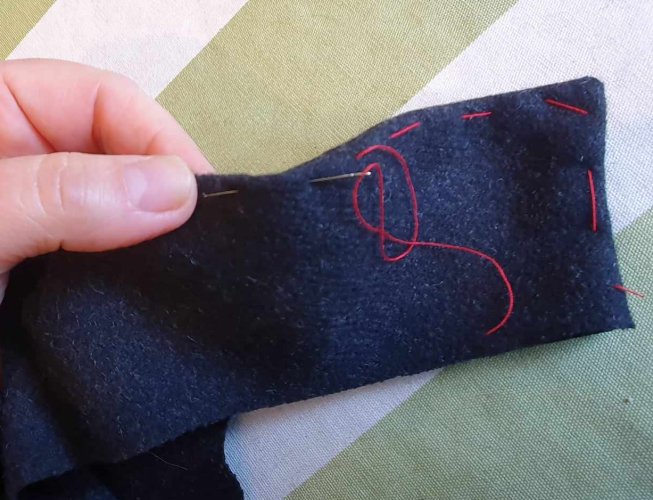
I did a test run on a scrap of wool to see how the laced ribbon would go – good on one layer, but distorted going through two. Since it is hard to decorate before sewing and get the decoration perfectly aligned, I decided to make the brim flaps and then decorate.
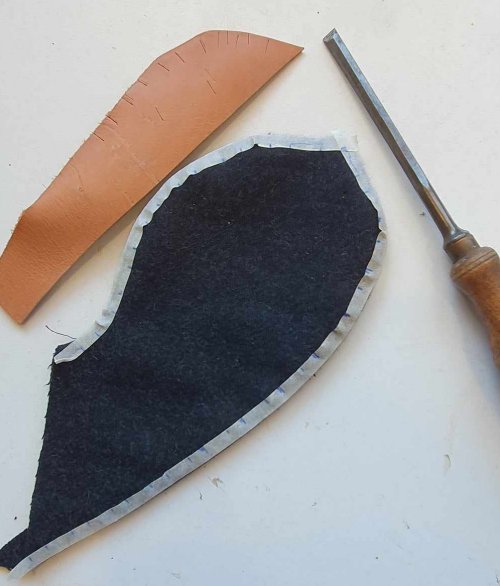
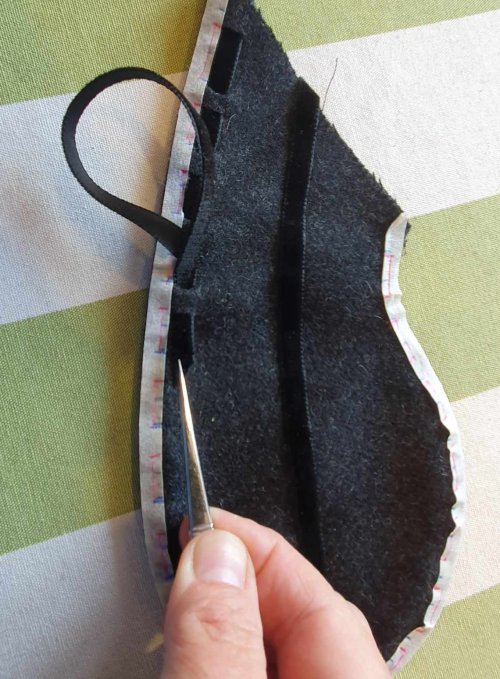
I cut out 2 sets of pieces, sewed them up, then clipped and turned, rolled the seam edge and basted, as with the back brim. To make it easy to see my spacing marks, I stuck down quilters’ tape around the edge and marked that. This also ensures I keep the same distance from the edge (a trick I use frequently!).
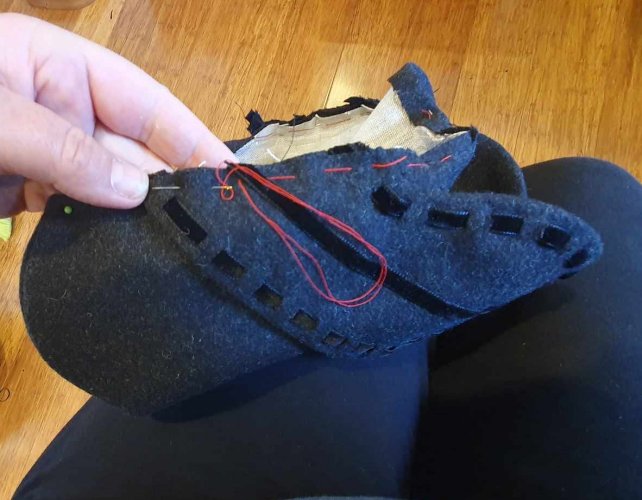
With a scrap of leather inside, I used my fine chisel to cut slots around the rim and one at the end to take the central ribbon. I couched down the central ribbon, tucking the end into the slot for a neat finish. To make the lacing easier, I used a pair of forceps to ease the ribbon through each pair of slots.
Some examples show one flap buttoned through the tip of the other, while others have a button between the flap points. Because of the ribbon decoration, the latter works better here. I covered a wooden button in black velvet and sewed it to the two points, joining the brim sections together.
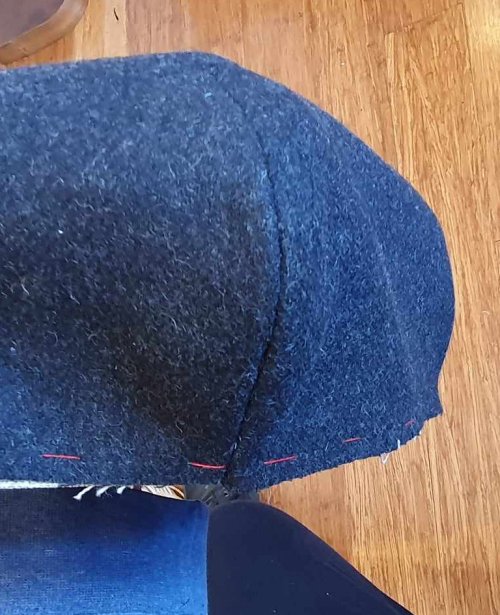
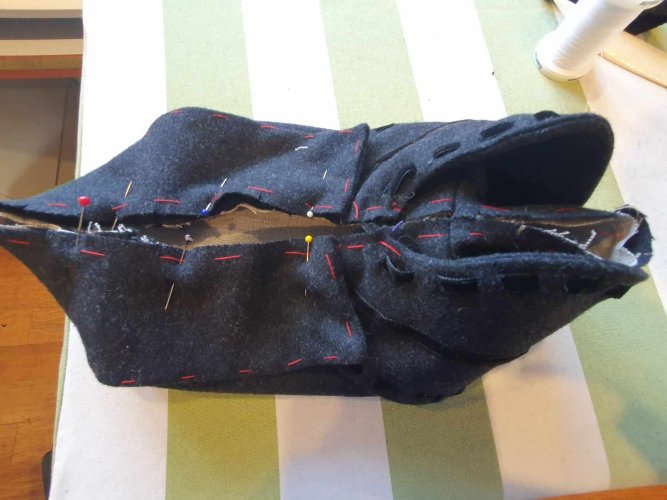
I put the cap on the headform and pinned the brim on, making sure it was centred and lay smoothly. Then I took it off the form and basted the pieces to the edge of the brim. Then I added the back brim, making sure it was centred, basted this and then checked it all on the headform.
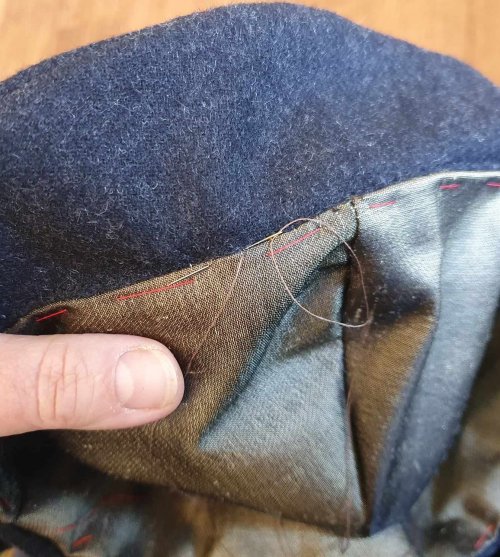
I sewed the brim sections to the crown, then graded the seam to reduce bulk. I turned up the seam allowances and stitched them to the crown lining all around, then pressed the seam.
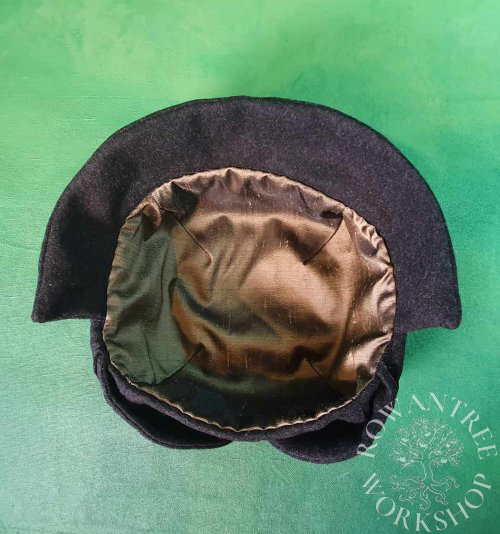
Finally, I made up a silk lining using the the crown pattern, then slip-stitched this in place.
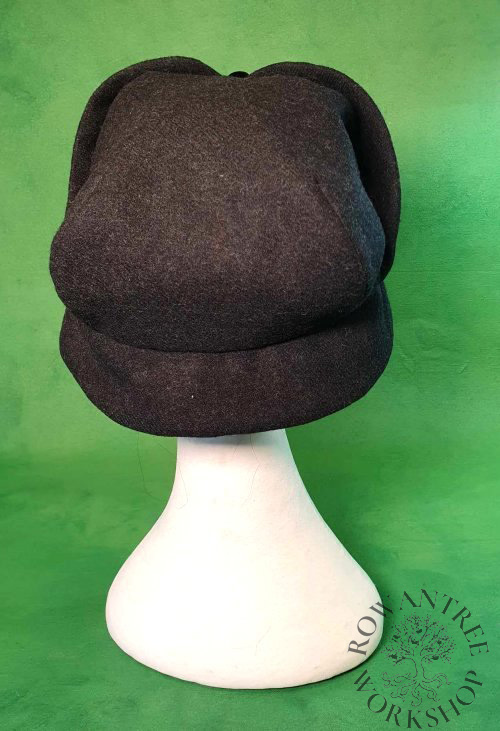
And the Schlappe was complete!
I tried it all on with the ‘hair band’ to see how it felt – quite secure, but very warm. I can see why this is often depicted as a winter hat. I think I’ll need to wait until the weather cools again to wear it to an event…
But right now, I’m just happy to have finally made this style!
Afterthoughts
I’m really happy with the pattern and general construction, but the back brim is a little soft. I should have interlined it with linen, like the crown.
In retrospect, I could have decorated the front flaps before sewing on the lining, by basting the seam allowance to give the line. After decorating, I could then slip-stitch the lining in place. It would have been easier, and just as accurate! Next time…