A small leather case for holding pins or needles, with impressed and stamped decoration, based on several extant examples.
I’ve taught several classes on how to make these simple casework items, but never recorded the process or kept any of the cases. I’ve gifted the other casework items I’ve made (like the Spectacles case and Penner), so I didn’t actually have any examples!
I was asked to teach another casework class, and thought that this time I would prepare a set of teaching samples to show all the stages of the process….
Research & Design
‘Casework’ refers to a range of two-layered leather containers which emerged in the 13th century and were ubiquitous across Europe by the 15th century. They are strong, light, hard-wearing, protective and decorative!
Leather cases were used to hold an astonishing range of items from wax tablets to eye-glasses, surgical instruments and crowns. There are several examples of casework needle-cases recorded as archaeological finds, including those below from England, Germany and the Netherlands.
Source: Cowgill, de Neergaard & Griffiths (2000)

Source: Bildindex
Source: Dordrecht Ondergronds
Small leather items such as needle-cases, knife sheaths and the like were decorated in a range of styles and techniques. Ward-Perkins (1940) classified the main techniques in his Medieval Catalogue, but I prefer the terms used by Nøttveit (2010):
- Impressed – with a blunt tool, not breaking the surface (Ward-Perkins terms this ‘Engraved’)
- Stamped – using blunt decorative punch
- Embossed – moulded from either front or back
- Incised – with a sharp knife.
These techniques can be used alone or in combination, and further enhanced with dye, paint or gilding to produce the final effect.
The first two needle-case examples above were incised and stamped with foliate and zoomorphic designs common in the 14th century. The Dordrecht example also has traces of red paint (probably egg tempera) in the punched background.
Contemporary examples also include simple linework (such as the London find); repeat patterns of lines and frets; and stamp patterns – especially small repeat patterns in a diamond grid (Cowgill, de Neerguard and Griffths 1987, Nøttveit 2010, and Volken and Goubitz 2020). Unlike knife sheaths, the pattern covers the front as one design, with no demarcation at the cap.
The casework technique changed in the 15th century, with the outer layer glued rather than sewn (Volken and Goubitz 2020). The shape of needle-cases changed too, from rectangular to cylindrical, but the basic casework process remains the same.
For this demonstration set, I decided to make a simple 14th century case, with an equally simple decoration.
Construction
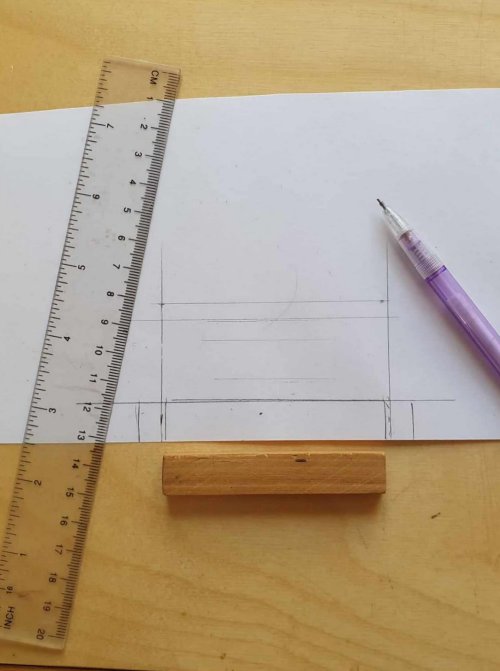
As with all casework items, the first step is making the mould of the thing you want to hold – in this case, a small space for pins or needles.
My small wooden mould (75 x 15 x 6mm) will make a finished needle-case of 80 x 20 x 12mm, similar in scale to the extant examples (the cap adds another 20mm or so). As a rule of thumb, I allow 2.5 times the width of the leather when calculating mould size vs final size.
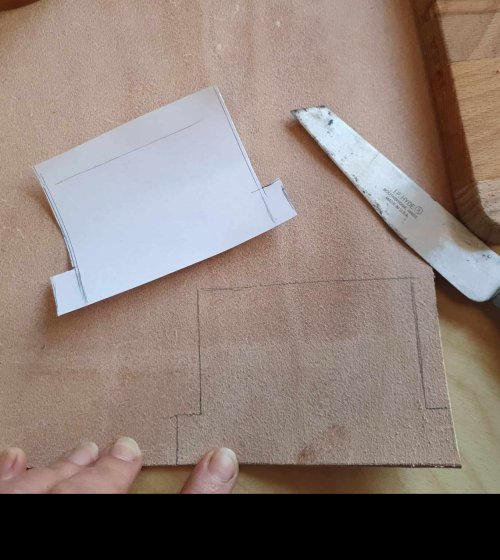
The next step is to make the pattern for the leather. Casework relies on wet moulding, so the leather must be vegetable tanned. Small casework items like this work best in thin leather – 1.5 – 2mm is ideal.
I start by drawing around one long side of the wooden form, then roll it over to get the circumference. I stand the form on end and draw around the top and base. The leather needs to be larger to wrap around the form, so I add 1x thickness on either side and 6x the leather thickness to the circumference.
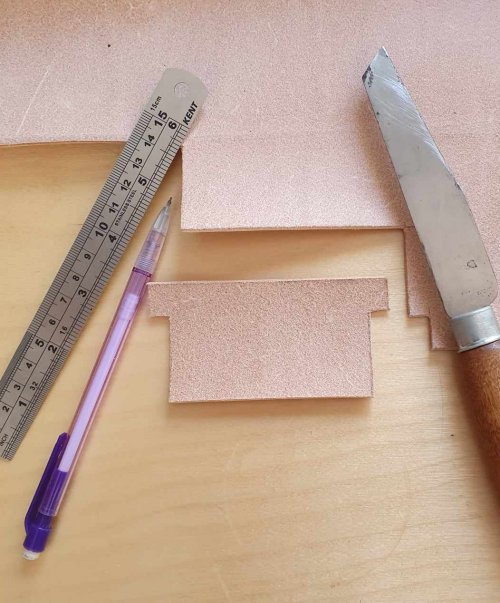
I trace the pattern onto the back of the leather, then cut it out with a sharp knife and metal ruler.
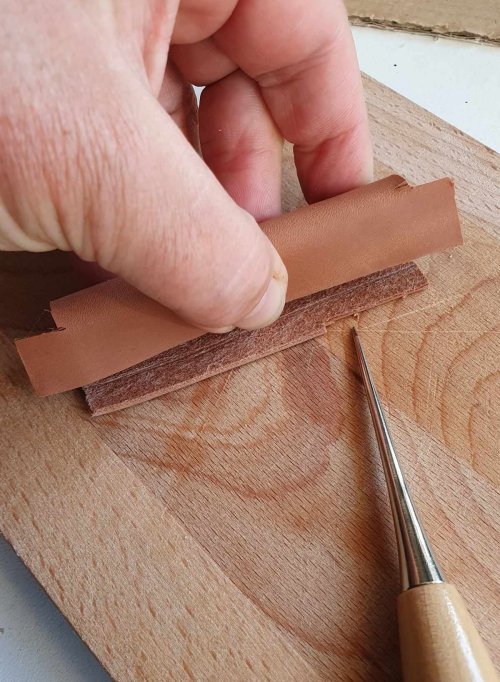
The leather needs to be thoroughly wet to take the shape. I soak it in water for a few minutes, remove it and leave it to mellow for a few minutes, until the surface water has been absorbed.
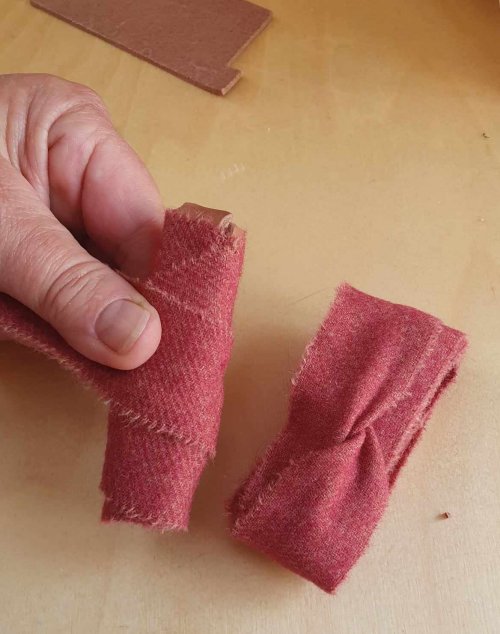
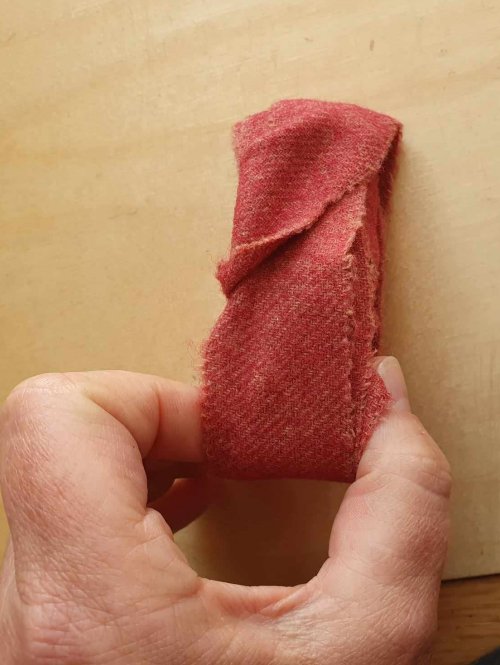
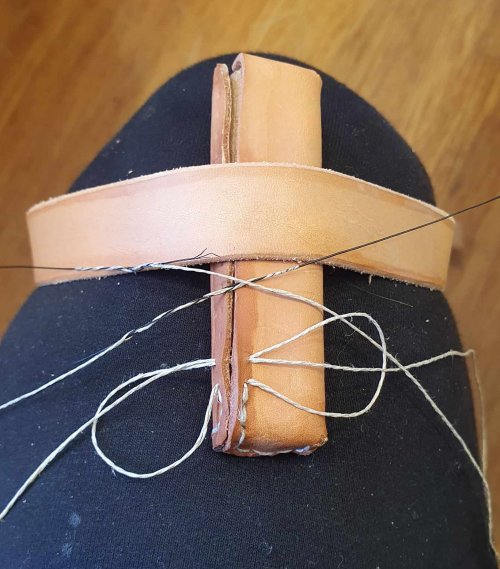
First I wrap the leather around the form, flesh side (fuzzy side) out to check the size, trimming it if needed – the edges should meet without gap or overlap. To make it easier to form the leather, I use a long strip of wool to act as a soft clamp. With the middle secure, I check and trim the ends so they fit exactly, then bind the whole lot up and set to dry overnight (or a few days).
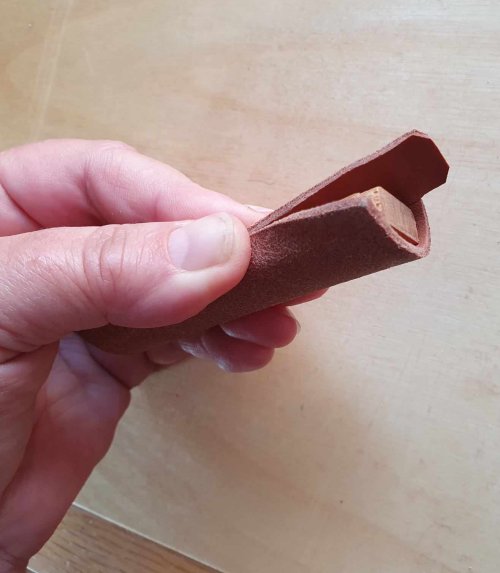
Once dry, I take off the wool strip – the leather fits the form closely, ready for sewing (it may need minor trimming). I mark where the inner cap will be cut – about 1cm higher than the outer cap.
I load my boar bristle with linen thread prepared with coad The coad (beeswax and rosin) makes the thread strong and slightly sticky – the stitches grip together making a very strong seam – but you could also use a needle and waxed thread.
I damp the leather along the seam, then use a fine awl to make the holes as I go, whip-stitching the seam, with an extra stitch below the cap line. Once the leather is dry again, I polish the seam with a bone folder to set the stitches and then cut the cap line (and stitches), making sure it is completely free.
I’ve learned (the hard way) that it’s easy to sew the layers together, so cutting the lining cap at this stage makes removal much easier later. I also mark the top with an X in case I lose track of which way is up – it will be hidden once complete.


Next, the outer layer. This is the same process as the lining, starting with a new pattern made over the sewn lining. I cut this out of leather, wet and mellow it, then wrap around the form, grain side (smooth side) outwards. I trim this to size, allowing a bit of extra ease around the case to allow for the cord channels later.
As before, I wrap this up using a strip of wool, and set it to dry overnight.
Once dry, I unwrap the bundle, prise open one end to check for my X mark on the lining and mark the external cap line, which will be cut later.
Unlike the lining, the outer layer is sewn with shoemaker’s stitch (like double-running with a twist) using a linen thread with coad and a bristle mounted on each end. I wet down the sewing line and mark the stitch spacing for a neat seam (you can just do it by eye).
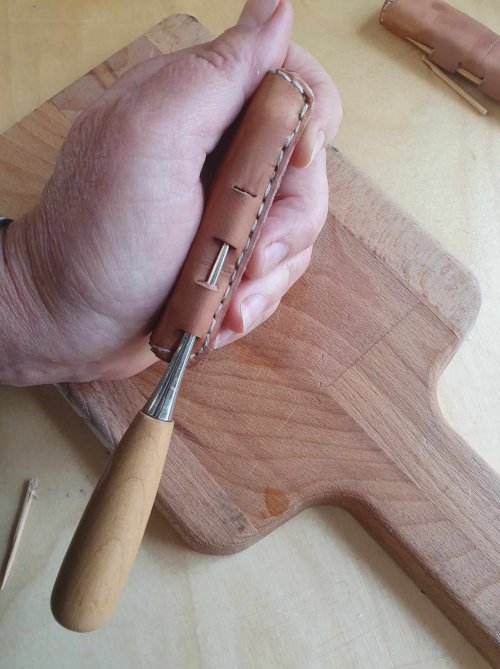
I make a hole with the awl for each stitch, as I sew. Sewing this way needs two hands, so I hold the work with a leg strap, moving the piece as needed for best access. I smooth off the leather edges with a bone folder, then leave to dry overnight.
Once dry, I polish the stitches down with the bone folder – the friction melts the coad and the stitches sink into the leather.
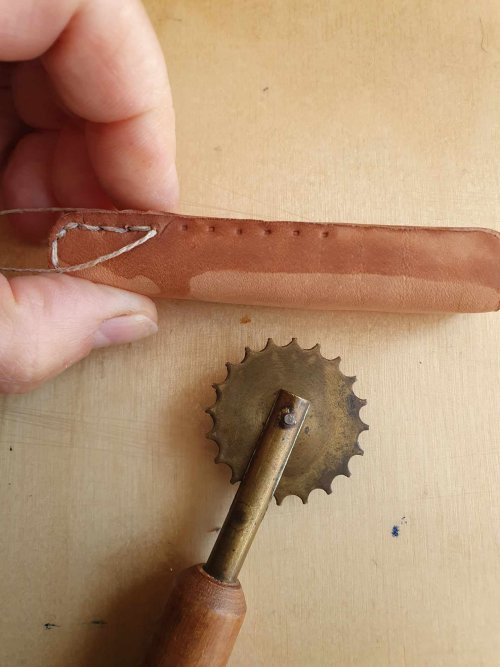

The next step is to form the channels for the cord.
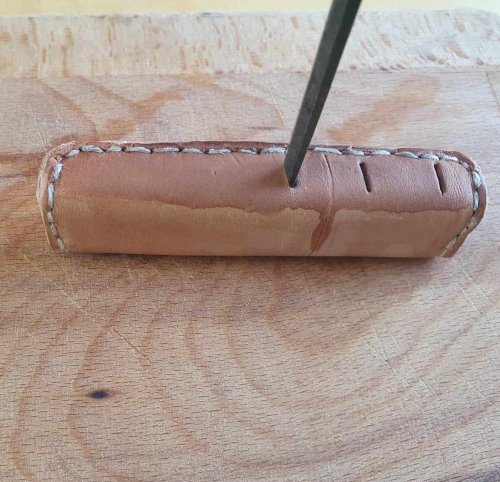
I wet the sides down thoroughly and use a fine chisel to cut a pair of slots in the cap and base – just through the outer layer. Keeping the leather really damp, I lift the slots with my awl, then insert skewers to keep the holes open, being careful not to strain the stitches. With the bone folder, I press down the edges of the slots to firm and tighten the channels.
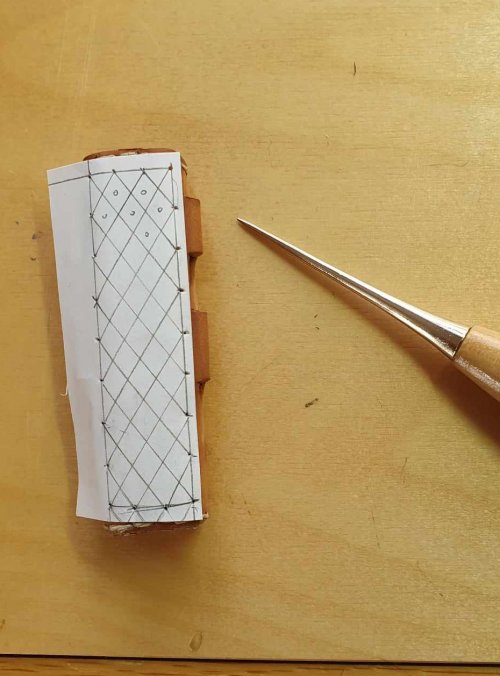
Small cases like this are may be decorated all over, or only on the front surface. I measure the case and then draw some designs on paper to work out the spacing. In this case, I’ve gone for a simple grid pattern for both samples – one incised and one stamped.
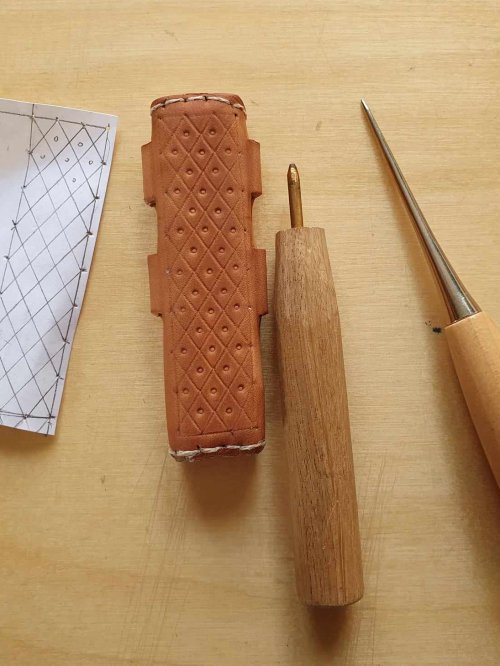
I wet the front thoroughly and waited for the water to soak in. The ideal moisture is very damp but not wet, so it takes the impression cleanly. It’s worth trying this out on a scrap of the same leather so you can recognise what this looks like! Once the leather is at the right moisture level, I use my scratch awl to lightly transfer the key marks of the design to the cases.
For the incised design, I used the scratch awl and ruler to firmly draw the diamond grid, and then the border. I used a tiny circle stamp in the centre of each diamond to complete the pattern.
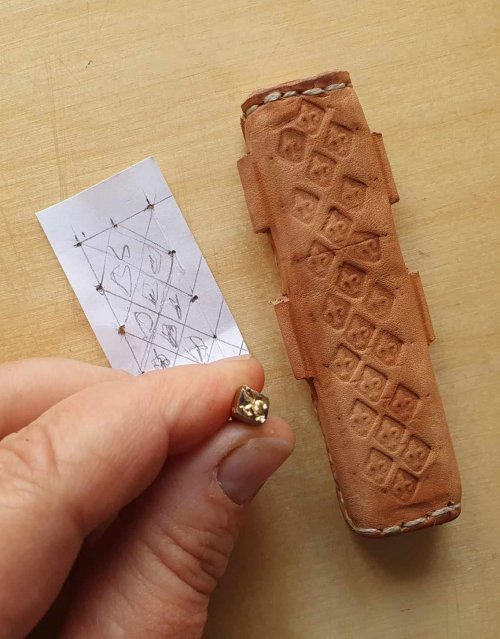
For the stamped design, I used the scratch awl to lightly draw a diagonal grid, then used my small fleur-de-lys stamp to mark each diamond. (I made this bronze stamp last year and still haven’t fitted a handle, so they are a bit uneven But so are some extant examples…)
I used the bone folder to smooth over any obvious marker holes. Because this case will be dyed, I could have used a pen to mark the dry leather, rather than the awl. Pencil does not show up well enough when wet.
And dry overnight…
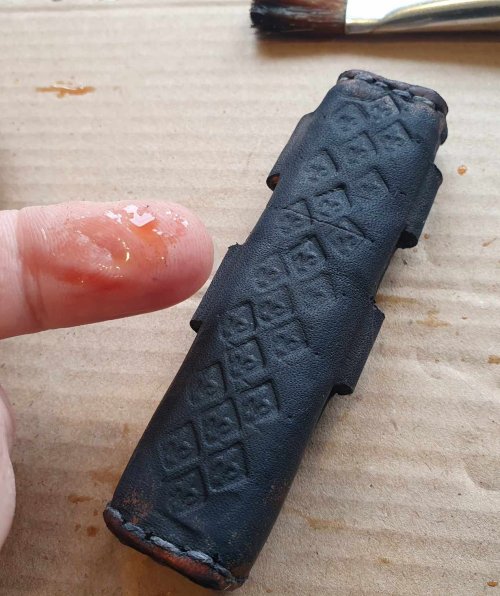
Many everyday leather items were left natural – with use and exposure to light, the leather will go a rich brown colour. Black was also very common, so I’m dyeing the stamped case using iron acetate, which combines with the tannin in the leather to form a permanent black dye.
And dry overnight…
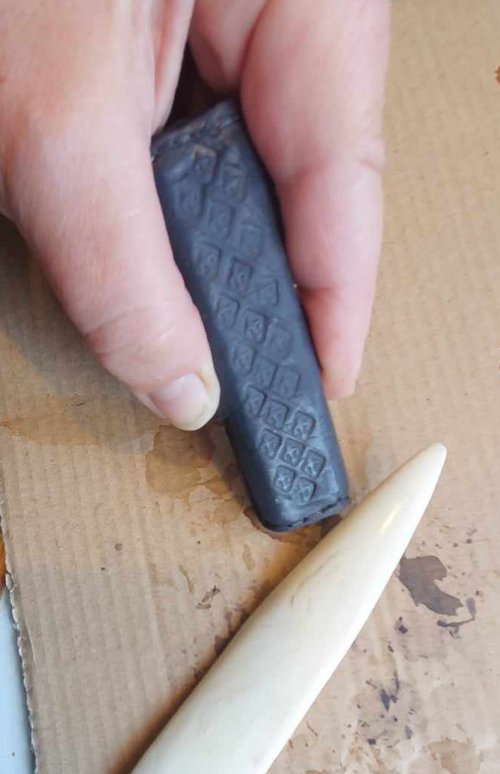
Once dry, I use the bone folder to lightly burning the surface of the leather, making it shine. Then a final polish with beeswax and boiled linseed oil.
And now, the big moment.
I carefully cut open the case, ideally just through the outer layer (although a little scoring won’t hurt the lining). I pull off the cap, and then remove the wooden form, using pliers if stubborn. If the lining is loose, I’ll glue it in using a starch-based glue.
On larger cases, I harden the sleeve by dipping it in hot (not boiling) water, but on something this size, the leather is stiff enough.
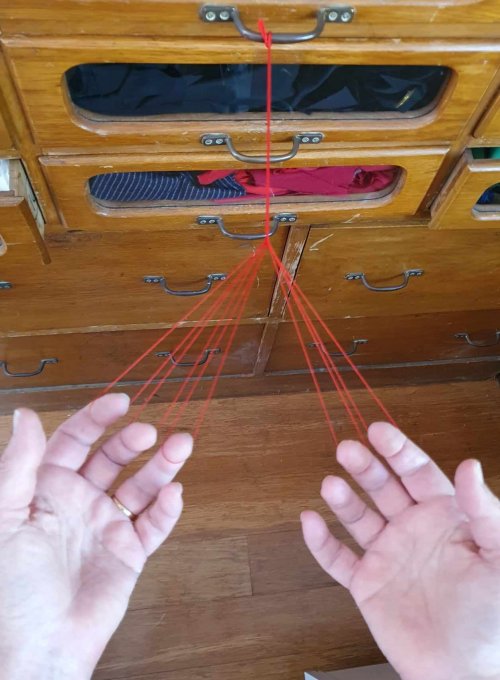
Casework caps can be secured with a leather thong or – more commonly – a fingerloop braid. In this case, I’ve made a braid of 5 bowes in red silk, 20cm long. I thread it through the channels using a large needle and knot at each end, trimming the ends to form small tassels.

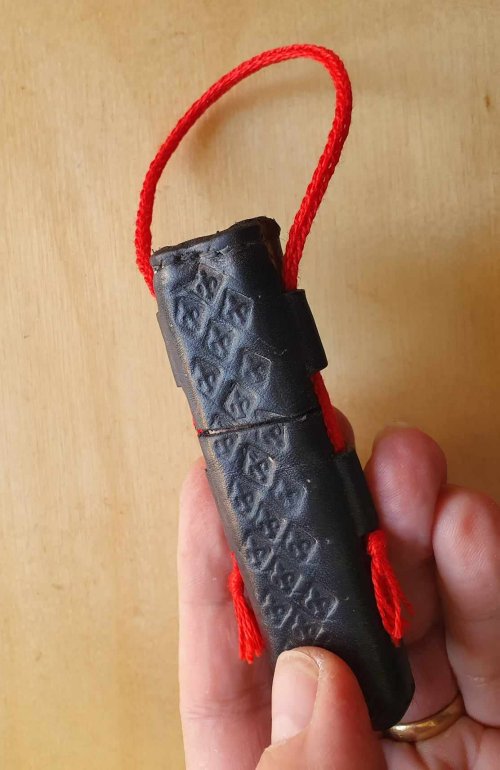
And it’s done!
By pausing my five examples at key steps along the way, I now have a step-by-step teaching set, showing all the stages of making such a case, to make it easier for students to understand the process.