

A simple gathered Frauenhemd (woman’s shirt), which might be worn by all classes of German women in the first half of the 16th century – or in the Netherlands, France (Chemise), Italy (Camisa), or Spain (Camicia).
It is cut differently to the 16th century English smock, which has shoulder seams and plain, ungathered body with gores for fullness.
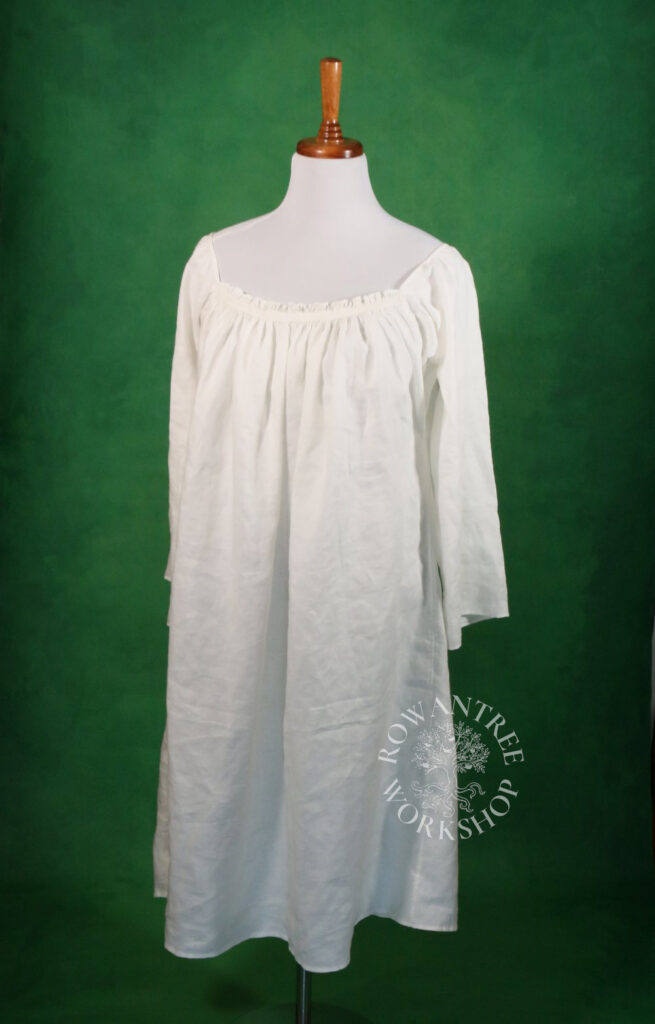
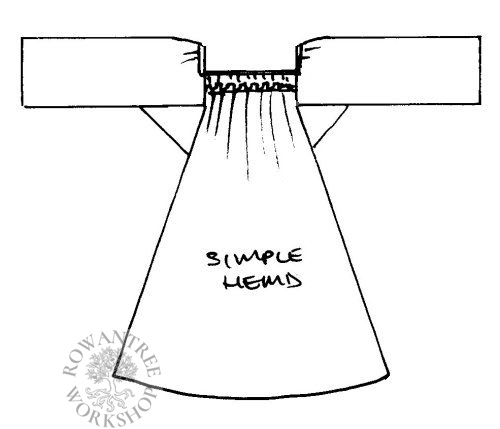
This is a simplest style of women’s Hemd (smock/shirt), made from four rectangles sewn at right angles, with an underarm gusset and gathered neck. This construction technique allows for round or square necklines, with the front and back at different heights, and several options for finishing: frilled, self bound, braid/embroidery or a combination.
Other Hemd styles are constructed differently to give different looks – examples include the Halshemd (high neck), and the Holbein style with a wide gathered neck, and versions with gathered and embroidered front panels.
I have made dozens of simple Frauenhemden over the years, but never documented the process. Since I need to replenish my stock of body linens, now is a good time to remedy that…
Note: this article is quite long, with detailed steps on patterning and construction, including simple run-and-fell gussets. I’ve also made a middle class version, with embroidery and gathered sleeves.
Research and Design
Zander Seidel (1990) states the Frauenhemd was in use by 1500, but was then replaced the high-necked Halshemd from the 1520s. However, there are still many examples of the Frauenhemd in art through to mid century and a reference to an ‘old-Franconian cut-out Frauenhemd’ from a probate inventory of 1577, so it was clearly still in use into the later 16th century, even if no longer fashionable.
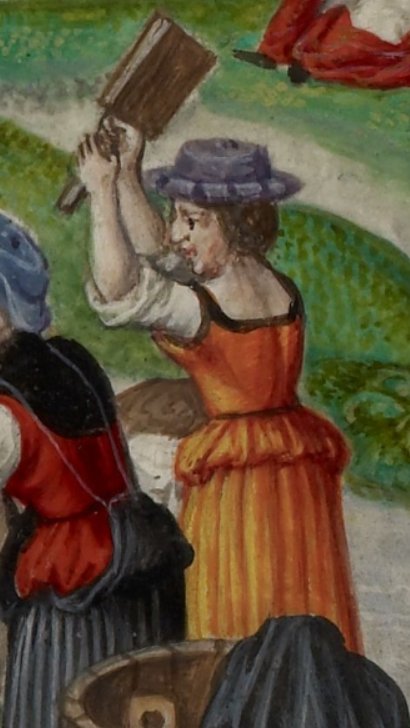
The sleeve width varies with class and purpose. Lower class sleeves are typically slim fitting, so they can be easily rolled up for messy tasks, as in the examples below. These women are not wearing their Röcke (gowns), so we can see the narrow sleeves without cuffs.
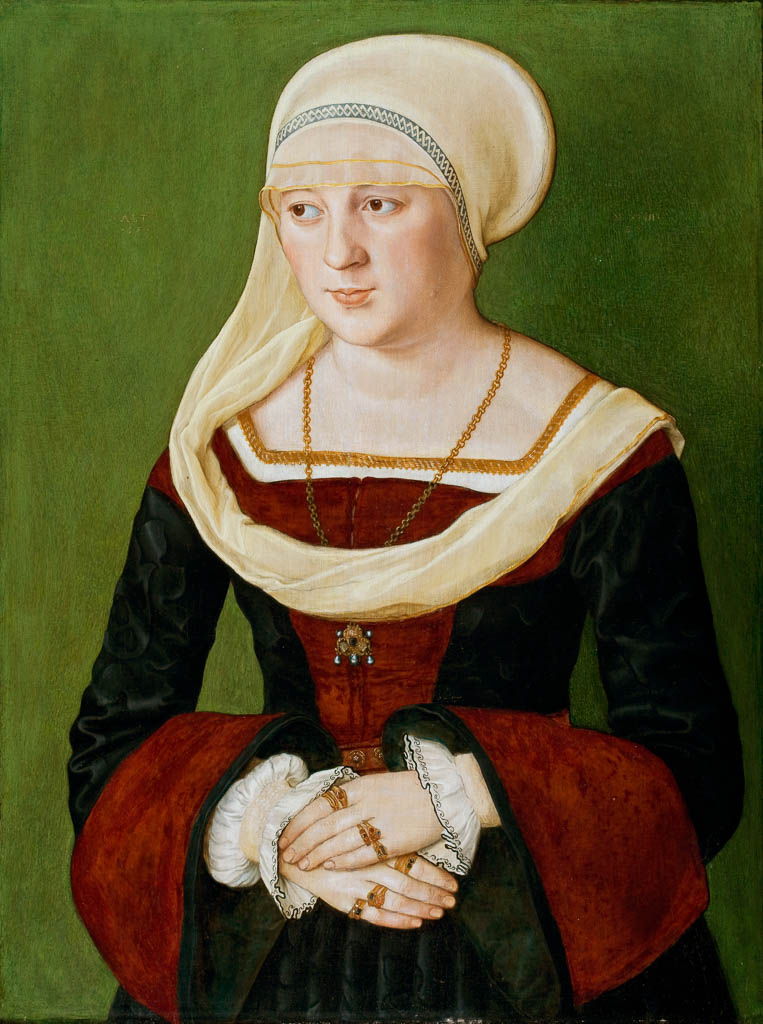
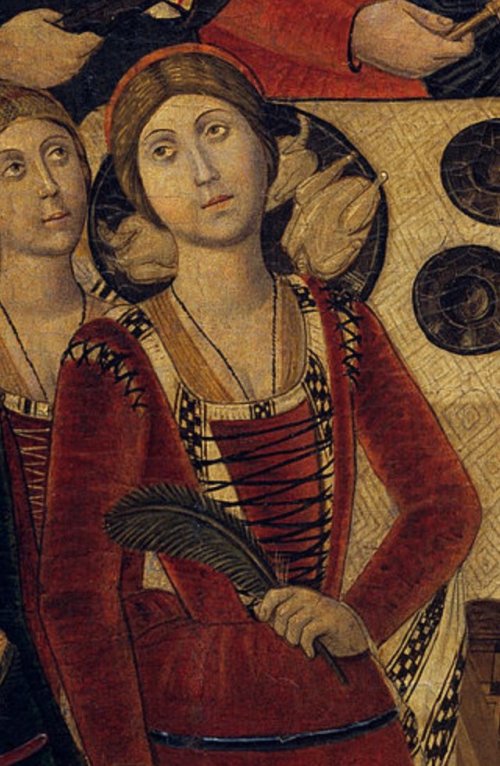
The necklines also vary. The servant in the Altdorfer painting has a ruffle all around the neckline. The Beham mother has a gathered front, and a split for breastfeeding. In the Splendor Solis example, the back of the Hemd is cut lower than the Unterrock and is not visible.


Source: British Library
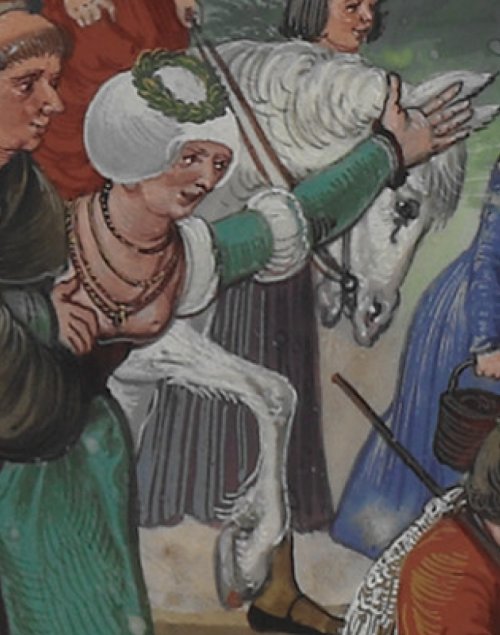
The same rectangular cut was also worn by women in other classes – the elite, the middle class Burgher and the Landschnecht Kampfau – along with other styles of Hemden. Slim sleeves also work well for middle class under gowns with long narrow sleeves, but the elite, some middle class and Kampfrau often have wider sleeves, providing fullness for slashed and puffed sleeves. The cuffs may be simply hemmed, gathered into a band, or finished with elborate frills.
Source: Biblioteca Digital Hispanica fol 173

This is not just a German style. The same cut was also popular in early-mid 16th century in the Netherlands, in France (Chemise), Italy (Camisa) and in Spain from the late 15th century (Camicia), as can be seen in the images below. Arnold (2008) notes that smocks from Mediterranean countries are made without gores, unlike the English examples.
These examples also show a variety of neck finishes (gathered and bound, gathered into an embroidered band, and gathered into a ruffle) and cuffs (plain hem, gathered into narrow band, and gathered into ruffled cuffs).
Source: The Met

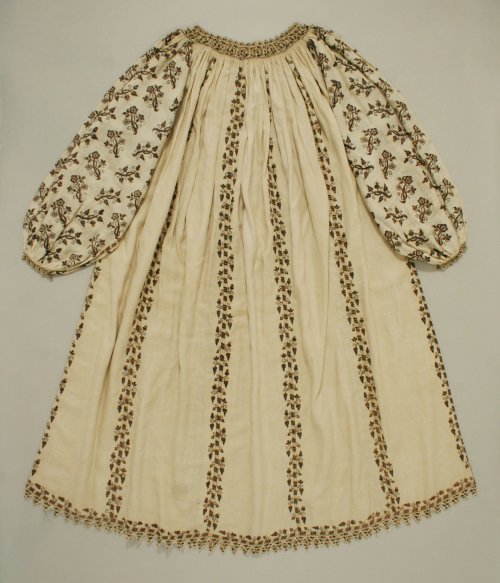
There are very few extant body linens and those that remain are highly decorated elite examples (such as the Italian camisa above) and not for German women, but they still tell us much about the fabric, cut and construction.
The elite examples in Patterns of Fashion 4 (Arnold, 2008) show several methods for finishing seams: run and fell, fine hemmed and whipped together, or held with decorative insertion stitches. While the insertion stitches are an elite technique, both run and fell and whipped sections are suitable for all classes.
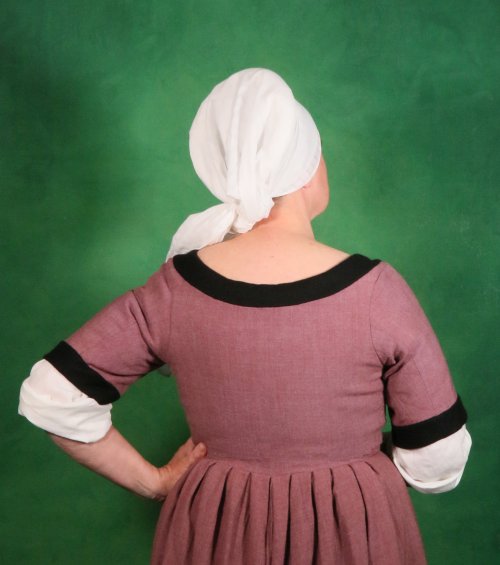
This project describes the construction of a lower class Hemd with narrow sleeves with no cuff, a neckline frilled at the front and bound at back and sides, sewn with run and fell seams.
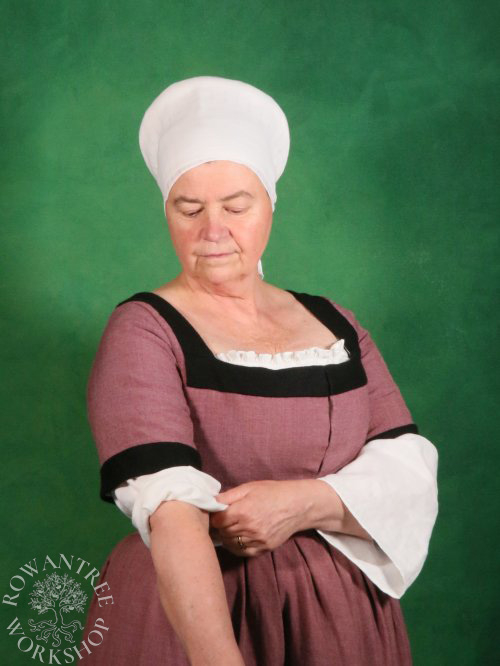
The same basic pattern could be used to make women’s body linens for many classes (and cultures) simply by varying the width of the body and sleeve panels, and the neckline and cuff treatments. I’ve also made a middle class version with frilled cuffs.
Patterning
This style of Hemd is made of simple rectangles with square gussets under the arms. The dimensions will depend on your size, the status of the garment (lower class garments tend to use less fabric), and the width of your linen.
My final patterns (see under Layout below) would be a good starting point for a range of women’s sizes, but if want to make a custom version, with the neckline sitting exactly where you want it, then here are the steps…
Body panels
The front and back should be long enough to go from the Hemd neckline to mid calf. I measure this looking at the mirror – for me, about 100-110cm. Since the back neckline is higher than the front, the back panel will be longer – I’ll calculate the actual difference later.
The body needs to be wide enough to walk in easily, or wider for a full, gathered Hemd. 90cm wide panels are my minimum, with very full examples (like the Italian camisa above) up to 120cm wide. Consider the weight of your linen – heavier fabric can get very bulky!
Sleeves
For a narrow sleeve, the width needs to fit your upper arm and bent elbow without strain and be easy to roll up. If you have very large upper arms, you may want to taper the sleeve a little to reduce the cuff size.
For a fuller sleeve, the width will depend on how much linen you want to show under your gown sleeve or through the slits. My sleeve widths vary from 40-80cm, with extant Italian examples up to 1m wide, in fine linen.
The sleeve length is your shoulder to wrist measurement plus 5cm for a simple sleeve or 20-30cm for a full sleeve which puffs out, and extra for cuffs if required. My sleeve lengths vary from 65-80cm.
Neckline
To ensure the neckline sits where I want it, I mark it out on the Rock using ribbon or woven tape, pinned at the corners. (I’ve used a dressform, but you can do it flat on the table too, with fabric pinned below, or get a friend to measure you wearing it.) If you want a rounded neckline, pin at the approximate corner.
In this version, the front will be visible but the sides and back will be hidden. You can use the same approach to ensure the neckline is visible all around, or completely hidden.
Once it looks right, I measure the length of the front, back and sides. I mark the top of the shoulder, then measure the distance from the shoulder point to the front and back corners – here the front is lower.

I also need to measure the armscye. Because the gusset will be part of the armscye, I pin a mock gusset (20cm square, folded on the diagonal) under the sleeve – it must be horizontal. I measure from the front and back neckline corners to the gusset corners. The difference should match the difference measured from the shoulder point.
I’m calling these the front offset and back offset. The difference between them is the neckline difference. Depending on the style and fullness, these offsets could be anything from 5-20cm. In this case, my front offset is 5cm, the back is 10cm and the difference is 5cm.
Here, the sleeves of my Rock are quite close fitting, so I’m measuring over the top, which will give me a small amount of ease. If the armcye was large, you might need to reduce this – or get a friend to measure on your body.
Layout
With this information I can plan the cut and construction.
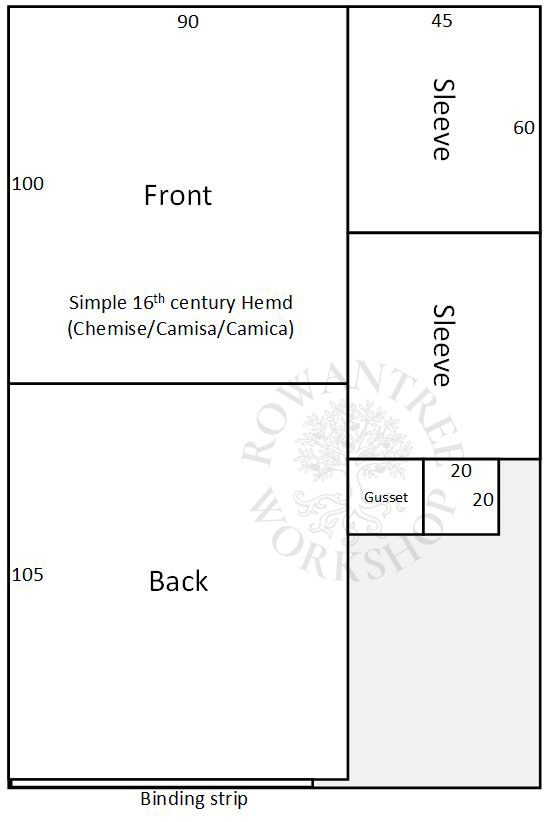
- Front – [measured length] x [required width]. For this project – 100 x 90cm.
- Back – [front + neckline difference] x [required width]. Here – 108 x 90cm.
- Sleeve x 2 – [measured length + 5cm/extra for puff or cuff ] x [minimum width + extra fullness if desired). Here – 60 x 45cm
- Gusset x 2 – 20cm square
- Binding strip, if required – [long enough to go around neckline] x [4 x binding width]. Here – 78 x 2cm.
For this lower class Hemd, I’m using heavy shirting 140cm wide, with modern selvedges. With the selvedges trimmed, the sleeves and gussets fit beside the body panels, with a bit left over for some future project. To make the best use of the fabric, the front and back panels are actually a bit over 90cm wide.
I start by pulling a thread to get a clean line and trim the fabric square. Then I use a combination of pulled threads and measuring to cut accurate pieces.
Construction
To get the look I want, this Hemd has a frill at the front, with the sides and back gathered and bound, hidden under the Rock neckline. This is actually the trickiest version – all frill or all bound is much simpler!
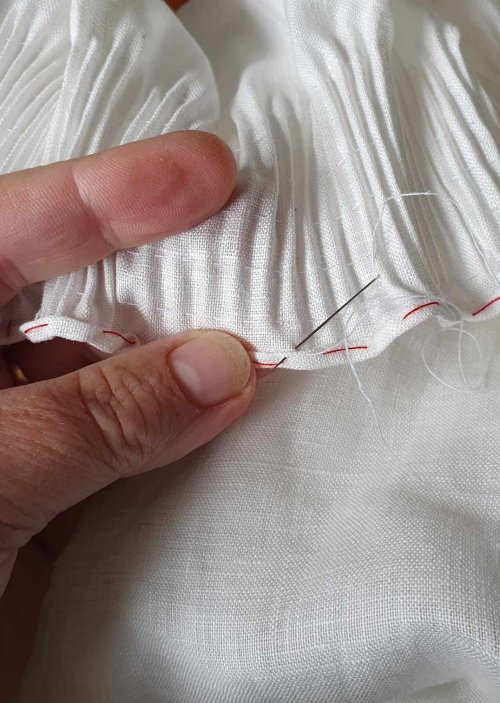
Because only the front panel will have a frill, I am gathering and finishing it first. For neat pleats, I put the linen through my smocking pleater, then turned a fine hem. (Without a pleater, I would have hemmed it first and then machine gatherered it. If I was gathering the whole neckline into a frill or binding, I could do all this after the pieces were sewn together.)
I’m using simple woven linen tape to hold the pleats (a higher status version might use fancy trim). I marked the tape and pleats in 1/8ths, pinned them together and drew up the pleats evenly, then basted the tape on. This holds better than pins and makes the sewing easier. Then I stitched the tape on, sewing every pleat on both edges of the tape.
Now I can assemble the pieces. I’m sewing run and fell seams by machine, with hand finishing on the bits that might be visible: the top of the front seam, and the arm seams.
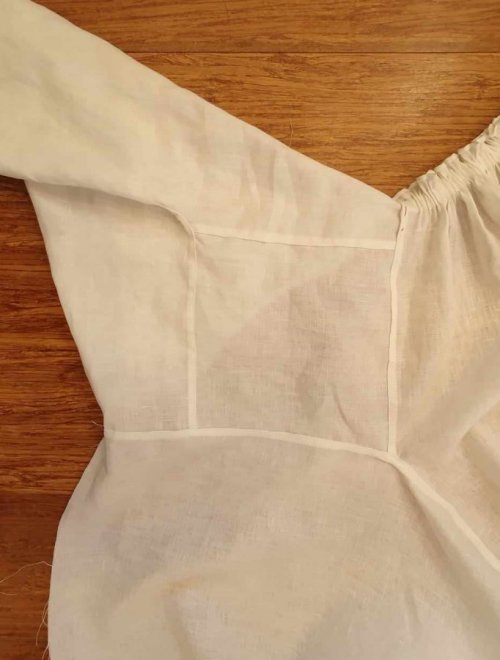
Getting the underarm gusset in neatly can be tricky, but if you follow a logical sequence, it all works out!
- Pin and sew the gusset to the top/side of sleeve
- Trim half the seam allowance on the gusset side, press to the gusset, fold the edge under and sew (fell the seam)
- Pin the front to the sleeve+gusset, with the front offset – here, the top of the frill is 5cm above the gusset seam. Pin and sew the seam
- Trim half the seam allowance on the gusset side, press to the gusset and fell
- Take the free corner of the gusset and match it to the other top sleeve corner. Pin and sew the gusset to the sleeve and continue along the sleeve seam to the cuff, making sure you catch the previous seam
- Trim half the seam allowance on the gusset side, press to the gusset and fell. Pause when you cross the previous seam and pivot around the needle to sew the rest of the seam. The sleeve is now complete.
- Finally, pin the top of the back to the sleeve+gusset, with the back offset – here, the top of the back panel is 10cm above the gusset seam. Pin the back to the gusset edge and then down the side seam, and sew the seam to the hem, making sure you catch the previous seam
- Trim half the seam allowance on the gusset side, press to the gusset and fell, pivoting over the seam as before.
Repeat all this on the other side.
Here is a summary of the sequence (shown without a pleated front):
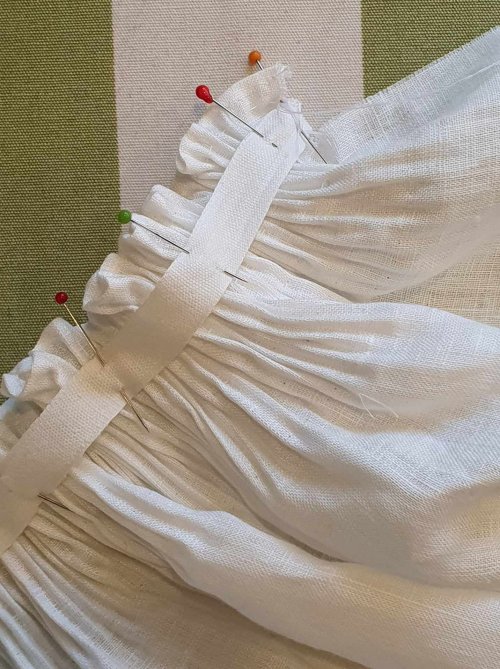
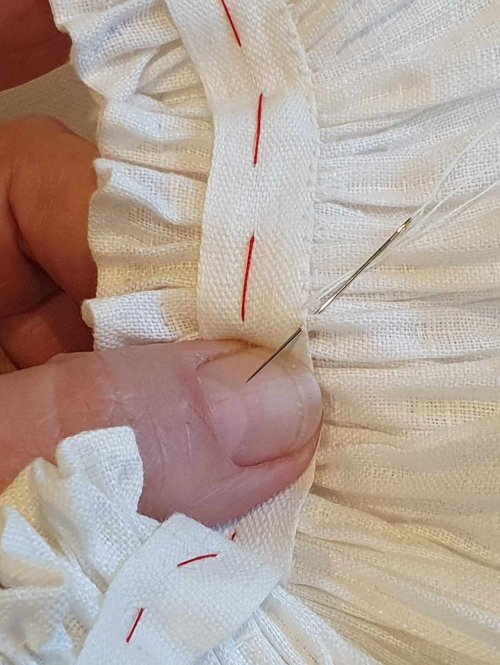
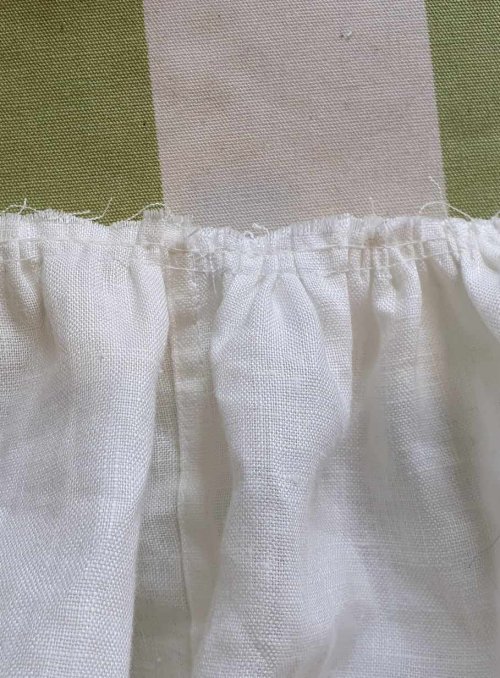
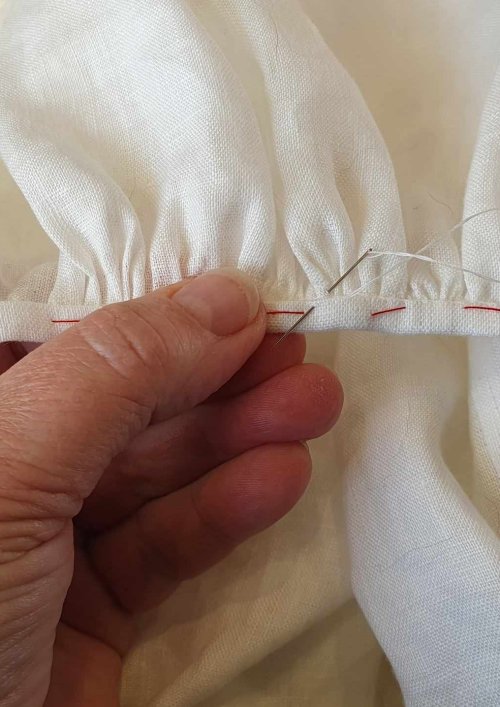
Now I can finished the neckline. I run a pair of gathering threads around the neckline, then mark the neckline in sections – in quarters for the sleeves, and 1/8ths for the back, which has more fabric.
To bind the edge, I use a strip of the same linen, 20mm wide and 78cm long (neckline sides + back + end turnings). I turn the ends under, mark the back corners, then divide the sides into 4, and the back into 8.
With the ends pinned in place (on the outside), I match the marks and draw up the gathers to fit, distributing them evenly, then sew a 5mm seam. I turn the binding to the inside, fold and baste. To make the neckline sit as a square, I pleat the corner of the binding at the seamlines. Then I sew the binding to the stitchline, sewing the corner pleats as I go.
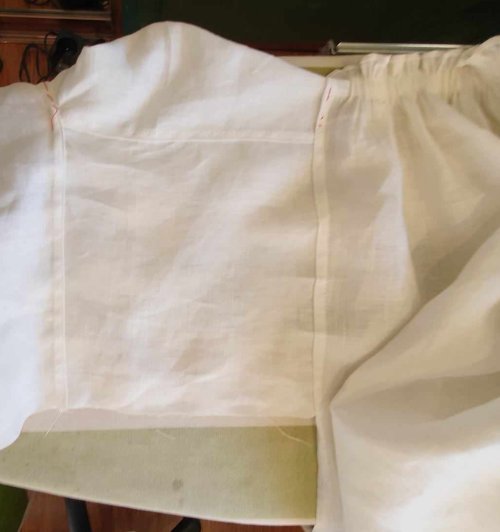
To finish the Hemd, I put it on and checked the sleeve length (1cm too long), trimmed it and hand-sewed a small hem. Finally, I turned a hem on the body and machine sewed it. Done!
The Hemd sits nicely at the front, scoops at the back and has plenty of free arm movemennt,
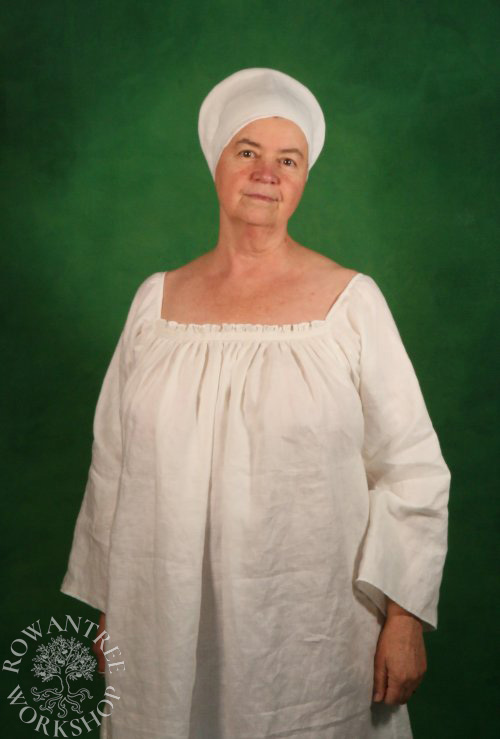
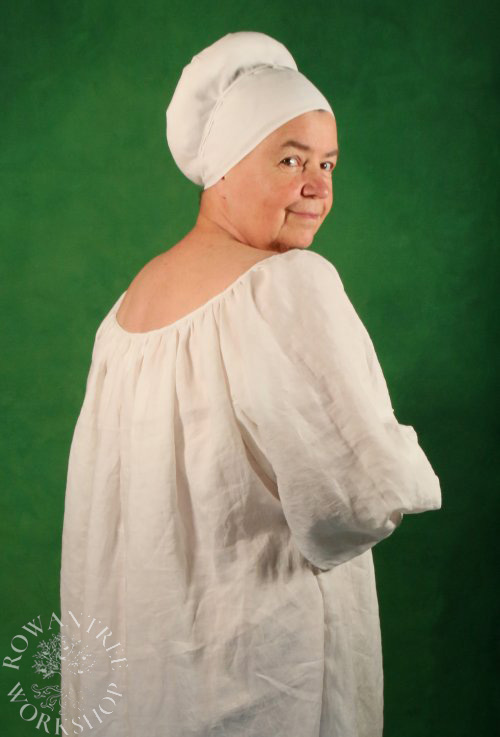

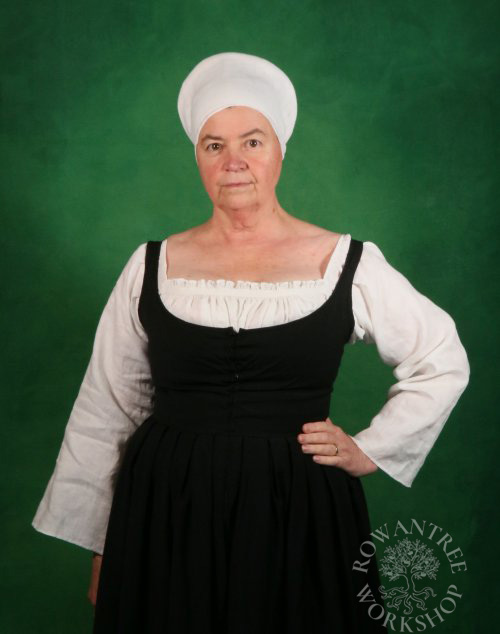
When the Hemd is worn, the front frill sits just above the neckline of my lower class Rock, but is not visible at the back.
The narrow sleeves are easy to roll up for practical work, but large enough to look good if I add the lower sleeves.
Variations
The same basic construction method can be used to make other styles of Hemden, such as the examples in the Research section above – frill all around, bound, or braid edged; round or square.
Full frill
- With a pleater: Pleat the top of the front, back and sleeves, then construct the garment. Fine hem the neckline edge
Otherwise: Construct the garment, fine hem the edge, then run a pair of gather threads aroung the neckline - Sew your ribbon into a loop, mark at front and back seam points (put the seam at the side back)
- Divide and gather evenly as described in the project above, then sew on the ribbon, leaving the frill above.
For a square neckline with frill as seen in the Holbein drawing, mitre the corners of the ribbon at the seam points.
Fully bound
- With a pleater: Pleat the top of the front, back and sleeves, then construct the garment
Otherwise: Construct the garment, then run a pair of gather threads aroung the neckline - Sew your binding into a loop, mark at front and back seam points (put the seam at the side back)
- Divide and gather evernly as described above, then sew the binding to the outside.
- Fold over, fold the edge under and sew, as described in the project above.
Braid edge
Remember to pre-shrink your braid!
The easiest approach is to bind the whole edge as above, then sew the braid around on top of the binding. This ensures a neat finish and also means that you can remove and replace the braid if it wears.
For a square neckline as seen in the Beeham painting, mitre the corners of the braid at the seams.